
The Art of the Zero-Budget Upgrade
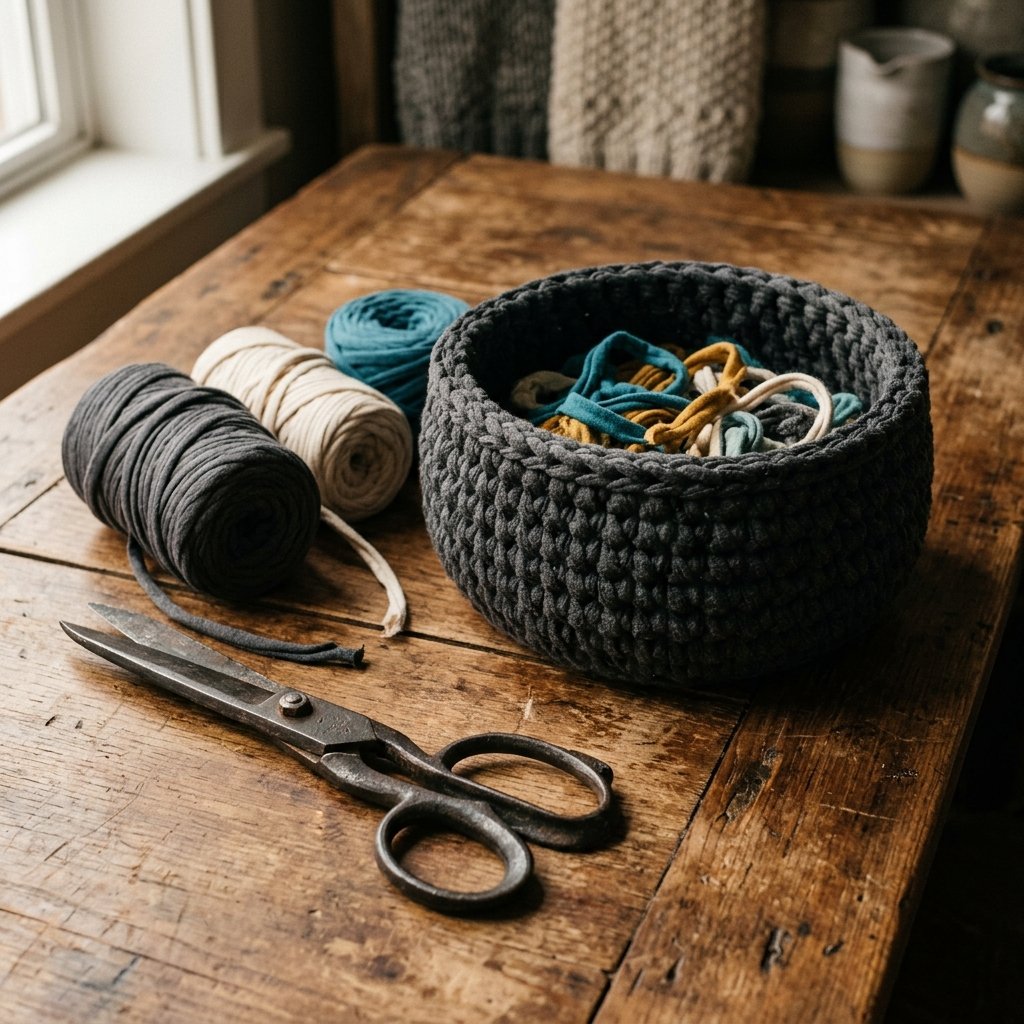
In a world of mass-produced plastic and disposable home goods, there is a profound satisfaction in creating something rugged, functional, and aesthetically pleasing from what others might call trash. If you have a drawer full of old, faded t-shirts that are too worn to donate but too sentimental to toss, you are sitting on a goldmine of raw material. Today, we are going to bypass the overpriced boutique storage bins and create a bespoke woven yarn bowl that looks like it belongs in a high-end industrial loft. This project isn’t just about saving money—though you will save 100% of the cost of a store-bought alternative—it is about the clever application of resourcefulness. Whether you are a frugal DIYer looking to organize your workshop or a crafty parent teaching the kids the value of upcycling, this 20-minute workflow is your blueprint for success. We aren’t just making a bowl; we are engineering a second life for your textiles.
The Raw Materials: Sourcing Your Fabric Gold

Before we pick up the shears, we must identify the right ‘ore’ for our project. Not all t-shirts are created equal when it comes to structural integrity. For a bowl that stands firm and maintains its shape, you want 100% cotton or a high-cotton jersey blend. These fabrics provide the necessary friction and ‘memory’ to hold a weave without sagging. Avoid high-lycra or thin, sheer fabrics, as they lack the ‘heft’ required for a rugged finish.
Inventory Check & Cost Comparison
Let’s look at the numbers. A designer woven rope bowl from a major retailer can easily set you back $35 to $50. By raiding your own closet, you are effectively paying yourself for your time. Here is how the materials break down:
| Material | Source | Estimated Cost |
|---|---|---|
| 2-3 Old T-Shirts | Your Closet / Thrift Bin | $0.00 |
| Fabric Scissors | Tool Kit | $0.00 |
| Template Bowl | Kitchen Cupboard | $0.00 |
| Masking Tape | Junk Drawer | $0.00 |
| Total Project Cost | Resourcefulness | $0.00 |
Budget Savvy Mantra: The most expensive item is the one you buy twice because the first one was low-quality. A DIY woven bowl is virtually indestructible.
Transforming Rags into Rope: The Continuous Strip Technique
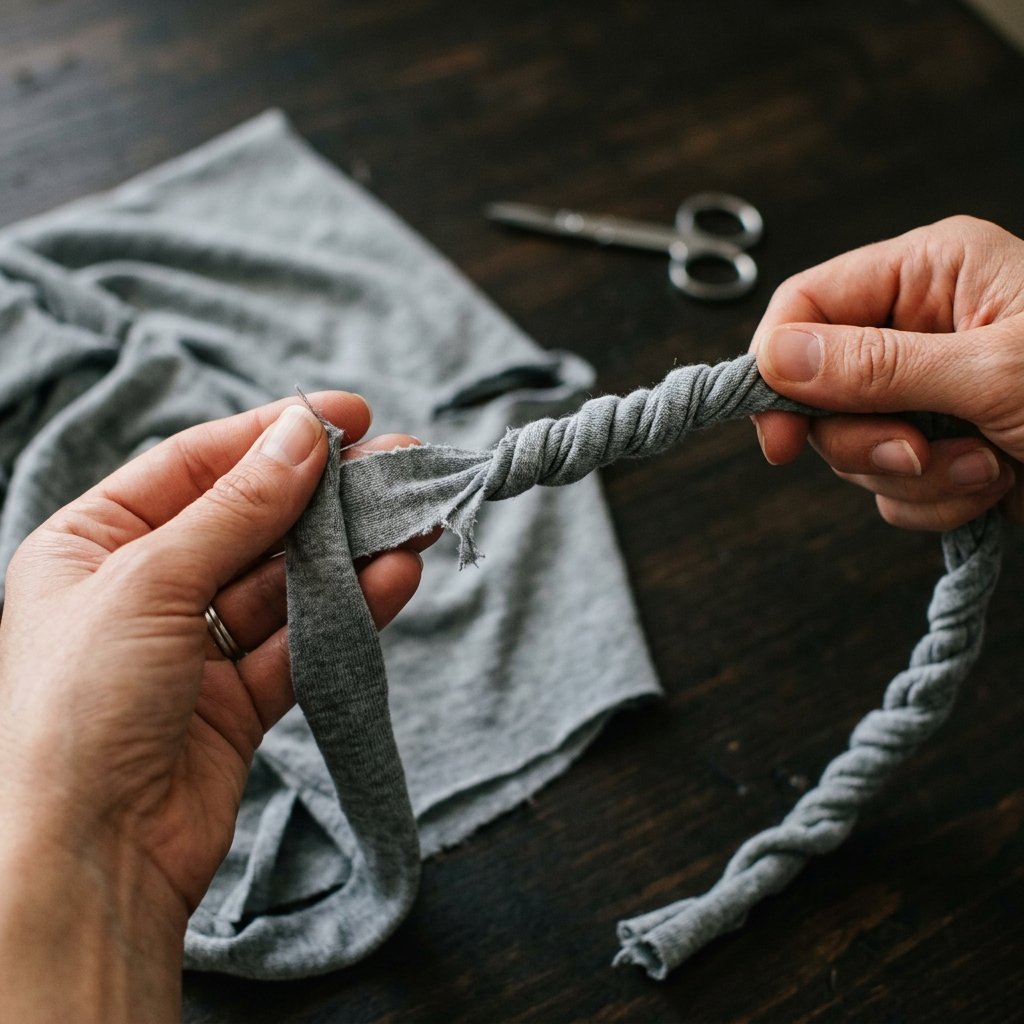
The secret to a 20-minute build is efficiency in preparation. We aren’t cutting random scraps; we are creating a continuous ‘yarn’ that allows for a seamless weave. This technique, often used by professional upcyclers, maximizes the length of your fabric strip while minimizing knots and weak points.
The 5-Minute Yarn Prep
- Step 1: Lay the shirt flat and cut off the bottom hem and the top section (from the armpits up). You are left with a fabric tube.
- Step 2: Fold the tube in half vertically, but leave about 1 inch of the bottom layer protruding past the top layer.
- Step 3: Cut horizontal slits about 1.5 inches wide from the folded edge toward the protruding edge, but stop before you cut through the protruding inch.
- Step 4: Open the shirt. You will see a ‘spine’ of uncut fabric. Cut diagonally across this spine to connect the slits, creating one long, continuous strip.
- Step 5: The Magic Stretch. Pull the strip firmly between your hands. The jersey fabric will curl inward, creating a rounded, durable ‘yarn’ that is ready for weaving.
The Weaving Framework: Setting Your Foundation
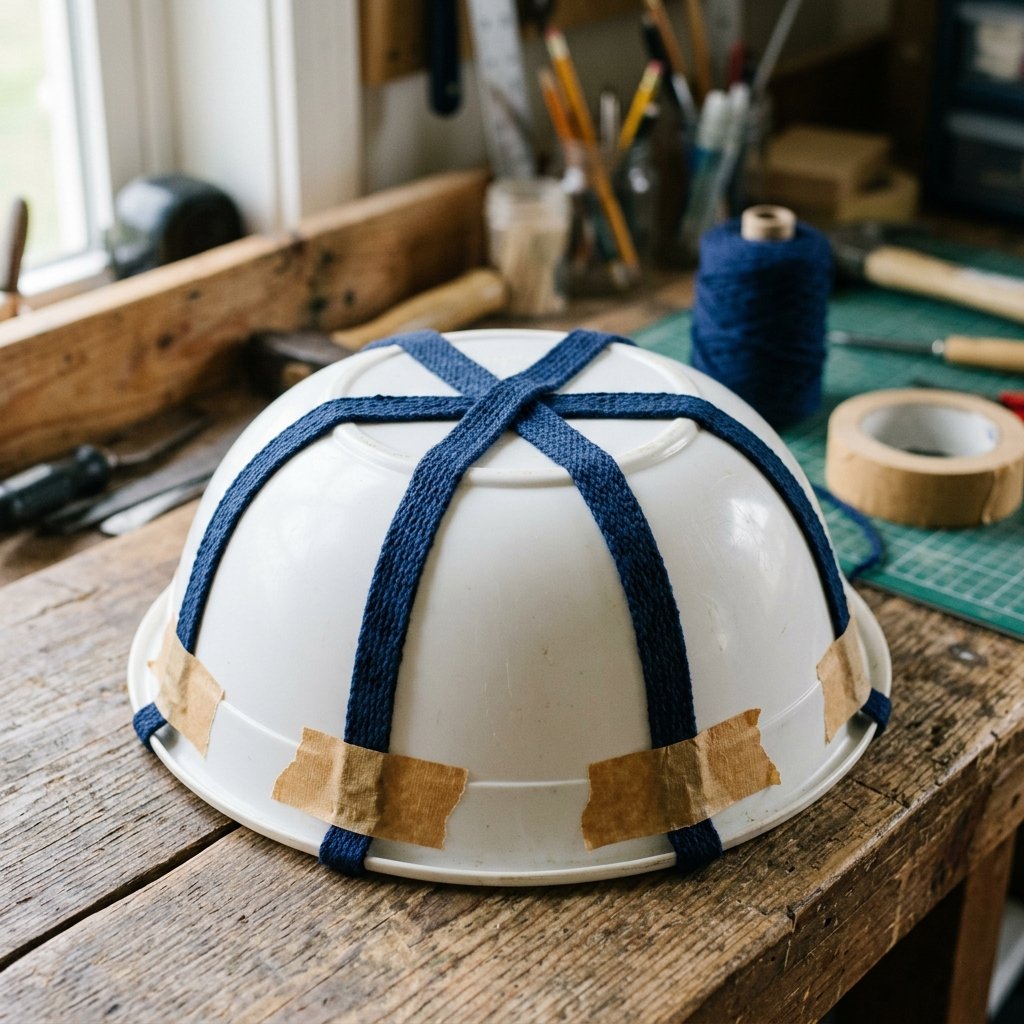
To ensure your bowl has a professional, symmetrical shape, we use a ‘template’ bowl. This is the crafty expert’s secret to getting a high-end look without years of weaving experience. We will be setting up a ‘warp’ (the vertical supports) and a ‘weft’ (the horizontal weaving strand).
Setting the Warp
- Select a kitchen bowl that matches the size you want for your final piece. Invert it on your workspace.
- Cut 5 to 7 strips of t-shirt yarn, each about 24 inches long. These are your ‘warp’ threads.
- Lay them across the bottom of the inverted bowl so they cross in the exact center, like spokes on a wheel.
- Pro Tip: Use a small piece of masking tape to secure the ends of these strips to the inside rim of the template bowl. This keeps your tension consistent while you work.
- Ensure you have an odd number of spokes. This is critical for the over-under pattern to alternate correctly on every circuit.
Safety Note: When using heavy-duty fabric shears, always cut away from your body and keep your fingers clear of the blade path. These tools are designed to bite through multiple layers of textile with ease.
The 20-Minute Workflow: Weaving for Strength
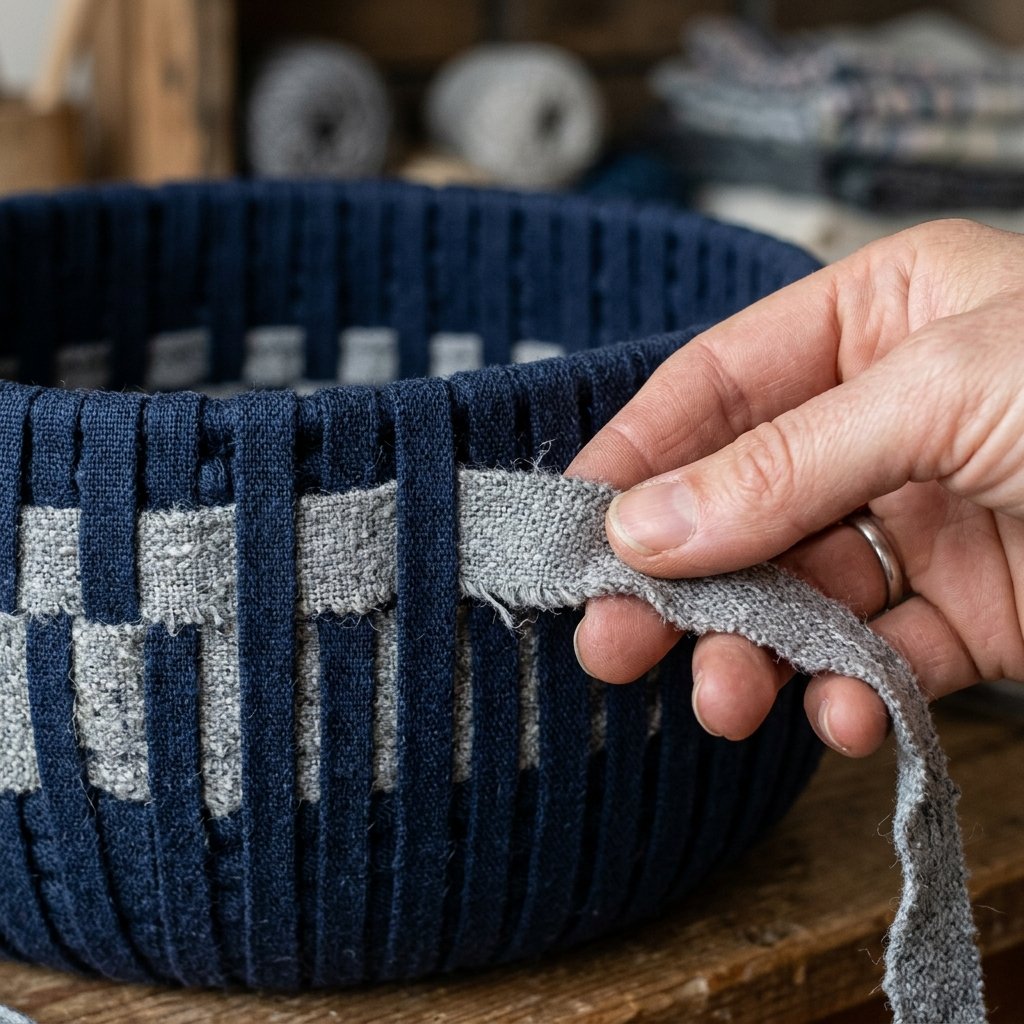
Now we begin the rhythmic process of weaving. This is where the bowl takes its structural form. The key here is tension. Too loose, and the bowl will be floppy; too tight, and it will warp the template.
The Weaving Process
- The Start: Take your long continuous roll of yarn and tie the end to the center point where all your warp spokes meet.
- The Pattern: Begin weaving the yarn over one spoke and under the next. Because you have an odd number of spokes, the ‘over’ will naturally become an ‘under’ on the next pass.
- The Build: Continue circling the bowl. As you move from the flat bottom to the curved sides, maintain a firm but gentle pull. You will see the fabric ‘rope’ begin to stack, creating a thick, protective wall.
- Adding Length: If you run out of yarn, simply tie a small, tight square knot to a new strip. Tuck the ‘tails’ of the knot into the weave as you go to keep the interior clean and professional.
- The Finish: Once you reach the desired height, untape the warp spokes from the template bowl.
The Master’s Finish: Securing the Rim
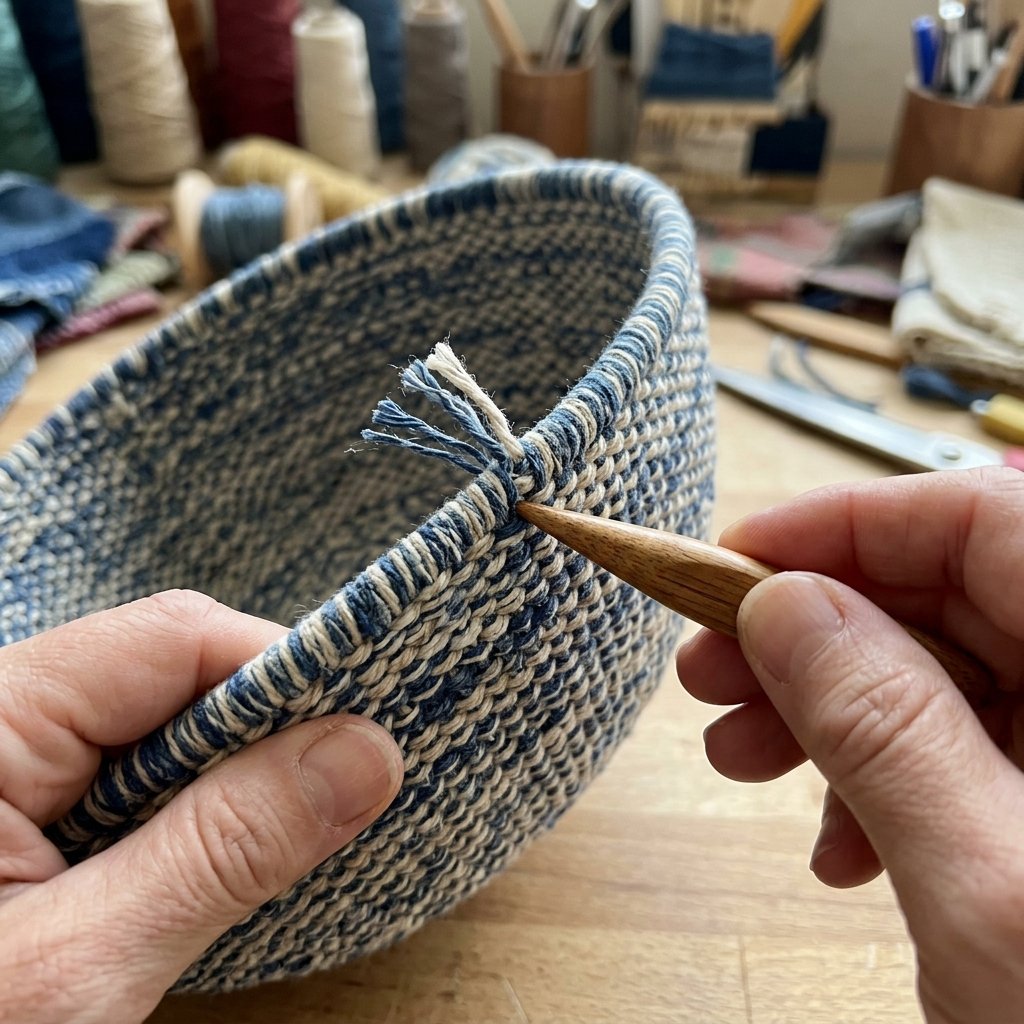
The difference between a ‘craft project’ and a ‘piece of decor’ lies in the finishing. We want a rim that is sturdy and flush. This final step ensures your bowl won’t unravel when filled with heavy items like keys, tools, or craft supplies.
Tying Off
Remove the template bowl. You will now have the loose ends of your warp spokes sticking up. Take two adjacent spokes, tie them in a simple overhand knot tight against the top row of your weave, and tuck the remaining fabric back down into the woven layers using your fingers or a crochet hook. Repeat this all the way around the rim. This creates a beautiful, scalloped edge that reinforces the entire structure.
| Use Case | Benefit of T-Shirt Yarn |
|---|---|
| Entryway Valet | Soft surface won’t scratch phone screens or sunglasses. |
| Nursery Storage | Washable and free of sharp edges or chemicals. |
| Workshop Organizer | Rugged enough to hold heavy bolts and metal parts. |
Conclusion
A Masterpiece from the Scrap Heap
In just 20 minutes, you have successfully diverted textile waste from the landfill and created a functional piece of home decor that is as rugged as it is refined. This woven bowl is a testament to the power of the frugal mindset—proving that with a little cleverness and a pair of scissors, the items we already own can be transformed into the items we need. Your new bowl is durable, washable, and carries a story that no store-bought item ever could. So, the next time you see an old t-shirt, don’t see a rag; see the potential for your next zero-cost masterpiece. Keep crafting, keep saving, and remember: luxury is a matter of creativity, not credit cards.

Makenzie is the founder and lead writer at MoneyHackTips.com — a personal finance blog dedicated to delivering street-smart financial wisdom for real people on real budgets. With 300+ published articles covering everything from debt management to investing fundamentals, Makenzie’s mission is to make every dollar work harder. When not writing about money hacks, Makenzie is testing frugal living strategies, optimizing side hustles, and helping readers build financial freedom from scratch.