The Magic of Cardboard Engineering
In an age of flashing lights and digital screens, there is something profoundly grounding about a toy that requires nothing but imagination and a little bit of cardboard. As a frugal DIYer, you know that the best treasures aren’t found in a toy aisle; they are built at the kitchen table from the remnants of your latest online delivery. This DIY Cardboard Rotary Phone is more than just a craft; it is a lesson in history, a masterpiece of upcycling, and a ruggedly durable toy that will survive the most enthusiastic play sessions.
Why spend $40 or $50 on a wooden retro-replica when you can achieve the same aesthetic for nearly $0? By utilizing the structural integrity of corrugated cardboard and the simple mechanics of a brass fastener, we can create a functional spinning dial that provides that satisfying tactile feedback kids love. Whether you are a handy parent looking for a rainy-day project or a crafty gift-giver aiming for that ‘wow’ factor, this project is your ticket to being the ultimate trash-to-treasure guru.
The Blueprint: Materials and Cost Comparison

Before we dive into the construction, let’s look at what you’ll need. Most of these items are likely sitting in your recycling bin or your junk drawer right now. We are aiming for a high-end look using low-end materials.
| Material | Potential Source | Estimated Cost |
|---|---|---|
| Corrugated Cardboard | Shipping Boxes | $0.00 |
| Brass Fastener (Brad) | Office Supplies | $0.05 |
| Hot Glue / School Glue | Craft Stash | $0.20 |
| Acrylic Paint | Dollar Store | $1.25 |
| Yarn or Old Cord | Scrap Basket | $0.00 |
| Total Project Cost | – | $1.50 |
DIY vs. Store-Bought Value
When you compare this to a boutique wooden rotary phone, the savings are staggering. A typical heirloom-quality wooden toy phone retails between $35 and $60. By choosing to upcycle, you are saving over 95% of the cost while providing a toy that has more character and personal value.
“Frugality isn’t about having less; it’s about making more out of what you already have. A cardboard box is a blank canvas for a child’s next great adventure.”
Phase 1: Engineering the Phone Base

The base of the rotary phone needs to be sturdy to withstand the ‘heavy’ calls your little one will be making. We will use a slanted-top design to mimic the classic 1950s style.
- Step 1: Cut two identical trapezoids for the sides. They should be roughly 6 inches long at the bottom and 4 inches tall at the back, sloping down to 2 inches at the front.
- Step 2: Cut a rectangular base piece (6×5 inches) and a back piece (5×4 inches).
- Step 3: Cut the front sloped face. This is where the dial will sit. Measure the distance along the slope of your side pieces to ensure a perfect fit.
- Step 4: Assemble the pieces using hot glue for a rugged, immediate bond. For a cleaner look, use a miter-cut technique by slightly angling the edges of the cardboard so they meet flush.
Remember to reinforce the internal corners with extra glue or small cardboard ‘L’ brackets. This ensures the phone won’t collapse if a toddler decides to use it as a step stool.
Phase 2: The Secret to the Spinning Dial
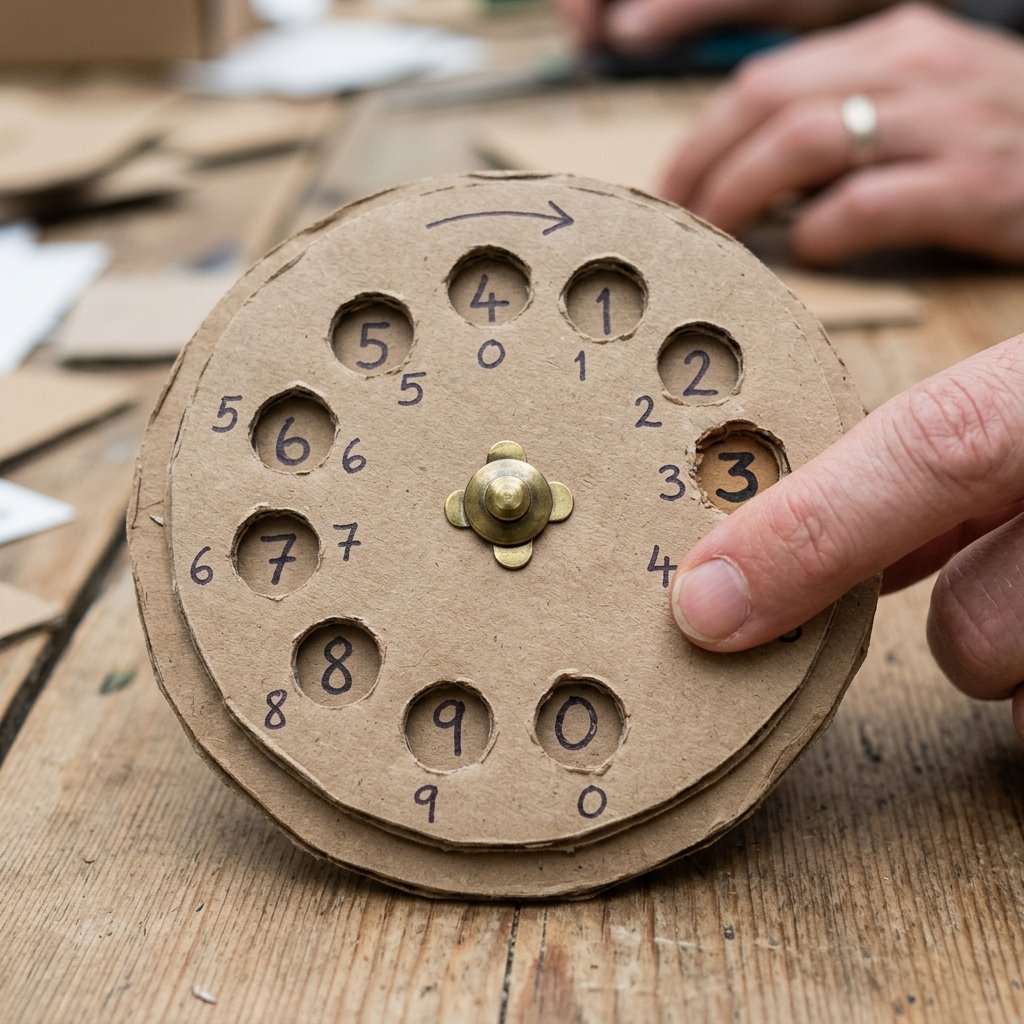
The soul of the rotary phone is the dial. To make it spin smoothly, we use a simple mechanical trick that costs less than a penny.
The Two-Circle Method
- Cut a large circle (approx. 4 inches in diameter) from a thick piece of cardboard. This is the stationary background.
- Cut a slightly smaller circle (approx. 3.5 inches) from a thinner piece of cardboard. This will be the spinning part.
- Use a hole punch or a utility knife to cut 10 small circles around the perimeter of the smaller circle. These are the ‘finger holes’.
- The Pivot Point: Poke a hole exactly in the center of both circles. Insert a brass fastener (brad) through the spinning circle, then through the stationary circle, and finally through the sloped face of the phone base.
- Spread the wings of the fastener inside the phone. Pro Tip: Place a small washer or a scrap of plastic between the circles to reduce friction and allow for a faster spin.
“The secret to a perfect spin is a loose fastener and a smooth surface. Don’t over-tighten the brad, or the ‘operator’ won’t be able to connect the call!”
Phase 3: Crafting the Handset and Cord
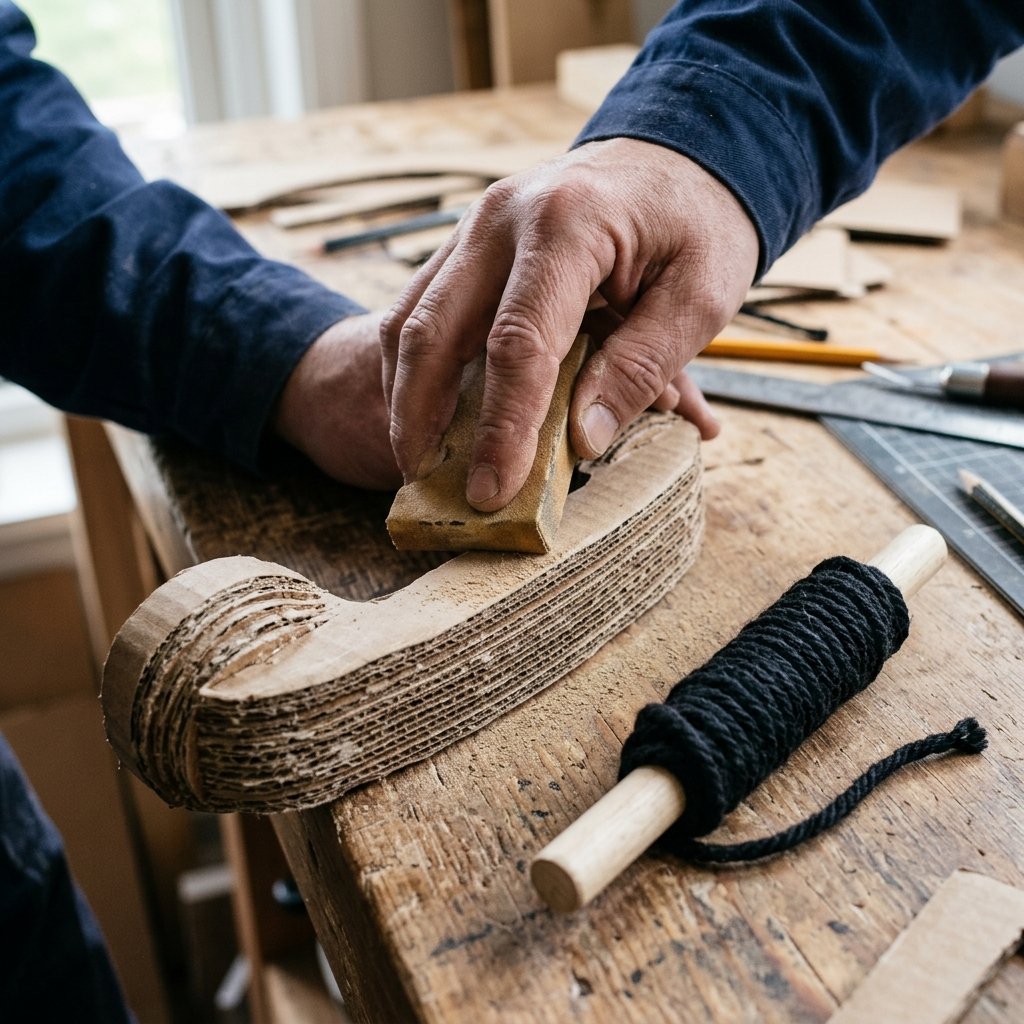
No phone is complete without the handset. This requires a bit of ‘sculpting’ with cardboard layers to get that ergonomic, masculine-elegant curve.
Handset Construction
Trace a handset shape (the ‘bone’ shape) onto cardboard. You will need to cut 4 to 6 layers of this shape and glue them together to create thickness. Once the glue is dry, use a piece of sandpaper to smooth the edges, giving it a rounded, professional finish.
The Coiled Cord
To get that classic coiled look without using a real wire (which can be a safety hazard), use thick yarn or a shoelace. Wrap the yarn tightly around a pencil, spray it lightly with hairspray or a diluted glue mixture, and let it dry. When you slide it off, it will retain a springy, coiled shape. Attach one end to the handset and the other to the side of the base.
Phase 4: Aesthetic Finishes and ‘High-End’ Styling
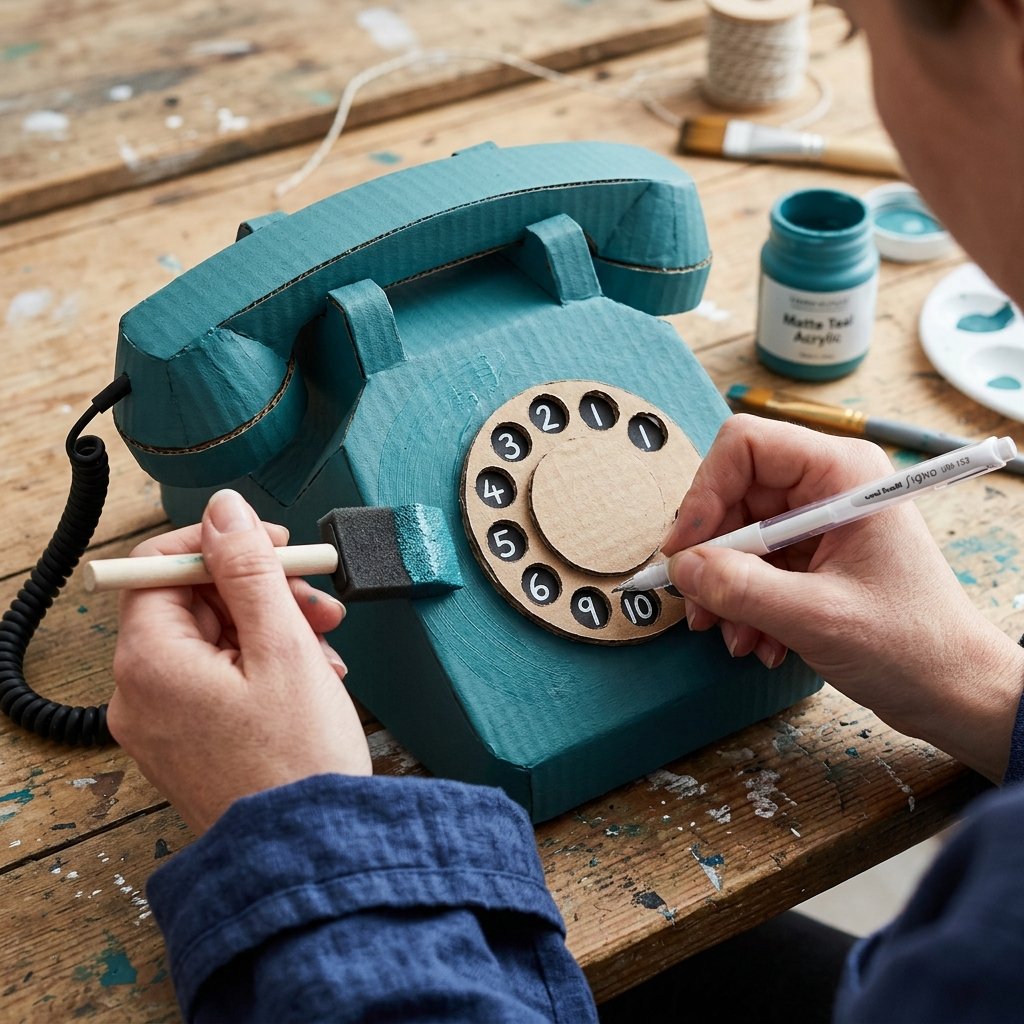
Now for the transformation. We want this to look like a vintage find, not a cereal box. This is where your inner Dollar Tree Interior Designer shines.
- Priming: Give the entire piece a thin coat of white gesso or primer. This prevents the cardboard from soaking up too much paint and keeps the colors vibrant.
- Color Choice: Opt for ‘Mid-Century Modern’ colors. Think Dusty Rose, Seafoam Green, or a Matte Charcoal for a more rugged look.
- Detailing: Use a fine-tip permanent marker or a white paint pen to write the numbers (1 through 0) inside the holes of the dial.
- The Finish: A quick coat of clear matte or glossy sealant will protect the paint from sticky fingers and give it a professional, store-bought sheen.
Safety and Durability Tips
“Safety is the foundation of play. Ensure all edges are smooth and all small parts are securely fastened.”
While cardboard is generally safe, here are a few tips for the ‘Handy Parent’:
- Edge Safety: If the cut edges of the cardboard are sharp, run a bead of hot glue along the edge and flatten it with a scrap of wood to create a ‘bumpered’ edge.
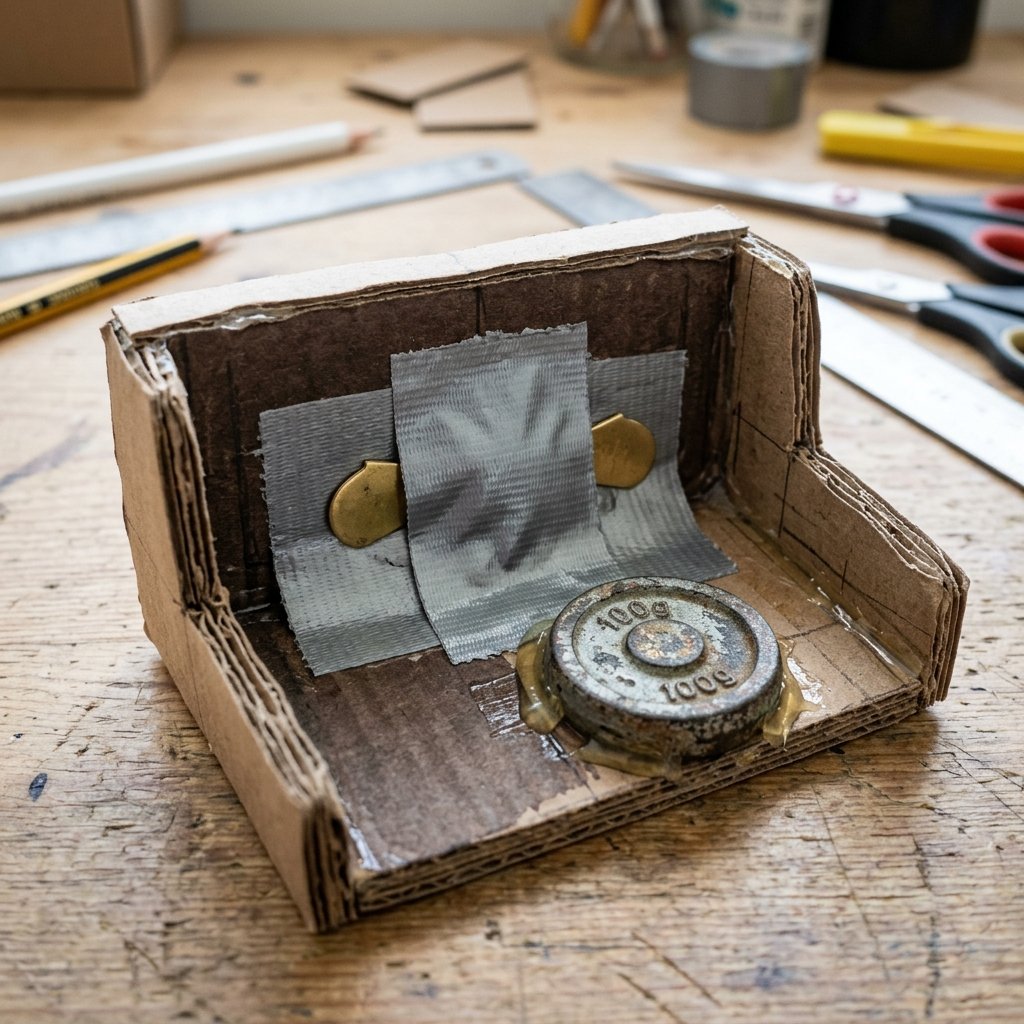
- Choking Hazards: Ensure the brass fastener is spread wide and taped over on the inside so it cannot be pulled out.
- Weighting: If the phone is too light and tips over during dialing, glue a few heavy pebbles or a bag of sand inside the base before sealing it up. This gives it a premium, weighted feel.
Conclusion
Ring-Ring! Your Masterpiece is Complete
Congratulations! You’ve just turned a pile of recycling into a Super Cute DIY Cardboard Rotary Phone. Not only have you saved a significant amount of money, but you’ve also created a unique, eco-friendly toy that encourages screen-free, imaginative play. This project proves that with a little resourcefulness and some clever ‘trash-to-treasure’ engineering, the most humble materials can become the most cherished gifts.
Now, sit back and watch as the ‘calls’ start coming in. Whether they are ordering a pretend pizza or calling Grandma, the joy on their face is the best return on investment you’ll ever get. Happy crafting!

Makenzie is the founder and lead writer at MoneyHackTips.com — a personal finance blog dedicated to delivering street-smart financial wisdom for real people on real budgets. With 300+ published articles covering everything from debt management to investing fundamentals, Makenzie’s mission is to make every dollar work harder. When not writing about money hacks, Makenzie is testing frugal living strategies, optimizing side hustles, and helping readers build financial freedom from scratch.