

The Art of the Sophisticated Outdoor Shield
There is nothing quite like a summer evening on the patio, but nothing ruins the vibe faster than a swarm of uninvited mosquitoes. While you could go out and buy plastic, mass-produced tiki torches that scream ‘cheap backyard,’ a resourceful crafter knows there is a better way. By upcycling glass wine bottles, you can create a masculine-elegant lighting solution that keeps the bugs at bay while adding a touch of industrial-chic charm to your outdoor space. This project isn’t just about utility; it is about taking something destined for the bin and turning it into a high-end centerpiece for under $5. Whether you are a frugal DIYer looking to spruce up your deck or a handy parent prepping for a backyard BBQ, this guide will show you how to master the craft of the wine bottle torch.
The Budget Breakdown: DIY vs. High-End Retail
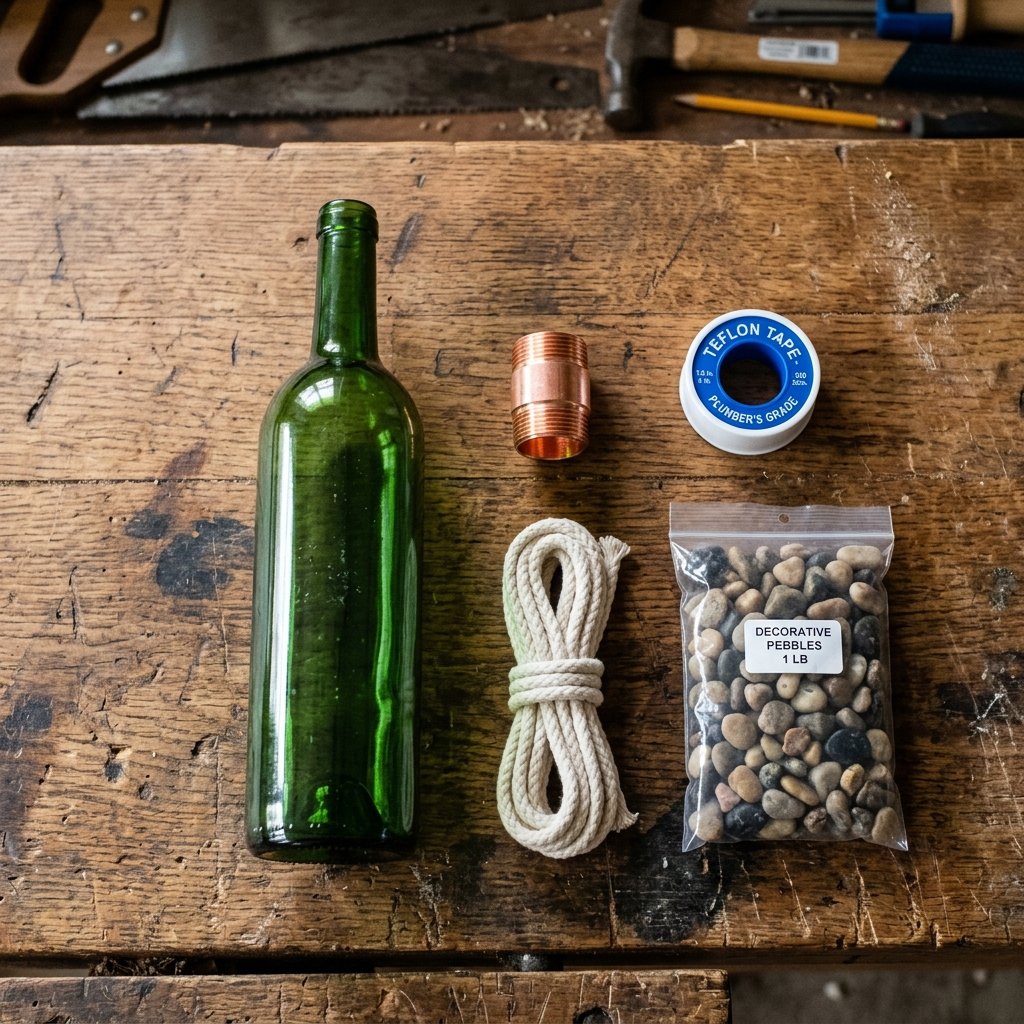
Before we dive into the assembly, let’s talk numbers. If you were to purchase a pre-made glass patio torch from a high-end home goods store, you would easily be looking at $35 to $60 per unit. By sourcing your own bottles and using clever hardware store finds, your cost per unit drops significantly. Most of the materials can be bought in bulk, making this a perfect project for creating a matching set of four or six torches.
| Item | Retail Store Price | DIY Upcycled Cost |
|---|---|---|
| Glass Torch Vessel | $25.00 | $0.00 (Upcycled) |
| Wick & Hardware | $15.00 | $2.50 |
| Citronella Fuel (per fill) | $5.00 | $1.50 |
| Total Per Unit | $45.00 | $4.00 |
As you can see, the savings are over 90%. This budget-savvy approach allows you to spend your hard-earned money on better steaks for the grill rather than overpriced decor.
Sourcing and Preparing Your Glass Vessels
Selecting the Right Bottle
Not all wine bottles are created equal. For a rugged and stable torch, look for bottles with a thick glass base. Darker colors like forest green, cobalt blue, or deep amber not only look more sophisticated but also hide the fuel and wick assembly inside, maintaining a cleaner aesthetic. Avoid bottles with thin glass or unusual shapes that might make them tip-heavy once filled with fuel.
The ‘Grandma’s Secret’ Label Removal
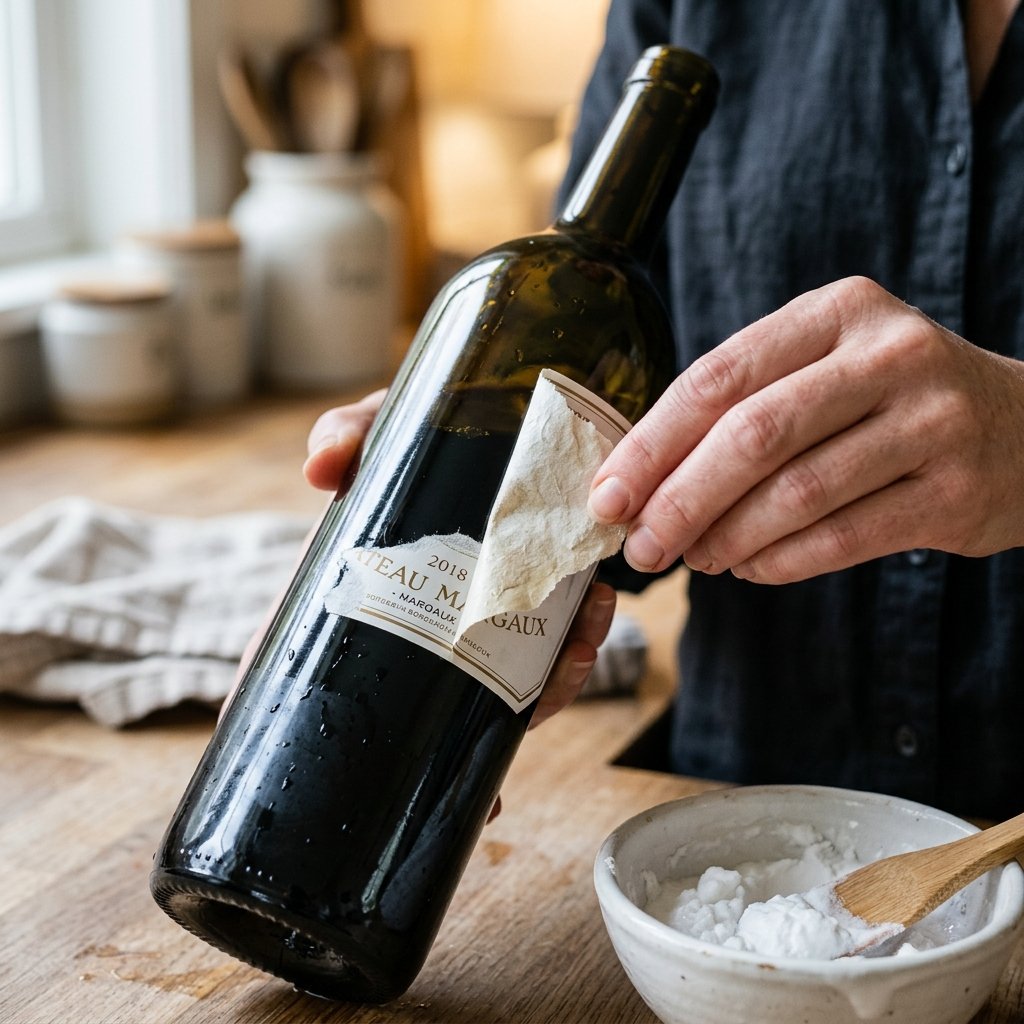
To get that high-end look, you need a clean slate. Forget expensive chemical adhesive removers. Use this clever, budget-friendly formula:
Mix equal parts baking soda and cooking oil. Slather the paste onto the label and let it sit for 30 minutes. The label will slide right off, and the residue can be wiped away with a paper towel.
Once the labels are gone, wash the bottle thoroughly with hot soapy water to ensure no oil remains on the exterior, which could be a fire hazard.
The Hardware Hack: The Copper Coupling Trick
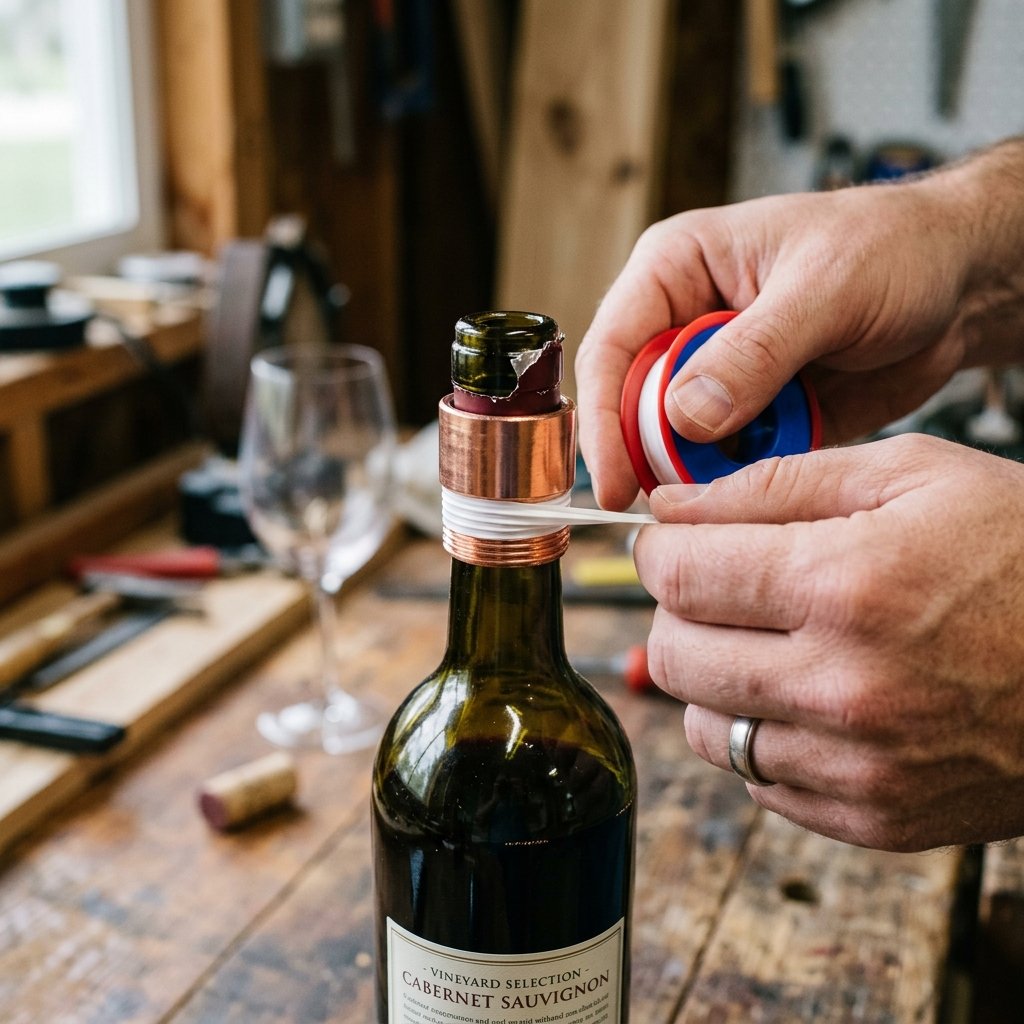
The secret to a professional-looking wine bottle torch is the 1/2-inch copper coupling. This small plumbing part fits perfectly into the mouth of most standard wine bottles and provides a secure, fireproof housing for your wick.
Materials Needed:
- 1/2″ x 3/8″ Copper Coupling (or a straight 1/2″ coupling depending on bottle neck width)
- Teflon Tape (Plumber’s tape)
- Replacement Tiki Wick (Fiberglass is best as it doesn’t burn away)
- Decorative Pebbles or Marbles (Optional, for stability)
Assembly Steps:
- Wrap the Coupling: Take your copper coupling and wrap the middle section with Teflon tape. Keep wrapping until the diameter is slightly larger than the bottle opening. This creates a snug, airtight seal that prevents the coupling from falling into the bottle.
- Thread the Wick: Pull your fiberglass wick through the copper coupling. You want about 1/2 inch of the wick protruding from the top.
- Weight the Base: If you live in a windy area, drop a handful of small pebbles or glass marbles into the bottom of the bottle. This lowers the center of gravity and prevents the torch from tipping over.
Fueling and Safety Protocols

When dealing with open flames and flammable liquids, safety is the priority. Using the right fuel ensures a long-lasting, bug-free experience without excessive soot.
Safety First: Never use gasoline, kerosene, or alcohol in your torches. Only use approved Citronella Torch Fuel or Paraffin Lamp Oil. Always fill your bottles in a well-ventilated area away from open flames.
The Filling Process:
Use a small funnel to fill the bottle about 2/3 full. Do not overfill, as the fuel needs room to expand as it warms up. Once filled, insert your wick and coupling assembly. Let the wick soak for at least 15 minutes before lighting. This ensures the fuel has traveled up to the tip, preventing the wick itself from charring immediately.
Extinguishing the Flame:
Do not blow out the torch, as this can spray hot oil. Instead, use a copper cap (a 1/2″ copper pipe cap works perfectly) to smother the flame. This also protects the wick from rain when not in use.
Styling for the ‘Masculine-Elegant’ Vibe

Now that your torches are functional, it’s time to make them look like a million bucks. A plain bottle is fine, but a few crafty additions can elevate the design to Pottery Barn levels.
The Nautical Wrap
Take some jute twine or nautical rope and wrap it tightly around the neck or the base of the bottle. Secure the ends with a dab of high-heat adhesive or a clever sailor’s knot. This adds texture and a rugged, coastal feel.
The Mounted Look
If you want to clear up table space, you can mount your wine bottle torches to a fence or a wooden post using top-plate connectors and split-ring hangers. This industrial look is incredibly popular and keeps the flames at a safer height, away from children and pets.
| Mounting Hardware | Approximate Cost | Visual Impact |
|---|---|---|
| Zinc Split-Ring Hanger | $1.50 | Industrial/Modern |
| Copper Pipe Strap | $0.75 | Rustic/Warm |
| Black Iron Flange | $4.00 | Heavy-Duty/Masculine |
Conclusion
Light Up Your Summer
Creating your own upcycled wine bottle citronella candles is the ultimate trash-to-treasure win. It combines the rugged practicality of a hardware store project with the refined elegance of a curated outdoor space. By following these steps, you’ve not only saved over $40 per torch, but you’ve also created a conversation piece that is as functional as it is beautiful. So, the next time you finish a bottle of your favorite vintage, don’t toss it—turn it into a beacon of bug-free light. Stay crafty, stay budget-savvy, and enjoy your mosquito-free sanctuary!

Makenzie is the founder and lead writer at MoneyHackTips.com — a personal finance blog dedicated to delivering street-smart financial wisdom for real people on real budgets. With 300+ published articles covering everything from debt management to investing fundamentals, Makenzie’s mission is to make every dollar work harder. When not writing about money hacks, Makenzie is testing frugal living strategies, optimizing side hustles, and helping readers build financial freedom from scratch.