
The Art of the Frugal Wedding Masterpiece
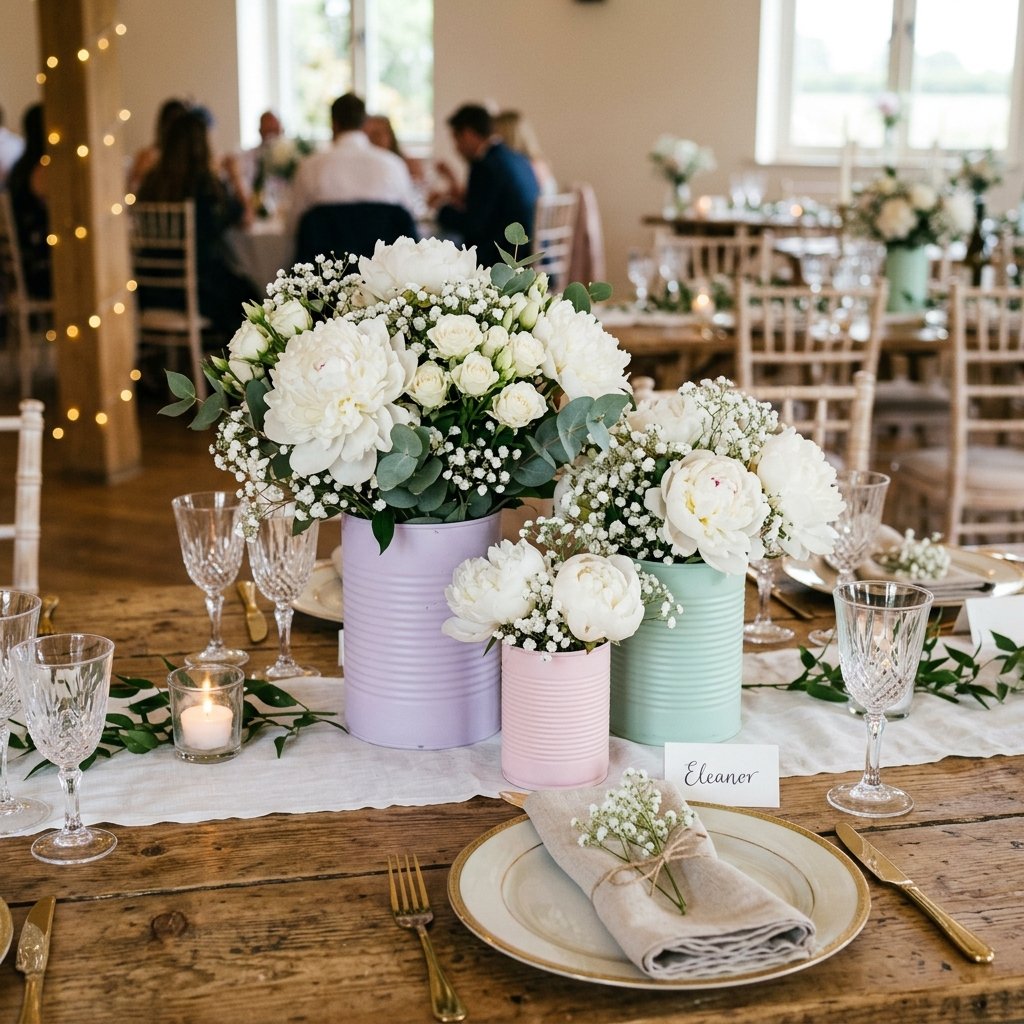
Welcome to the ultimate guide for the resourceful bride and the budget-savvy groom. In an era where wedding costs are skyrocketing toward the stratosphere, there is a quiet, rugged elegance in the act of upcycling. We aren’t just talking about ‘making do’; we are talking about a total trash-to-treasure transformation. By the time we are done, your guests won’t be asking where you bought your vases; they will be asking which high-end boutique florist designed your tablescapes. Using nothing more than salvaged tin cans, a bit of sandpaper, and a sophisticated pastel palette, you can create a wedding atmosphere that is both masculine-elegant and softly romantic.
Why spend $500 to $2,000 on glass vessels that will sit in a box after the big day? Today, we reclaim the humble tin can—a sturdy, versatile, and 100% free resource—and turn it into the star of your reception. Whether you are planning a rustic barn wedding, a backyard garden party, or a chic industrial loft celebration, these 10 pastel designs will elevate your decor while keeping your savings account intact.
The Economics of Elegance: DIY vs. Store-Bought
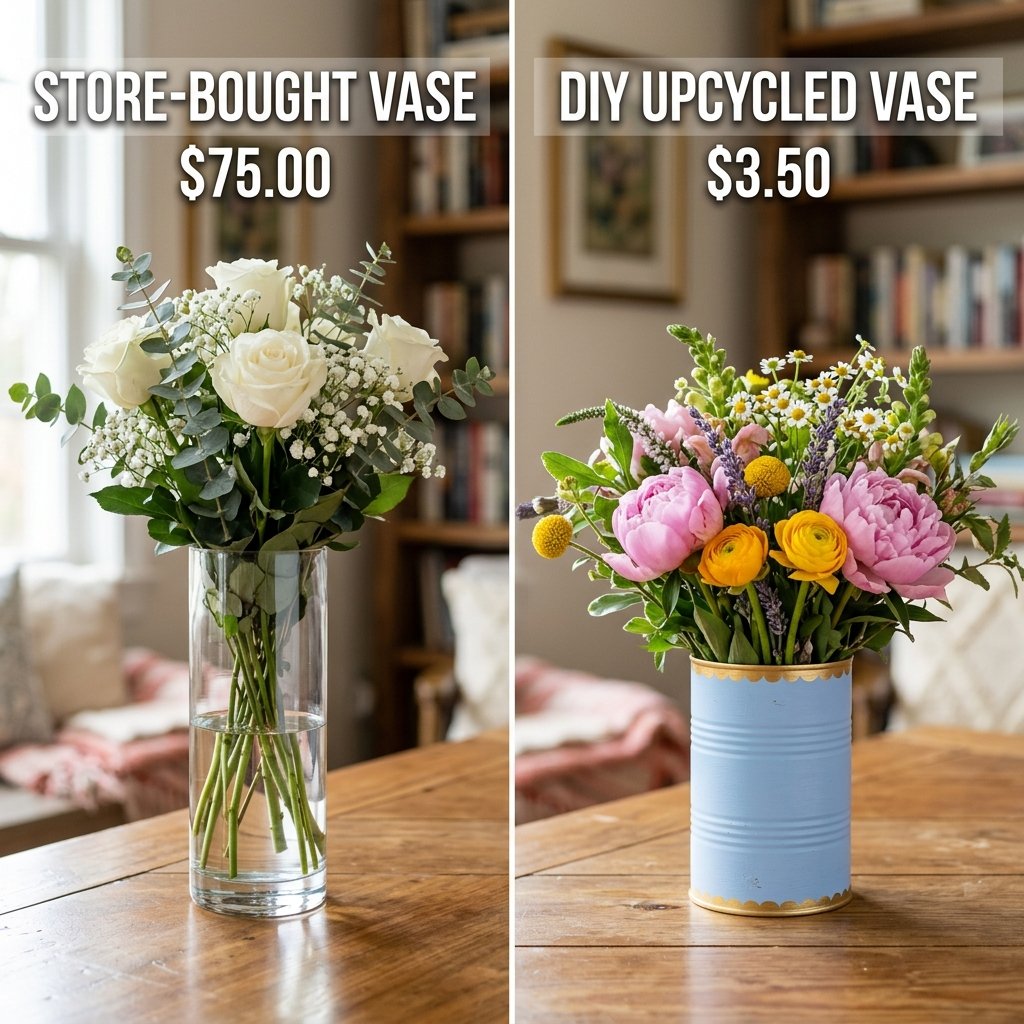
Before we pick up a paintbrush, let’s talk numbers. The savvy crafter knows that every dollar saved on a vase is a dollar that can go toward better food, a better photographer, or your honeymoon fund. When you choose to upcycle tin cans, your cost per unit drops from $15.00+ to roughly $0.85 (the cost of paint and supplies). Over 20 tables, that is a massive saving of nearly $300 just on the vessels alone!
| Item | Retail/Rental Cost (Per Unit) | DIY Upcycled Cost (Per Unit) | Total Savings (20 Tables) |
|---|---|---|---|
| Ceramic/Glass Vase | $18.50 | $0.00 (Recycled) | $370.00 |
| Professional Painting/Finish | $10.00 | $0.65 (Spray Paint) | $187.00 |
| Decorative Accents (Lace/Twine) | $5.00 | $0.20 (Bulk Buy) | $96.00 |
| Total Per Centerpiece | $33.50 | $0.85 | $653.00 |
As you can see, the crafty-expert approach isn’t just about being ‘cheap’; it is about being financially brilliant. You are creating custom art that fits your specific wedding vision perfectly, rather than settling for mass-produced items from a big-box store.
The Essential Toolkit: Prepping Your Canvas
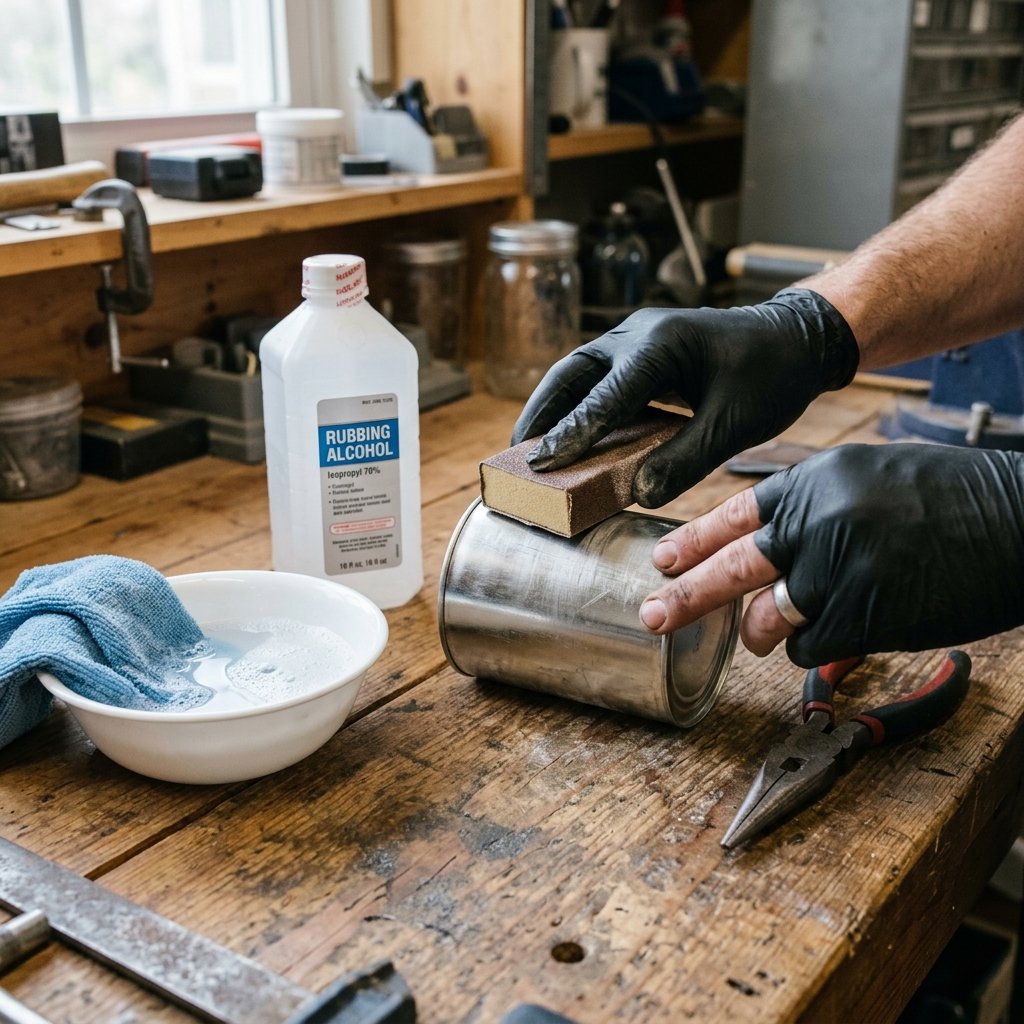
A professional finish starts with professional preparation. You cannot simply spray paint a dirty soup can and expect it to look like a Pottery Barn dupe. Follow these rugged, practical steps to ensure your ‘trash’ looks like ‘treasure’.
- Label Removal: Soak cans in hot, soapy water for 20 minutes. For stubborn adhesive, use a mixture of baking soda and vegetable oil to scrub the residue away.
- Safety First: Use a smooth-edge can opener during the initial opening to avoid jagged rims. If you have traditional cans, use a pair of pliers to crimp down any sharp bits.
- Surface Prep: Lightly sand the exterior of the can with 220-grit sandpaper. This creates ‘tooth’ for the paint to grip, preventing peeling later.
- Degreasing: Wipe the can down with rubbing alcohol to remove any oils from your hands.
Safety Note: Always wear work gloves when handling sharp metal edges and work in a well-ventilated area when using spray paints or sealants.
The Master List: 10 Pastel Designs That Dazzle
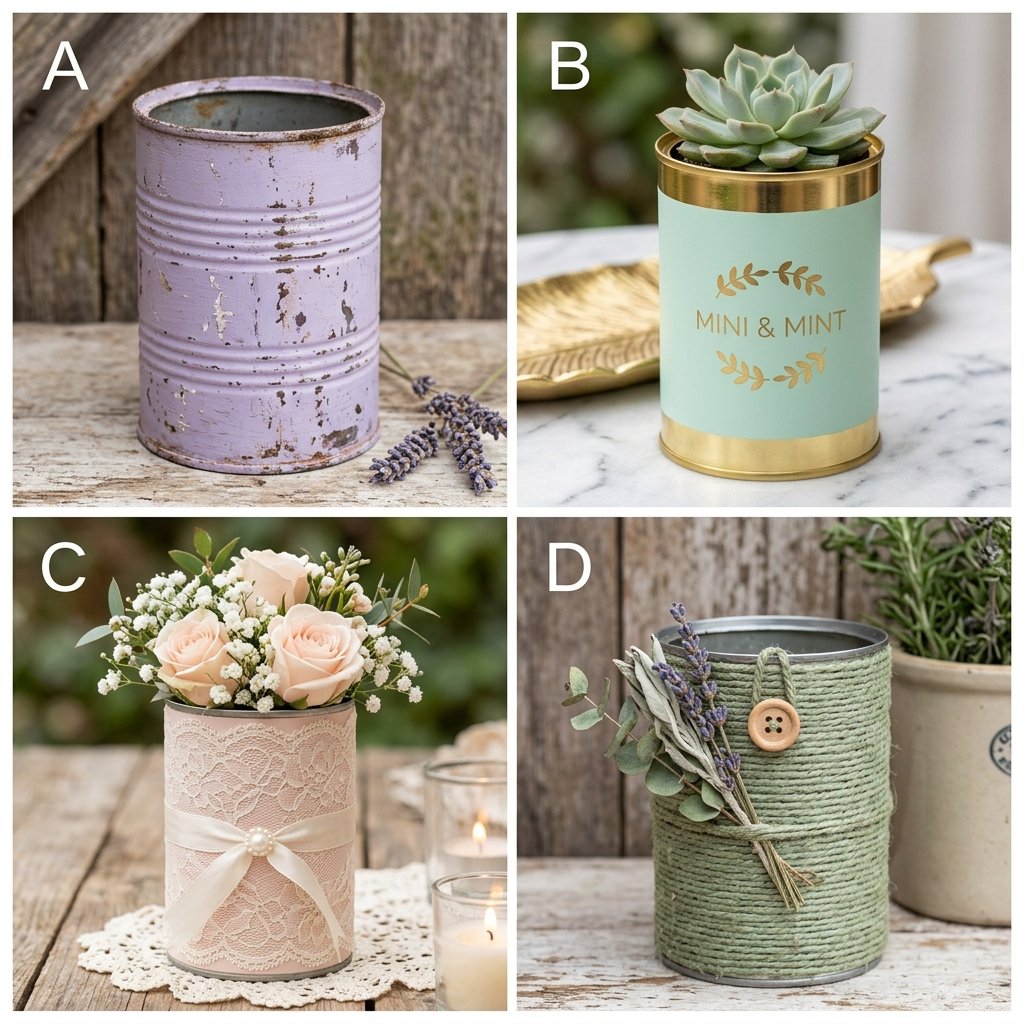
Here are ten specific styles that take the tin can from the pantry to the pedestal. Each of these uses a sophisticated pastel palette: Mint, Blush, Lavender, Peach, and Sky Blue.
1. The Distressed ‘Chalky’ Lavender
Use matte chalk paint in a soft lavender. Once dry, use a sanding block to scuff the ridges of the can, revealing the silver metal beneath. This creates a rugged-elegant vintage look perfect for cottagecore weddings.
2. The Gold-Rimmed Mint Masterpiece
Paint the entire can in a satin mint green. Once cured, use a small brush to apply liquid gold leaf or a metallic gold paint pen to the top and bottom rims. It adds an instant touch of ‘expensive’ to the piece.
3. Lace-Overlay Blush
Spray the can in a soft blush pink. Once dry, wrap a 2-inch strip of white vintage lace around the center, securing it with a thin bead of hot glue. This is the epitome of crafty-expert romanticism.
4. The Hammered Copper & Peach Duo
Using a ball-peen hammer, gently tap the surface of the can before painting to create a dimpled texture. Paint it in a creamy peach. The texture catches the candlelight beautifully.
5. The Ombre Sorbet Gradient
Start with white at the top and gradually mist a pastel yellow or coral toward the bottom. This clever technique makes the cans look like high-end glass art.
6. Twine-Wrapped Sage
Paint the can in a deep sage green. Wrap the bottom one-third of the can tightly with natural jute twine. This provides a masculine-elegant contrast to soft floral arrangements.
7. Stenciled Sky Blue
Use a delicate floral stencil and white acrylic paint over a sky-blue base. This mimics the look of fine bone china.
8. The ‘Dipped’ Look
Paint the can white, then ‘dip’ the bottom half into a pastel teal paint. This modern, minimalist aesthetic is perfect for urban weddings.
9. Vertical Ribbon Stripes
Use painter’s tape to create 1/2 inch vertical stripes. Alternate between a matte pastel and a glossy white for a subtle, high-contrast texture.
10. The Decoupage Floral Cream
Apply floral paper napkins to a cream-painted can using Mod Podge. It creates a seamless, hand-painted look that is 100% budget-friendly.
Floral Fillers: What to Put Inside Your Masterpieces
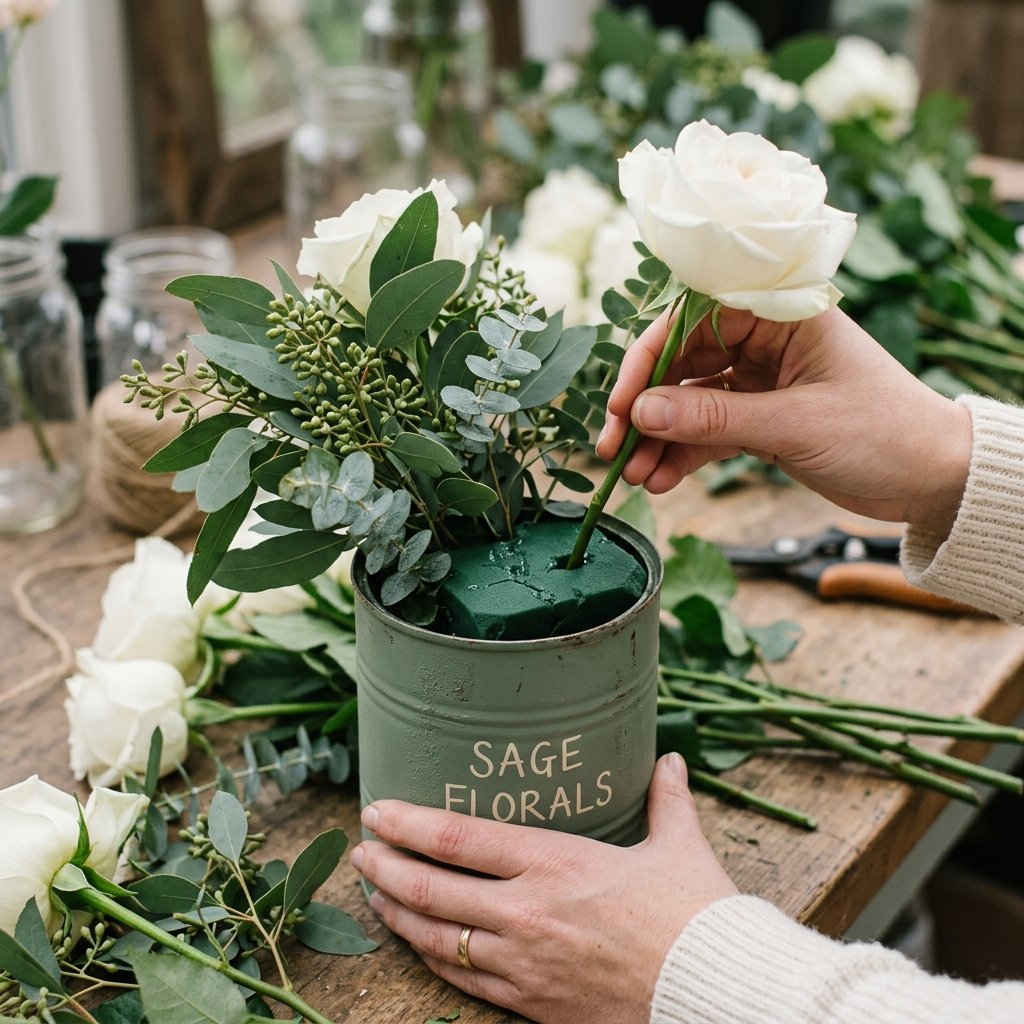
To complete the trash-to-treasure look, you need the right greenery. Because tin cans are opaque, you don’t have to worry about the ‘stems’ looking messy in water, which allows you to use floral foam or chicken wire for structure.
| Floral Type | Best Pastel Can Match | Vibe |
|---|---|---|
| Baby’s Breath | Sage Green / Twine Wrapped | Rustic & Airy |
| White Peonies | Blush Pink / Lace Overlay | Classic Romance |
| Succulents | Distressed Lavender | Modern & Rugged |
| Eucalyptus Sprigs | Gold-Rimmed Mint | Sophisticated & Clean |
| Wildflowers | Sky Blue / Stenciled | Whimsical Garden |
Pro Tip: If you are using real flowers, place a small plastic cup or a cut-down water bottle inside the tin can to hold the water. This prevents the tin from rusting over the course of a long wedding weekend and keeps your water crystal clear.
The ‘Pro-Level’ Finishing Touches
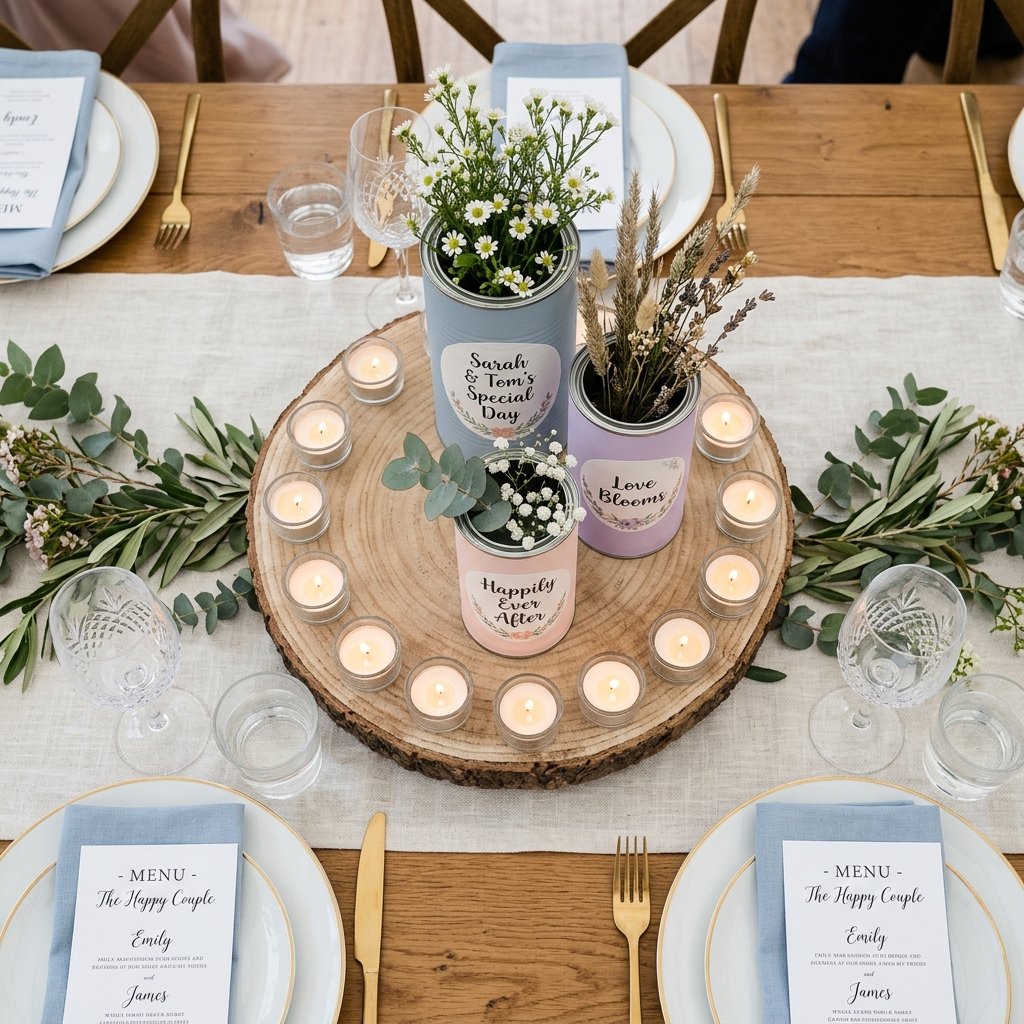
How do you make sure people don’t just see ‘painted cans’? You style them like a professional event planner. Here is the secret formula for a high-end centerpiece layout:
- The Rule of Three: Never place a single can in the center of the table. Group them in odd numbers. Use three different heights (e.g., a large tomato juice can, a standard soup can, and a small tuna can).
- Vary the Texture: Mix a matte-painted can with a lace-wrapped can and a metallic-rimmed can within the same color family.
- Anchor the Look: Place your cluster of cans on a wood slice, a mirrored tray, or a piece of cheesecloth runner. This defines the space and makes the ‘collection’ look like a single, intentional art piece.
- Light it Up: Surround the cans with votive candles. The light reflecting off the pastel paint and the metallic rims (if you added them) creates a warm, expensive glow.
Mantra for the Budget Bride: ‘Texture, height, and light—the three pillars of expensive-looking DIY.’
Conclusion
Your $0.85 Masterpiece Awaits
By choosing to upcycle, you aren’t just saving money; you are infusing your wedding with character, soul, and sustainability. These 10 pastel painted tin can centerpieces prove that with a little resourceful creativity and a crafty-expert touch, ‘trash’ can truly become the most talked-about ‘treasure’ of your wedding day. Your guests will love the charm, you will love the savings, and the planet will thank you for the second life you’ve given to these humble materials. Now, grab your sandpaper, pick your favorite pastel, and start creating the masculine-elegant decor of your dreams!

Makenzie is the founder and lead writer at MoneyHackTips.com — a personal finance blog dedicated to delivering street-smart financial wisdom for real people on real budgets. With 300+ published articles covering everything from debt management to investing fundamentals, Makenzie’s mission is to make every dollar work harder. When not writing about money hacks, Makenzie is testing frugal living strategies, optimizing side hustles, and helping readers build financial freedom from scratch.