In the world of high-end interior design, the Boho-Minimalist aesthetic has reigned supreme, often commanding prices that would make any budget-savvy crafter wince. You have likely seen them in boutique windows or glossy catalogs: those stunning, architectural split wood bead wreaths that look like they belong in a Scandinavian loft or a high-end coastal retreat. Usually, these pieces retail for anywhere between $45 and $120. But what if I told you that with a little resourcefulness and a few clever tricks, you could replicate that exact look for under $10?
This isn’t just about saving money; it’s about the rugged satisfaction of building something beautiful with your own two hands. Whether you are a handy parent looking to spruce up the nursery, a budget bride planning a chic reception, or a frugal DIYer who loves a good challenge, this project is for you. We are going to take basic, raw wood components and transform them into a sophisticated piece of home decor using nothing more than a few drops of glue and a bit of creative grit.
“True luxury isn’t about what you spend; it’s about the cleverness of the execution and the soul you pour into the craft.”
The Budget Breakdown: Sourcing Your Materials
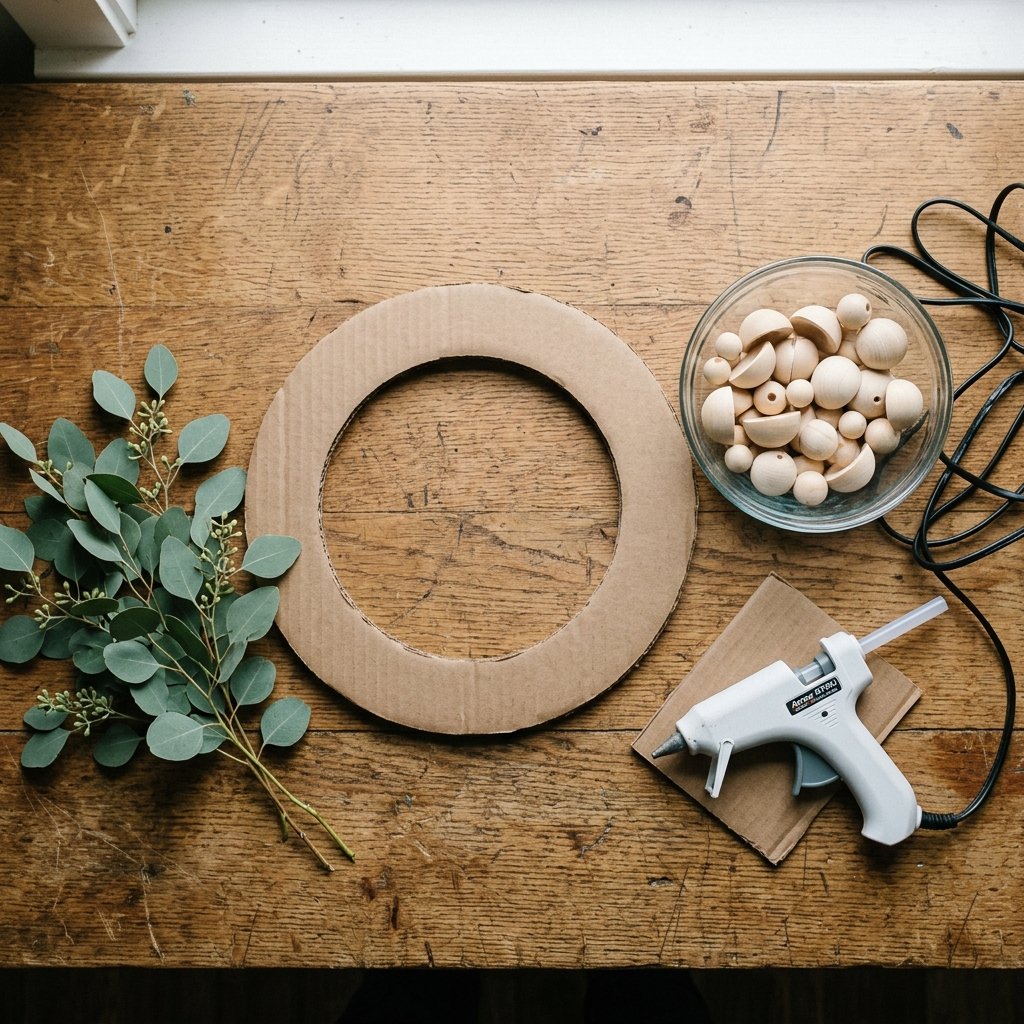
The secret to keeping this project under the $10 mark lies in smart sourcing. While craft stores often mark up specialty wood items, looking for “split wood beads” or “half wooden balls” in bulk online or at discount retailers is the way to go. For a standard 12-inch wreath, you will need approximately 40 to 50 beads, depending on their diameter.
Essential Materials List
- Split Wood Beads (20mm or 25mm): These are flat on one side, making them perfect for gluing onto a frame.
- Flat Wreath Form: A 12-inch MDF or cardboard ring works best for maximum surface area.
- Strong Adhesive: A high-temp hot glue gun or a rugged wood glue.
- Hanging Element: A scrap of leather, twine, or a piece of velvet ribbon.
| Material Item | Source Recommendation | Estimated Cost |
|---|---|---|
| Split Wood Beads (50pk) | Bulk Online Retailer | $5.50 |
| 12-inch MDF Wreath Ring | Dollar Store / Scrap Cardboard | $1.25 |
| Hot Glue Sticks (Small Pack) | Pantry / Dollar Store | $1.25 |
| Faux Greenery or Ribbon | Upcycled / Scraps | $1.00 |
| Total Project Cost | – | $9.00 |
Pro Tip for the Rugged Crafter
If you cannot find an MDF ring at the dollar store, do not spend $8 at a craft chain. Instead, find a sturdy shipping box in your recycling bin. Use a large mixing bowl and a smaller salad plate to trace a perfect ring onto the cardboard. Cut it out with a utility knife, and you have a 100% free, eco-friendly base that is just as sturdy once the beads are applied.
Step-by-Step Construction: The Precision Laydown
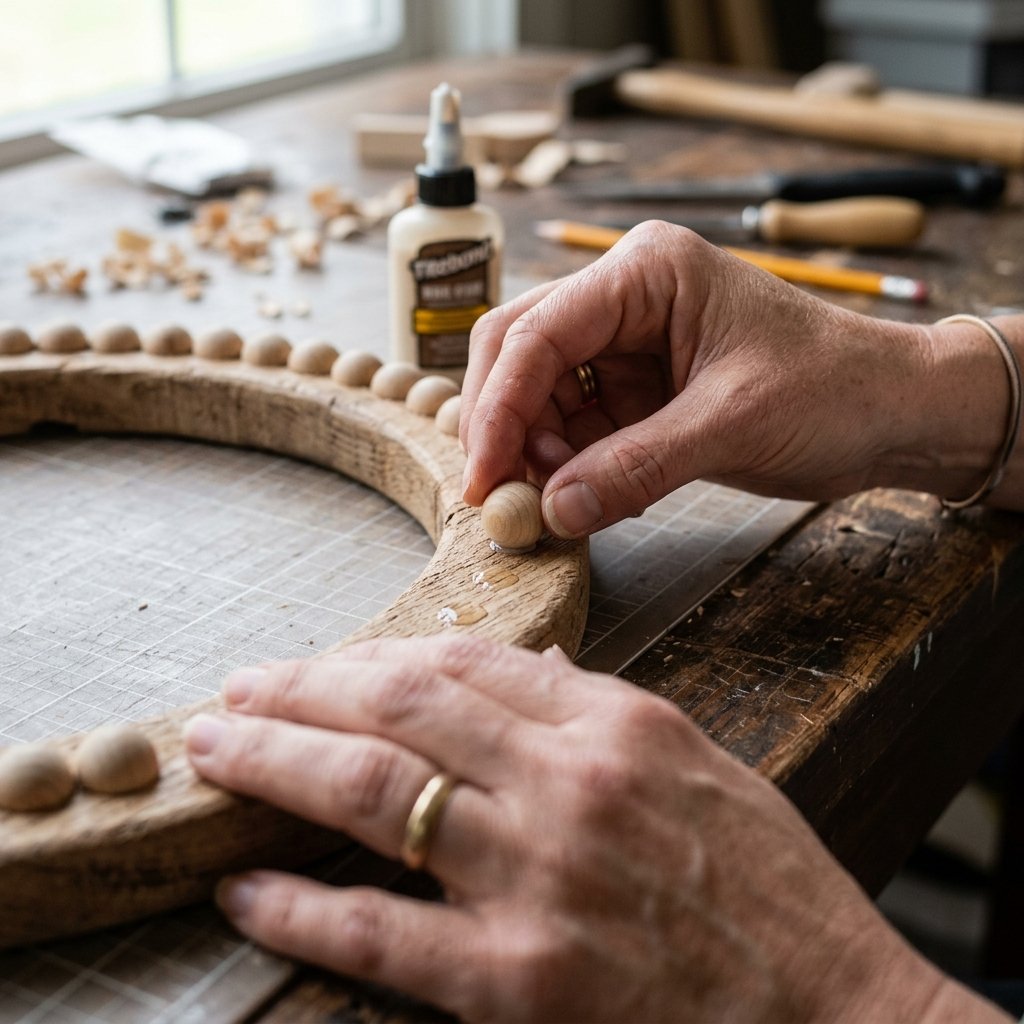
Creating a professional-looking wreath requires a bit of strategy. You don’t want to end up with a massive gap at the end or beads that are crooked. Follow these steps for a high-end finish.
- Prep the Base: If you are using a cardboard base, consider painting it a light tan or cream color first. This ensures that if any tiny gaps appear between the beads, the brown cardboard won’t peek through.
- Dry Fit First: Before you touch the glue, lay your beads all the way around the ring. This allows you to adjust the spacing. If you have a small gap at the end, space the beads out by a millimeter each to close the loop invisibly.
- The Glue Phase: Apply a pea-sized amount of hot glue to the flat side of the bead. Press it firmly onto the center of the ring.
- Maintain the Radius: Ensure the flat edge of the bead is perfectly flush with the inner or outer edge of your ring (depending on the look you want). For a modern look, center them perfectly.
“Patience in the dry-fit prevents frustration in the finish. Take 5 minutes to align, and save 20 minutes of prying off dried glue.”
If you are using wood glue instead of hot glue, you will have a longer “open time” to slide the beads into place, but you will need to let it cure for at least 2 hours before hanging. For the impatient (but clever) crafter, hot glue is the gold standard.
Customizing Your Finish: From Raw Wood to Masculine-Elegant
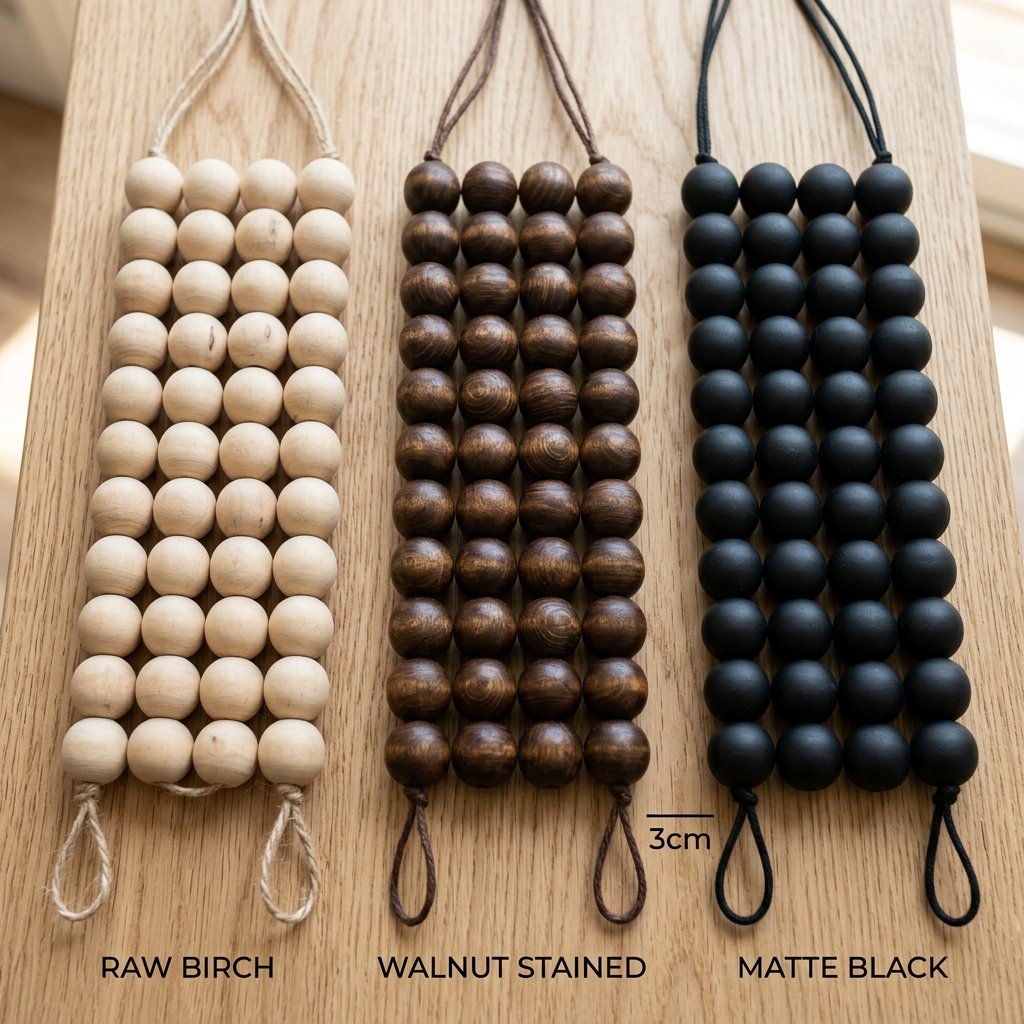
The beauty of the split wood bead wreath is its versatility. While the raw, light-colored birch look is the hallmark of Boho style, you can adapt this project to fit a more rugged or sophisticated interior with just a few cents’ worth of finish.
Finish Options and Ratios
| Style Name | Method | Visual Result |
|---|---|---|
| Scandinavian Minimal | Leave Raw / Clear Matte Sealer | Light, airy, and natural. |
| Rugged Farmhouse | Coffee or Tea Stain | Warm, aged, and rustic. |
| Modern Noir | Matte Black Spray Paint | Bold, architectural, and expensive-looking. |
| Whitewashed Coastal | Watered-down Acrylic (1:1 ratio) | Soft, weathered, and beachy. |
If you choose to stain your beads, do so before gluing. Place the beads in a large Ziploc bag with a small amount of stain or concentrated coffee, shake vigorously, and spread them out on a paper bag to dry. This ensures 100% coverage without the mess of brushing each individual bead.
Safety Note
Always work in a well-ventilated area when using spray paints or oil-based stains. Wear a mask and eye protection to keep your DIY session safe and enjoyable.
The Final Flourish: Styling and Hanging
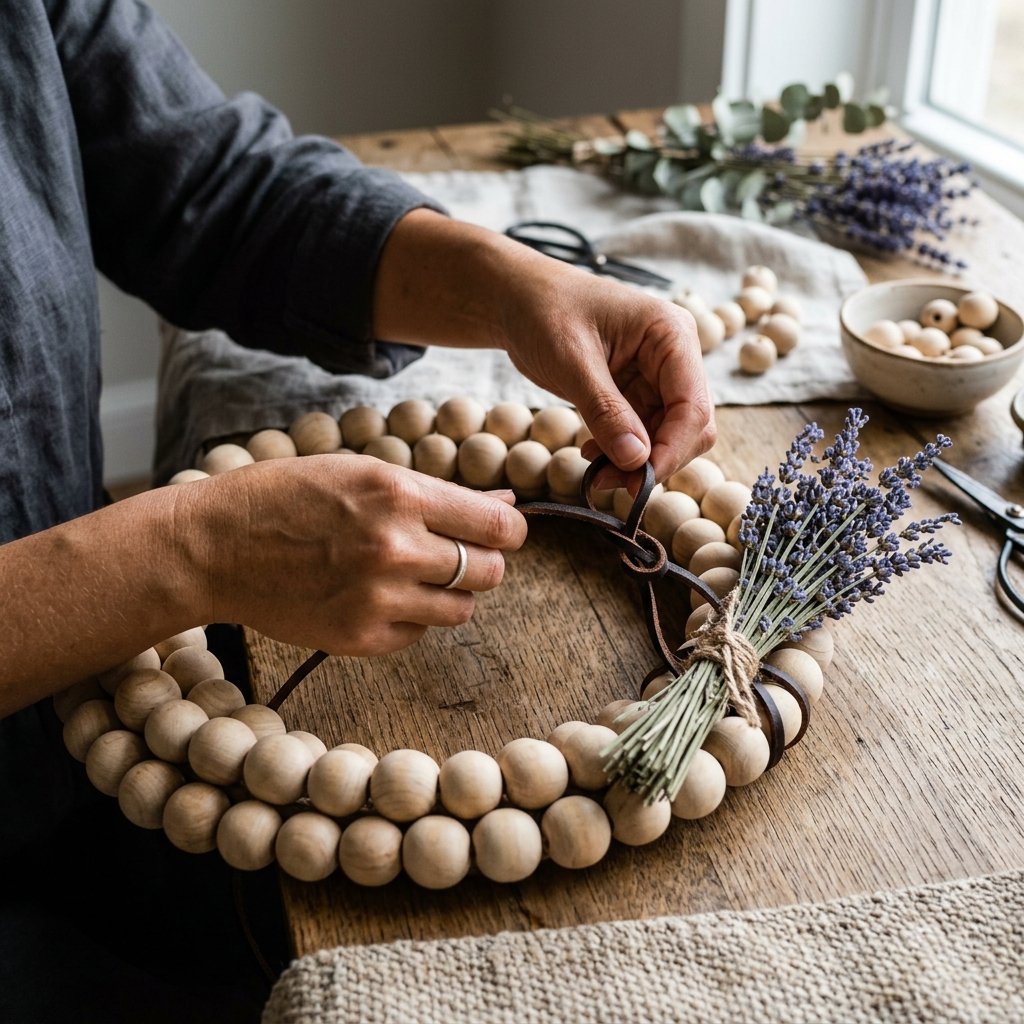
Now that your wreath is assembled and dried, it is time for the “Stylist’s Touch.” This is where you take a $10 project and make it look like a $100 investment. The key to the Boho look is asymmetry.
- The Greenery: Instead of covering the whole wreath, attach a small bundle of dried eucalyptus, pampas grass, or a single faux air plant to the 4 o’clock position. Use floral wire or more hot glue to secure it.
- The Hanging Loop: Avoid the standard over-the-door metal hanger. Instead, use a 6-inch strip of cognac-colored leather or a thick piece of jute twine. Loop it through the center and knot it at the top.
- Placement: These wreaths are lightweight, making them perfect for Command hooks. Hang it over a mirror, on a nursery door, or as part of a gallery wall.
By keeping the adornments minimal, you allow the geometric repetition of the wood beads to be the star of the show. This is the essence of masculine-elegant design: clean lines, natural materials, and zero clutter.
Conclusion
Congratulations! You have just successfully navigated the path from “trash to treasure.” By choosing to build rather than buy, you’ve saved over $50 and created a bespoke piece of decor that carries the story of your own craftsmanship. This Modern Boho Split Wood Bead Wreath proves that you don’t need a massive budget to have a stylish home—you just need a resourceful spirit and a few hours of creative focus.
Now that you’ve mastered the split-bead technique, consider using the leftovers for matching napkin rings or picture frame accents. The possibilities are as endless as your imagination. Happy crafting, and enjoy your beautiful new space!

Makenzie is the founder and lead writer at MoneyHackTips.com — a personal finance blog dedicated to delivering street-smart financial wisdom for real people on real budgets. With 300+ published articles covering everything from debt management to investing fundamentals, Makenzie’s mission is to make every dollar work harder. When not writing about money hacks, Makenzie is testing frugal living strategies, optimizing side hustles, and helping readers build financial freedom from scratch.