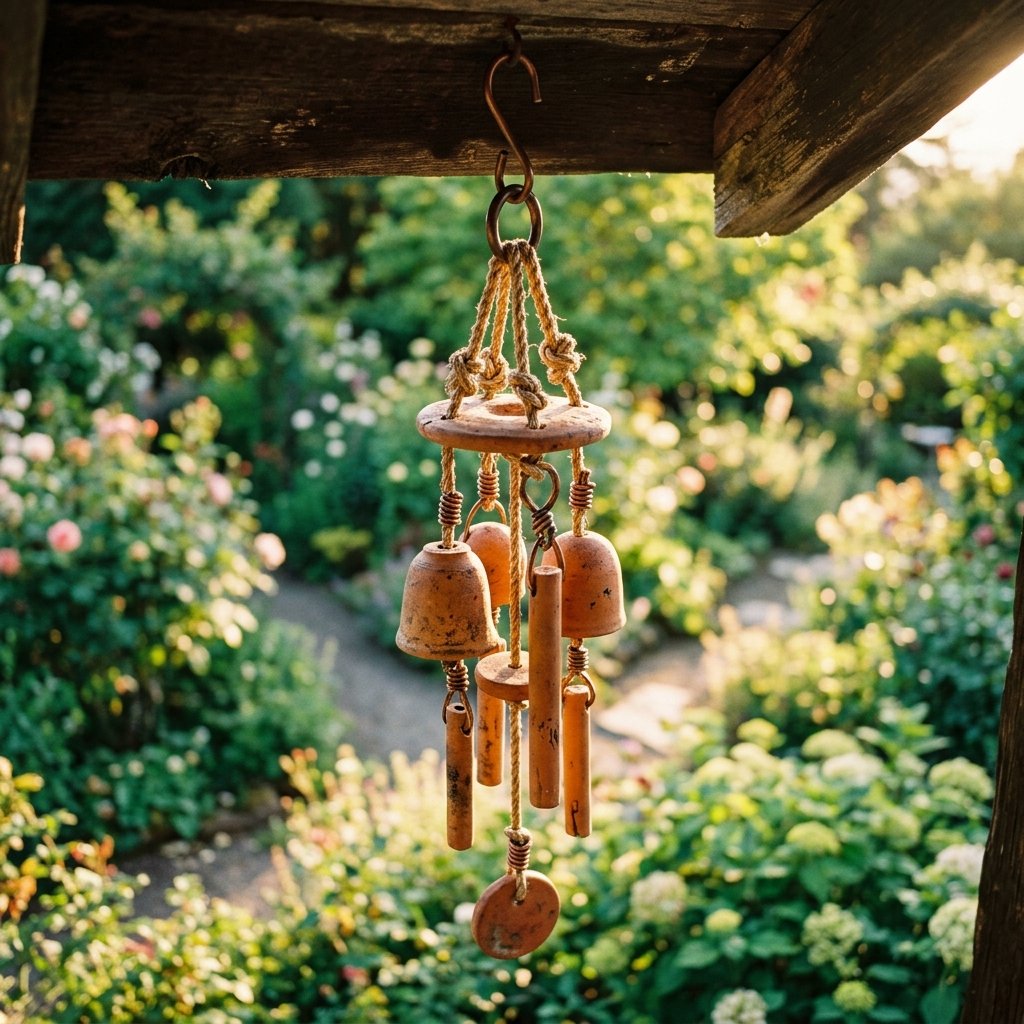

There is something inherently soulful about the hollow, earthy clink of terra cotta. Unlike the sharp, sometimes piercing ring of metal chimes, clay pot wind chimes offer a grounded, melodic resonance that transforms a simple backyard into a sanctuary. But if you have browsed high-end garden boutiques lately, you have likely seen these rustic beauties retailing for $40, $60, or even $100. As a resourceful crafter, you know better. You know that the magic is not in the price tag, but in the craftsmanship.
In this guide, we are going to strip away the boutique markup and build a breathtaking set of wind chimes using materials sourced almost entirely from the local dollar store. We are talking about a total investment of less than $10 for a piece that looks—and sounds—like it belongs in a professional artisan’s portfolio. Whether you are a handy parent looking for a weekend project or a budget-savvy decorator aiming for that masculine-elegant porch aesthetic, this project is your ticket to high-end style on a shoestring budget.
The Blueprint: Sourcing Your Materials with Savvy
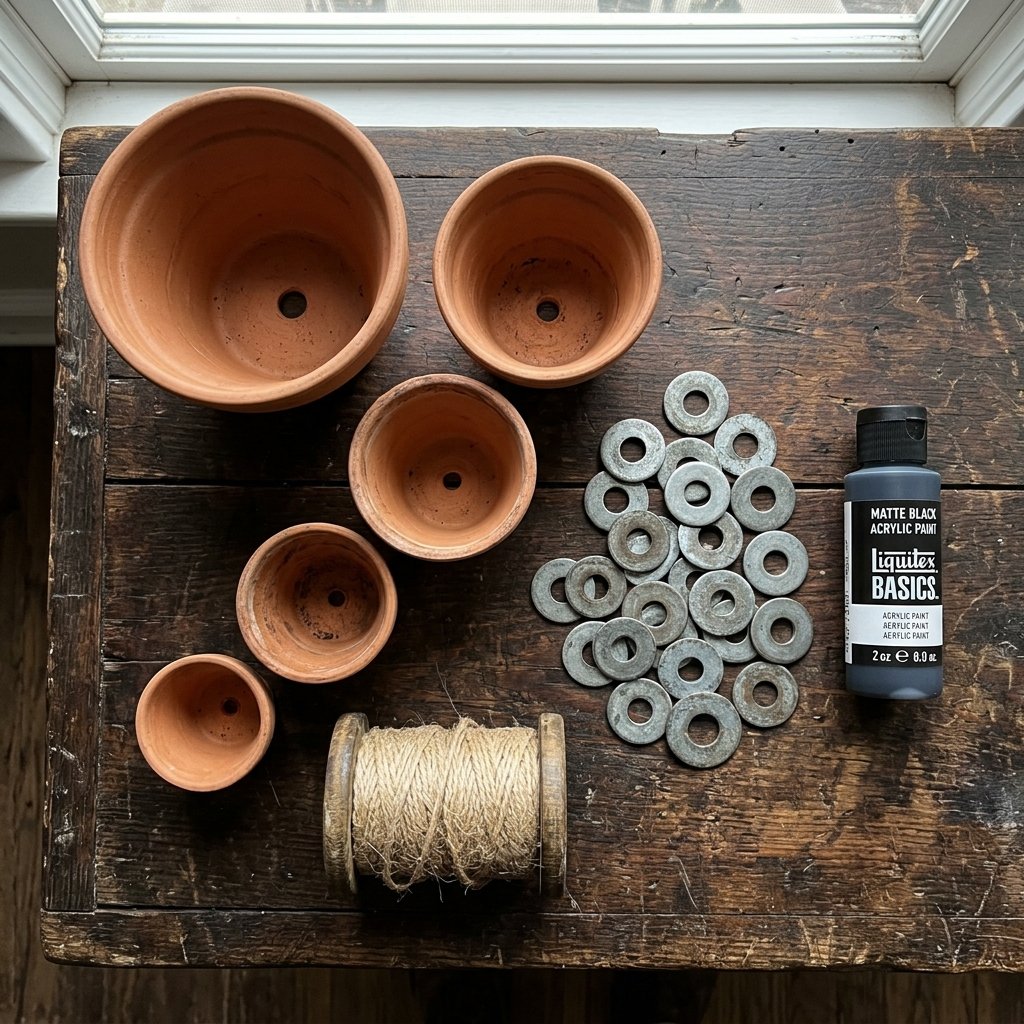
Success in any DIY project starts with the hunt. To achieve a look that defies its low-cost origins, we need to look past the bright orange of new terra cotta and see the potential for texture and tone. Most dollar stores carry small to medium terra cotta pots in the gardening aisle, usually sold in packs of two or three for $1.25. For this project, we want a graduated sound, which means we need pots of varying sizes to create different pitches.
Beyond the pots, we need a sturdy ‘spine’ for our chime. Forget flimsy craft store thread; we are going for rugged durability. Look for jute twine, nylon masonry line, or even thick leather cord if your budget allows for a small splurge. For the ‘strikers’—the parts that actually hit the pots to make noise—we will be upcycling heavy metal washers or old wooden beads.
| Material Item | Dollar Store Source | Estimated Cost |
|---|---|---|
| Terra Cotta Pots (3-5 sizes) | Gardening Section | $3.75 |
| Jute Twine / Nylon Cord | Hardware/Tool Aisle | $1.25 |
| Metal Washers or Large Beads | Hardware Section | $1.25 |
| Outdoor Acrylic Paint | Craft Aisle | $1.25 |
| Clear Gloss or Matte Sealer | Hardware/Paint Aisle | $1.25 |
| Total Investment | – | $8.75 |
The Frugal Guru’s Mantra: Never buy new what you can find in the junk drawer. Check your toolbox for old nuts, bolts, or heavy keys to use as strikers. These ‘industrial’ elements add a rugged, masculine touch and create a unique, heavy clink that plastic beads simply cannot replicate.
Aesthetic Engineering: Achieving the Faux-Stone & Patina Look

The biggest giveaway of a cheap DIY is the ‘raw’ look of the materials. To elevate our clay pots, we are going to apply a sophisticated finish. If you prefer a modern, masculine-elegant look, a matte black or deep charcoal grey is unbeatable. For a more ‘found-object’ rustic vibe, we will use the ‘dry brush’ technique to mimic aged stone or weathered copper.
Step-by-Step Finish Guide:
- Cleaning: Wipe down your pots with a damp cloth to remove any factory dust. This ensures the paint bonds permanently.
- Base Coat: Apply a solid coat of your primary color. If you are going for an aged look, start with a dark brown or black.
- The Dry Brush: Once the base is dry, take a very small amount of light grey or seafoam green paint on a dry, stiff brush. Wipe most of it off on a paper towel, then lightly flick the brush over the rims and edges of the pots. This highlights the natural texture of the clay.
- Sealing: Since these will live outdoors, a quick spray of clear sealant is non-negotiable. It prevents the paint from bubbling in the rain and protects the clay from cracking during temperature shifts.
Time-Saving Tip: If you are making multiple sets as gifts, assembly-line your painting. Line them all up on a piece of cardboard and do all the base coats at once. You can finish five sets of chimes in under 45 minutes of active work time.
The Assembly: Stringing for Durability and Sound
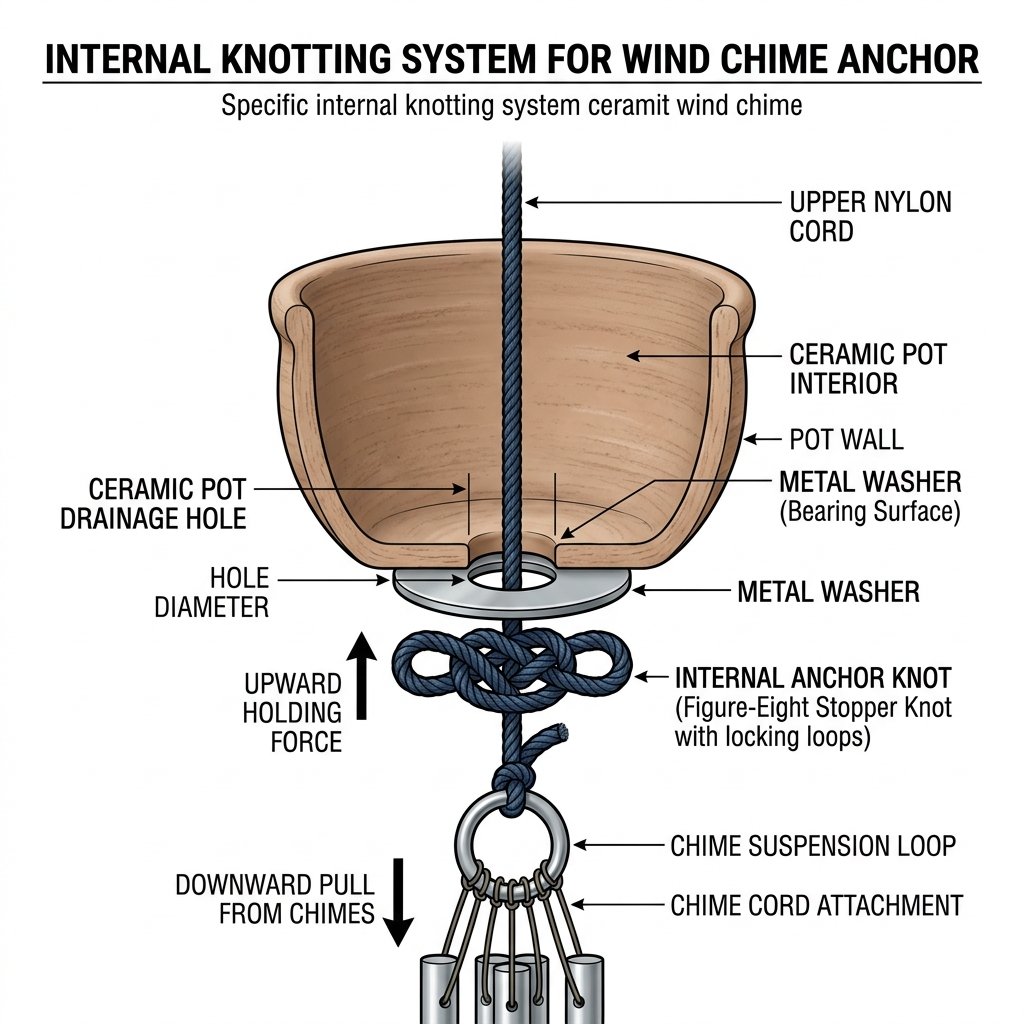
Now we move into the mechanical phase. The goal is to string the pots so they nest slightly inside one another without being completely muffled. This is where the physics of sound meets the art of the knot. We will use a ‘stacked’ method, which is the most structurally sound for outdoor use.
- Measure the Spine: Cut a length of cord approximately 4 feet long. This gives you plenty of room for knots and hanging loops.
- The Anchor: Tie a large, heavy-duty knot at the bottom of the string. Thread on your first ‘striker’ (a washer or bead). This striker should be positioned so it sits right at the level where the next pot will hang.
- The First Pot: Thread the string through the drainage hole of the smallest pot. The pot should rest on a knot you tie about 2 inches above the striker.
- The Spacing: Tie another knot 3-4 inches higher. Thread the next size pot. The rim of the lower pot should just barely overlap with the bottom of the upper pot.
- The Internal Striker: Inside each pot, there should be a striker hanging. When the wind blows, the pots will hit each other, but the internal strikers hitting the clay walls create the ‘magic’ secondary tones.
Safety Note: When working with jute or nylon cord, use a lighter to quickly singe the ends of the rope after cutting. This prevents fraying and makes threading through the small drainage holes much easier. Be careful not to touch the molten plastic!
Resonance Control: Tuning Your DIY Masterpiece

Not all clay pots are created equal. Depending on the thickness of the clay and the firing temperature, two pots of the same size might have different notes. To ‘tune’ your chime, you can adjust the height of the strikers. A striker hitting the rim of the pot produces a higher, clearer note, while a striker hitting the middle of the ‘bell’ produces a deeper, more thud-like sound.
Sound Comparison: DIY vs. Store-Bought
| Feature | Store-Bought Metal Chime | DIY Clay Pot Chime |
|---|---|---|
| Tone Profile | High-pitched, metallic, sharp | Deep, earthy, resonant, soothing |
| Customization | None (fixed) | Infinite (change pots/strikers) |
| Cost | $35.00+ | $8.75 |
| Durability | Prone to rust | Weather-resistant (if sealed) |
If you find the sound is too ‘clunky,’ try adding a few metal elements between the pots. Adding a few stainless steel spoons from the dollar store’s kitchen aisle can introduce a ‘shimmer’ to the sound, blending the earthy clay tones with a bright metallic finish. This is the hallmark of a crafty expert: knowing when to mix materials for the best sensory result.
Installation & Rugged Maintenance

Your chime is a piece of functional art, but it is also a structural element that needs to withstand the elements. Hanging a heavy clay chime requires a secure anchor. Avoid using suction cups on windows; instead, go for a screw-in ‘C’ hook or a heavy-duty bracket mounted to a porch post.
Maintenance Checklist:
- Annual Inspection: Check the cord for signs of UV damage or fraying every spring. Jute is biodegradable and may need replacing every 2 years if exposed to heavy rain.
- Winter Care: If you live in a climate with hard freezes, bring your clay chimes inside. Moisture trapped in the clay pores can freeze and expand, causing the pots to shatter.
- Cleaning: A simple spray with a garden hose will remove spider webs and dust, keeping the resonance clear.
For the gift-givers among us, these chimes make incredible Father’s Day or housewarming presents. To package them, wrap each pot individually in brown kraft paper to prevent clinking and breaking during transport. It adds a rugged, artisanal touch that matches the masculine-elegant aesthetic of the project.
Conclusion
Creating your own DIY clay pot wind chimes is more than just a craft; it is an exercise in resourceful creativity. You have taken $10 worth of basic utility items and transformed them into a piece of decor that provides peace, sound, and beauty to your home. This project proves that you don’t need a massive budget to have a high-end home—you just need a bit of clever engineering and a crafty eye.
Now, every time the wind picks up and you hear that deep, earthy melody echoing across your porch, you can take pride in knowing you built it yourself. So, go ahead—hang your masterpiece, grab a cold drink, and hear the magic of a job well done.

Makenzie is the founder and lead writer at MoneyHackTips.com — a personal finance blog dedicated to delivering street-smart financial wisdom for real people on real budgets. With 300+ published articles covering everything from debt management to investing fundamentals, Makenzie’s mission is to make every dollar work harder. When not writing about money hacks, Makenzie is testing frugal living strategies, optimizing side hustles, and helping readers build financial freedom from scratch.