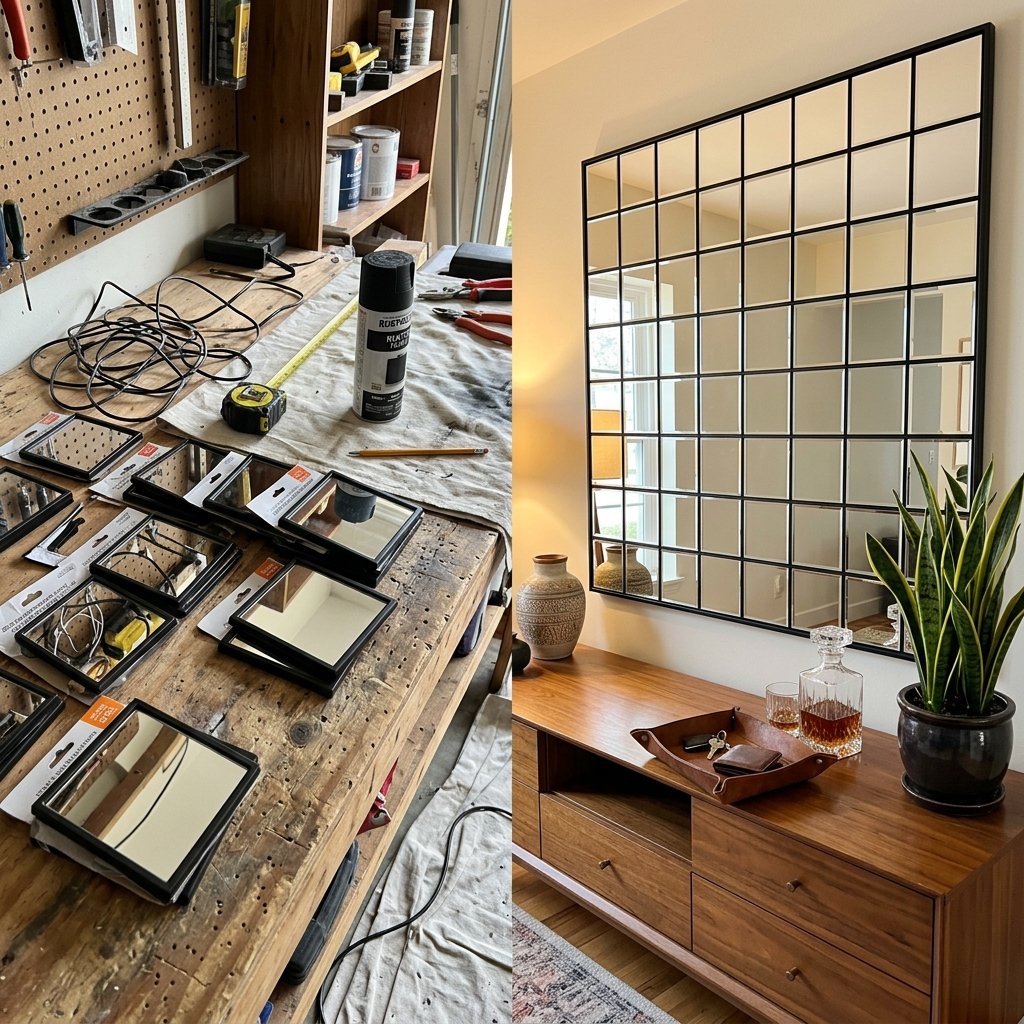

We have all been there. You are scrolling through high-end home decor catalogs, sipping your morning coffee, and you spot it: the perfect, architectural grid mirror. It is industrial, it is sleek, it has that masculine-elegant vibe that completely anchors a room. Then, you look at the price tag, and your jaw hits the floor. $400? $600? For what is essentially glass and metal? As resourceful, budget-savvy creators, we know a secret that the big-box luxury retailers do not want us to know: you can build that exact same statement piece for the cost of a couple of fancy lattes.
Welcome to the ultimate trash-to-treasure decor hack. Today, we are channeling our inner craftsman and dollar-store designer to create a massive, high-impact grid mirror wall that looks incredibly expensive but costs exactly $14.50 to pull off. Whether you are a frugal DIYer looking to elevate your entryway, a handy parent wanting to add light to a dark hallway without blowing the family budget, or a crafty upcycler who loves the thrill of a good dupe, this project is your weekend blueprint.
By utilizing basic dollar-store framed mirrors, a touch of spray paint alchemy, and some precise, craftsman-level measuring, we are going to transform cheap plastic into what looks like heavy, forged iron or brushed brass. It is time to roll up your sleeves, grab your measuring tape, and prove that high-end style is about ingenuity, not your income bracket.
The Blueprint: Decoding the Expensive Grid Mirror Look
Why the Grid Mirror Works
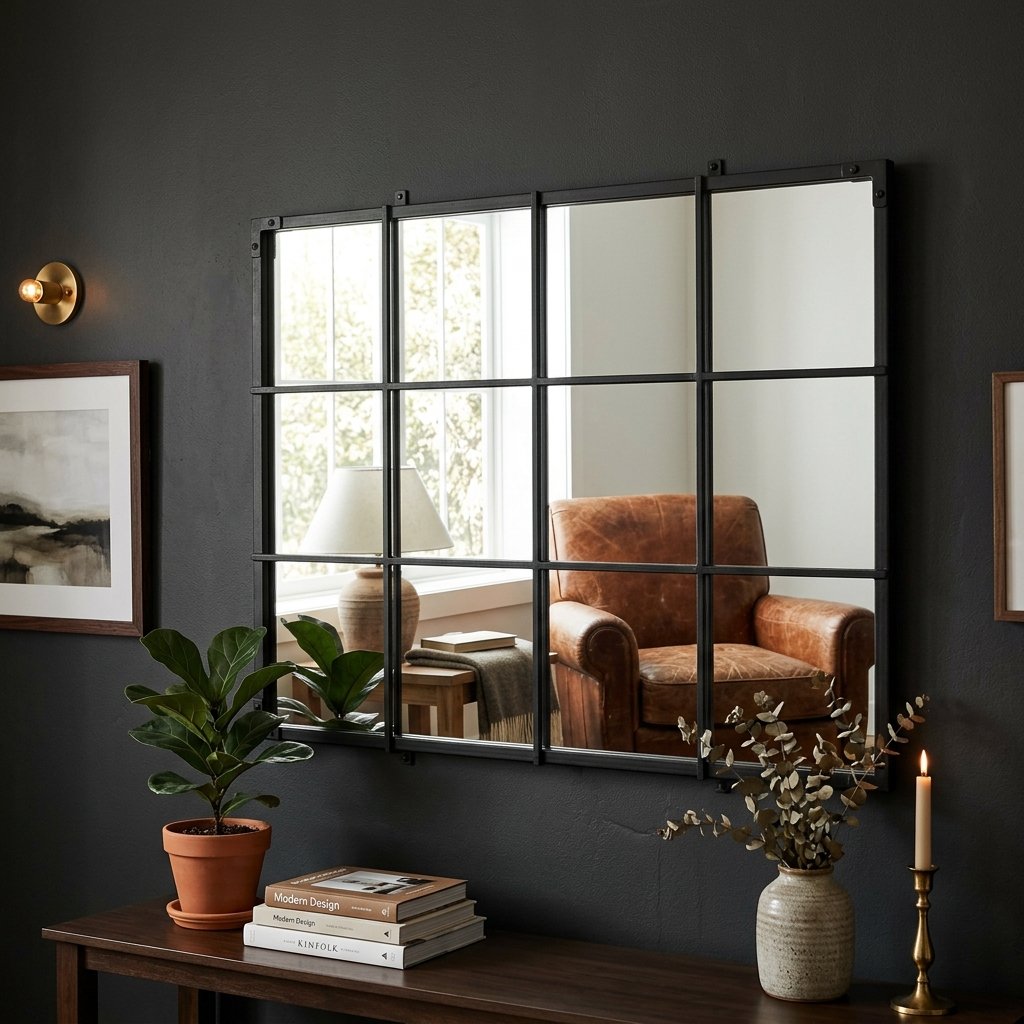
Before we dive into the materials, let us dissect why the windowpane or grid mirror is such a coveted design element. It is all about architectural symmetry and light reflection. A large, solid mirror can sometimes look like a generic gym wall. But when you break that reflection up with a grid, you mimic the look of an industrial factory window. It adds immediate depth, rugged character, and a sense of history to a blank wall.
The Cost of Luxury vs. The Power of DIY
High-end retailers charge a premium for the heavy metal framing and the logistics of shipping a massive, fragile piece of glass. Our resourceful workaround? We use individual, lightweight square mirrors. By spacing them perfectly on the wall, the wall itself becomes the “grout” or the grid lines. This not only completely eliminates the need for heavy metal welding or woodworking, but it makes the installation a one-person job that takes less than 60 minutes.
| Feature / Item | High-End Retailer (e.g., West Elm) | Our Resourceful DIY Hack |
|---|---|---|
| Frame Material | Heavy welded iron or brass | Lightweight plastic (painted to look like metal) |
| Weight | 40+ lbs (requires heavy-duty anchors) | Under 3 lbs total (damage-free hanging) |
| Installation Time | 2 hours (requires two people & stud finder) | 45 minutes (solo project) |
| Total Cost | $450 – $600+ | $14.50 |
“True craftsmanship isn’t about how much you spend on materials; it’s about the vision and precision you apply to the materials you have.” – The Upcycler’s Mantra
Sourcing Your Arsenal: The Under-$15 Materials List
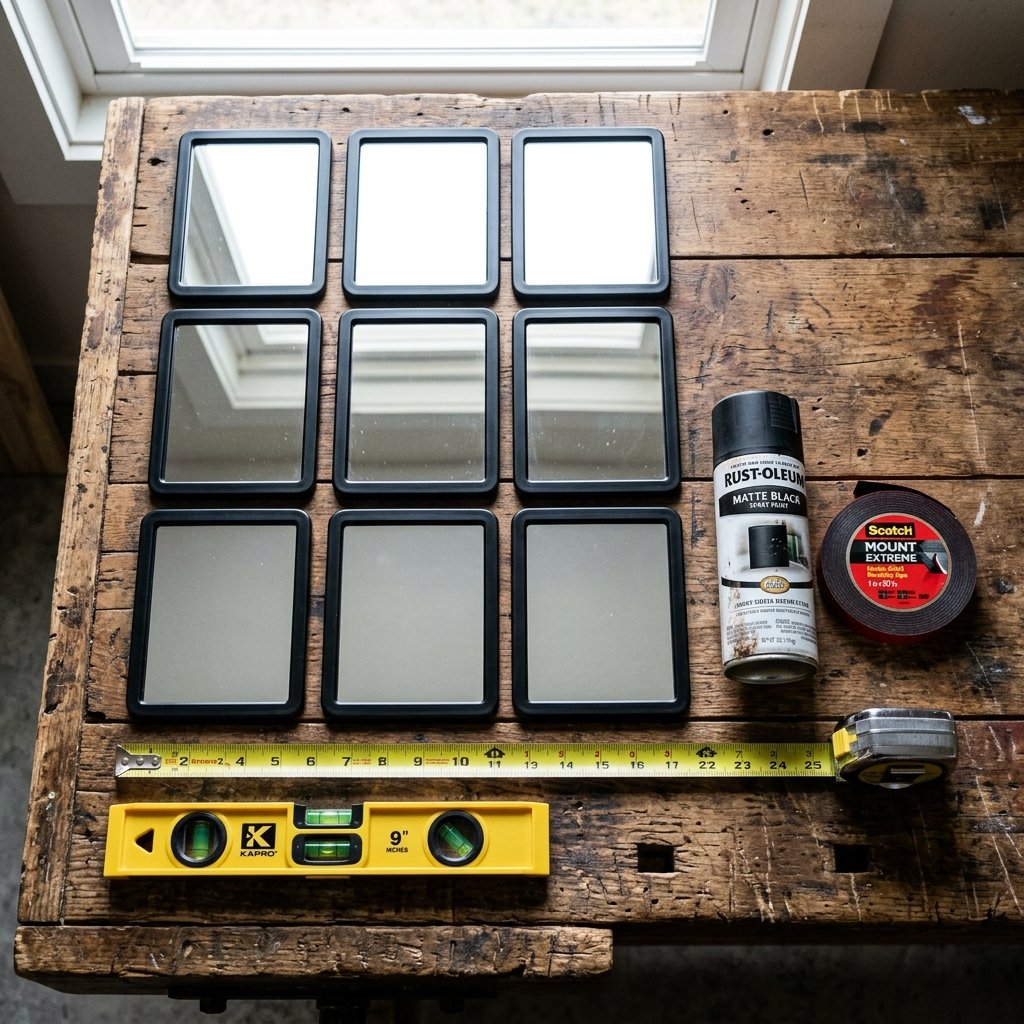
The Dollar Tree Hunt
Your local dollar store is a treasure trove if you look past the bright plastic and cheap packaging. For this project, you are hunting for standard square framed mirrors. They are usually found in the candle aisle (used as candle plates) or the picture frame aisle. They typically measure 8×8 inches or 10×10 inches. You will need 9 or 12 of them, depending on how large you want your grid.
Materials Needed & Estimated Budget
Here is the exact breakdown of what you need to gather. Keep in mind, you might already have some of these items in your garage or workshop, bringing your total cost down even further.
| Material / Tool | Quantity Needed | Estimated Cost |
|---|---|---|
| Dollar Store Framed Mirrors (Square) | 9 to 12 mirrors | $11.25 – $15.00 |
| Matte Black or Antique Brass Spray Paint | 1 can | $0.00 (Use leftover garage stock) |
| Double-Sided Foam Mounting Tape | 1 roll (or Command Strips) | $3.00 |
| Rubbing Alcohol & Cotton Pads | Small amount | $0.00 (Pantry item) |
| Measuring Tape & Level | Standard toolkit items | $0.00 (Already own) |
| Painter’s Tape | 1 roll | $0.00 (Already own) |
Choosing the Right Vibe
Think about your room’s existing hardware. If you have a rugged, industrial, or modern masculine space, go for a Flat or Matte Black spray paint. It perfectly mimics wrought iron. If your space leans more mid-century or you want a touch of warmth, opt for an Antique Brass or Metallic Gold finish. The beauty of this budget-savvy hack is that you are the master of the final aesthetic.
The Alchemy of Paint: Turning Plastic into Forged Metal
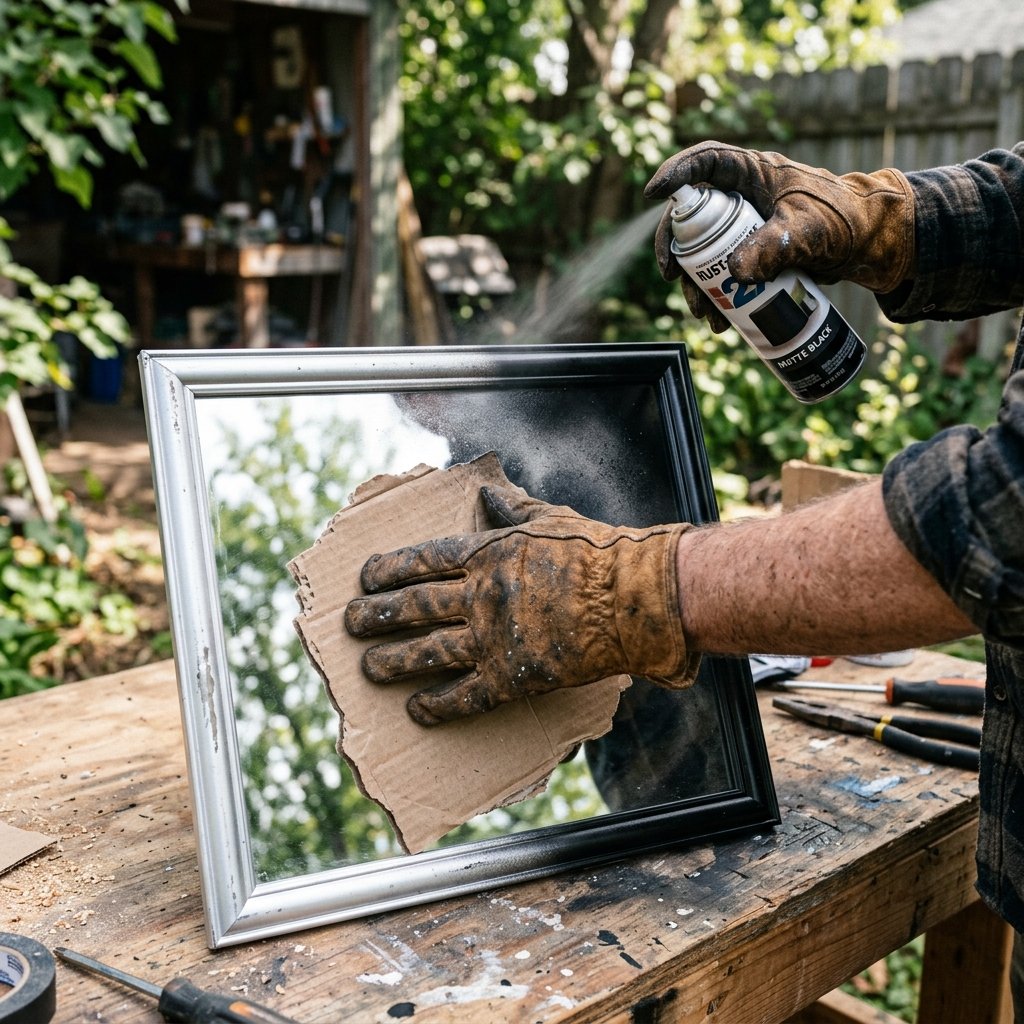
Prepping the Canvas
The biggest mistake amateur DIYers make is skipping the prep work. Paint will not adhere properly to glossy, oily plastic. You do not need to spend hours sanding, but you do need a clean surface.
- Clean the Frames: Take a cotton pad soaked in rubbing alcohol and aggressively wipe down the plastic frames of all your mirrors. This removes the factory release agents, fingerprints, and dust. Let them dry for 2 minutes.
- Protect the Glass: You have two options here. You can either carefully apply painter’s tape and newspaper to cover the glass, OR, if you have a steady hand, you can use the “cardboard shield” trick. Simply cut a piece of cardboard to the exact interior dimension of the frame and hold it over the glass as you spray.
The Spraying Protocol
To achieve that high-end, forged metal look, your spray paint technique must be flawless. No drips, no thick globs.
- Shake Vigorously: Shake the can for a full 60 seconds.
- Distance is Key: Hold the can 10 to 12 inches away from the frames.
- Light Layers: Do not try to cover the frame in one coat. Apply three very light, dusting coats, allowing 5 to 10 minutes of drying time between each.
Safety & Crafting Note: Always use spray paint outdoors or in a highly ventilated garage. Wear a mask to protect your lungs from aerosolized particles, and lay down a drop cloth to save your driveway from permanent overspray.
Adding Faux Texture (Optional Masterclass Step)
If you want to take this from “good” to “unbelievable,” grab a tiny bit of baking soda. Before your final coat of black paint dries, lightly dust the wet paint with a pinch of baking soda. Once dry, wipe away the excess and do one final, quick mist of black paint. This gives the plastic a subtle, gritty texture that feels exactly like cast iron.
The Craftsman’s Grid: Precision Measuring and Wall Prep
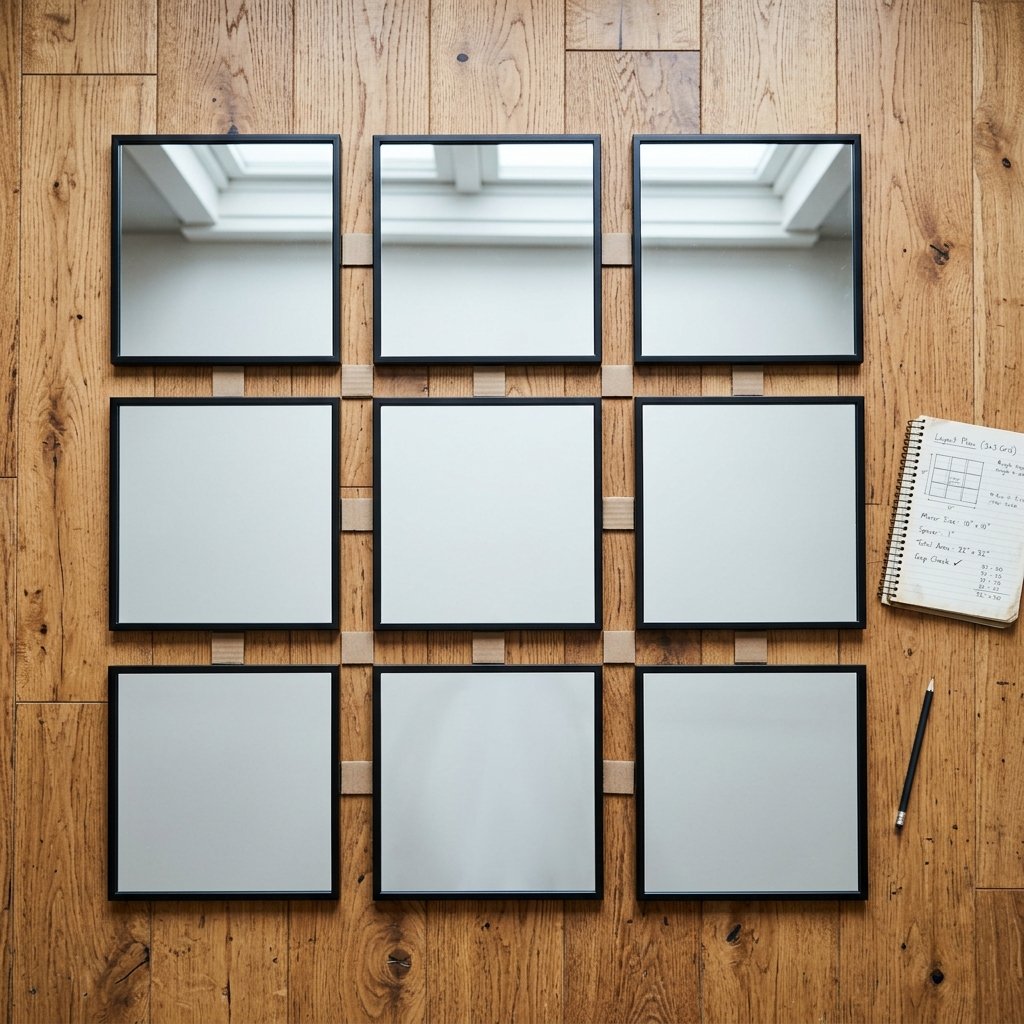
The Blueprint Layout
This is where the magic happens, and where your craftsmanship truly shines. A grid mirror only looks expensive if the spacing is mathematically perfect. Even a quarter-inch deviation will catch the eye and ruin the illusion. We are aiming for a flawless 3×3 or 3×4 grid.
The Floor Test
Never start by sticking things to the wall. Clear a space on your floor and lay out your freshly painted mirrors. Use your measuring tape to determine the ideal gap between each mirror. A gap of 1 inch to 1.5 inches generally looks the most authentic, mimicking the mullions of a real factory window.
- Lay out your 9 mirrors in a 3×3 square.
- Cut small blocks of cardboard exactly to your desired gap width (e.g., 1 inch). Use these blocks as spacers between the mirrors on the floor.
- Measure the total width and total height of your complete grid layout. Write these numbers down.
Prepping the Wall
Now, transfer those measurements to your wall. Find the center point of where you want the installation to live (for example, centered over your console table, keeping the bottom edge about 4 to 6 inches above the tallest item on the table).
- Use your level and a pencil to draw a faint, perfectly straight horizontal line for the bottom edge of your bottom row of mirrors.
- Draw a perfectly vertical line intersecting the center of your horizontal line. This crosshair is your anchor.
- Use painter’s tape to map out the outer boundary of your grid on the wall. This gives you a visual preview before you commit.
The Execution: Mounting Your Masterpiece
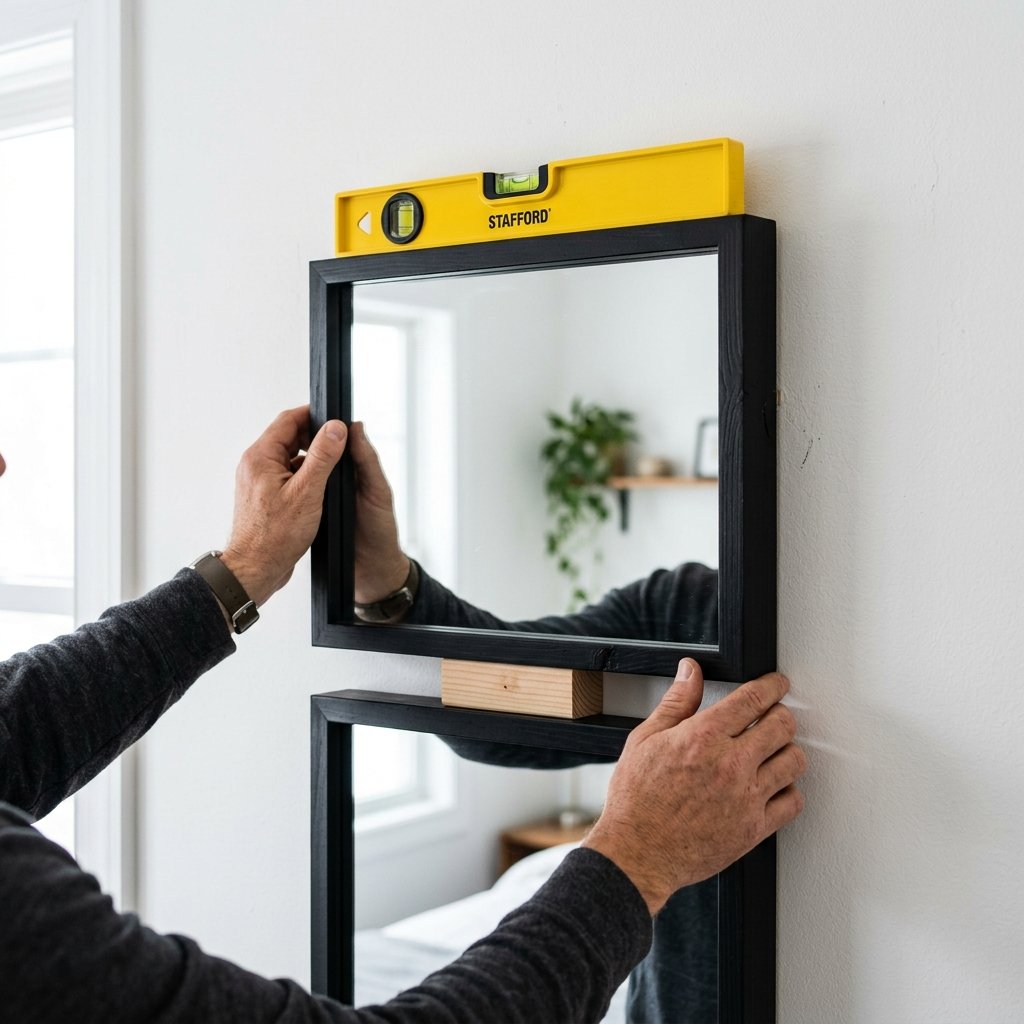
The Damage-Free Adhesion Hack
Because dollar-store mirrors are incredibly lightweight (usually just plastic and thin glass), we do not need drywall anchors, hammers, or nails. This makes it the perfect project for renters or anyone who hates patching drywall. We will use heavy-duty double-sided foam tape or Command strips.
Step-by-Step Mounting
- Tape Application: Cut four 2-inch strips of mounting tape for each mirror. Apply them to the four back corners of the frame. Press firmly for 30 seconds to ensure a strong bond with the plastic.
- The Anchor Mirror: Start with the bottom center mirror. This is the keystone of your arch. Align the bottom edge with your leveled pencil line, and center it on your vertical crosshair. Remove the tape backing, use your torpedo level to ensure it is perfectly straight, and press it firmly against the wall.
- Building the Row: Move to the mirror on the right. Place your 1-inch cardboard spacer block against the side of the anchor mirror. Press the next mirror tightly against the spacer, check for level, and stick it to the wall. Repeat for the left side.
- Stacking the Grid: Once your bottom row of three is perfect, move to the second row. Place your spacer blocks on top of the bottom mirrors to ensure the horizontal gap is identical to the vertical gap. Work your way up until all 9 (or 12) mirrors are mounted.
Pro-Tip for Precision: Always trust your level over your eyes. Ceilings and baseboards are rarely perfectly straight in any home. If you align your mirrors to a crooked ceiling, the whole grid will look warped. Follow the bubble in your level!
Styling the Space: Masculine-Elegant Finishing Touches
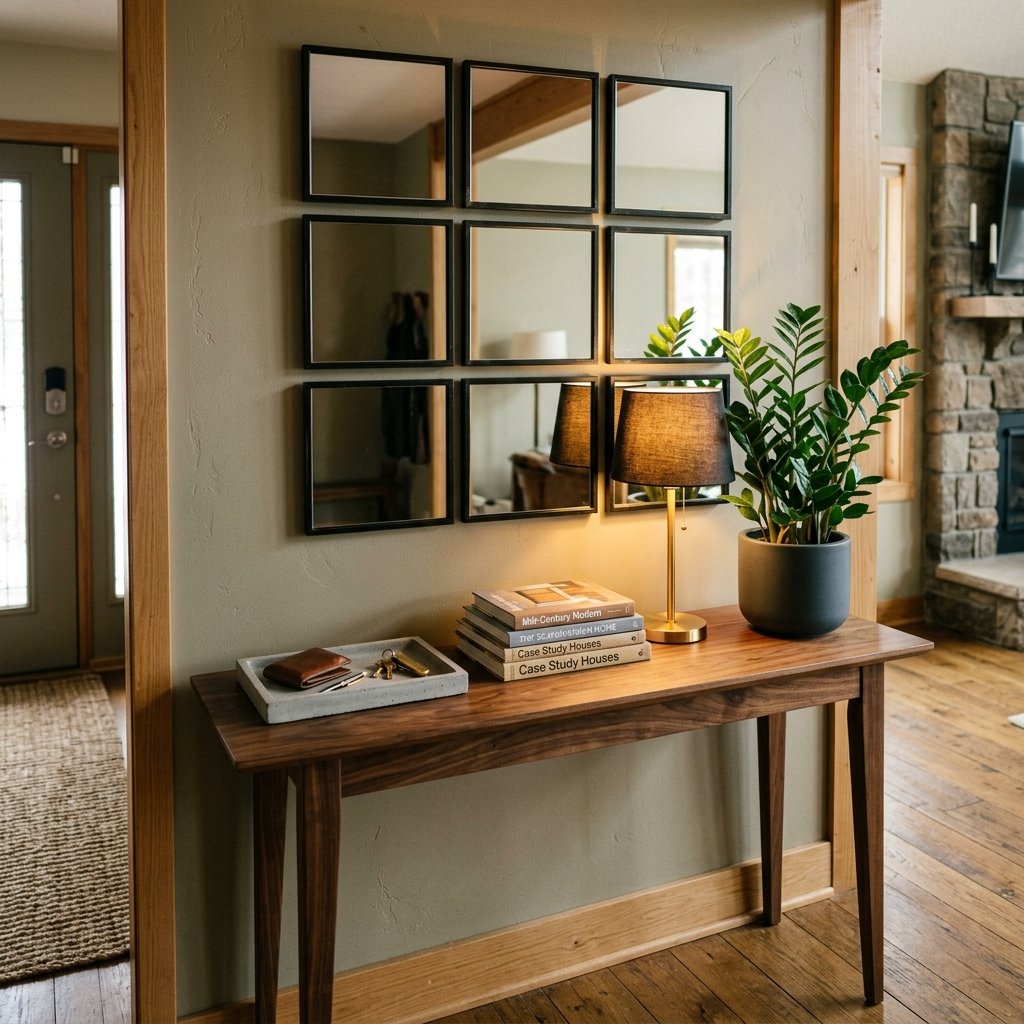
Elevating the Illusion
You have successfully installed a massive, architectural grid mirror for under $15. Now, it is time to style the surrounding space so the whole vignette screams “high-end design.” The mirror is the anchor; the decor is the storytelling.
The Console Table Setup
If your mirror is hanging in an entryway or over a living room credenza, play with contrasting textures. The hard, reflective surface of the glass and the industrial matte black frames need to be softened with organic and rugged materials.
- Add Greenery: Place a tall, structural plant like a Snake Plant (Sansevieria) or a ZZ plant to one side of the mirror. The reflection of the leaves will add incredible depth to the room.
- Rugged Textures: Introduce a concrete tray, a dark leather valet box for keys and sunglasses, or a stack of vintage, cloth-bound books.
- Ambient Lighting: Place a small, warm-toned lamp or a pair of thick pillar candles in front of the grid. When lit, the grid mirror will multiply the warm glow, making your space feel instantly cozier and more expensive.
| Styling Element | Why It Works with the Grid Mirror |
|---|---|
| Warm Wood Tones | Warms up the cold, industrial feel of the black “metal” frames. |
| Leather Accents | Adds a masculine, tactile richness that complements the architectural lines. |
| Warm Ambient Lighting (2700K) | Reflects beautifully in the multiple panes, creating dynamic shadows. |
Maintenance and Cleaning
To keep your dupe looking like a million bucks, avoid spraying glass cleaner directly onto the mirror, as it can drip down and degrade the painted frames or the mounting tape over time. Instead, spray your microfiber cloth with glass cleaner first, then gently wipe each pane. Your $15 investment will continue to fool guests for years to come.
Conclusion
And there you have it—a masterclass in resourceful design and budget-savvy upcycling. By looking past the cheap packaging of dollar-store items and applying a little bit of craftsman precision, you have created a stunning, high-impact architectural piece. This West Elm-inspired grid mirror proves that creating a home with a rugged, masculine-elegant aesthetic does not require a massive budget; it just requires a bit of creativity, a can of spray paint, and the willingness to tackle a weekend project.
Every time you walk past your new statement wall, you get to enjoy the reflection of a space you elevated with your own two hands. Plus, you get the ultimate satisfaction of knowing you saved over $400. So go ahead, style that entryway, light a candle, and bask in the glow of a DIY well done. Keep crafting, keep upcycling, and never stop looking for the hidden potential in everyday items.

Makenzie is the founder and lead writer at MoneyHackTips.com — a personal finance blog dedicated to delivering street-smart financial wisdom for real people on real budgets. With 300+ published articles covering everything from debt management to investing fundamentals, Makenzie’s mission is to make every dollar work harder. When not writing about money hacks, Makenzie is testing frugal living strategies, optimizing side hustles, and helping readers build financial freedom from scratch.