
The High-End Boutique Allure on a Frugal Crafter’s Budget
We have all experienced that intoxicating moment. You walk through the heavy, ornate wooden doors of a high-end boutique like Anthropologie. The air smells faintly of sugared citrus and exotic spices. Everywhere you look, there is an effortless, bohemian-chic aesthetic that perfectly balances rugged natural textures with elegant, feminine details. Your eyes land on a stunning, minimalist embroidery hoop wreath. It features exposed raw wood, an asymmetrical sweep of frosted eucalyptus, and a perfectly placed dried thistle. It is gorgeous. It is perfect for your front door or living room gallery wall. And then, you flip over the tiny, artisanal kraft paper price tag: $148.00.
For the frugal DIYer, the budget-savvy home stylist, and the crafty upcycler, that price tag is not a deterrent; it is a challenge. Why spend a small fortune when you can harness your own creativity, a few dollar-store staples, and some clever construction techniques to achieve the exact same high-end look for under $10? Welcome to the ultimate masterclass in trash-to-treasure, budget-friendly home decor. Today, we are going to build a gorgeous DIY embroidery hoop wreath that looks like it was plucked straight from a designer catalog.
This project is the perfect intersection of practical craftsmanship and elegant design. Whether you are a handy parent looking to spruce up your entryway, a budget bride designing chic wedding centerpieces, or a creative gift-giver crafting a thoughtful housewarming present, this tutorial is your blueprint. We will explore the design theory behind minimalist wreaths, source our materials resourcefully, and execute the build with rugged, durable techniques that ensure your creation lasts season after season. Grab your wire cutters, fire up that glue gun, and let us get crafty.
Deconstructing the Designer Look: The Anatomy of a Minimalist Wreath
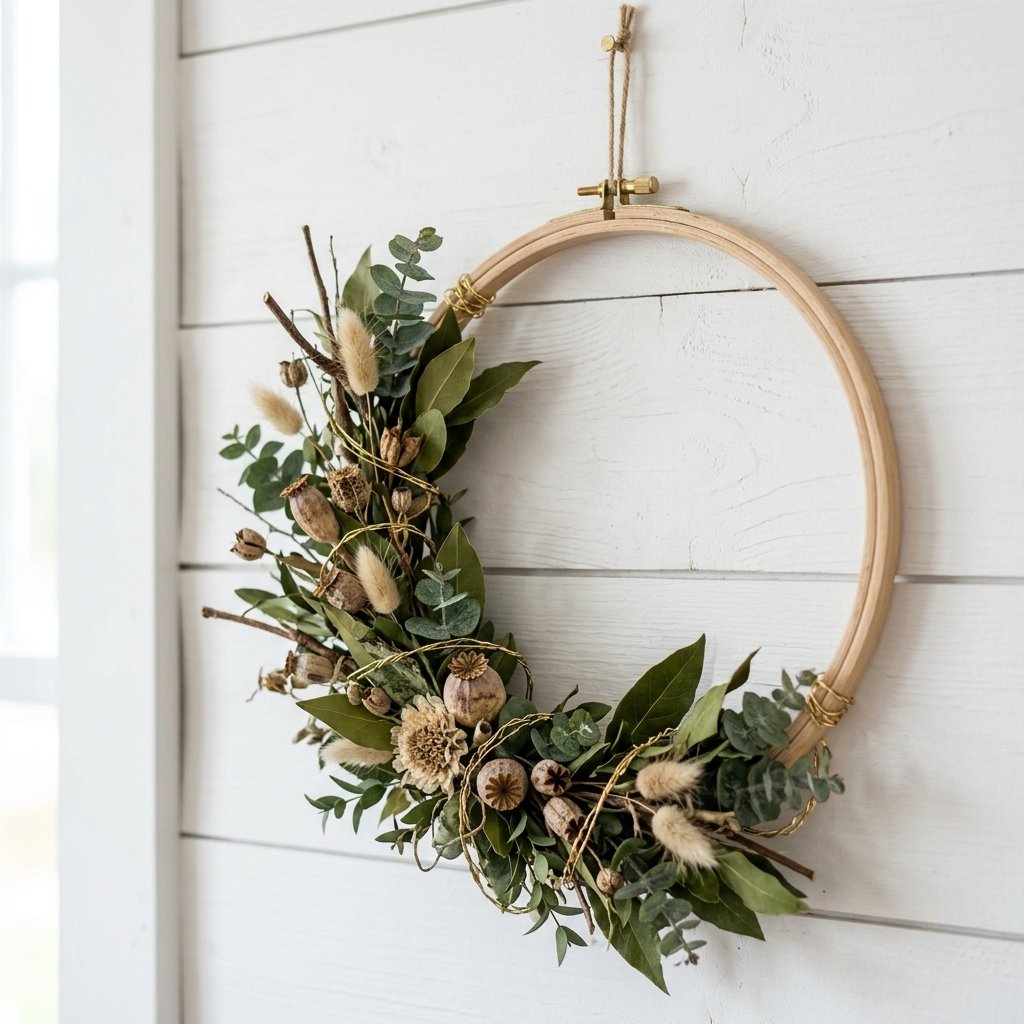
Before we dive into the hot glue and floral wire, we need to understand exactly what makes a wreath look expensive. High-end designer decor rarely relies on throwing every available flower onto a frame. Instead, it thrives on restraint, texture, and architectural balance. If you want to replicate the Anthropologie aesthetic, you must master the art of the asymmetrical, minimalist design.
1. The Power of Negative Space
Traditional wreaths are massive, perfectly symmetrical donuts of pine or faux flowers. The modern, bohemian hoop wreath flips this script. By using a slender wooden embroidery hoop, you are intentionally leaving 50% to 70% of the wooden frame exposed. This negative space is crucial. It draws the eye, highlights the natural grain of the wood, and makes the floral arrangement pop dramatically against whatever wall or door it hangs upon.
2. Asymmetry and the Rule of Thirds
A high-end hoop wreath usually features an arrangement that sweeps from the bottom center up one side, typically covering the space from the 5 o’clock position to the 9 o’clock position on a clock face. This asymmetry feels organic, wild, and effortlessly styled. When placing your focal point (your largest flower or most striking dried element), you want to place it slightly off-center, adhering to the photographer’s rule of thirds.
3. Mixing Rugged and Refined Textures
The secret sauce of boutique decor is texture mixing. An all-plastic floral wreath looks cheap. However, if you mix raw, unstained wood with soft faux lambs ear, prickly dried thistles, gleaming brass wire, and a rugged leather hanging strap, you create a tactile experience that screams luxury. It is this masculine-elegant balance—the ruggedness of leather and wood paired with the delicacy of florals—that elevates a craft project into a piece of true interior design.
Remember this frugal styling mantra: Restraint is the ultimate luxury. You do not need more materials; you need better placement. Let the raw materials speak for themselves.
The Frugal Crafter’s Arsenal: Sourcing High-End Materials on a Dime
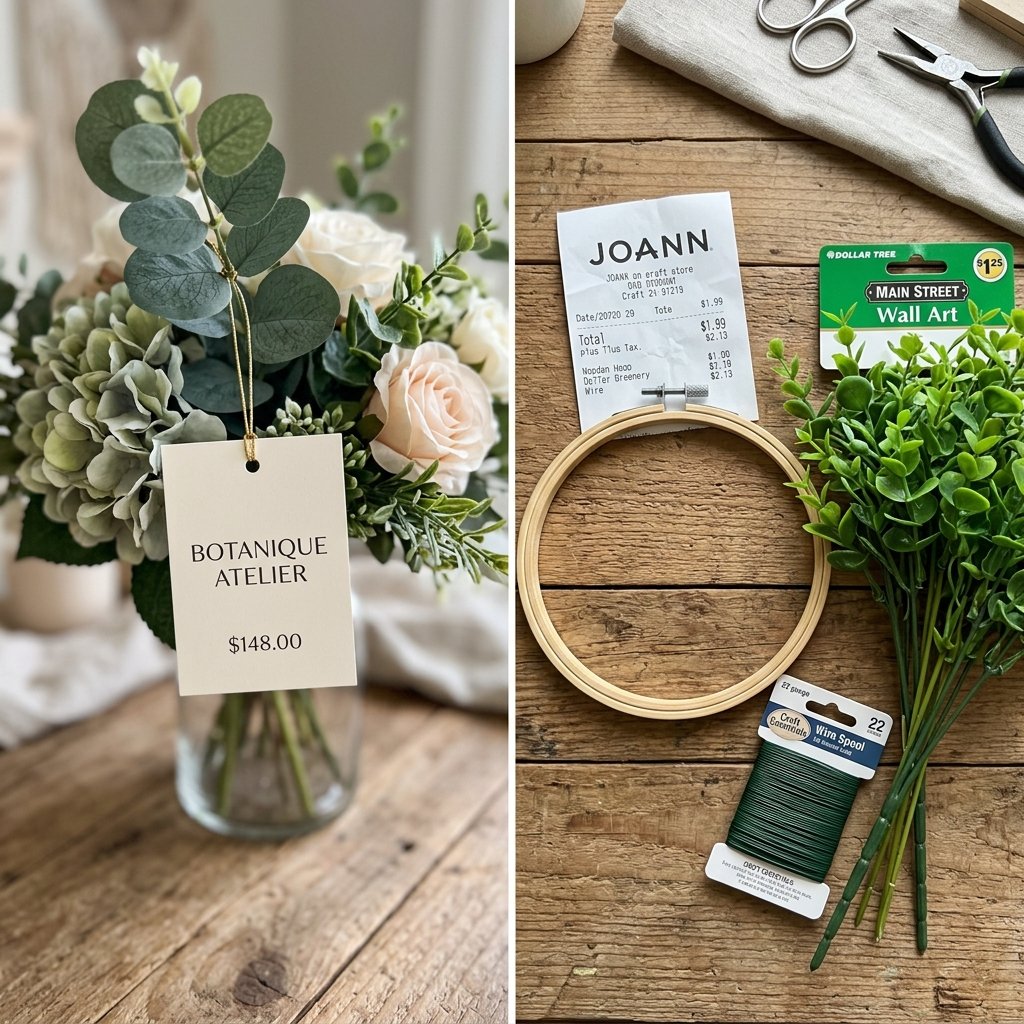
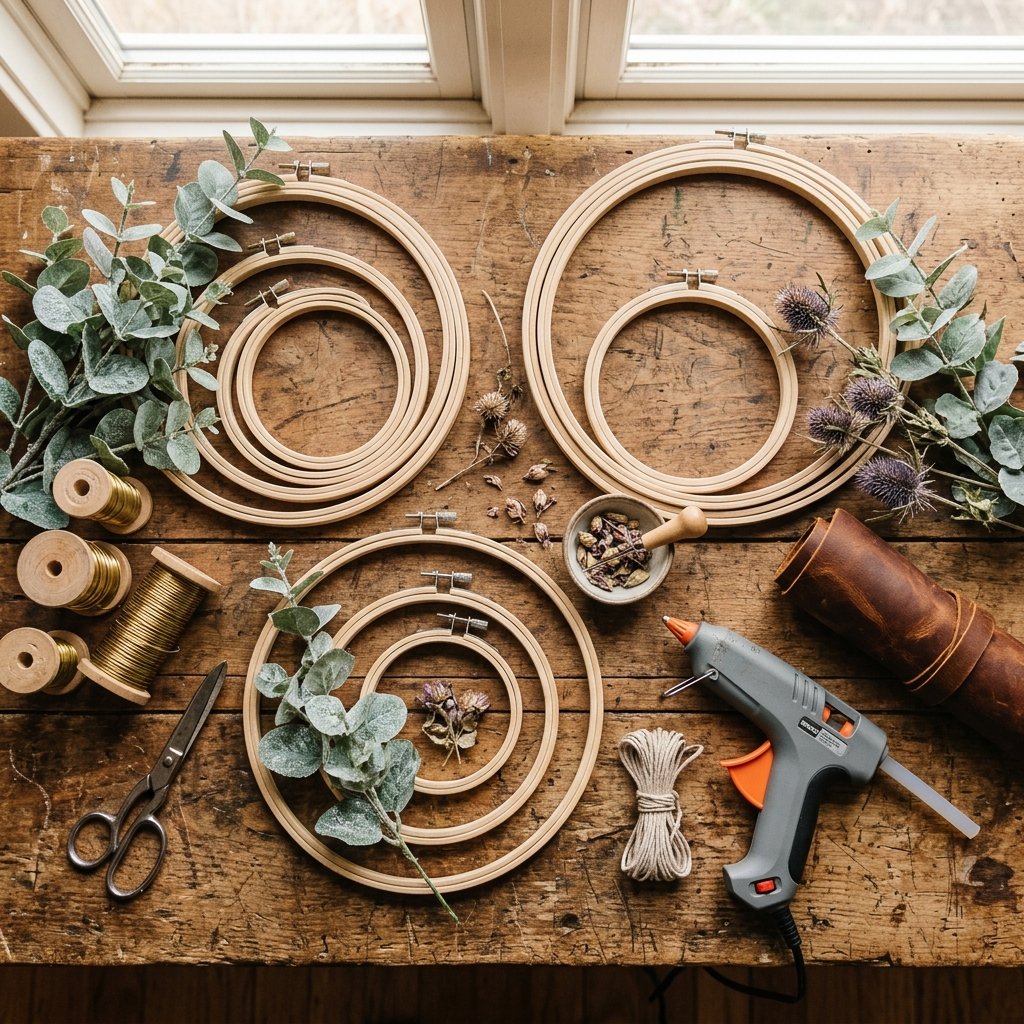
Now that we understand the design theory, it is time to gather our supplies. The beauty of this project is that the foundation is incredibly cheap. Embroidery hoops can be found at thrift stores, yard sales, or your local craft store for mere pennies. The trick to keeping your budget low while maintaining a high-end look is knowing where to splurge slightly (usually on one realistic focal stem) and where to save (using Dollar Tree greenery as filler).
Where to Find Your Supplies
- The Hoop: Check thrift store craft aisles first. You can often find vintage wooden hoops for $0.50. If buying new, a standard 12-inch or 14-inch wooden hoop from a craft store costs around $2.00 to $3.00.
- The Greenery: The Dollar Tree is your best friend for filler. Look for their faux eucalyptus, ferns, or willow branches. To make cheap plastic greenery look expensive, lightly dust it with a matte clear spray paint or a tiny bit of cornstarch to remove the fake plastic shine.
- The Focal Florals: This is where you spend your $3.00 to $5.00. Go to a dedicated craft store (always use a coupon!) and buy one high-quality stem of faux peonies, ranunculus, or real dried protea.
- The Hardware: Instead of relying solely on hot glue, which can snap in fluctuating temperatures on a front door, we will use brass floral wire for a rugged, permanent hold.
Budget Breakdown: Store-Bought vs. Zero-Budget DIY
Let us look at the hard numbers. Here is exactly how much you are saving by rolling up your sleeves and doing it yourself.
| Material / Component | High-End Boutique Cost | Frugal DIY Cost |
|---|---|---|
| 12-Inch Wooden Frame | $25.00 (Custom Wood Frame) | $2.00 (Embroidery Hoop) |
| Faux Greenery Base | $45.00 (Premium Stems) | $2.50 (Dollar Tree Stems) |
| Focal Flowers & Accents | $60.00 (Artisanal Dried Florals) | $4.00 (Craft Store with Coupon) |
| Hanging Hardware/Ribbon | $18.00 (Velvet/Leather Strap) | $1.00 (Upcycled Leather Scrap) |
| Total Estimated Cost | $148.00 | $9.50 |
By utilizing upcycled materials and smart shopping, you are achieving a 93% savings. That is the power of resourceful creativity!
Step-by-Step Masterclass: Crafting Your Embroidery Hoop Wreath
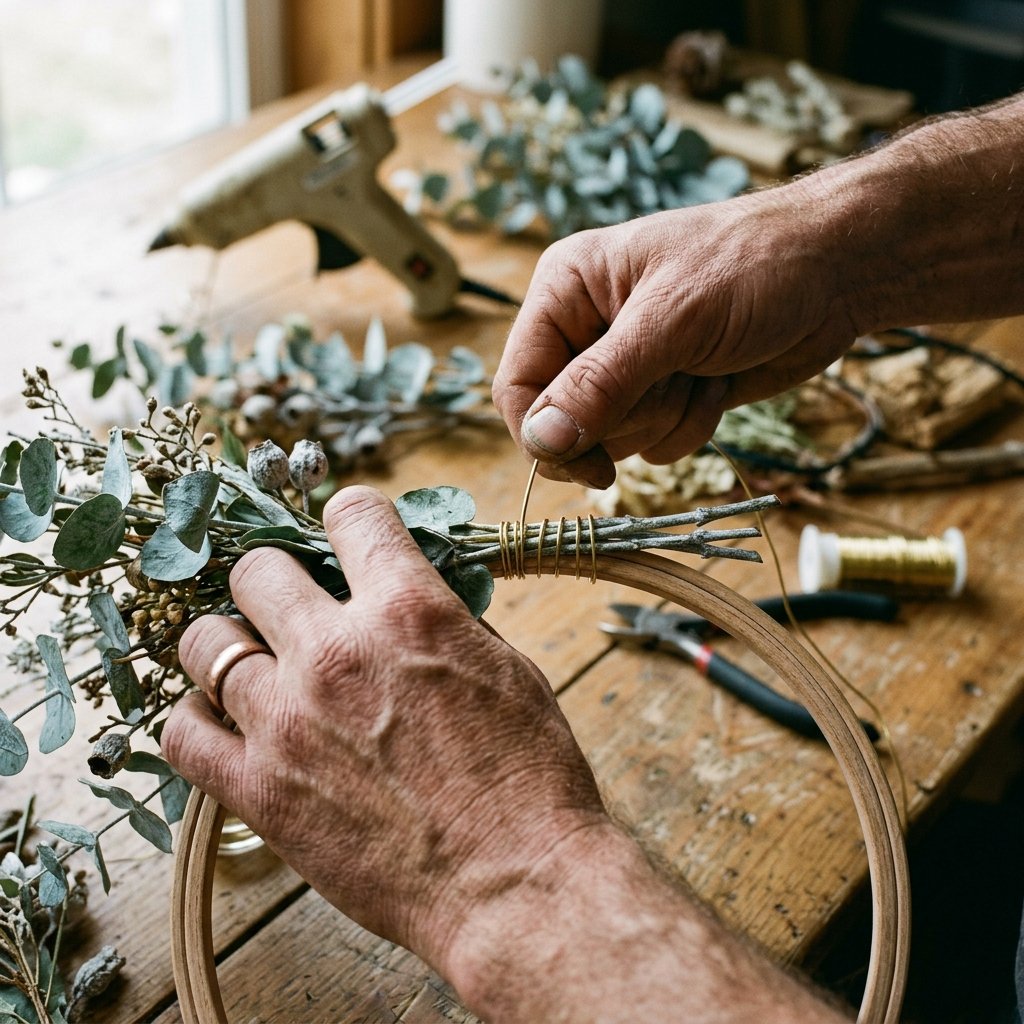
It is time to build. Clear off your workbench, plug in your hot glue gun, and lay out your materials. We are going to construct this wreath in layers, ensuring a durable, weather-resistant build that can withstand the elements if hung on a front porch.
Step 1: Prep and Polish the Wooden Hoop
- Separate the Hoops: An embroidery hoop consists of an inner and an outer ring held together by a metal tension screw. Loosen the screw and separate them. You now have two separate wreath bases! You can make one for yourself and gift the other. We will use the inner, solid hoop for a cleaner look, but the outer hoop with the brass hardware adds a great industrial touch if you prefer.
- Sand and Stain (Optional): If the wood looks too pale or raw for your taste, take a piece of fine-grit sandpaper and smooth the edges. Rub a small amount of dark walnut wood stain or even strong brewed coffee over the wood with a rag to give it a rich, aged patina. Let it dry for 20 minutes.
Step 2: Build the Greenery Foundation
- Trim Your Stems: Using heavy-duty wire cutters, snip your greenery stems into smaller, manageable sprigs (about 4 to 6 inches long). Do not try to attach one massive branch; breaking it down gives you total control over the shape.
- Wire the Base Layer: Start at the bottom center of your hoop. Lay your first sprig of greenery flat against the wood, pointing outward toward the 9 o’clock position. Take your brass floral wire and wrap it tightly around the stem and the hoop 3 or 4 times. Do not cut the wire!
- Layer and Overlap: Lay the next sprig over the bare stem of the first one, hiding the wire. Wrap the continuous spool of wire around this new stem. Continue this process, working your way up the side of the hoop until you reach the desired height.
- Repeat for the Other Side: Go back to the bottom center. Lay a sprig pointing toward the 3 o’clock or 4 o’clock position. Wire it down. You should now have a beautiful, asymmetrical crescent of greenery with the stems meeting in the middle.
Step 3: Anchor the Focal Points
- Place the Anchor Flower: Right where all the stems meet at the bottom, there will be a messy junction of wire and plastic stems. This is where your largest focal flower goes. Snip the stem of your main flower down to about 1 inch. Apply a generous dollop of hot glue to the back of the flower head and press it firmly over the messy junction. Hold for 30 seconds until the glue sets.
- Add Secondary Textures: Tuck in smaller accent flowers, dried thistles, or pinecones around the main flower. Work in odd numbers (groups of 3 or 5) for the most visually pleasing arrangement. Use a combination of hot glue and small bits of wire to secure these heavy elements.
Safety Note: Hot glue guns can reach temperatures upwards of 380 degrees Fahrenheit. Always keep a bowl of cold water nearby when doing intricate floral work, and use silicone finger protectors if you are pressing materials directly into hot glue.
Elevating the Aesthetic: Seasonal Variations & Rugged-Elegant Customizations
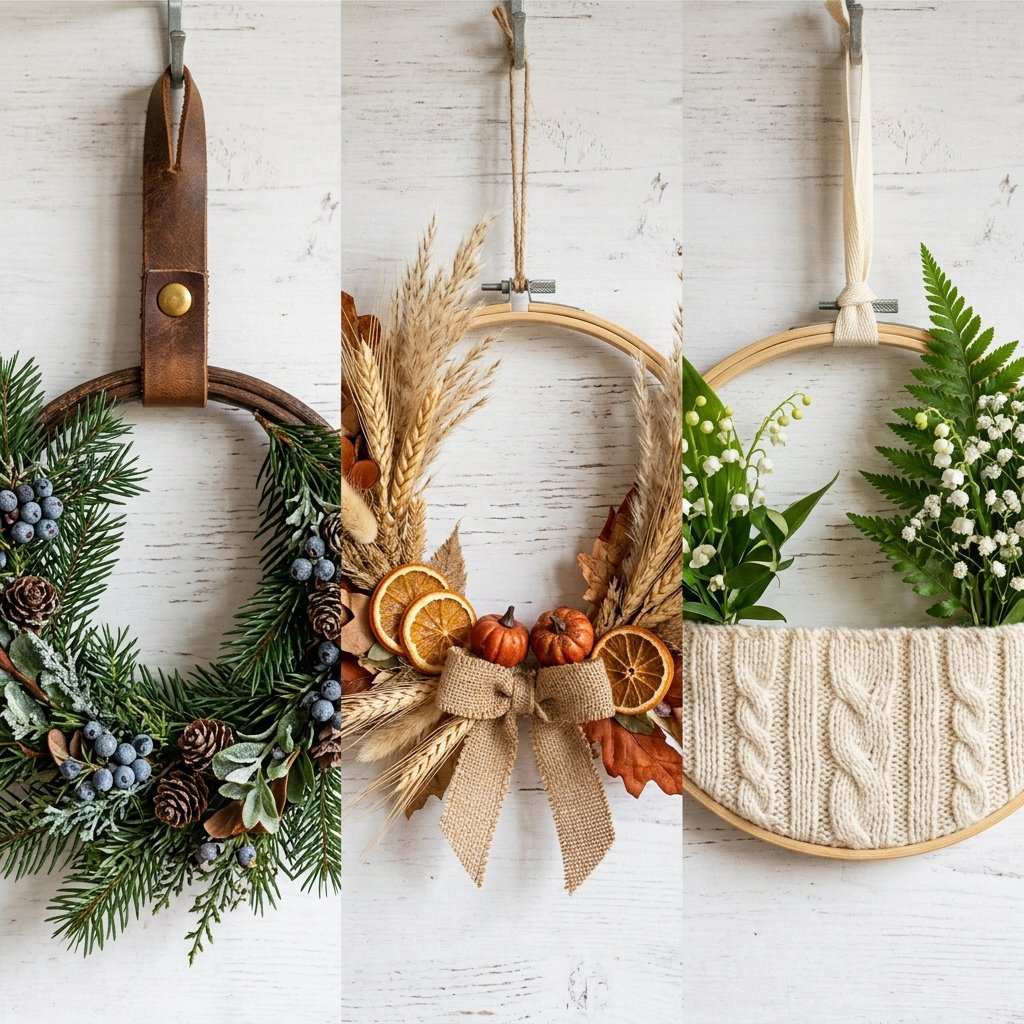
The true genius of the minimalist hoop wreath is its versatility. Because you are only decorating a portion of the frame, it is incredibly easy to customize the vibe based on the season or your personal interior design style. Here is how you can tweak the base tutorial to fit different aesthetics, leaning into that practical, masculine-elegant, and resourceful mindset.
The Autumnal Harvest Vibe
Swap out the eucalyptus for dried oak leaves, faux wheat stalks, and tiny faux white pumpkins. Instead of bright floral accents, wire in some real pinecones that you have baked in the oven (to remove bugs) and cinnamon sticks. The natural browns, oranges, and raw wood of the hoop create a stunning, rustic Thanksgiving welcome. Tie it all together with a frayed burlap ribbon.
The Winter Cabin Aesthetic
For a rugged, snowy cabin feel, skip the traditional red and green. Instead, use flocked faux pine branches, juniper berries, and dried orange slices. The dried oranges add a beautiful pop of translucent color and a faint citrus scent. To hang this wreath, ditch the ribbon entirely and use a 1-inch wide strip of reclaimed brown leather, secured at the top with a heavy brass rivet or a Chicago screw. This leather-and-wood combination screams high-end, masculine elegance.
The Spring Forager Look
Keep it incredibly light and airy. Use delicate faux ferns and a few sprigs of artificial baby’s breath or lavender. You want maximum negative space here—perhaps only covering 25% of the hoop. This minimalist approach looks incredible hanging in a brightly lit kitchen or a nursery.
Pro Upcycling Tip: The Sweater Weather Hack
If you have an old, moth-eaten cable knit sweater that is beyond mending, do not throw it away! Cut a strip of the textured wool and wrap it tightly around the exposed wooden portion of the hoop, gluing it in the back. This adds an incredibly cozy, tactile element to the wreath that mimics high-end woven wall hangings found in boutique catalogs.
Styling and Displaying Your Wreath Like a Pro Interior Stylist
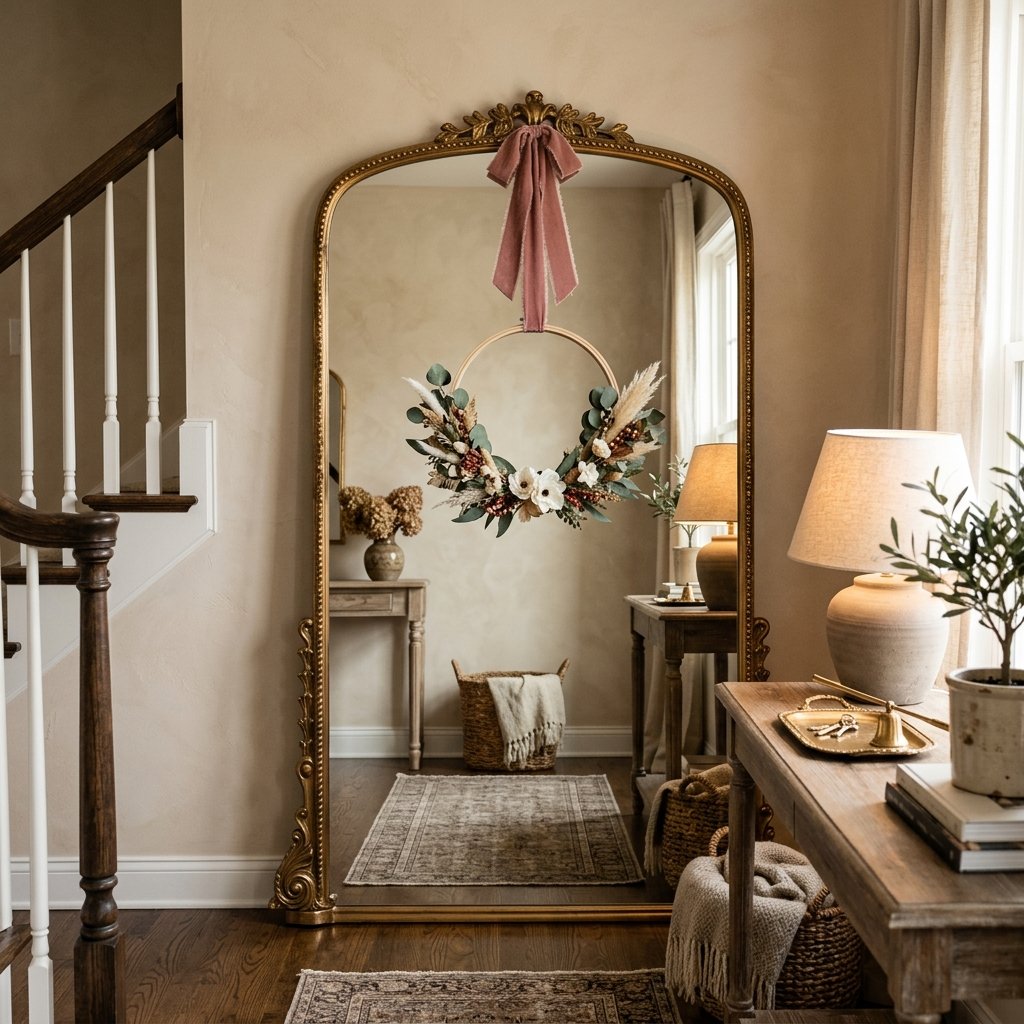
You have successfully crafted a masterpiece that saved you over $130. Now, you need to display it in a way that honors the effort and elevates your space. How you hang your wreath is just as important as how you built it. Frugal DIYers know that presentation is everything.
1. The Floating Door Illusion
If you are hanging your hoop wreath on a front door, avoid those chunky, cheap-looking over-the-door metal hooks. They ruin the minimalist aesthetic. Instead, use an outdoor-rated clear Command hook. Place the hook upside down on the inside of your door, near the top. Tie a long piece of velvet ribbon or jute twine to your wreath, run the ribbon over the top of the door, and tie it to the upside-down hook inside. This gives the illusion that the wreath is magically floating on the front of your door.
2. Layering Over Mirrors and Windows
Embroidery hoop wreaths look spectacular when layered over other reflective surfaces. Use a small suction cup hook to hang your wreath directly in the center of a large vintage mirror or an old window pane. The reflection of the back of the wreath (which you kept neat and tidy with your wire-wrapping skills!) adds depth to the room.
3. The Tension Rod Window Hack
If you want to hang a trio of different-sized hoop wreaths in a large window but do not want to drill holes in the frame, grab a cheap spring-loaded tension rod. Secure the tension rod horizontally across the top of the window frame. Tie your wreaths to the rod using varying lengths of fishing line or leather cord. This creates a stunning, floating gallery display that is 100% renter-friendly and damage-free.
4. Gallery Wall Integration
Do not limit wreaths to doors. A 10-inch minimalist hoop wreath makes a fantastic 3D addition to a living room gallery wall. Hang it alongside framed family photos, wooden signs, and canvas art. The circular shape breaks up the sharp right angles of picture frames, bringing a soft, organic flow to the wall’s layout.
Conclusion
Resourceful Creativity is the Ultimate Luxury
Creating a home that feels curated, warm, and stylish does not require an unlimited budget; it requires an unlimited imagination. By looking past the intimidating price tags of high-end boutiques and breaking down the anatomy of what makes an item beautiful, you unlock the power to transform simple, everyday materials into extraordinary decor.
This DIY Anthropologie-inspired embroidery hoop wreath is more than just a weekend craft project. It is a testament to the frugal crafter’s mindset. You took a $2 wooden hoop, some budget-friendly greenery, and a spool of wire, and through clever layering, textural balance, and rugged construction, you engineered a piece of art that commands attention. Whether you hang it proudly on your front door, gift it to a friend, or use it to elevate your wedding decor, you can look at it and know exactly how much skill—and savings—went into it.
So keep your eyes peeled at the thrift store, save those leather scraps, and never underestimate the potential of the Dollar Tree floral aisle. With a little hot glue, some brass wire, and a lot of ingenuity, your home can look like a million bucks on a pocket-change budget. Stay crafty, stay resourceful, and happy building!

Makenzie is the founder and lead writer at MoneyHackTips.com — a personal finance blog dedicated to delivering street-smart financial wisdom for real people on real budgets. With 300+ published articles covering everything from debt management to investing fundamentals, Makenzie’s mission is to make every dollar work harder. When not writing about money hacks, Makenzie is testing frugal living strategies, optimizing side hustles, and helping readers build financial freedom from scratch.