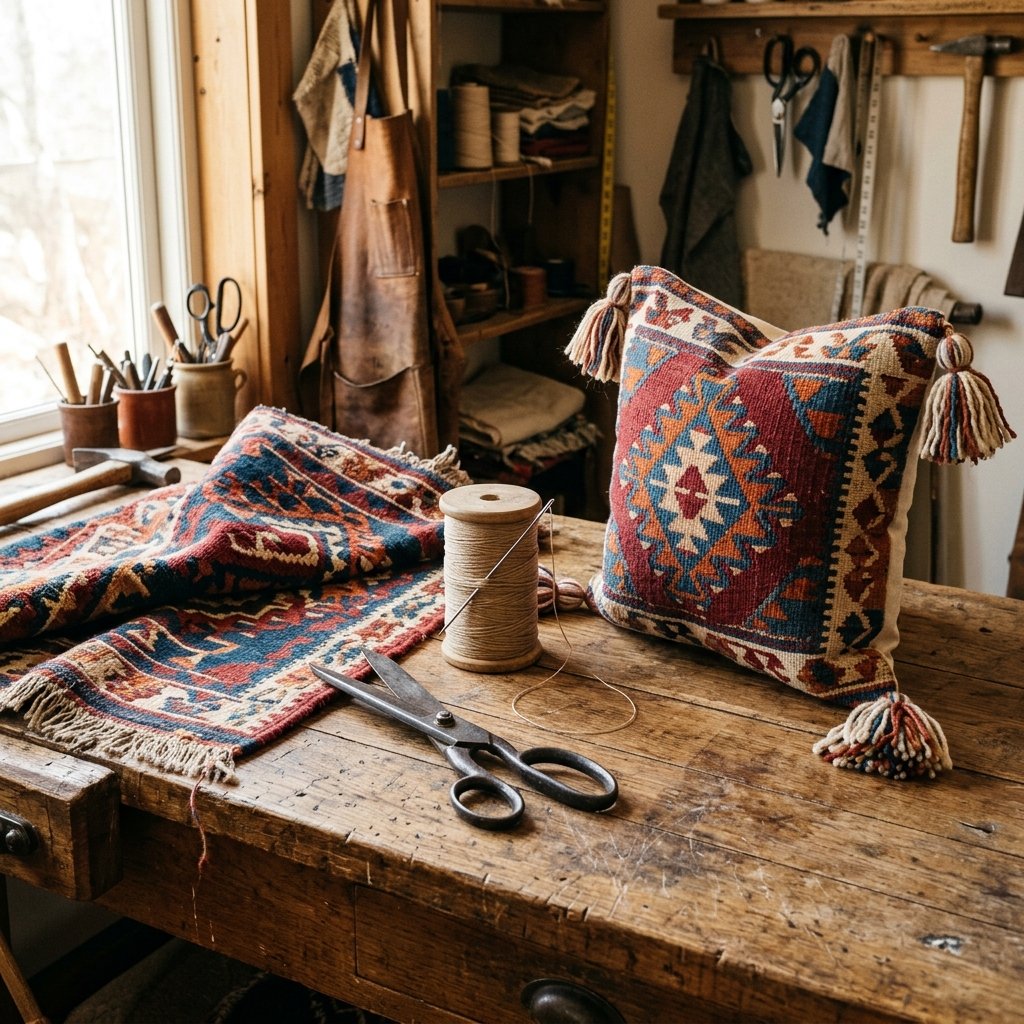

Walk into any high-end boutique or flip through a trendy home decor catalog, and you will immediately spot them: heavily textured, beautifully woven, globally inspired boho throw pillows. They exude a rugged elegance, a worldly charm, and an absolutely eye-watering price tag. We are talking $80 to $150 for a single pillow. But for the resourceful DIYer, the crafty parent, and the budget-savvy upcycler, paying retail is simply not an option. Why empty your wallet when you can roll up your sleeves, hit the local thrift store, and craft an identical—if not superior—masterpiece for under $10? Welcome to the ultimate trash-to-treasure masterclass. Today, we are taking cheap, overlooked thrift store scatter rugs and transforming them into luxurious, high-end boho throw pillows. This project is the perfect marriage of practical frugality and masculine-elegant design. It requires a bit of grit, a touch of clever engineering, and a willingness to look at a $3 floor mat and see a designer accent piece. Whether you are looking to revamp your living room, stage a budget-friendly outdoor patio, or create a thoughtful, custom gift for a housewarming, this guide will walk you through every single step. We will cover how to source the right textiles, the secret to cutting woven rugs without them unraveling into a disastrous mess, and the heavy-duty sewing hacks needed to tame thick fabrics. Grab your heavy-duty shears, thread your needle, and let us turn that thrifted bargain into a breathtaking treasure.
The Thrill of the Hunt: Selecting the Ultimate Thrift Store Rug
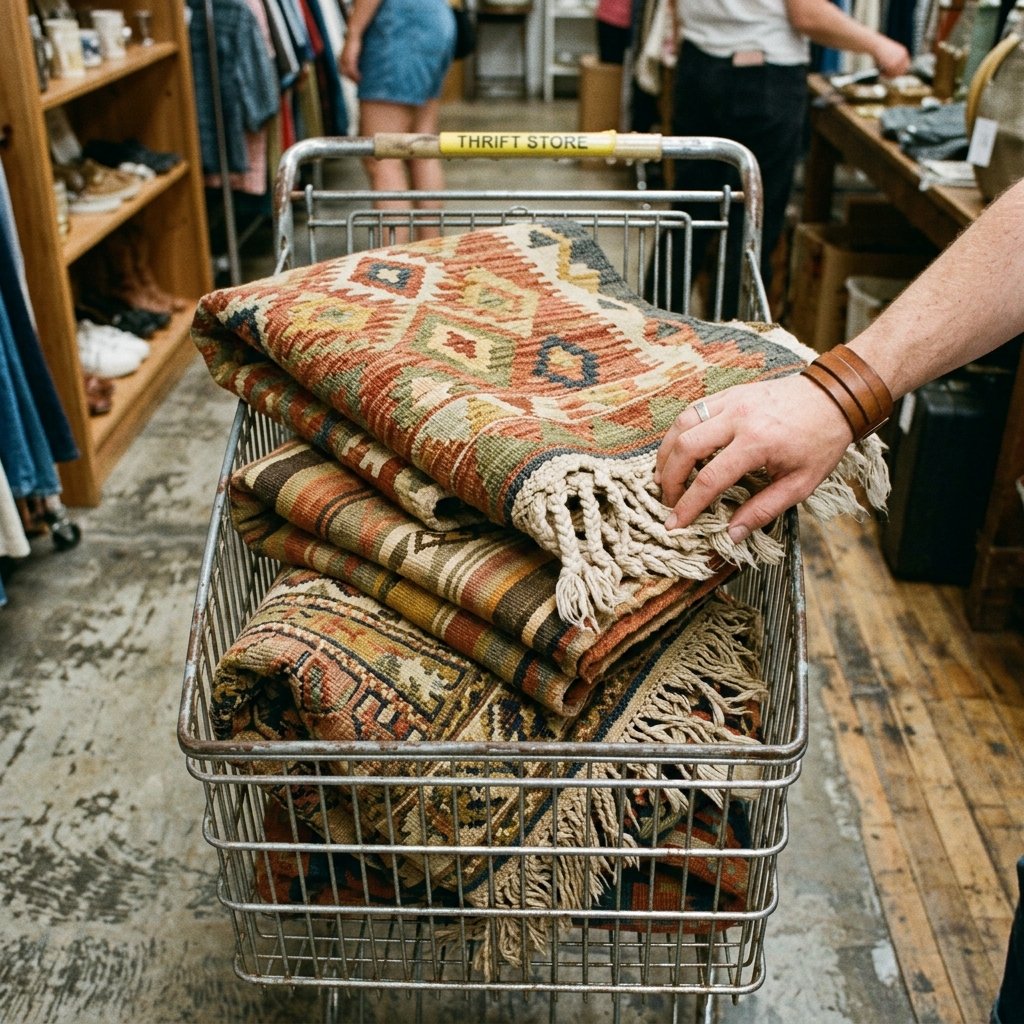
The foundation of this high-end dupe begins in the dusty, often chaotic aisles of your local thrift store, flea market, or discount bin. Not all rugs are created equal when it comes to pillow-making. You are hunting for small scatter rugs, typically measuring 2×3 feet or 3×5 feet. The goal is to find textiles that offer rich texture, vibrant colors, or classic geometric patterns. Kilim rugs, woven cotton rag rugs (chindi), and lightweight tufted wool rugs are your holy grail. These materials mimic the exact fabrics used by brands like Anthropologie and Pottery Barn. However, you must be strategic. Avoid anything with a thick rubberized non-slip backing, as this will destroy your sewing machine needles and create a stiff, uncomfortable pillow. Similarly, stay away from extremely thick, coarse jute, which is incredibly difficult to sew and unpleasant to rest your head against. When you find a potential candidate, give it the ‘fold test.’ If you can comfortably fold the rug in half and pinch the edge without feeling like you are wrestling an alligator, it is pliable enough to become a pillow.
The Frugal Upcycler’s Inspection Checklist
- Check for structural integrity: Ensure there are no massive dry-rotted holes, though small tears can be patched or cut around.
- Smell test: Avoid rugs with deep-set mildew odors. A slight dusty smell is fine and will wash out, but heavy dampness is a dealbreaker.
- Material composition: Look for 100% cotton, wool blends, or soft synthetics.
Once you bring your prize home, hygiene is paramount. Most woven cotton rugs can be tossed directly into the washing machine on a gentle cycle with cold water and a splash of white vinegar to kill bacteria and brighten colors. For wool or delicate kilims, a thorough vacuuming followed by a hand-wash in the bathtub with mild detergent is the safest route. Hang the rug over a sturdy fence or drying rack in direct sunlight—nature’s best disinfectant and bleaching agent.
| Rug Type | Pillow Suitability | Estimated Thrift Cost | Designer Retail Equivalent |
|---|---|---|---|
| Woven Cotton (Chindi) | Excellent – Soft, easy to sew, highly textured. | $3 – $5 | $60 – $80 |
| Kilim / Flatweave Wool | Great – Classic boho look, requires heavy-duty needle. | $5 – $10 | $120 – $150 |
| Tufted / Shag Accent | Good – Great for fronts, messy to cut. | $4 – $8 | $90 – $110 |
| Rubber-Backed Bath Mat | Poor – Stiff, damages sewing machines. | $2 – $4 | N/A |
Prepping and Cutting: The Blueprint for Success (and Fray Prevention)

This is the stage where many novice crafters meet their downfall. Woven rugs are essentially hundreds of threads held together by tension. The moment you take a pair of scissors to them, that tension is released, and the rug will immediately attempt to unravel into a pile of useless yarn. To prevent this, we must employ a clever, budget-savvy trick: the tape-and-cut method. Before your scissors ever touch the fabric, you need a solid blueprint. Determine the size of your pillow insert (for example, a standard 18×18 inch square). To ensure a plump, overstuffed designer look, you will actually cut your rug slightly smaller than the insert—around 17×17 inches. This forces the insert to fill out the corners completely.
The Tape-and-Cut Technique
- Measure and Mark: Lay your washed and dried rug completely flat on a large work surface. Use a piece of tailor’s chalk or a light-colored marker to draw your 17×17 inch square directly onto the back of the rug.
- Apply the Tape: Take heavy-duty masking tape or painter’s tape and run it directly over the chalk lines you just drew. The tape should straddle the line, locking the woven threads in place on both sides of your intended cut.
- The Cut: Using sharp, heavy-duty fabric shears (do not use dull paper scissors), cut directly down the middle of the tape. The tape will hold the freshly cut edges together, preventing any unraveling.
- The Zig-Zag Lock: Take your freshly cut, taped piece to the sewing machine. Run a wide zig-zag stitch right along the very edge of the cut, sewing directly through the tape and the rug. Once the perimeter is entirely stitched, you can carefully peel away the tape. You now have a perfectly stabilized, fray-proof rug panel ready for assembly.
Crafty Expert Mantra: “Measure twice, tape once, cut confidently. An unraveling rug is a crafter’s nightmare, but a locked stitch is a permanent dream.”
If you do not have a sewing machine, do not panic. You can achieve a similar stabilizing effect by running a bead of clear fabric glue or hot glue along the cut edge and pressing it flat. Allow it to cure completely before proceeding to the hand-sewing stage. This resourceful adaptation ensures that even zero-machine DIYers can execute this high-end project flawlessy.
| DIY Method | Materials Needed | Time Required | Fray Prevention Rating |
|---|---|---|---|
| Machine Zig-Zag | Sewing machine, heavy thread, painter’s tape | 10 minutes | 10/10 – Permanent hold |
| Fabric Glue Edge | Clear fabric glue, painter’s tape | 30 minutes (drying) | 8/10 – Great for hand-sewers |
| Hot Glue Bind | Hot glue gun, silicone finger protectors | 5 minutes | 7/10 – Fast but adds bulk |
The Canvas Envelope Backing: Maximizing Your Materials
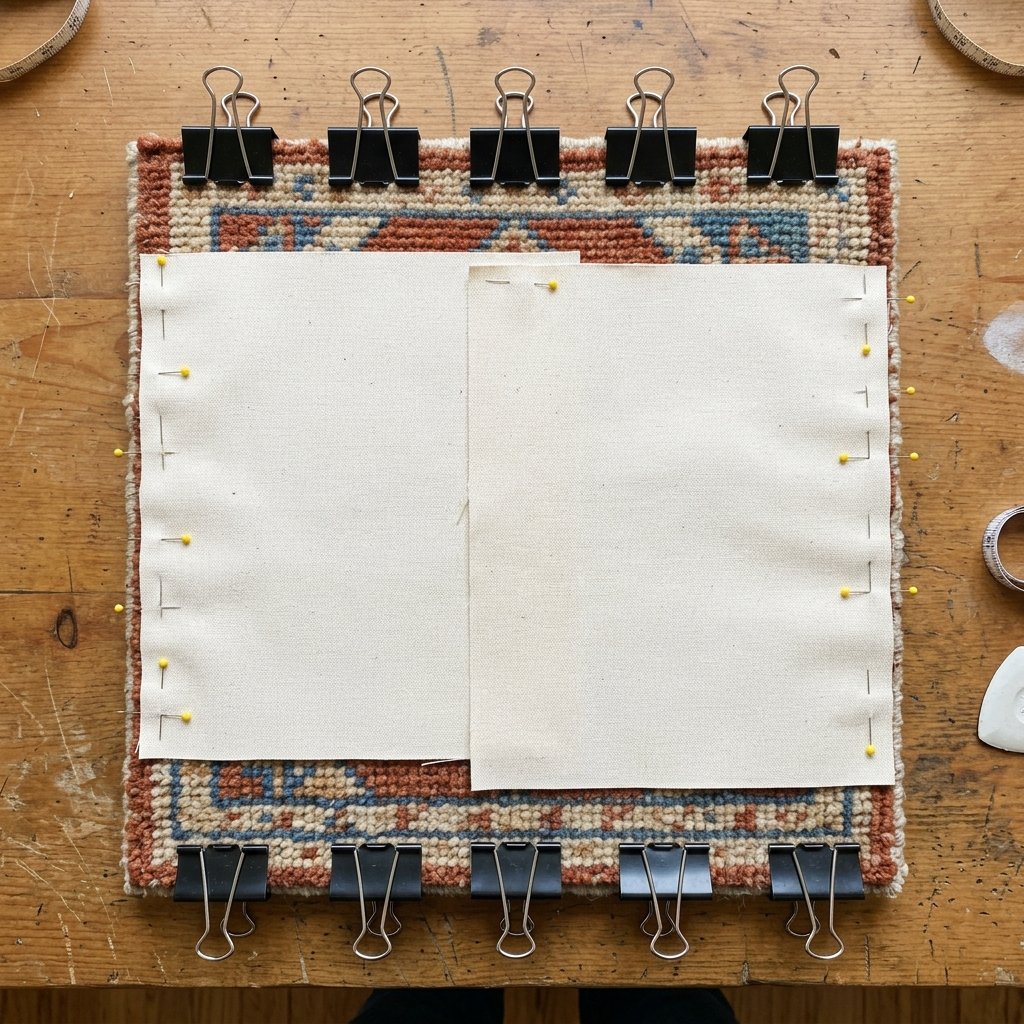
A true frugal upcycler knows how to stretch a dollar and a material. While you could technically cut two squares from your thrifted rug to make the front and back of the pillow, this makes the pillow extremely thick, difficult to sew, and wastes precious rug real estate. Instead, we are going to use the rug exclusively for the front display panel and create an ‘envelope closure’ for the back using a cheaper, thinner, yet durable material. This is exactly how high-end retailers manufacture their pillows to save on premium textile costs! For the backing, head to your linen closet or the thrift store’s bedding section. A heavy-duty cotton canvas drop cloth, an old denim shirt, or a vintage linen bedsheet are perfect candidates. The envelope closure consists of two overlapping panels of fabric that allow you to easily insert and remove the pillow form for washing, completely eliminating the need for sewing tricky, expensive zippers.
Engineering the Envelope Back
If your rug front is cut to 17×17 inches, you will need to cut two rectangular panels for your backing fabric. The width will be the same (17 inches), but the height of the two panels combined needs to overlap by about 4 to 5 inches. Therefore, cut two panels measuring 17 inches wide by 12 inches tall. This mathematical formula guarantees a snug, professional overlap that won’t gape open when stuffed.
- Hem the Overlap Edges: Take one of your 17×12 inch backing panels. Along one of the 17-inch sides, fold the fabric down half an inch, press it flat, and then fold it down another half inch to hide the raw edge. Pin it in place and sew a straight line to create a clean hem. Repeat this process for one of the 17-inch sides on the second backing panel.
- Layering the Sandwich: Lay your stabilized rug panel on your table, right side facing up. Take your first backing panel and lay it on top of the rug, right side facing down, aligning the raw outer edges (the hemmed edge will be towards the middle). Take the second backing panel and lay it down on the opposite end, right side down, aligning its outer edges with the rug. The two hemmed edges of the backing panels should now be overlapping each other in the center.
- Pin with Vigor: Because you are dealing with a thick rug and canvas, standard sewing pins might bend. Use heavy-duty quilting pins or, even better, metal binder clips from your office supplies to hold the thick layers together securely around the entire perimeter.
By utilizing this clever backing method, a single 3×5 foot thrift store rug can yield three to four stunning pillow fronts, dropping your cost-per-pillow to absolute pennies while maintaining a rugged, elegant aesthetic.
Heavy-Duty Stitching: Taming Thick Textiles Like a Pro
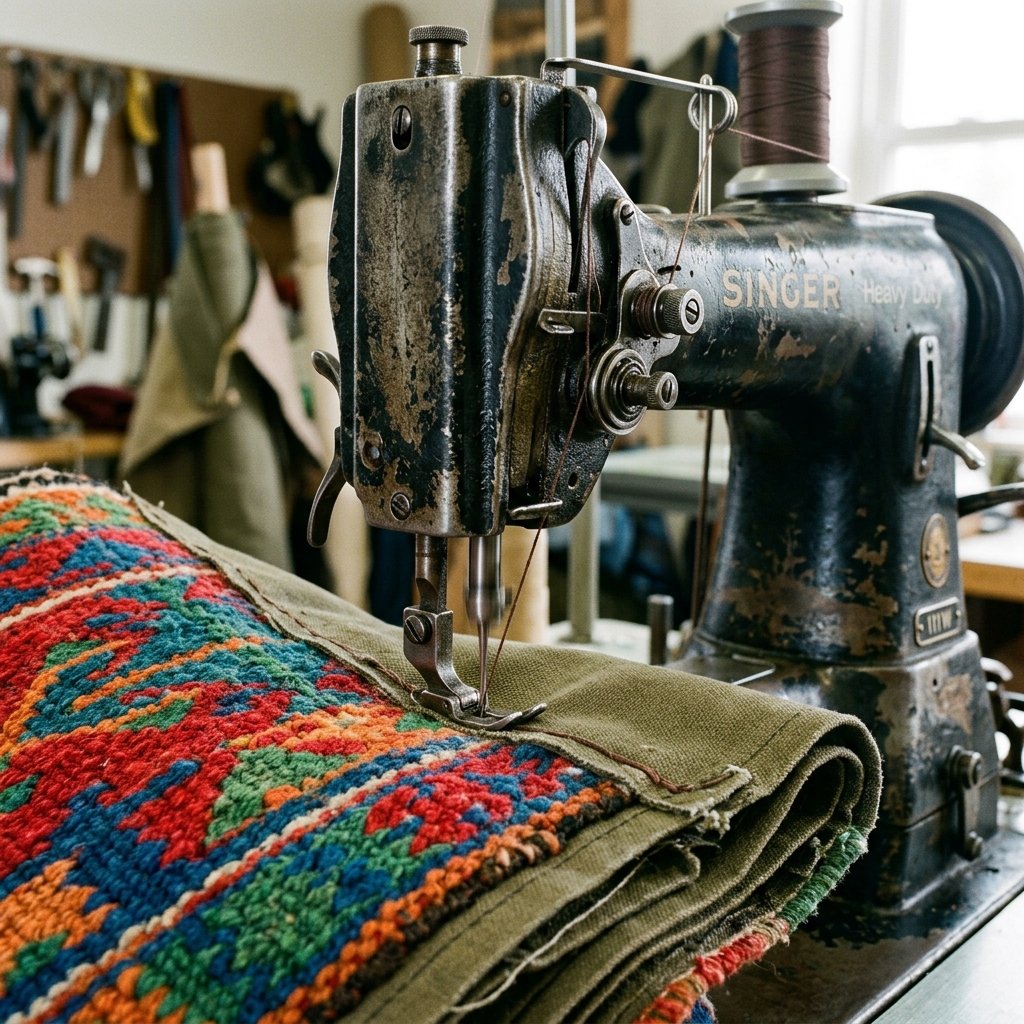
We have reached the critical junction: permanently joining your layers. Sewing through a woven rug and two layers of canvas requires respect, preparation, and the right tools. If you attempt to run this through a standard sewing machine with a flimsy universal needle and cheap dollar-store thread, you will experience snapped needles, tangled bobbins, and immense frustration. We are channeling practical, heavy-duty tailoring here.
Machine Sewing Mastery
If you are using a sewing machine, you must upgrade your hardware. Swap your standard needle for a Denim (Jeans) Needle (Size 90/14 or 100/16) or a Leather Needle. These needles possess a reinforced shaft and a sharper point designed to punch through dense, fibrous materials without deflecting. Next, thread your machine with heavy-duty upholstery thread or bonded nylon. This thread is practically unbreakable by hand and will ensure your pillow seams do not burst when someone aggressively flops onto the couch.
Safety & Tool Disclaimer: Sewing thick rugs can put immense strain on a domestic sewing machine motor. Sew slowly. If your machine struggles or stalls, STOP immediately. Use the manual handwheel to crank the needle through the thickest parts (especially the corners where the envelope backing overlaps). Always wear safety glasses when pushing your machine to its limits—a shattered needle flying at your face is a hazard easily avoided.
Sew a straight stitch around the entire perimeter of your pinned square, leaving a generous 1/2-inch seam allowance. When you reach the corners, stop with the needle down in the fabric, lift the presser foot, pivot the fabric 90 degrees, lower the foot, and continue. Once the entire perimeter is sewn, sew over the overlapping envelope sections one more time; these areas take the most stress when stuffing the pillow and require reinforcement.
The Hand-Sewing Alternative (Rugged Mending Style)
No machine? No problem. Hand-sewing a rug pillow is a deeply satisfying, almost meditative process that yields incredibly durable results. You will need a heavy darning needle or a curved upholstery needle, and a thimble (preferably a leather coin thimble for pushing through thick jute or cotton). Use a double strand of waxed heavy-duty thread. Employ a tight backstitch around the perimeter. The backstitch is the strongest hand-sewing stitch in existence, mimicking the locking mechanism of a machine. It takes longer—budget about 45 to 60 minutes of steady stitching—but the result is a bespoke, handcrafted item that boasts incredible structural integrity. Once sewn, clip the four corners at a diagonal (being careful not to cut your stitches) to reduce bulk, and turn the entire pillow cover right-side out through the envelope opening. Push the corners out crisp using the blunt end of a chopstick or a closed pen.
Designer Embellishments: Leather Accents and Chunky Tassels
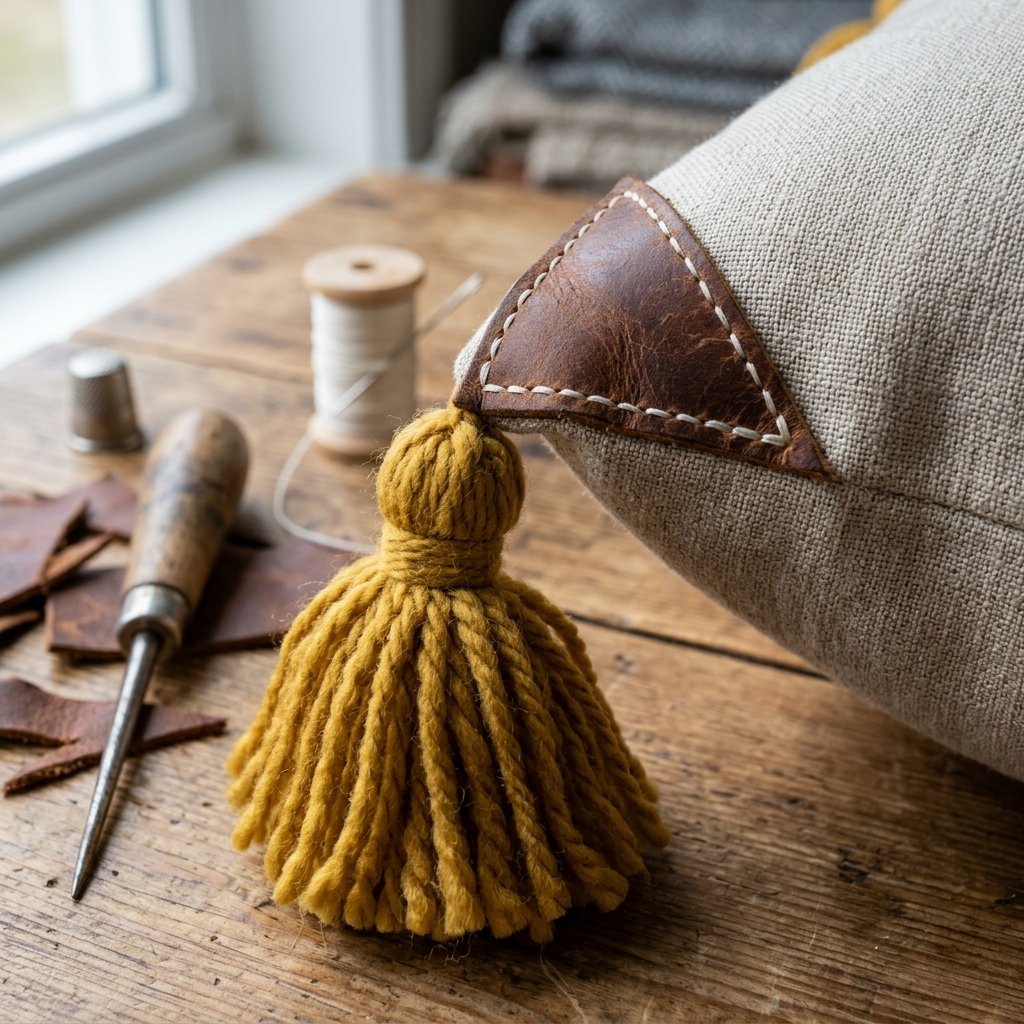
Your pillow cover is functional, but we want high-end, jaw-dropping aesthetics. The difference between a basic DIY and a $150 designer dupe lies in the bespoke embellishments. This is where your crafty, resourceful genius truly shines. By adding custom tassels, fringe, or leather accents, you elevate the rugged, masculine-elegant vibe of the piece.
Upcycled Leather Corner Accents
Nothing screams ‘expensive’ quite like genuine leather detailing. Head to your closet (or back to the thrift store) and find an old, damaged leather jacket, a worn-out belt, or a thrifted leather purse that has seen better days. Cut four identical right-angle triangles from the leather, about 2 inches wide at the base. Using a leather hole punch or an awl, pre-punch small stitching holes along the edges of the leather triangles. Position one triangle over each corner of your finished, stuffed pillow and hand-stitch them in place using thick, contrasting embroidery floss or waxed canvas thread. This not only reinforces the corners but adds a sophisticated, Ralph Lauren-esque equestrian touch to your boho rug.
Zero-Budget Chunky Yarn Tassels
If your rug is a vibrant kilim, chunky yarn tassels are mandatory. Do not buy expensive pre-made tassels. Make them yourself using leftover yarn, or unravel a thrifted knit sweater! Take a piece of heavy cardboard cut to 5 inches tall. Wrap your yarn around the cardboard 40 to 50 times to create a thick bundle. Slide a separate 10-inch piece of yarn under the wrapped bundle at the top edge and tie it tightly in a double knot. Slide the bundle off the cardboard. Cut the loops at the bottom edge to create the fringe. Take another piece of yarn and tie it tightly around the bundle, about one inch below the top knot, to create the ‘head’ of the tassel. Trim the bottom fringe so it is perfectly even. Use a large needle to securely sew one heavy tassel onto each corner of your pillow cover.
| Embellishment Type | Material Source | Cost | Designer Impact |
|---|---|---|---|
| Leather Corner Caps | Thrifted purse / old belt | $1.00 | Rugged, masculine, high-end structural look. |
| Chunky Yarn Tassels | Unraveled thrift sweater | $0.50 | Playful, classic boho, adds visual weight. |
| Macrame Fringe | Scrap cotton rope | $2.00 | Textured, coastal-chic vibe. |
The Perfect Designer Chop: Upcycled Stuffing Secrets
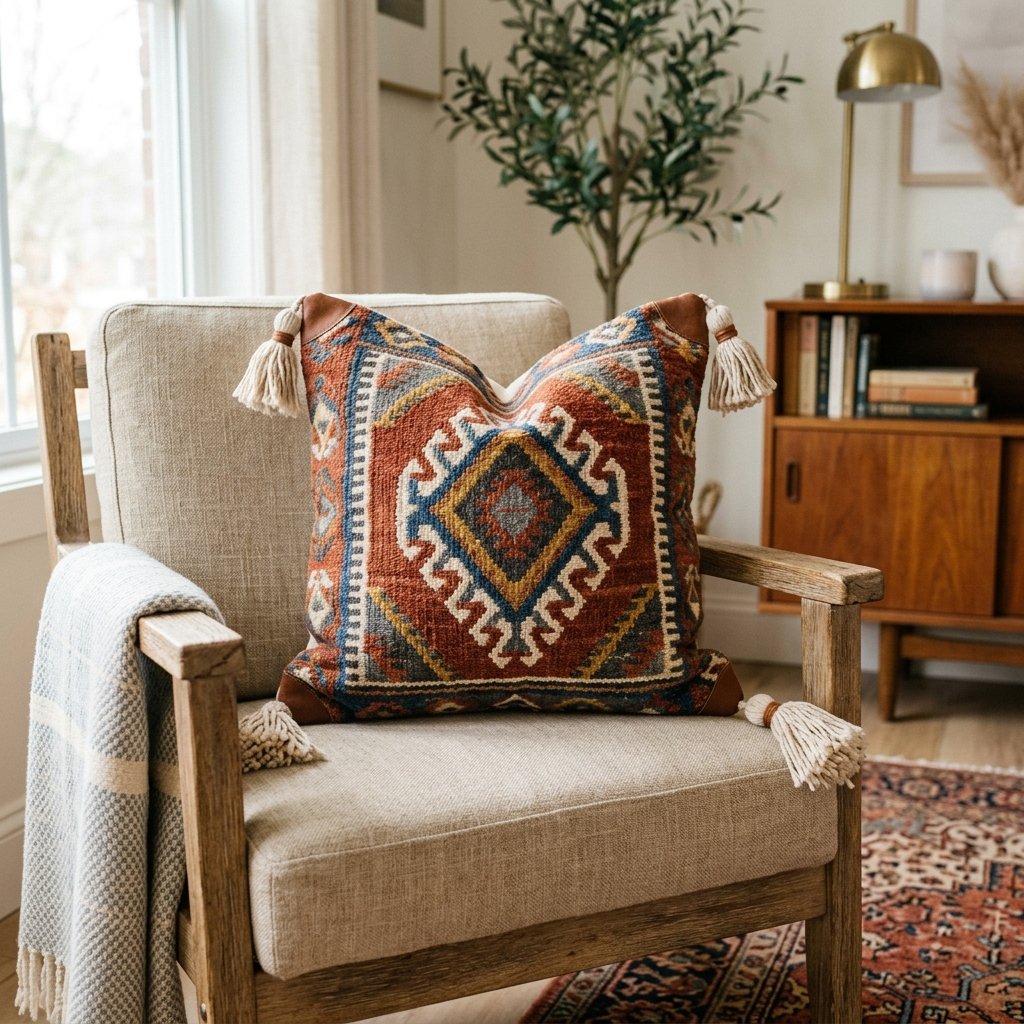
You have crafted a breathtaking, durable pillow cover. Do not ruin it by stuffing it with a flat, lifeless, cheap polyester insert. A high-end pillow is defined by its weight, its density, and its ability to hold a ‘designer chop’ (that satisfying V-shape crease down the top center of the pillow). Purchasing premium down-feather inserts can cost upwards of $25 each, completely negating our frugal DIY budget. Instead, we turn to the ultimate upcycler’s stuffing secrets.
The Zero-Waste Stuffing Method
If you do not have an old pillow insert to reuse, you can create a dense, heavy, custom insert using textile waste. Every household has them: stained t-shirts, hole-ridden socks, worn-out towels, and fabric scraps from previous sewing projects. Wash all these items thoroughly. Cut them into smaller strips and squares (about 2×2 inches). Stuff these fabric scraps tightly into your envelope backing. This method creates a heavy, substantial pillow that feels incredibly expensive and firm—perfect for lower back support on a deep couch. It is 100% free and keeps textile waste out of landfills.
The Thrifted Coat Hack
For that luxurious, moldable down-feather feel without the retail markup, head back to the thrift store during the off-season and look for heavily damaged, stained, or torn genuine down puffer coats or old down sleeping bags. You can often buy these for $2 to $5 because they are unwearable. Carefully cut them open outdoors (feathers will fly!) and harvest the down clusters. Stuff this harvested down into a basic cotton zippered case (or a sewn-up thrifted pillowcase) to create a premium feather insert. When you slide this custom feather insert into your heavy rug cover, the result is magical. The heavy rug fabric provides structure, while the down feathers provide that squishy, luxurious, perfectly ‘choppable’ center.
Budget-Savvy Tip: Always overstuff slightly. Woven rugs are heavy and will compress the stuffing over time. A pillow that feels slightly too firm on day one will break in to become perfectly plush by day thirty.
Once stuffed, zip or button your envelope closure, give the pillow a firm fluff, place it on your favorite armchair, and execute the perfect karate-chop to the top center. Step back and admire your work. You have successfully bypassed the retail supply chain, saved a textile from the landfill, and elevated your living space with a piece of custom, ruggedly elegant decor that looks like it cost a small fortune.
Conclusion
Turning cheap thrift store rugs into high-end boho throw pillows is more than just a weekend craft project; it is a testament to the power of resourceful creativity. By combining an eye for hidden potential with some basic, heavy-duty tailoring skills, you have bypassed the exorbitant markups of designer home decor brands. You took a $4 overlooked floor mat, applied clever fray-prevention techniques, utilized zero-waste envelope backings, and added rugged leather and yarn embellishments to create a bespoke masterpiece. Whether you keep these luxurious pillows to elevate your own living room or gift them to a friend who appreciates practical, handcrafted elegance, you have proven that true style does not require a massive budget. It requires grit, imagination, and the willingness to see the treasure hiding just beneath the dust of a thrift store shelf. So keep your shears sharp, keep your heavy-duty thread stocked, and never look at a discount bin the same way again. Happy thrifting, and even happier crafting!

Makenzie is the founder and lead writer at MoneyHackTips.com — a personal finance blog dedicated to delivering street-smart financial wisdom for real people on real budgets. With 300+ published articles covering everything from debt management to investing fundamentals, Makenzie’s mission is to make every dollar work harder. When not writing about money hacks, Makenzie is testing frugal living strategies, optimizing side hustles, and helping readers build financial freedom from scratch.