
The Art of the High-End Dupe: Why Pie Tins are Your Secret Weapon
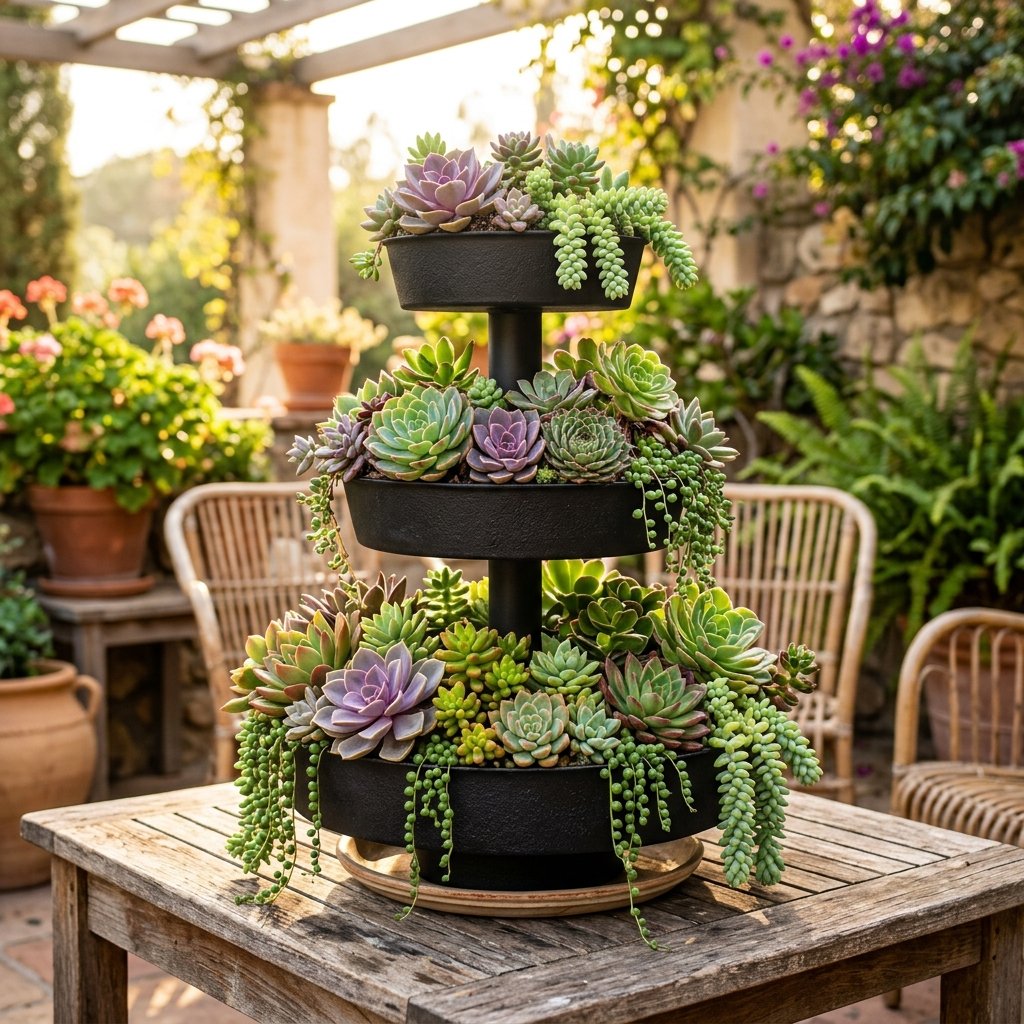
We have all been there—strolling through a high-end garden center or browsing a luxury home decor catalog, only to find a stunning tiered succulent centerpiece with a price tag that makes your eyes water. Usually, these pieces retail anywhere from $45 to $120. But as a resourceful DIYer, you know a secret: the shape and structure are what matter, not the original price tag of the materials. By looking past the shiny aluminum of a standard Dollar Store pie tin, you can see the skeleton of a rugged, masculine-elegant planter that looks like it was forged in a boutique workshop rather than bought in the baking aisle.
In this guide, we are going to engineer a three-tiered masterpiece that combines industrial grit with organic beauty. We aren’t just gluing pans together; we are creating a structural piece of decor using heavy-duty techniques that ensure longevity. Whether you are a budget bride looking for the perfect centerpiece, a handy parent teaching the kids about upcycling, or a frugal decorator wanting to level up your porch game, this project is the ultimate ‘trash-to-treasure’ win. Get ready to save over 90% compared to retail prices while creating something truly unique.
The Blueprint: Materials and Cost Comparison

Before we pick up a drill or a paintbrush, let’s look at the logistics. The beauty of this project lies in its accessibility. Most of these items are sitting in your kitchen or can be found at your local discount store. We are aiming for a ‘Pottery Barn’ aesthetic on a ‘Pocket Change’ budget.
| Material | Source | Estimated Cost |
|---|---|---|
| 3 Aluminum Pie Tins (Small, Medium, Large) | Dollar Store | $3.75 |
| Threaded Rod or Sturdy Wooden Dowel | Hardware Store / Scrap Pile | $2.00 |
| Matte Black or Faux-Stone Spray Paint | Workshop Supply | $4.00 |
| Nuts and Washers (if using rod) | Hardware Store | $1.50 |
| Potting Mix & Succulents | Garden Center / Propagations | $0.00 – $10.00 |
| Total Project Cost | DIY Savvy | $11.25 – $21.25 |
The Frugal Guru’s Mantra: Never pay full price for a silhouette you can replicate with a tin and a vision. A $10 investment today creates a $100 look for your home.
Prepping the ‘Pans’: From Kitchenware to Industrial Chic
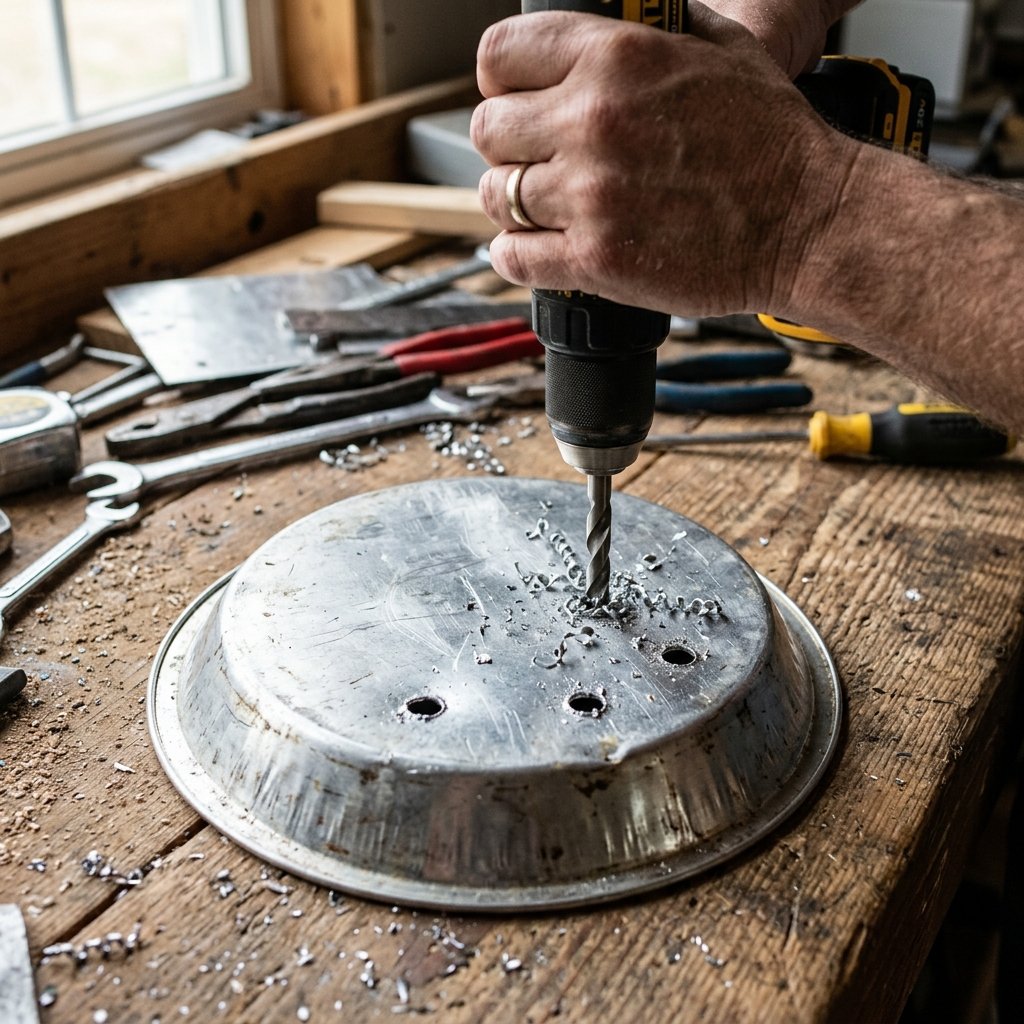
Surface Preparation and Drainage Engineering
The first step in any successful upcycle is removing the ‘cheap’ look. Aluminum is notoriously shiny and smooth, which screams ‘disposable.’ We need to give it some ‘tooth’ for the paint to adhere to. Take a medium-grit sandpaper and scuff the entire surface of each tin. You don’t need to remove the metal, just dull the shine. This ensures your high-end finish won’t flake off in a week.
The Critical Drainage Step
Succulents hate ‘wet feet.’ Without proper drainage, your beautiful planter will become a graveyard. Using a 1/4 inch drill bit or a sturdy nail and hammer, punch 5 to 8 holes in the bottom of each tin. Space them evenly to ensure water doesn’t pool in the corners. If you are using a threaded rod for the center support, you will also need to drill a center hole exactly in the middle of each tin that matches the diameter of your rod.
Safety Note: When drilling or punching holes in thin aluminum, always place a scrap piece of wood underneath the tin to prevent bending the metal or damaging your work surface. Wear eye protection to guard against small metal shards.
The ‘Baking Soda’ Paint Trick: Achieving a Faux-Stone Finish

Creating Texture and Patina
To make these tins look like heavy cast iron or weathered stone, we use the legendary ‘Baking Soda Paint Trick.’ This is a favorite among budget interior designers because it adds instant weight and age to plastic or thin metal.
- Step 1: Mix 1 cup of matte acrylic paint (black, charcoal, or terracotta) with 1/4 cup of baking soda.
- Step 2: Stir until it reaches a thick, gritty consistency—almost like wet sand.
- Step 3: Use a stippling motion (dabbing rather than stroking) to apply the mixture to the tins. This creates a porous, stone-like texture.
- Step 4: Let it dry for 2 hours. For a ‘rugged’ look, lightly dry-brush a bit of gray or white paint over the high points to simulate a natural patina.
By the time you are finished, the tins will have lost their metallic ‘ping’ and will look like heavy, expensive vessels. This simple hack saves you from buying specialized $15 stone-texture sprays.
Structural Assembly: Building the Spine
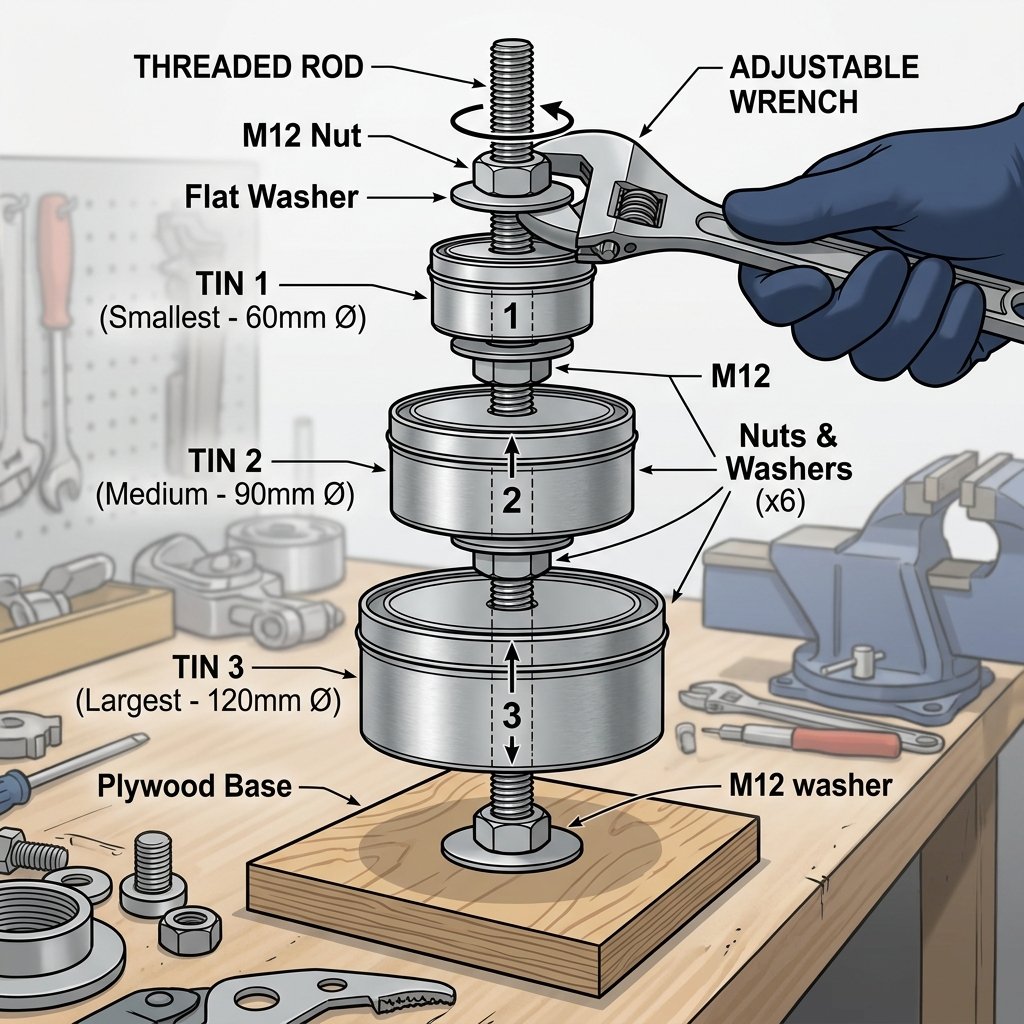
Engineering the Tiers for Stability
A tiered planter needs a solid backbone. While you could simply glue candlesticks between the pans, using a threaded rod is the ‘pro’ move for a rugged, masculine-elegant result that won’t wobble. This method allows you to tighten everything down into one solid unit.
- Thread the Base: Place a washer and a nut at the bottom of your 12-inch threaded rod. Slide the largest tin onto the rod so it sits on the washer.
- Secure the First Tier: Add another washer and nut inside the tin, tightening it against the bottom. This ‘sandwiches’ the metal, making it incredibly stable.
- Create the Gap: Thread another nut down the rod to the height where you want your second tier to sit (usually 4-5 inches up). Add a washer, then the medium tin, then another washer and nut.
- Repeat for the Top: Follow the same process for the smallest tin.
- The Final Cap: Use an acorn nut (a decorative rounded nut) at the very top for a finished, polished look.
If you prefer a more rustic look, you can use painted PVC pipe or wooden spools as spacers between the tiers, running the rod through the center of them to hide the threads.
The Green-Thumb Finish: Planting for Longevity
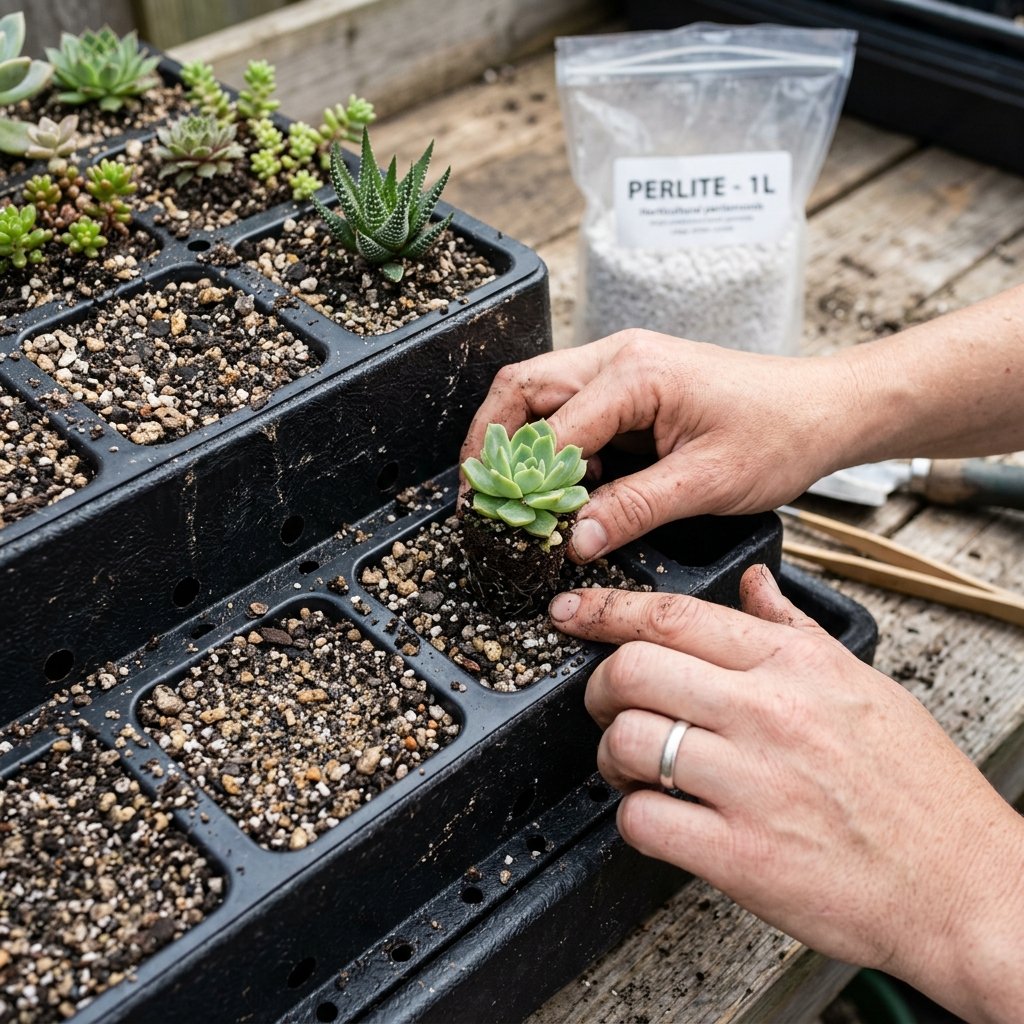
Succulent Selection and Soil Ratios
Now for the life! Because our tins are shallow (usually 1 to 2 inches deep), you need succulents with shallow root systems. Think Echeveria, Sedum (Stonecrop), and Sempervivum (Hens and Chicks). These varieties thrive in tight spaces and look stunning when cascading over the edges of the tiers.
| Layer | Recommended Plants | Visual Effect |
|---|---|---|
| Top Tier | Single ‘Showstopper’ Echeveria | Central Focus |
| Middle Tier | Mixed Sedums and Jade | Textural Variety |
| Bottom Tier | ‘String of Pearls’ or ‘Donkey Tail’ | Cascading ‘Waterfall’ effect |
Use a specific succulent soil mix. If you want to be even more budget-savvy, make your own: 2 parts potting soil, 1 part coarse sand, and 1 part perlite or pumice. This ensures the fast drainage these desert plants crave. Pack the soil firmly but leave 1/2 inch of space at the top of each tin to prevent overflow when watering.
Styling and Maintenance: The Final Reveal
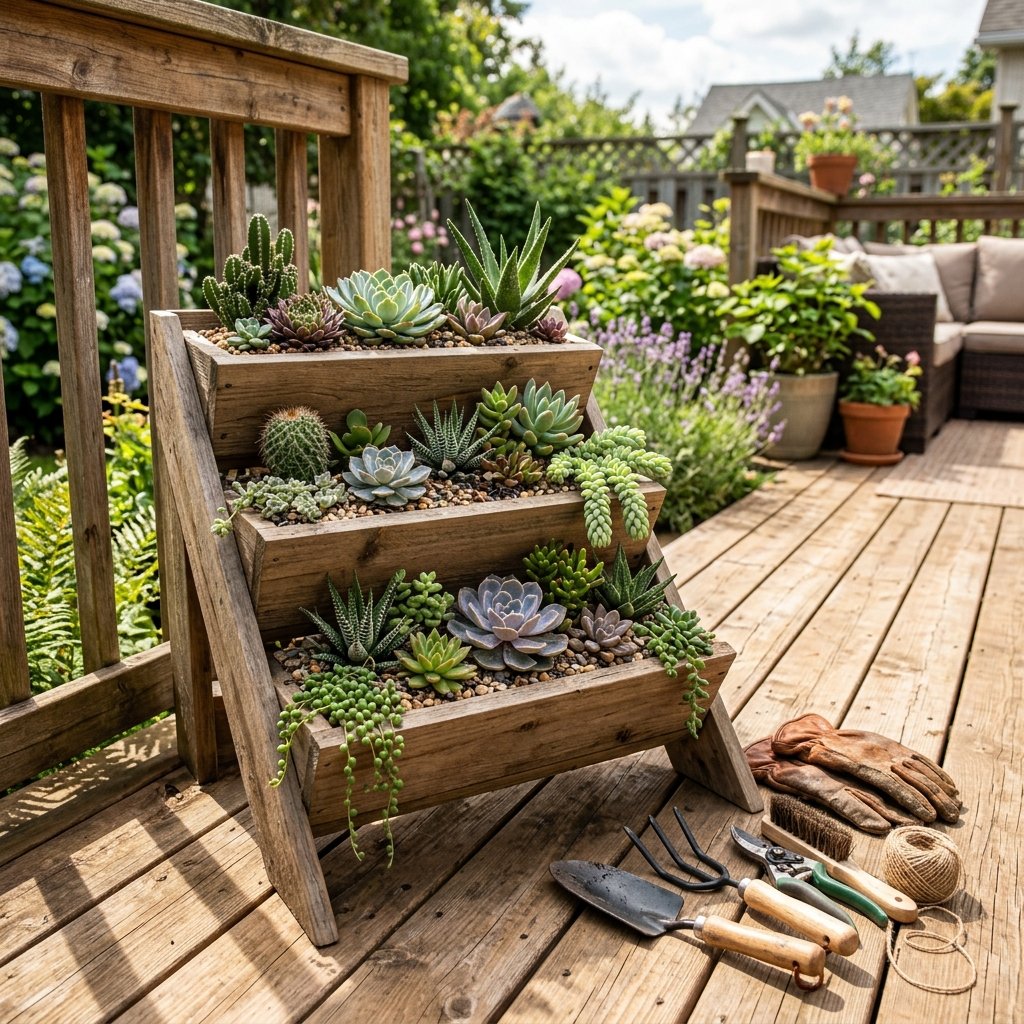
Where to Place Your Masterpiece
Your new tiered planter is a versatile decor piece. Because of its rugged, elegant finish, it fits perfectly in several settings:
- The Farmhouse Kitchen: Place it near a sunny window as a ‘living’ centerpiece.
- The Industrial Office: The matte black and green contrast looks sharp against a metal or reclaimed wood desk.
- The Outdoor Patio: Use it as a focal point on a bistro table.
Maintenance Tips for Busy Crafters
Succulents are the ‘low-maintenance’ kings, but they still need love. Water your planter only when the soil is bone dry—usually every 2 weeks. Use a small watering can with a long neck to reach the lower tiers without disturbing the soil. If a leaf falls off, don’t toss it! Set it on top of the soil, and it will likely grow a brand-new baby succulent, giving you 100% free plants for your next project.
Conclusion
The Frugal Victory: Luxury Design on a Dime
You have successfully transformed $4 worth of kitchen supplies into a stunning, multi-tiered garden that rivals high-end boutique decor. This project proves that with a little resourcefulness and a few clever hacks like the baking soda paint trick, you don’t need a massive budget to have a beautiful, stylish home. You’ve engineered a piece that is structural, functional, and undeniably elegant. So, next time you’re at the Dollar Store, look past the aisles of ‘stuff’ and see the potential for your next masterpiece. Happy crafting, and enjoy your new, ruggedly beautiful succulent display!

Makenzie is the founder and lead writer at MoneyHackTips.com — a personal finance blog dedicated to delivering street-smart financial wisdom for real people on real budgets. With 300+ published articles covering everything from debt management to investing fundamentals, Makenzie’s mission is to make every dollar work harder. When not writing about money hacks, Makenzie is testing frugal living strategies, optimizing side hustles, and helping readers build financial freedom from scratch.