
The Frugal Guru’s Manifesto: Why Your Closet is a Goldmine
Let’s be honest: the price of holiday decor has reached astronomical heights. Walk into any high-end home goods store and you’ll find ‘chunky knit’ stockings retailing for $35 to $50 apiece. For a family of four, that’s $200 just to hang socks on a mantel! But as a resourceful crafter, you know better. You see the world through the lens of potential. That drawer full of old, stretched-out cotton t-shirts isn’t a pile of rags; it’s a supply of premium ‘cotton gold’ waiting to be transformed.
In this guide, we are going to bypass the retail markup and lean into the rugged, practical elegance of upcycling. We’re making T-Shirt Yarn (or ‘Tarn’)—a thick, durable, and incredibly tactile material that mimics expensive wool roving but costs exactly $0. Whether you are a handy parent looking to save for the kids’ gifts or a budget-savvy decorator aiming for that ‘Anthropologie’ look on a ‘Dollar Tree’ budget, this project is your ticket to a stunning, bespoke holiday. We’ll cover everything from the ‘continuous cut’ technique to the ‘finger-crochet’ build, ensuring even the most tool-averse crafter can produce professional-grade results.
Mining for Materials: Selecting the Perfect ‘Donor’ Shirts
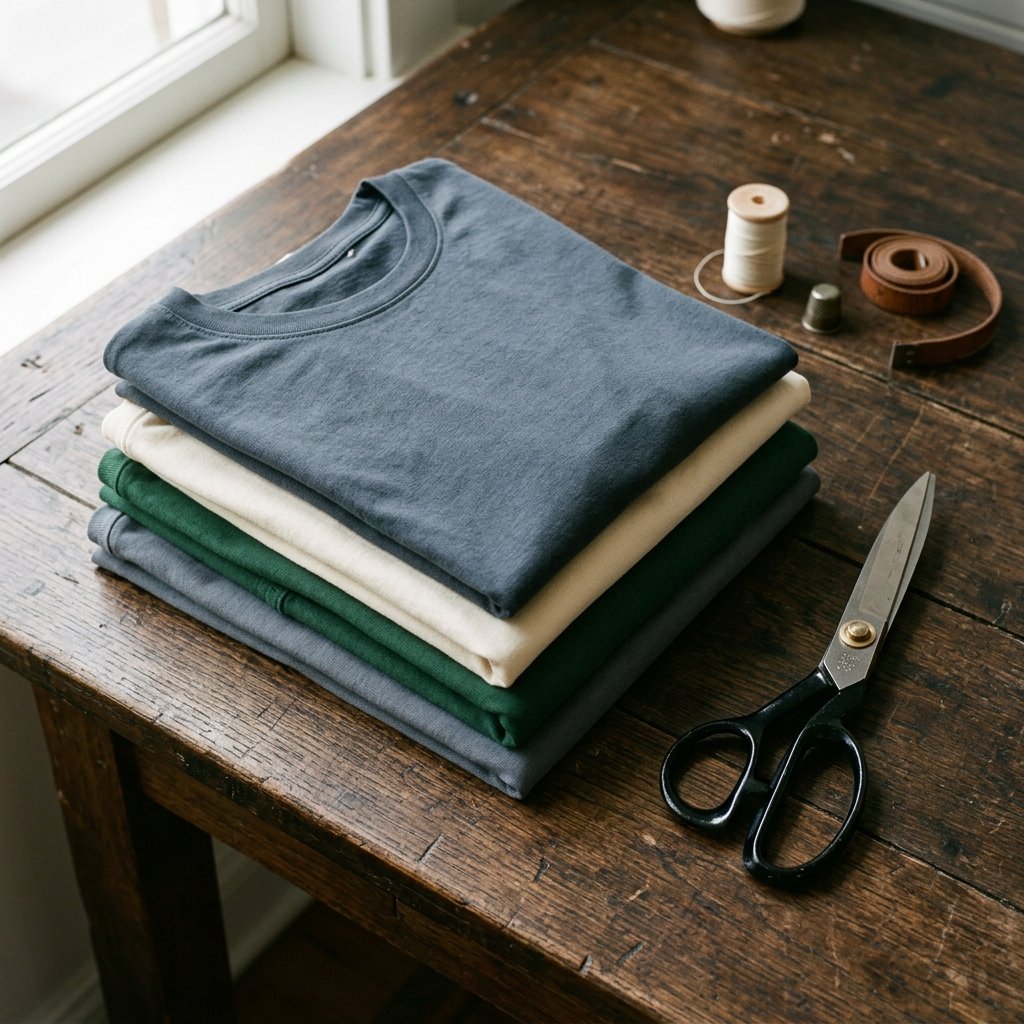
Not all t-shirts are created equal when it comes to yarn production. To achieve that thick, luxurious knit look, you need to be selective about your fabric. We are looking for 100% cotton or high-cotton blends with a bit of jersey stretch. Avoid shirts with side seams if possible, as they will create small bumps in your yarn, though we can work around them if necessary.
The Color Palette Strategy
For a sophisticated, masculine-elegant vibe, stick to a cohesive color story. Think ‘Rugged Cabin’ or ‘Modern Minimalist.’ Look for:
- Charcoal Grays and Navys: These provide a heavy, grounded look.
- Heathers and Creams: Perfect for that classic ‘oatmeal’ knit aesthetic.
- Forest Greens and Deep Reds: To keep things traditional but textured.
- Graphic Tees: Don’t discard them! The printed parts can add unique ‘speckled’ textures to your yarn that look like expensive hand-dyed wool.
| Fabric Type | Stretch Factor | Best Use Case |
|---|---|---|
| 100% Cotton Jersey | High (Curling) | Main Stocking Body |
| Cotton/Poly Blend | Medium | Decorative Accents |
| Ribbed Knit | Very High | Stocking Cuff/Top |
| Heavyweight Beefy-T | Low | Structural Hanging Loop |
Pro-Tip: Before you start cutting, ensure the shirts are clean and ironed. Removing the wrinkles now makes the cutting process 100% easier and results in a smoother yarn that curls perfectly.
The Continuous Strand Technique: Making Yarn in Minutes
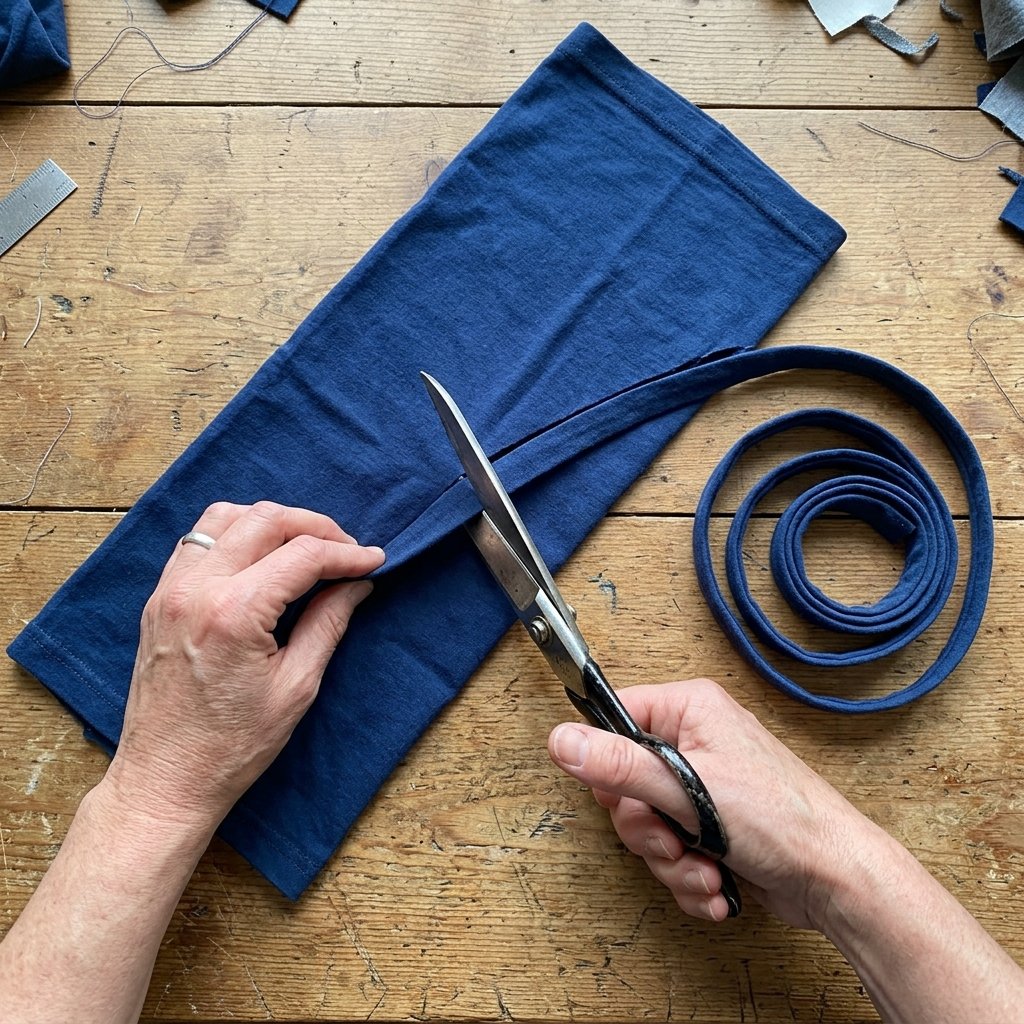
The secret to a beautiful stocking is minimizing knots. We want one long, continuous strand of yarn from a single shirt. This is where the ‘Spiral Cut’ method comes into play. It’s a clever, tactical approach that maximizes every square inch of fabric.
Step-by-Step Spiral Cutting
- Prep the Canvas: Lay the shirt flat on your workspace. Cut off the bottom hem and the top part (from the armpits up). You are left with a fabric tube.
- The Strategic Slits: Fold the tube in half, but leave about 1 inch of the bottom layer sticking out past the top layer.
- The Fringe Cut: Starting from the folded edge, cut strips about 1 to 1.5 inches wide toward the overlapping edge. CRITICAL: Stop cutting once you hit that 1-inch overlap. Do not cut all the way through!
- The Magic Diagonal: Open the shirt so the uncut 1-inch strip is in the center. Cut diagonally from the first slit to the second, the second to the third, and so on. This creates one unbroken strand.
- The Stretch: Once cut, take the yarn in sections and pull it taut. The jersey fabric will naturally curl inward, hiding the raw edges and creating a professional-looking cord.
The ‘Tarn’ Formula: 1 Large Adult T-Shirt = Approximately 25-30 yards of chunky yarn. You will need roughly 2-3 shirts per large stocking.
The Zero-Budget Build: Finger-Crocheting Your Stocking
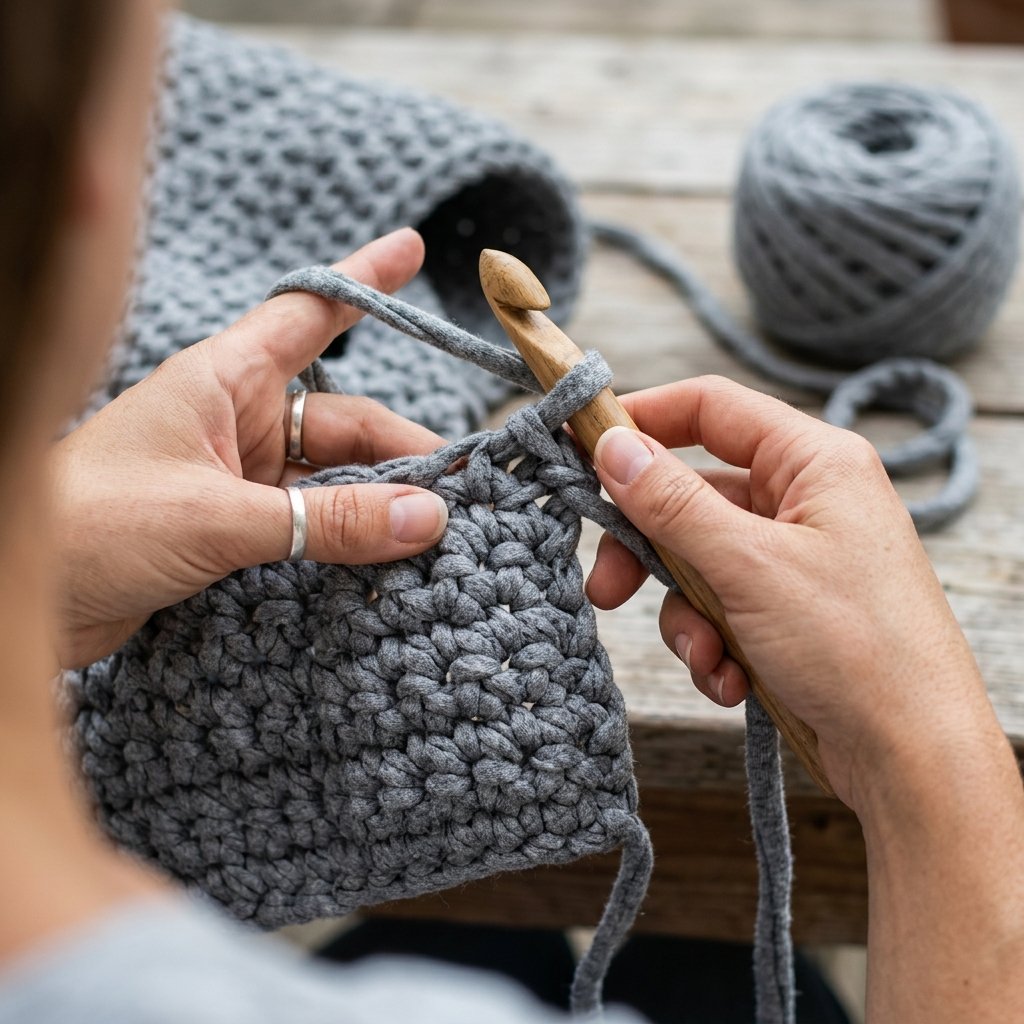
Don’t have a giant crochet hook? No problem. We are going to use the most versatile tools in your kit: your hands. Finger-crocheting allows for a loose, chunky tension that looks incredibly high-end and artisanal.
Construction Phases
- The Toe: Start with a ‘magic ring’ or a small loop of 4 stitches. This creates a rounded base that won’t leak small stocking stuffers.
- The Body: Work in a spiral. Because t-shirt yarn is bulky, the stocking will grow quickly. Aim for a diameter of about 6 to 7 inches.
- The Heel: This is the only ‘tricky’ part. You will work back and forth across half the stitches for three rows to create a ‘pocket,’ then rejoin the spiral. This gives it that classic ‘boot’ shape.
- The Cuff: Switch to a different color shirt (like a cream or a ribbed knit) for the top 3 inches to create a contrast cuff that pops.
| Project Phase | Estimated Time | Skill Level |
|---|---|---|
| Yarn Preparation | 15 Minutes | Beginner |
| Stocking Base/Body | 45 Minutes | Intermediate |
| Heel Shaping | 20 Minutes | Crafty-Expert |
| Finishing & Trim | 10 Minutes | Beginner |
By using your fingers instead of a hook, you can feel the tension of the fabric, ensuring the stocking is sturdy enough to hold heavy items like oranges, tools, or coal (if you’ve been naughty).
Rugged Customization: Finishing Touches for Him & Her
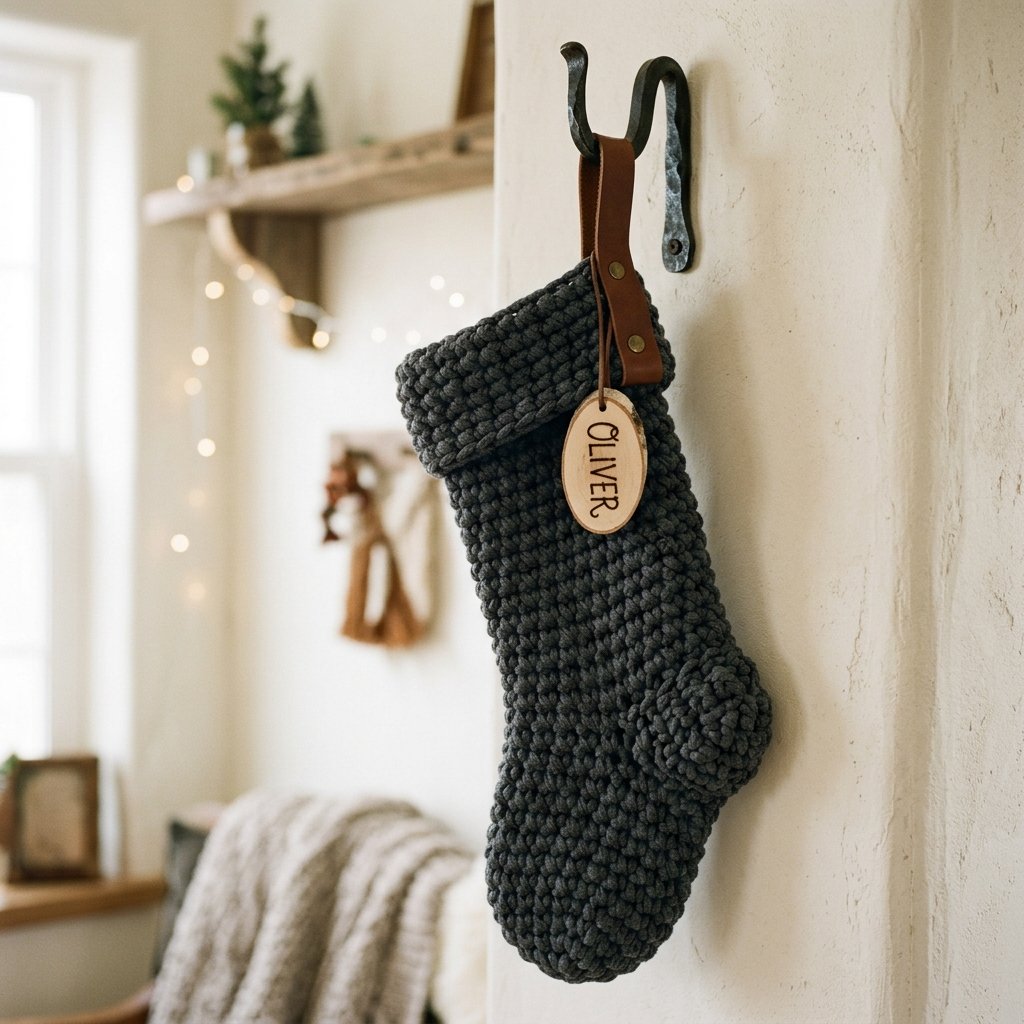
A plain stocking is a blank canvas. To elevate this from ‘recycled craft’ to ‘designer decor,’ we need to add masculine-elegant accents. This is where you can use scraps from other DIY projects to add value for $0.
Elevating the Aesthetic
- Leather Hanging Loops: Use an old leather belt or scrap garment leather. Cut a 1×6 inch strip, fold it, and secure it to the top with a simple cross-stitch or a metal rivet.
- Wooden Name Tags: Use a slice of a fallen tree branch (sanded smooth) or a scrap of plywood. Burn the recipient’s name into it for a rugged, personalized touch.
- Nature’s Accents: Tuck a sprig of real dried cedar or a cinnamon stick into the cuff. It adds visual depth and a natural holiday scent.
- Upcycled Buttons: Large wooden or bone buttons salvaged from old coats can be sewn onto the cuff for a ‘cabin-core’ look.
Safety Note: If using metal rivets or heavy-duty needles for leather, work on a stable surface and use a thimble to protect your fingers. Safety is the hallmark of a true pro.
Cost Comparison: DIY vs. Big Box Retail

If you’re still on the fence about whether this project is worth your time, let’s look at the cold, hard numbers. The ‘frugal win’ here is staggering. Not only are you saving money, but you are also keeping textiles out of the landfill—a double victory for the resourceful homeowner.
| Feature | Store-Bought ‘Chunky’ Stocking | DIY T-Shirt Yarn Stocking |
|---|---|---|
| Material Cost | $25.00 – $45.00 | $0.00 (Upcycled) |
| Durability | Low (Acrylic snags easily) | High (Heavy-duty cotton) |
| Washability | Dry Clean Only | Machine Washable |
| Uniqueness | Mass-Produced | One-of-a-Kind |
| Time Investment | 30 min at the mall | 90 min of creative fun |
The math is simple: for the price of one retail stocking, you could make an entire set for your extended family and still have money left over for the actual gifts inside. That is what I call Clever Crafting.
Conclusion
The Pride of a Handmade Holiday
There is a unique satisfaction that comes from looking at your holiday mantel and knowing that every stitch was made by your own hands, from materials that were destined for the bin. These T-shirt yarn stockings aren’t just decor; they are a testament to your resourcefulness and creativity. They are rugged enough to last for decades, machine-washable for those inevitable cocoa spills, and stylish enough to rival any high-end boutique.
This year, stop feeding the consumer machine and start mining your own closet. You’ll save hundreds of dollars, reduce waste, and create a warm, inviting home that tells a story of craftsmanship and care. Now, go grab those old tees and start cutting—your ‘cotton gold’ is waiting!

Makenzie is the founder and lead writer at MoneyHackTips.com — a personal finance blog dedicated to delivering street-smart financial wisdom for real people on real budgets. With 300+ published articles covering everything from debt management to investing fundamentals, Makenzie’s mission is to make every dollar work harder. When not writing about money hacks, Makenzie is testing frugal living strategies, optimizing side hustles, and helping readers build financial freedom from scratch.