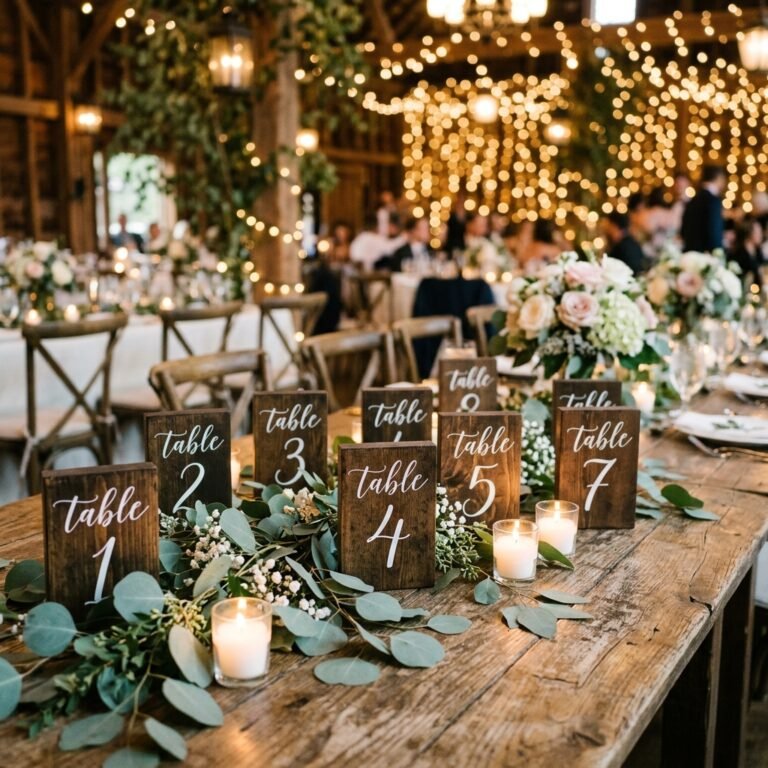
The Magic of Trash-to-Treasure Wedding Elegance
Let us talk about the elephant in the room when it comes to wedding planning: the jaw-dropping sticker shock of table decor. If you are aiming for that highly sought-after industrial-chic, modern-minimalist, or ruggedly elegant aesthetic, you have probably eyed those gorgeous concrete candle holders in high-end boutique catalogs. They are weighty, they are sophisticated, and they are incredibly expensive. But as resourceful, budget-savvy crafters and upcyclers, we know a secret. You do not need to spend a small fortune, nor do you need to mess with heavy, messy bags of actual cement to achieve this look.
Welcome to the ultimate masterclass in faux concrete crafting. By combining the rugged, masculine appeal of raw stone with the delicate, romantic ambiance of candlelight, you can create a tablescape that looks like it cost thousands of dollars for mere pennies on the dollar. We are going to take the most basic, uninspiring glass vases from the Dollar Tree or your local thrift store and transform them into textured, architectural masterpieces. This is not just about saving money; it is about the profound satisfaction of building your dream wedding with your own two hands. Whether you are a handy parent helping out with wedding prep, a frugal bride, or a creative gift-giver looking to make customized home decor, this technique will become a permanent staple in your DIY arsenal.
“Frugality is not about settling for less; it is about creatively engineering exactly what you want out of what you already have.”
In this comprehensive guide, we will walk you through the exact science of the baking soda paint trick, the art of layering textures to mimic aged stone, and the foolproof styling secrets to make your faux concrete candle holders the star of your reception. Roll up your sleeves, grab your paintbrushes, and let us turn cheap glass into timeless stone!
Why Fake It? The Case for Faux Concrete in Wedding Design
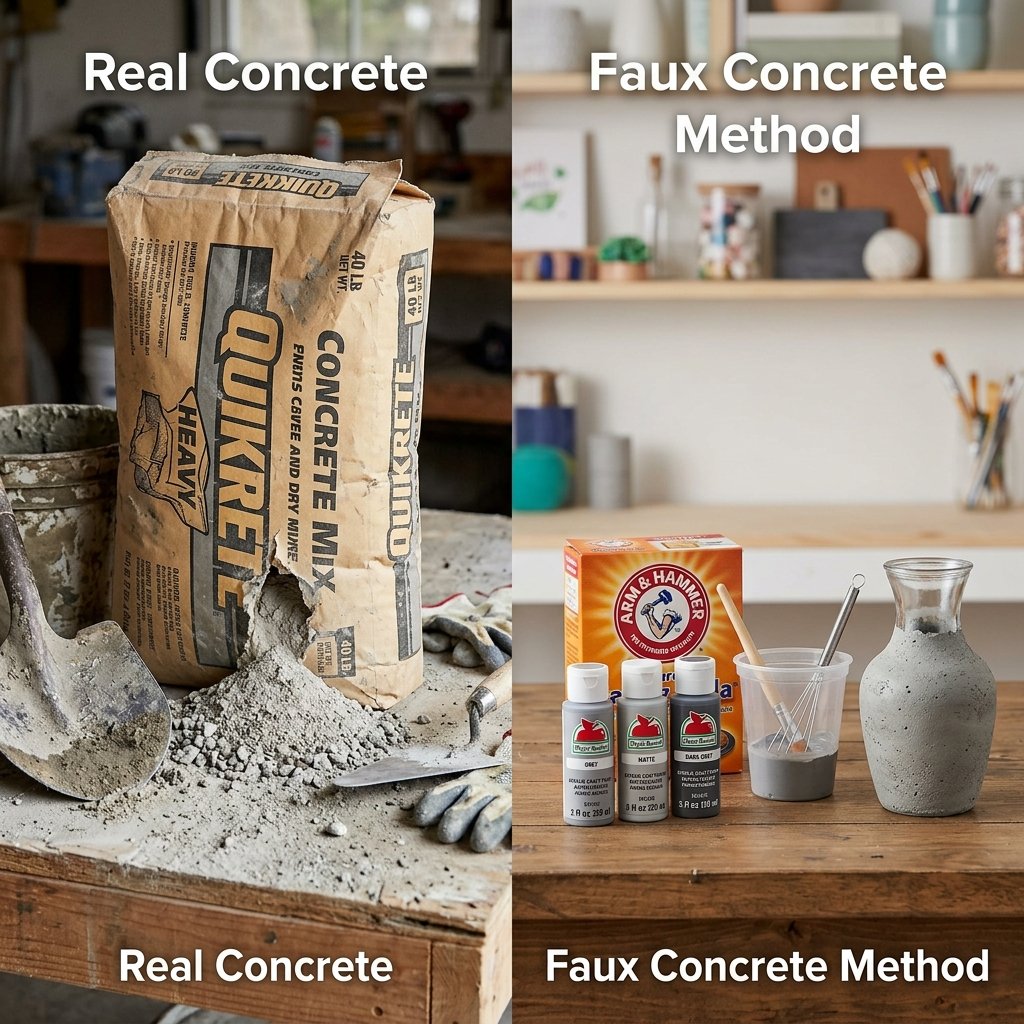
You might be wondering: why not just pour real concrete? While casting your own concrete vessels is a fantastic, rugged project for the weekend warrior, it presents several massive logistical nightmares for a wedding. First, real concrete is incredibly heavy. If you are transporting thirty centerpieces to a venue, you will be hauling hundreds of pounds of stone. Second, raw concrete can easily scratch delicate rented tables or snag expensive linens. Third, the curing time and the mess involved in mixing large batches of cement in your backyard can add unnecessary stress to an already hectic wedding timeline.
Faux concrete, on the other hand, is a masterclass in clever engineering. By utilizing a simple, budget-friendly texturizing mixture, you get the visual heft and architectural gravitas of stone without the physical weight. You can upcycle virtually any shape—from sleek cylindrical glass vases to ornate, thrifted brass candlesticks that have seen better days. The faux finish unifies mismatched items, allowing you to curate a bespoke collection of candle holders that look like a cohesive, expensive set.
Furthermore, this method is incredibly forgiving. Real concrete requires precise water-to-mix ratios, mold-release agents, and vibration to remove air bubbles. Our faux method relies on organic, imperfect brushstrokes. The messier you are, the more authentic the final stone texture will appear. It is the perfect project for a craft night with your wedding party, requiring zero specialized power tools and delivering 100% satisfaction.
The Budget-Savvy Arsenal: Gathering Your Materials
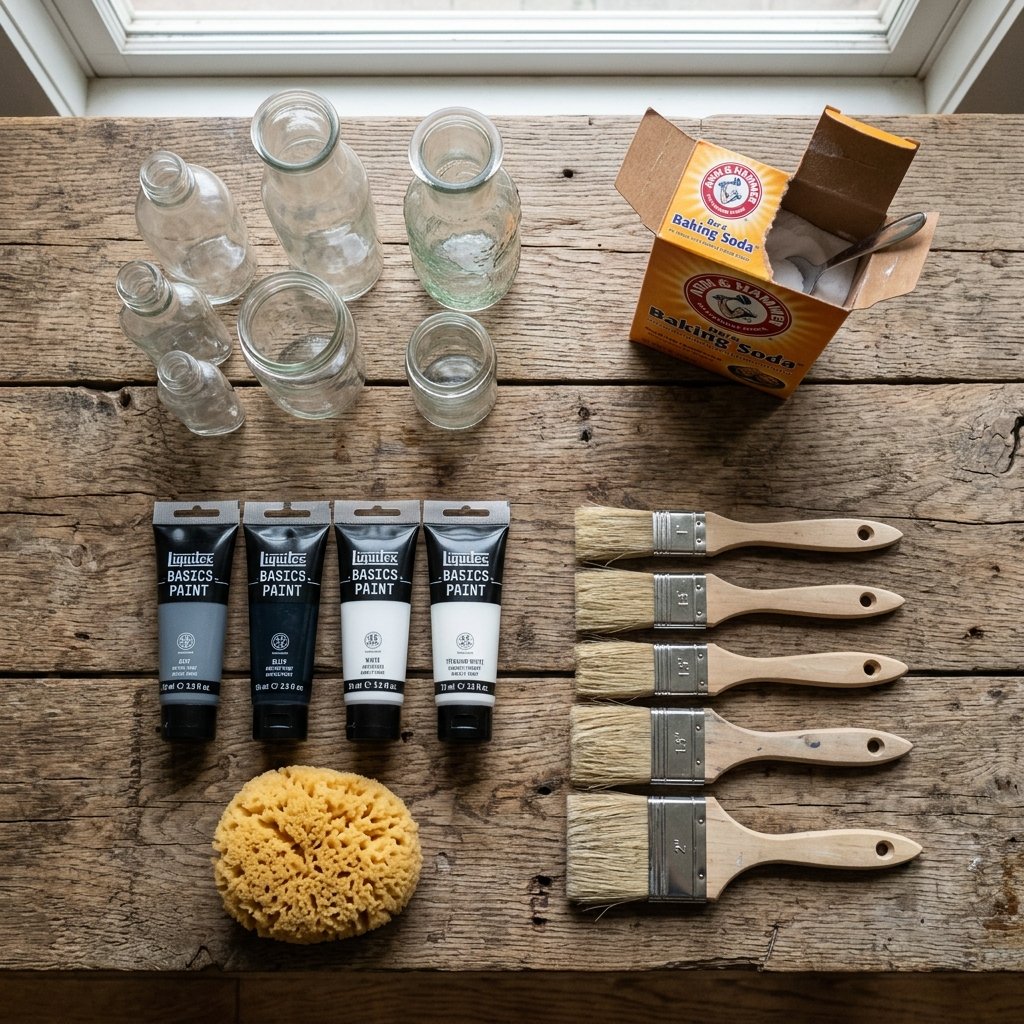
The true beauty of this project lies in its accessibility. You likely already have half of these materials sitting in your kitchen pantry or your workshop craft bin. For the base structure, we are hunting for glass, ceramic, or even rigid plastic vessels. The Dollar Tree is a goldmine for straight-sided glass cylinder vases, while thrift stores are perfect for finding uniquely shaped goblets, wine glasses, or dated candle pillars that can be flipped upside down for architectural interest.
Material Cost Breakdown
Let us look at the undeniable math. Renting or buying high-end concrete decor will drain your budget faster than you can say ‘I do.’ Here is how our zero-budget DIY approach stacks up against retail prices.
| Item / Material | Store-Bought / Rental Cost (Per Table) | Our DIY Faux Method Cost (Per Table) |
|---|---|---|
| Centerpiece Base (Vase/Holder) | $15.00 – $35.00 | $1.25 (Dollar Tree or Thrifted) |
| Texture Medium (Concrete vs. Baking Soda) | $8.00 (Pre-cast heavy vessels) | $0.50 (Household Baking Soda) |
| Colorant (Paints) | Included in retail | $0.75 (Craft Acrylics) |
| Sealer & Brushes | N/A | $0.50 (Prorated per piece) |
| Total Estimated Cost | $23.00 – $43.00+ | $3.00 (A massive 90% savings!) |
To execute this transformation, you will need the following:
- Assorted Glass or Ceramic Vases: Varying heights (e.g., 4-inch, 6-inch, and 9-inch) create the best visual interest on a table.
- Baking Soda: The magical ingredient that provides the grit and chalky matte finish of raw cement.
- Water-Based Acrylic Paint: You will need a medium gray for the base, plus white, black, and a warm taupe/tan for layering and distressing.
- Matte Mod Podge or Primer: To help the paint grip the slick glass surface.
- Chip Brushes and Sea Sponges: Cheap, bristly brushes are actually better here than smooth, expensive art brushes.
- Matte Clear Coat Spray: To seal the final product and protect it from dripping candle wax.
Safety & Workspace Note: While this project is non-toxic, sanding dried baking soda paint can create fine dust. Always work in a well-ventilated area or wear a basic dust mask when lightly sanding your finished pieces to protect your lungs.
The Master Recipe: Mixing the Perfect Faux Concrete Paste

Creating the texture paste is where the alchemy happens. We are not just painting these vases; we are encasing them in a rugged, stone-like shell. The ratio of baking soda to paint dictates the final texture. If you want a smooth, modern architectural concrete look, you will use less baking soda. If you want a deeply pitted, weathered, ancient-ruin aesthetic, you will pack that powder in.
The Golden Ratio for Stone Texture
The Faux Concrete Formula: Mix 1 part baking soda to 2 parts medium-gray acrylic paint. Stir thoroughly until the mixture resembles thick pancake batter or whipped frosting. It should hold its shape slightly when you pull the stir stick out.
Step-by-Step Mixing Instructions:
- Prep the Base: Glass is notoriously slick. To ensure your concrete shell does not peel off like a sunburn, first coat your vases in a thin layer of Matte Mod Podge or a spray primer. Let it dry for exactly 20 minutes until tacky.
- Mix the Base Coat: In a disposable plastic cup or old tupperware container, combine your medium gray paint with the baking soda using the golden formula above. Stir with a craft stick. You will notice the paint immediately thickens and takes on a chalky, ultra-matte appearance.
- Adjust the Consistency: If the mixture is too clumpy to spread, add a few drops of water or extra paint. If it is too runny and just looks like normal paint, gradually fold in more baking soda a tablespoon at a time.
- Prepare the Accent Colors: In separate, smaller cups, mix a tiny batch of dark charcoal gray (gray + black) and a batch of light ash (gray + white), both mixed with a pinch of baking soda. These will be used later for depth and highlighting.
Do not mix too much at once! The baking soda causes the acrylic paint to dry out much faster than normal. Mix just enough to cover 3 to 4 vases at a time. This keeps the project manageable and ensures your texture paste remains pliable and easy to manipulate.
The Application Process: Mastering the Art of the Smear
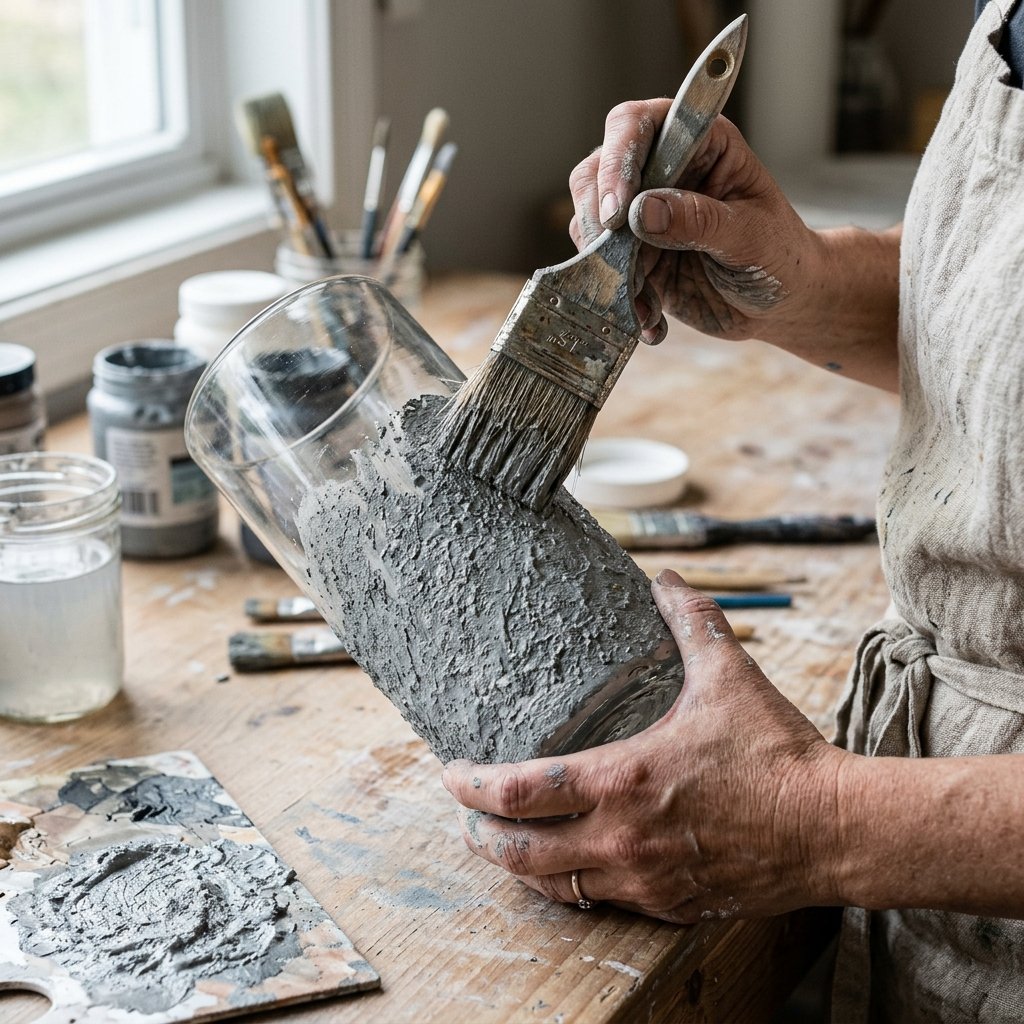
Now comes the most satisfying part of the project: applying the texture. This is where you channel your inner mason. Forget everything you know about smooth, even brushstrokes. For this project, perfection is the enemy of authenticity. Real concrete has divots, color variations, water stains, and rough patches. Your application technique should mimic the chaotic beauty of poured stone.
Step-by-Step Application Guide
- The Stipple and Slap: Dip your cheap chip brush into the thick gray paste. Instead of brushing up and down, use a stippling motion—jab the bristles directly against the glass. Slap the mixture on thickly in some areas and thinner in others. Cover the entire exterior of the vase, bringing the paint just over the top lip so the original glass is completely hidden.
- The First Cure: Allow this base coat to dry completely. Because of the thickness, this will take about 45 to 60 minutes. As it dries, the magic of the baking soda will reveal itself, turning the glossy paint into a dead-flat, chalky, cement-like surface.
- Layering for Depth (The Sponge Technique): Real concrete is never just one flat color. Take your natural sea sponge and dip it lightly into the dark charcoal mixture you prepared earlier. Dab most of it off onto a paper towel (like dry-brushing). Lightly pounce the sponge around the base of the vase and randomly in patches to simulate water-staining and natural curing shadows.
- Highlighting the High Points: Next, take a clean, dry chip brush and dip the very tips into your light ash (white/gray) mixture. Wipe almost all of it off. Gently sweep the brush horizontally across the heavily textured areas. This will catch the raised bumps of the baking soda, highlighting the grit and making it look incredibly three-dimensional.
- The Dusting Trick (Optional but Clever): For an ultra-realistic, dusty warehouse look, take a pinch of dry baking soda or even actual fireplace ash, and rub it into the wet paint during the highlighting phase. Blow off the excess. This adds an unparalleled level of matte, rugged authenticity.
If you find that an area looks too heavily painted or artificial, simply take a piece of medium-grit sandpaper (around 120 grit) and lightly scuff the surface once it is fully dry. This knocks down any sharp peaks from the paint and exposes the layers beneath, perfectly mimicking aged, weathered stone.
Advanced Finishes and Foolproof Sealing
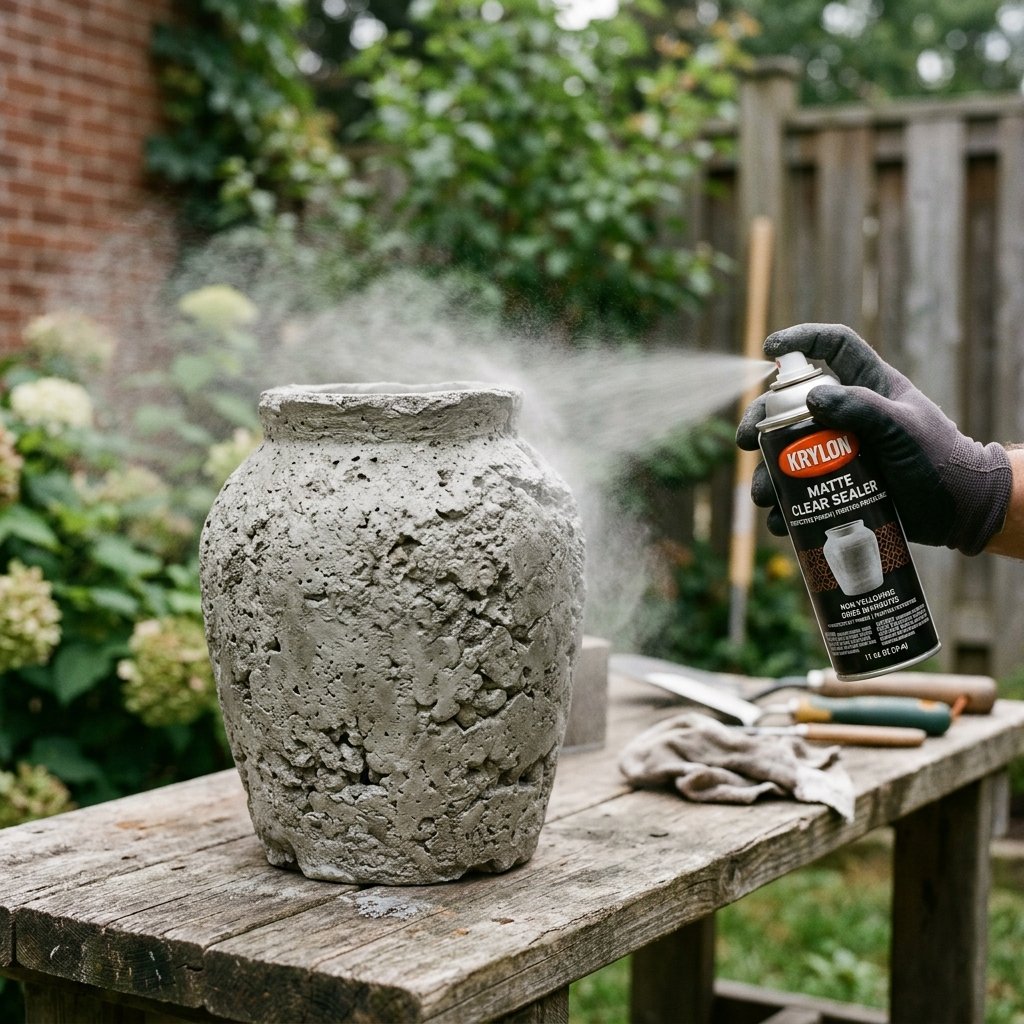
You have achieved the perfect concrete texture, but the project is not finished until it is properly protected. Wedding tablescapes are high-traffic zones. Between spilled wine, dripping candle wax, and guests handling the decor, your beautiful faux concrete needs an invisible shield.
Adding Warmth: The Taupe Wash
Before sealing, consider the lighting of your venue. Pure gray concrete can sometimes read as cold or sterile under harsh lighting. To bridge the gap between industrial and romantic, apply a highly diluted ‘dirt wash.’ Mix a tiny drop of warm taupe or raw umber brown paint with a tablespoon of water. Lightly brush this watery wash over the entire piece and immediately dab it away with a paper towel. The warm, muddy water will settle into the crevices of your texture, warming up the gray and giving it an earthy, aged patina that pairs beautifully with floral arrangements.
Sealing for Survival
Because baking soda makes the paint porous, it will absorb grease from fingerprints or wax from candles, which can leave dark, permanent stains. You must seal the pieces.
- Choose the Right Sealer: Absolutely avoid glossy or satin sealers. They will immediately destroy the illusion of stone, making your pieces look like cheap, painted plastic. You must use a Dead Flat or Ultra-Matte Clear Spray Enamel.
- Application: Take your pieces outside. Hold the can 10 to 12 inches away and apply two very light, sweeping coats, allowing 15 minutes of drying time between coats.
- Wax Protection: If you are using real taper candles, melt a few drops of wax into the bottom of the holder to secure the candle. The matte sealer will ensure that when the wedding is over, you can gently pop the hardened wax drips off the rim without peeling away your faux concrete finish.
Styling the Tablescape: Industrial Elegance on a Dime
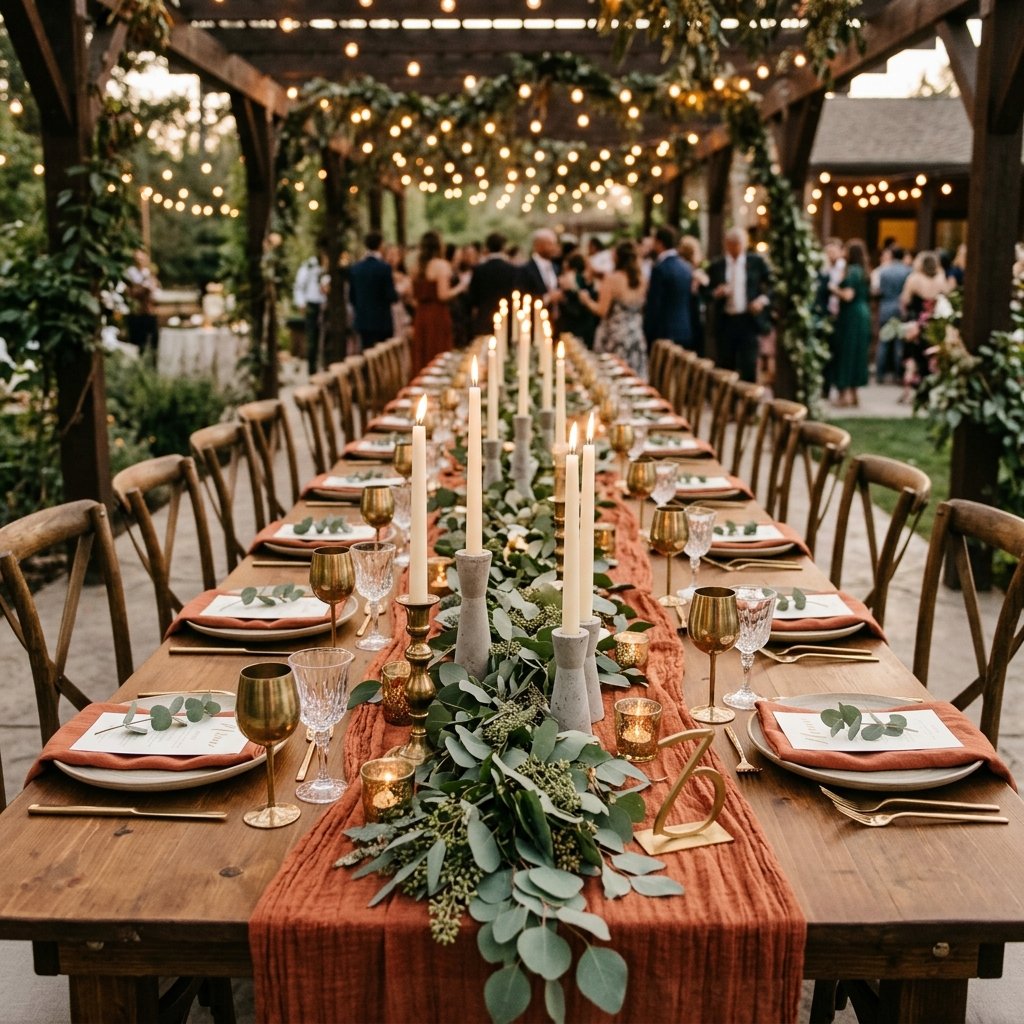
The true power of these DIY concrete candle holders is unlocked when they are styled correctly. The secret to a high-end wedding aesthetic is the juxtaposition of contrasting elements: hard and soft, rugged and delicate, industrial and romantic. Here is how to style your budget-friendly masterpieces to look like a million bucks.
The Rule of Threes and Varying Heights
Never place a single candle holder alone in the center of a table. Group them in clusters of three or five. Use the different heights you created (e.g., a 4-inch, 6-inch, and 9-inch cylinder) to draw the eye upward. This creates a miniature skyline on your table, adding depth and dimension.
Tablescape Pairings & Textural Contrasts
| Design Element | Why It Works with Faux Concrete | Budget-Savvy Sourcing Tip |
|---|---|---|
| Soft Chiffon or Cheesecloth Runners | The flowing, sheer fabric softens the hard, brutalist edge of the concrete. | Buy bulk unbleached cheesecloth online and hand-dye it with tea or cheap rit dye for a custom romantic hue. |
| Brass or Gold Accents | Warm metallics elevate the gray stone, adding a necessary touch of luxury and warmth. | Thrift mismatched brass candlesticks to intersperse between your concrete pillars. |
| Delicate Greenery (Eucalyptus/Ferns) | Organic, sprawling vines bring life and movement to the static, heavy stone look. | Forage local greenery or buy bulk bunches from a local grocery store rather than a high-end florist. |
| Taper Candles vs. Pillar Candles | Tall, slender taper candles add elegant verticality, while wide pillars emphasize the rugged heft. | Buy dripless taper candles in bulk online. Ivory or taupe candles look richer against the gray than stark white. |
Pro-Tip for Frugal Brides and Event Stylists: If you are using hollow cylinder vases, you do not actually have to fill the entire vase with a massive, expensive pillar candle. You can tightly wedge a piece of floral foam or a block of scrap wood inside the vase, about an inch from the top. Place a cheap, flat tealight or a short votive candle on top of the block. From the outside, the opaque faux concrete hides the illusion, and it looks like a solid, heavy concrete pillar casting a beautiful, ambient glow upward!
By mastering this simple, resourceful craft, you have not only saved hundreds of dollars on your wedding budget, but you have also created durable, stunning home decor. Long after the last dance, these rugged, elegant concrete holders can be repurposed on your dining room table, gifted to your bridal party, or utilized as chic planters for succulents on your patio. That is the true essence of clever, frugal DIY—creating timeless beauty out of the mundane, with your own two hands.
Conclusion
Your Blueprint for Budget-Savvy Brilliance
Transforming inexpensive glass into high-end faux concrete is more than just a clever crafting hack; it is a testament to the power of resourceful creativity. As frugal DIYers, handy upcyclers, and budget-conscious wedding planners, we refuse to let exorbitant price tags dictate our aesthetic. By armed yourself with nothing more than baking soda, acrylic paint, and a little bit of elbow grease, you have learned how to engineer architectural elegance out of thin air.
Remember the golden rules of this project: embrace the imperfections, layer your colors for authentic depth, and always seal your work with a dead-flat matte finish. These rugged, masculine-yet-elegant candle holders will not only cast a warm, romantic glow over your wedding reception, but they will also stand as a proud symbol of your ingenuity. When your guests marvel at the heavy, industrial-chic tablescape, you can smile knowing that the entire setup cost less than a cup of coffee per table.
So go ahead, raid the Dollar Tree, scour the thrift store shelves, and start mixing your magic paste. The perfect, bespoke wedding decor is entirely within your reach, and it is waiting to be built by your own two hands. Happy crafting, and here is to a beautiful, budget-savvy celebration!

Makenzie is the founder and lead writer at MoneyHackTips.com — a personal finance blog dedicated to delivering street-smart financial wisdom for real people on real budgets. With 300+ published articles covering everything from debt management to investing fundamentals, Makenzie’s mission is to make every dollar work harder. When not writing about money hacks, Makenzie is testing frugal living strategies, optimizing side hustles, and helping readers build financial freedom from scratch.