The Ultimate Frugal Bride’s Secret to High-End Venue Drama
Let us set the scene: You walk into your wedding reception, and suspended above the dance floor or the sweetheart table is a lush, cascading canopy of wisteria blossoms. It looks like a scene pulled straight out of a royal botanical garden. The guests are gasping. The photographer is snapping wildly. And your bank account? It is breathing a massive sigh of relief. Welcome to the ultimate intersection of frugal DIY crafting and high-end event styling.
Hanging floral installations are the absolute pinnacle of modern wedding luxury. However, a fresh wisteria ceiling installation installed by a professional florist will easily command a price tag of $3,000 to $10,000, depending on the scale and the season. For the resourceful upcycler, the handy parent helping fund the wedding, or the budget-savvy couple, dropping five figures on flowers that will wilt in forty-eight hours is simply out of the question.
But what if we told you that with a few rolls of crepe paper, some heavy-duty fishing line, a roll of chicken wire from the hardware store, and a bit of tactical, rugged rigging, you could build an identical masterpiece for under $150? This is not your average elementary school paper craft. This is structural, architectural, and jaw-droppingly elegant. In this comprehensive masterclass, we are going to walk you through the precise, step-by-step process of engineering a massive crepe paper wisteria installation. We will cover everything from the delicate, crafty art of petal shaping to the practical, masculine-elegant mechanics of safely suspending a large-scale structure from a venue ceiling.
Roll up your sleeves, grab your heavy-duty scissors, and let us turn a pile of basic paper into a breathtaking overhead wonderland.
The Blueprint: Designing Your Wisteria Wonderland on a Dime
Conceptualizing the Scale and Visual Weight
Before you cut a single piece of crepe paper, you need to think like an architect and an event stylist combined. A successful hanging installation relies entirely on volume, density, and strategic placement. You are not just making flowers; you are building a floating ceiling. To achieve that high-end, jaw-dropping look without spending a fortune, you must master the art of visual trickery.
Determining Your Anchor Points
First, evaluate your venue. Where will this installation make the most impact? Frugal DIYers know that you do not need to cover the entire ceiling to make a statement. Focus your efforts on high-impact zones:
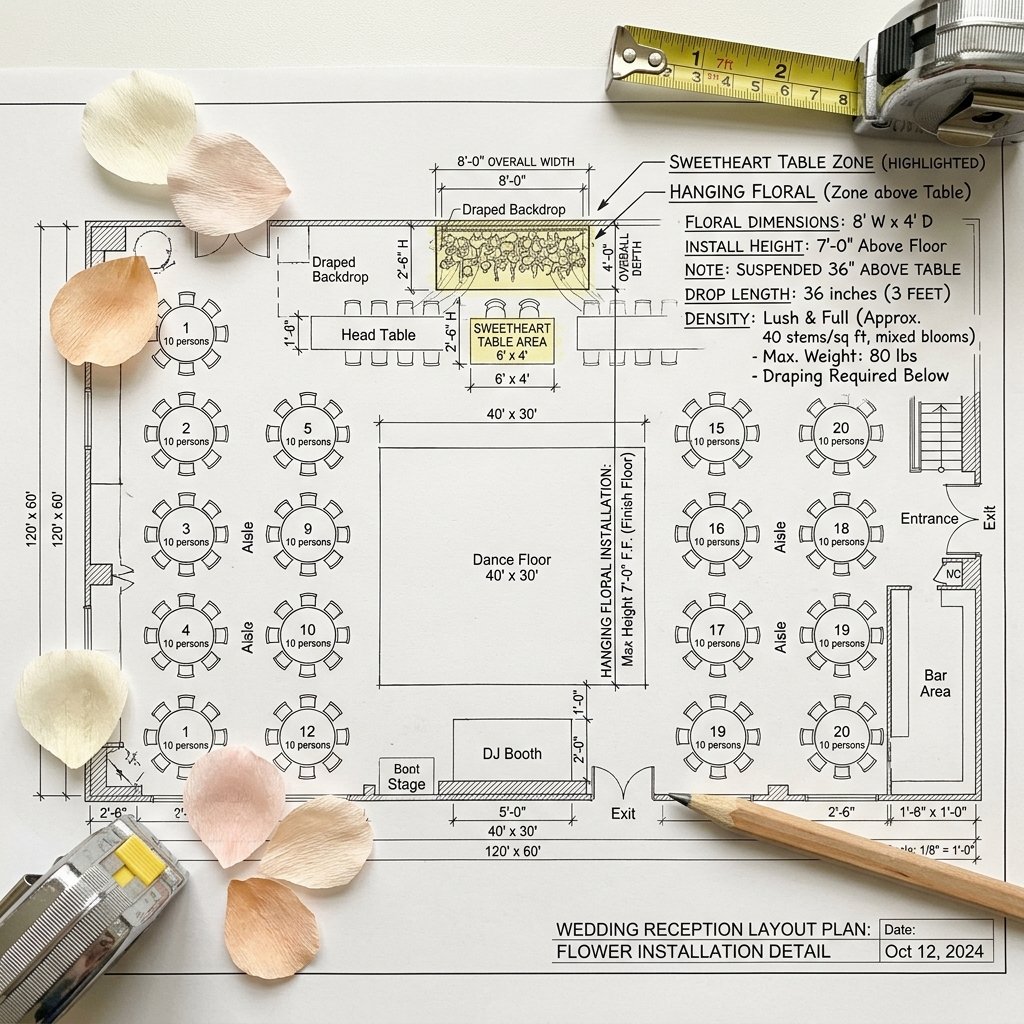
- Above the Sweetheart Table: A dense, 6-foot by 4-foot floating cloud of wisteria frames the couple perfectly for photos.
- Over the Dance Floor: A massive central chandelier-style installation commands the room.
- The Ceremony Arch: Repurposing the hanging structure to drape over a wooden pergola or archway.
Once you choose the location, determine the drop length. Wisteria is famous for its long, dramatic racemes (the cascading flower clusters). For a standard 10-foot ceiling, your longest blooms should drop no more than 36 to 40 inches to ensure they do not interfere with guests’ sightlines or tall centerpieces.
The Density Formula
The secret to masking the fact that these are paper flowers is overwhelming density. A sparse installation looks like a cheap craft project; a dense installation looks like a luxury florist’s masterpiece. You will need approximately 15 to 20 wisteria stems per square foot of your structural base. Do not panic—later in this guide, we will show you a mass-production cutting technique that makes assembling these stems incredibly fast.
“In budget event styling, volume is your greatest camouflage. When you mass-produce a single, simple element, the collective impact always looks expensive.”
Gathering Your Arsenal: Materials, Tools, and the Ultimate Cost Breakdown
Equipping Your Crafting Workshop
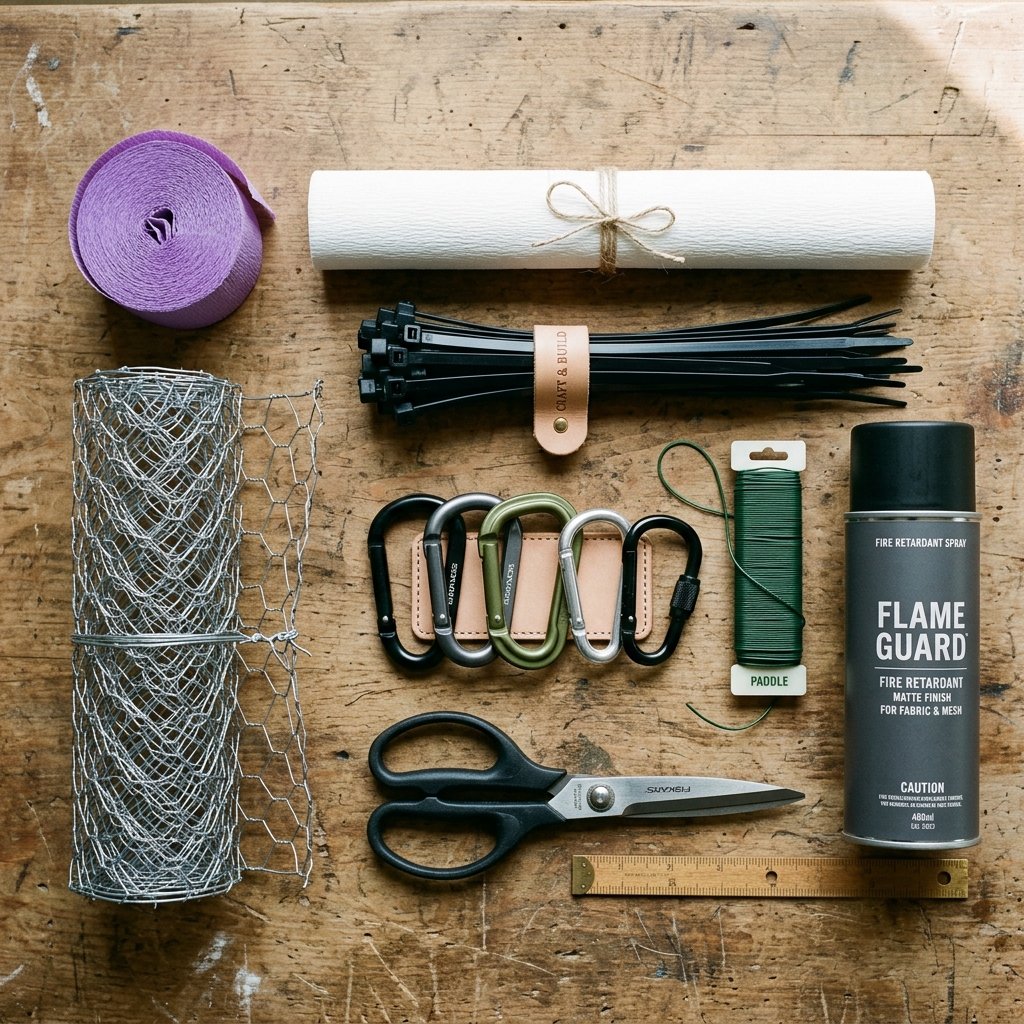
To pull off this large-scale build, you need to source materials smartly. We are combining delicate crafting supplies with rugged hardware store staples. The beauty of this project is that the bulk of your budget goes toward cheap, readily available items.
The Great Crepe Paper Debate: Italian vs. Dollar Store
For the absolute best results, we recommend using a mix. 180-gram Italian crepe paper has incredible stretch, holds its shape perfectly, and looks incredibly realistic. However, it is pricier. To balance the budget, use high-end crepe paper for the blooms that hang lowest (closest to eye level) and standard, inexpensive party streamers or generic craft crepe paper for the higher, denser filler layers.
Cost Comparison and Materials Budget
Let us look at the raw numbers. Here is how your resourceful DIY approach stacks up against a traditional florist, followed by your exact shopping list.
| Installation Type (6ft x 4ft Canopy) | Estimated Professional Cost | Zero-Budget DIY Approach |
|---|---|---|
| Fresh Floral Wisteria Installation | $3,500 – $5,000 (Includes rigging & labor) | Not Applicable |
| High-End Faux Silk Florals (Rented) | $800 – $1,500 | Not Applicable |
| DIY Crepe Paper & Hardware Rigging | Not Applicable | $85 – $130 (Total Materials) |
| Material / Tool | Purpose in the Build | Estimated Cost |
|---|---|---|
| Italian Crepe Paper (4 Rolls) & Party Streamers (10 Rolls) | The primary material for petals and blooms (Mix of white, lilac, and deep purple). | $45.00 |
| 20-Gauge Floral Wire & Heavy-Duty Fishing Line | Stems for the blooms and invisible suspension for the structure. | $12.00 |
| Chicken Wire (1-inch hex, 2ft x 10ft roll) | The rugged, flexible architectural base that holds everything together. | $15.00 |
| Green Floral Tape & Hot Glue Sticks | Binding the petals to the wire and securing the structure. | $10.00 |
| Heavy-Duty Zip Ties & Carabiners | Crucial for safely rigging the chicken wire to venue beams or drop-ceiling hooks. | $15.00 |
| Fire Retardant Spray (Paper/Fabric safe) | MANDATORY for venue compliance and safety. | $20.00 |
Safety & Compliance Disclaimer: Always check with your wedding venue regarding their rules for hanging installations. Because crepe paper is highly flammable, most venues require you to treat the finished installation with a certified, clear fire-retardant spray. Do not skip this step! It is a cheap insurance policy for a safe, spectacular night.
The Assembly Line: Mass-Producing Crepe Paper Wisteria Blooms
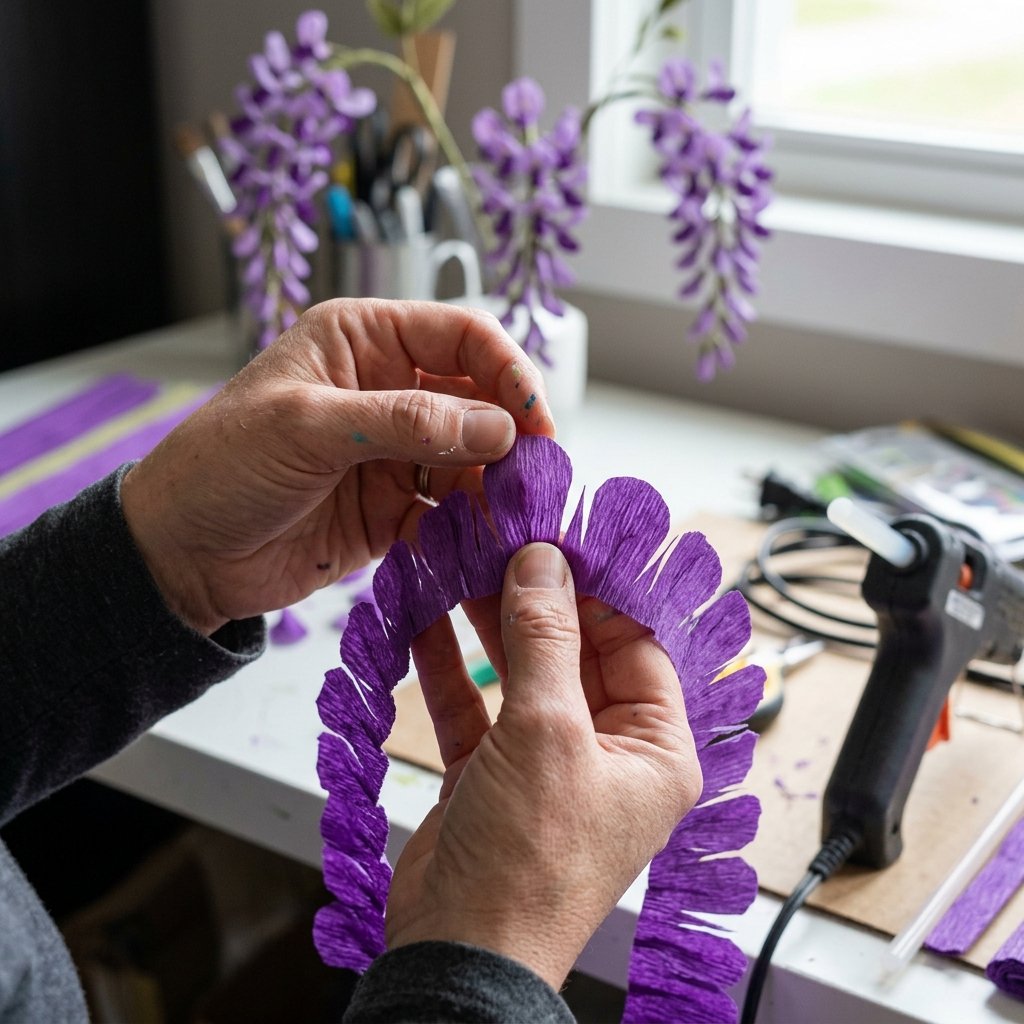
Mastering the Fold, Cut, and Twist Technique
You are going to need hundreds of wisteria stems. If you try to make these one by one, you will burn out before the wedding invitations are even mailed. You need to establish an efficient, frugal assembly line. Grab your partner, your bridal party, or a couple of handy friends, put on a movie, and start mass-producing.
Step 1: Preparing the Stems and Petal Strips
Wisteria blooms are essentially a series of small, folded petals cascading down a central wire, getting smaller toward the bottom. Cut your 20-gauge floral wire into varying lengths: 12-inch, 24-inch, and 36-inch pieces. This variety creates a natural, organic look.
Next, take your rolls of crepe paper. Do not unroll them! While the roll is still intact, use sharp, heavy-duty scissors to slice the roll into sections. You want sections that are 1 inch wide, 1.5 inches wide, and 2 inches wide. Unrolling these will give you massive, continuous strips of paper ready for the folding technique.
Step 2: The Accordion Fold and Scallop Cut
This is where the magic happens. To cut multiple petals at once:
- Take a long strip of your cut crepe paper and accordion-fold it back and forth until you have a stack of about 10 to 15 layers.
- Hold the base of the stack firmly. Using your scissors, cut the top of the folded stack into a rounded, teardrop shape, leaving the bottom edge intact.
- Unfold the strip. You will now have a long, continuous chain of scalloped petals.
- Gently stretch the center of each rounded petal with your thumbs. Because crepe paper has grain and stretch, this “cupping” motion gives the petal a realistic, 3D, bell-like shape.
Step 3: Assembling the Cascading Stem
Now, you will build the wisteria raceme from the bottom (the tip) to the top (the base).
- Take a piece of your pre-cut floral wire. Start with the smallest (1-inch wide) scalloped petal chain.
- Pinch the end of the paper strip to the tip of the wire. Apply a tiny dot of hot glue to secure it.
- Begin twisting the wire with one hand while guiding the paper strip with the other, spiraling the paper downward along the wire. The petals should overlap and cluster tightly.
- After covering about a third of the wire, switch to the medium (1.5-inch) petal strip. Continue spiraling.
- Finish the top third of the wire with the largest (2-inch) petals. Secure the final edge with floral tape, leaving about 3 to 4 inches of bare wire at the top. You will need this bare wire to attach the stem to your chicken wire base.
“The Crafty Assembly Mantra: Fold in bulk, cut in bulk, twist in bulk. Efficiency is the frugal crafter’s best friend. Do not strive for perfection on every petal; nature is imperfect, and volume hides all flaws.”
Building the Architecture: Chicken Wire, Tension Rigging, and Structural Integrity
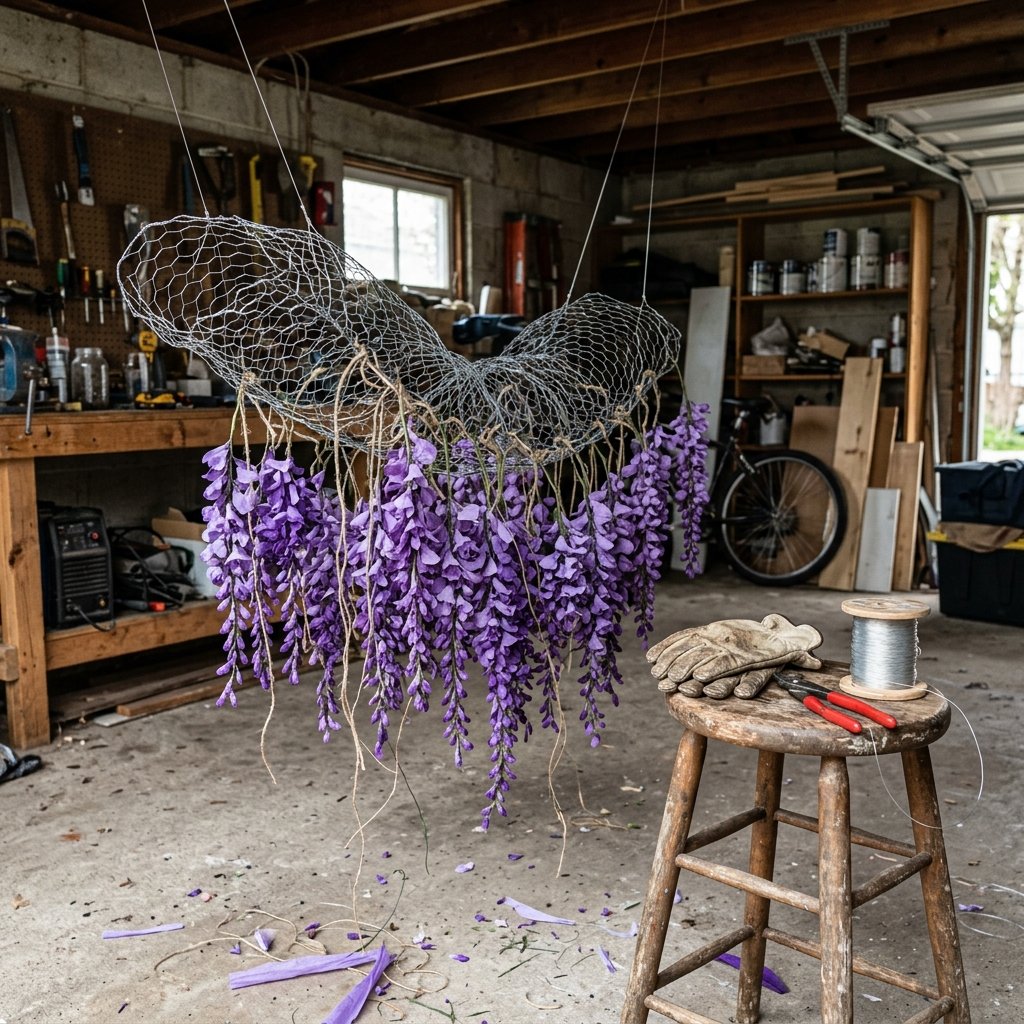
Engineering the Floating Canopy
Now we pivot from delicate paper crafting to rugged, practical engineering. The success of your hanging installation relies entirely on the structural integrity of its base. Chicken wire is the ultimate frugal upcycler’s secret weapon. It is lightweight, incredibly strong, cheap, and completely moldable.
Creating the Base Structure
Unroll your chicken wire outdoors or in a garage. For a standard sweetheart table installation, cut a piece that is 6 feet long by 4 feet wide. Wear heavy leather work gloves—the cut edges of chicken wire are sharp and unforgiving.
You do not want a flat, rigid rectangle; a natural floral canopy has dips, curves, and organic movement. Gently bend and mold the chicken wire to create a slightly domed or wavy shape. If you want the installation to look like it is growing out of a central point, mold the wire into a loose, inverted canoe shape.
Attaching the Blooms
Take the bare wire ends of your finished crepe paper wisteria stems and begin threading them through the hexagonal holes of the chicken wire. Twist the wire back onto itself to secure it tightly.
- The Density Strategy: Start in the center with your longest blooms (the 36-inch stems). As you work your way to the outer edges of the chicken wire, use the shorter (12-inch and 24-inch) stems. This creates a natural, tapered chandelier effect.
- Color Blending: Mix your colors organically. Cluster deep purples near the top and fade into lilacs and whites near the tips for a stunning ombre effect.
- Top Coverage: Once all the hanging stems are attached, take crumpled pieces of green tissue paper, leftover green crepe paper, or cheap faux ivy vines from the dollar store, and weave them through the top side of the chicken wire. This hides the mechanical mechanics (the wire twists) from anyone who might catch a glimpse from a balcony or staircase.
Rigging for Venue Suspension
How you hang this beast depends entirely on your venue.
- Exposed Wooden Beams: This is the easiest scenario. Loop heavy-duty, clear fishing line (look for an 80lb to 100lb test weight in the sporting goods section) through the chicken wire at four to six evenly spaced load-bearing points. Tie these lines to heavy-duty carabiners. You can then throw a thicker rigging rope over the venue beams, clip the carabiners, and hoist it up.
- Drop Ceilings: If your venue has a standard acoustic drop ceiling, you can purchase specialized “drop ceiling hooks” or “T-bar clips” online for a few dollars. These clip directly onto the metal grid holding the ceiling tiles. Use multiple hooks to distribute the weight evenly, then attach your fishing line and carabiners.
- Tent Installations: Consult with your tent rental company. Most structural tent poles can support the minimal weight of a paper and chicken wire installation, easily attached with heavy-duty zip ties.
Crucial Rigging Tip: Never rely on a single anchor point. Always use a minimum of four suspension points to prevent the installation from spinning, swaying dangerously, or collapsing.
Transport, Venue Installation, and the Magic of Uplighting
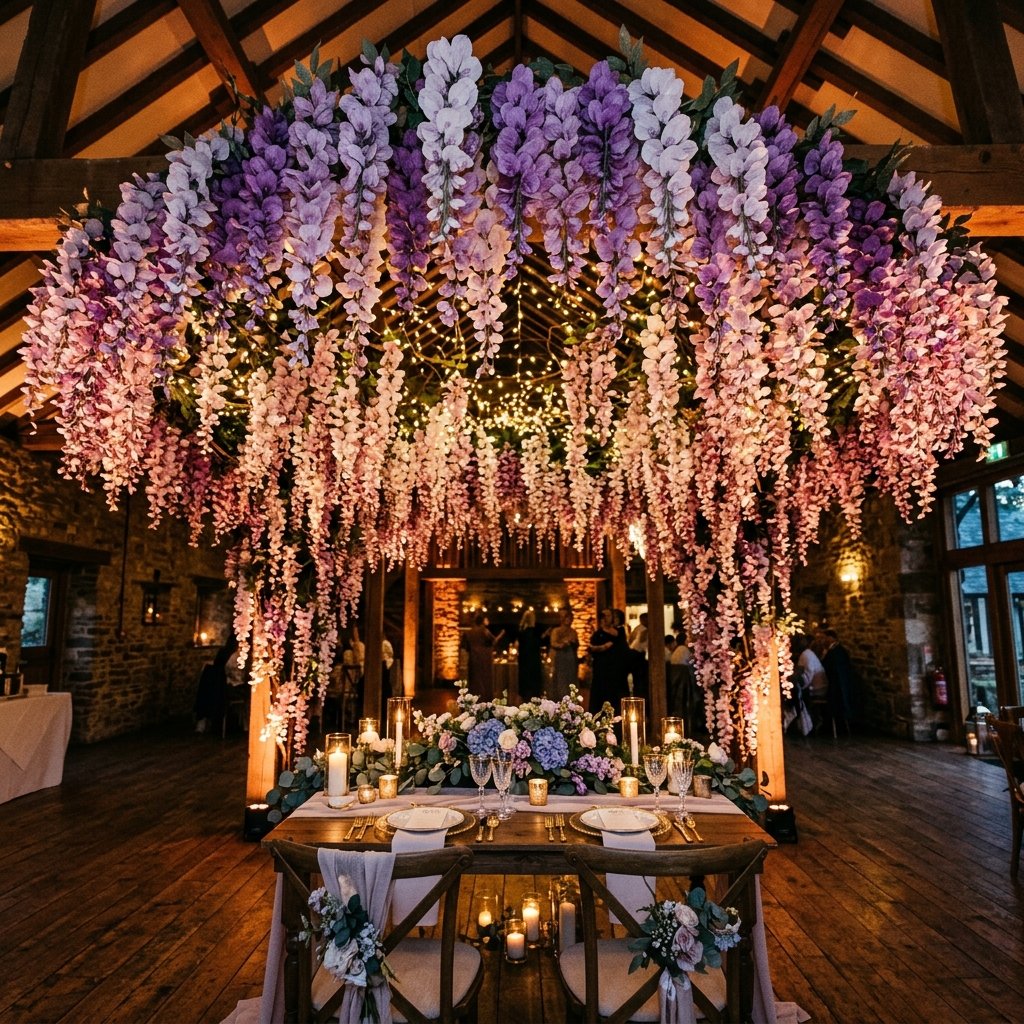
Executing the Final Setup Like a Pro
You have spent weeks crafting blooms and engineering your wire frame. Now comes the most nerve-wracking part for any budget bride or DIYer: getting it to the venue without destroying it, and making it look like a $5,000 masterpiece.
The Garbage Bag Transport Hack
Crepe paper is notoriously prone to crushing, and a 6-foot chicken wire structure is awkward to carry. Here is the ultimate frugal transport hack: The Hanging Garment Method. Do not lay the installation flat in the back of a truck; the weight of the structure will crush the paper blooms underneath.
Instead, keep the installation suspended if possible (hanging it from a rod in a van or box truck). If it must be laid down, place it upside down so the blooms fall naturally into the hollow cavity of the domed chicken wire. To protect the paper from moisture and dirt, slide clean, oversized, clear plastic contractor bags or mattress bags over the entire structure. Gently tie the bags closed.
Fluffing and Troubleshooting on Site
Once you arrive at the venue and hoist the installation into the air using your pre-planned rigging method, it is time for “fluffing.”
- Gravity is your friend: Let the installation hang untouched for at least an hour. The crepe paper will naturally relax, un-clump, and drop into place.
- Spot Fixes: Use a broom handle or a long dowel rod to gently separate any stems that have tangled during transport.
- The Bald Spot Fix: Always bring a “First Aid Craft Kit” to the venue containing extra pre-made stems, hot glue, and zip ties. If you hoist the canopy and notice a gap or a bald spot, simply hook an extra stem into the wire using a ladder.
The Final Polish: Fairy Lights and Uplighting
If you want to take your installation from “great DIY” to “jaw-dropping luxury,” lighting is the secret ingredient. Crepe paper is translucent, meaning it catches and diffuses light beautifully.
- Internal Glow: Before hoisting the installation all the way up, weave two or three strands of battery-operated, warm-white copper fairy lights through the chicken wire base. Let a few of the light strands dangle down among the wisteria blooms. This creates a magical, starry-night effect within the canopy itself.
- Venue Uplighting: Ask your DJ or venue if they provide floor uplighting. Place two LED uplights on the floor, aimed directly up at the hanging installation. Set the lights to a soft amber or a pale lavender. The uplighting will cast dramatic shadows, highlight the 3D texture of the crepe paper folds, and completely mask any imperfections in your crafting.
By combining cheap materials, smart mass-production, rugged hardware rigging, and clever event lighting, you have just saved thousands of dollars. More importantly, you have created a bespoke, breathtaking architectural piece that your guests will talk about for years to come.
Conclusion
Stand Back and Admire Your Frugal Masterpiece
Creating a jaw-dropping hanging wisteria installation is not just about saving money—though keeping $4,000 in your pocket is a spectacular victory. It is about the immense satisfaction of looking up at your wedding reception, surrounded by your loved ones, and knowing that you built that breathtaking canopy with your own two hands. You took basic rolls of crepe paper, a sheet of hardware store chicken wire, and a few clever rigging tricks, and you engineered a high-end luxury experience.
Whether you are a budget bride meticulously planning every detail, a handy dad looking to give his daughter the wedding of her dreams without breaking the bank, or a crafty upcycler who loves a massive challenge, this project proves that elegance does not require an exorbitant price tag. It just requires a little resourcefulness, a solid plan, and the willingness to roll up your sleeves.
So, gather your assembly line, perfect that accordion fold, and get ready to completely transform your venue. Your dream wedding aesthetic is well within reach, and it is going to look absolutely spectacular.

Makenzie is the founder and lead writer at MoneyHackTips.com — a personal finance blog dedicated to delivering street-smart financial wisdom for real people on real budgets. With 300+ published articles covering everything from debt management to investing fundamentals, Makenzie’s mission is to make every dollar work harder. When not writing about money hacks, Makenzie is testing frugal living strategies, optimizing side hustles, and helping readers build financial freedom from scratch.