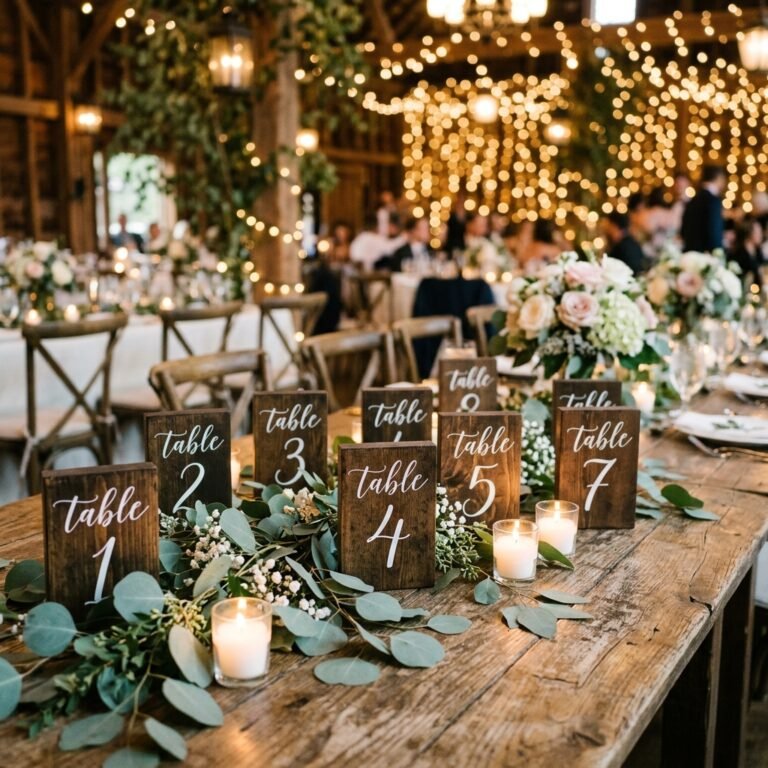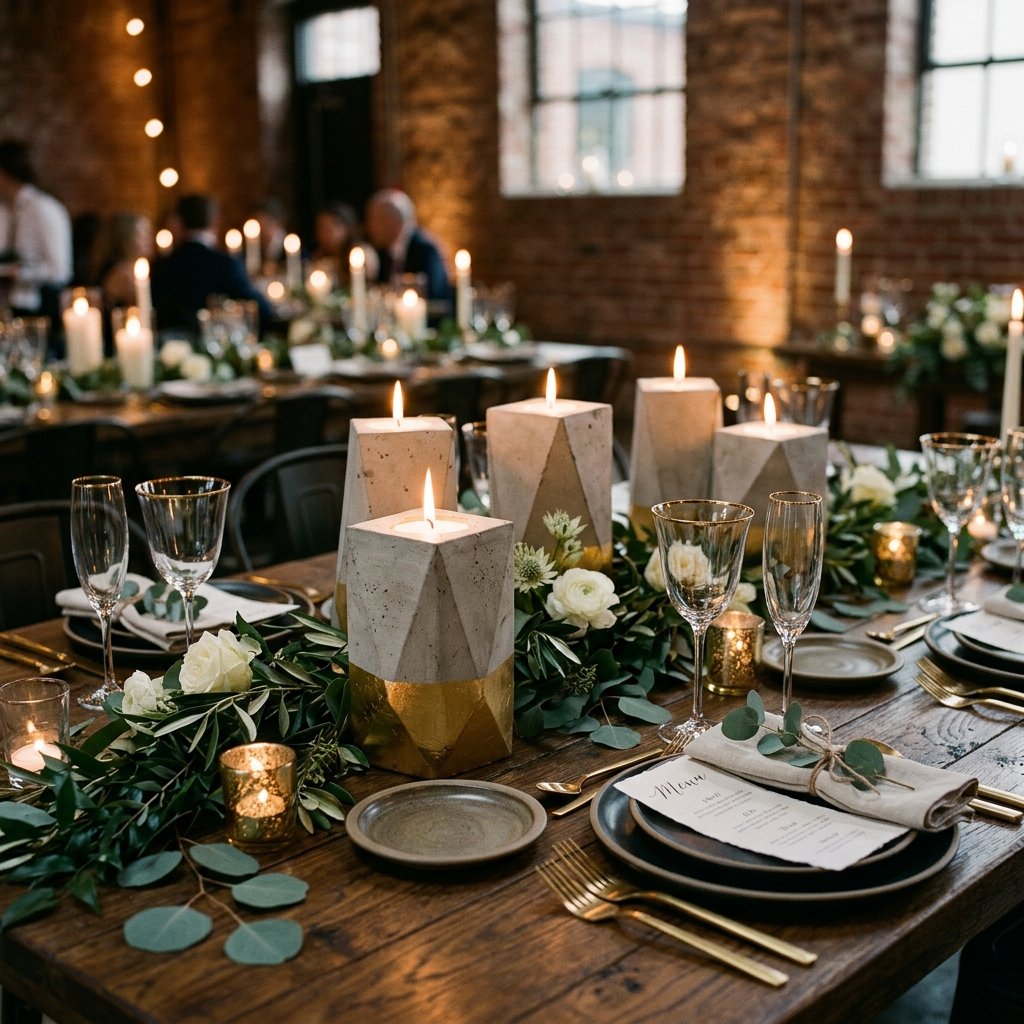

Let us talk about the elephant in the room when it comes to event planning and home decor: the staggering markup on anything labeled “industrial chic” or “modern minimalist.” If you have strolled through a high-end home goods store or flipped through a bridal magazine recently, you have undoubtedly seen them—those hefty, handsome, raw concrete centerpieces with a flawless, contrasting dip of metallic gold. They look incredibly expensive, heavy, and sophisticated. Retailers will happily charge you anywhere from $40 to $120 per piece for these beauties. But as resourceful, budget-savvy creators, we know a secret: those luxurious centerpieces are essentially just dressed-up dirt and water.
Welcome to the ultimate trash-to-treasure masterclass. Today, we are going to roll up our sleeves, tap into our rugged, crafty expertise, and learn how to make high-end gold-dipped cement centerpieces for literal pennies. Whether you are a budget bride looking to create eighty jaw-dropping table arrangements for under $50, a handy parent wanting to upgrade your patio decor, or a creative gift-giver crafting a masculine, elegant desk accessory for Father’s Day, this project is your golden ticket.
“The most breathtaking decor does not come from a limitless budget; it comes from limitless creativity and the willingness to get your hands a little dusty.”
By combining the raw, masculine texture of hardware-store cement with the glamorous, refined finish of metallic gold, we are creating a juxtaposition that screams luxury. The best part? The molds you need are currently sitting in your recycling bin. Grab your work gloves, clear off a sturdy workspace, and let us turn a heavy bag of gray powder into pure gold.
The Blueprint: Gathering Your Rugged Materials for Less
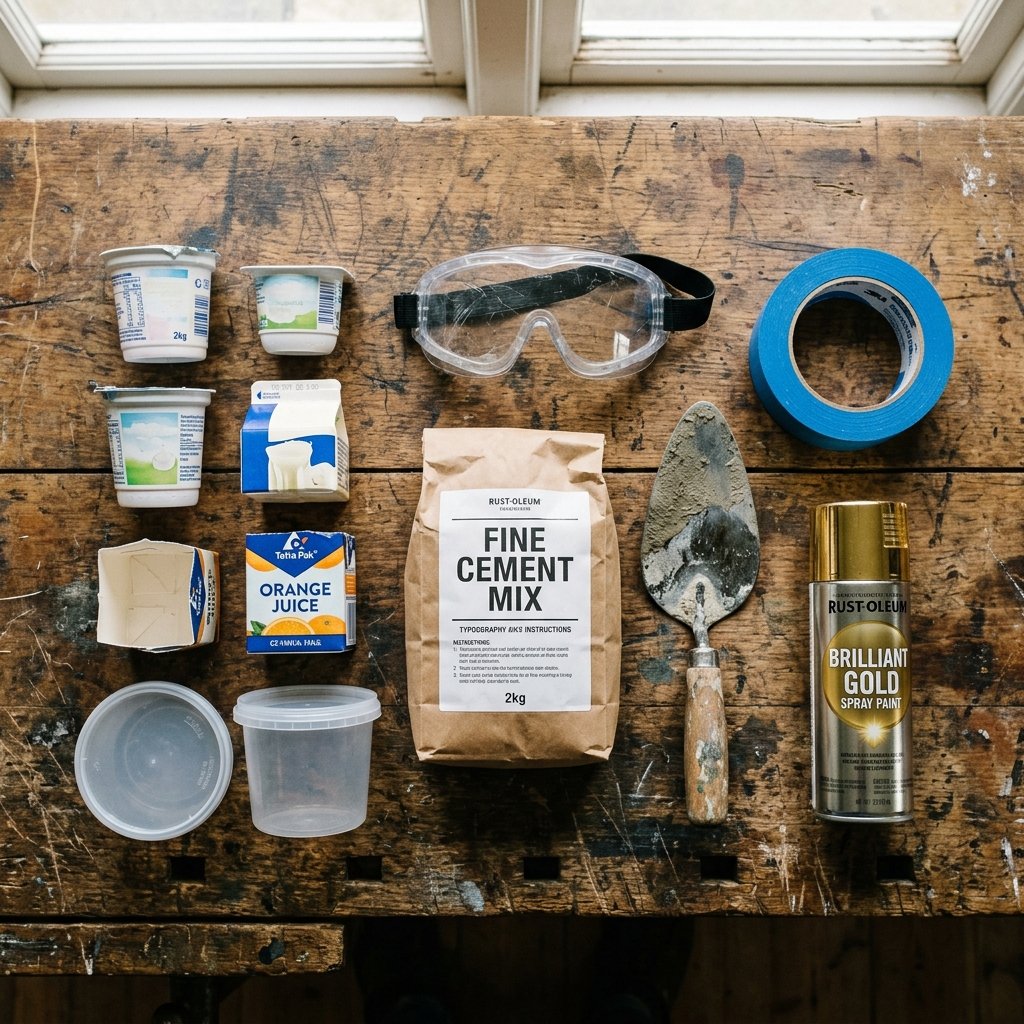
Before we start pouring, we need to gather our supplies. The beauty of this project lies in its incredibly low overhead. The star of the show is the cement itself. You want to look for a “shapeable” concrete mix or a fast-setting cement mix that does not contain large gravel. A standard 10-pound box of anchoring cement or a 50-pound bag of Portland cement mixed with fine sand will cost you less than a fancy cup of coffee and will yield dozens of centerpieces.
The Master Supply List
- Fine Cement Mix: Anchoring cement, Maker’s concrete, or standard Portland cement (sifted to remove large rocks).
- Water: Plain tap water.
- Mixing Supplies: A dedicated plastic bucket and a sturdy trowel or heavy-duty paint stirrer. (Do not use your good kitchen bowls!)
- Release Agent: Inexpensive non-stick cooking spray or a dab of petroleum jelly.
- Painter’s Tape: High-quality, sharp-edge painter’s tape for clean lines.
- Gold Finish: Metallic gold spray paint, or for a truly opulent look, gold leaf sheets and sizing adhesive.
- Sandpaper: Medium (120-grit) and fine (220-grit) sandpaper for polishing the edges.
- Safety Gear: A dust mask and nitrile gloves. Concrete dust is not your friend.
Let us break down the true cost of this project compared to buying retail. Prepare to be amazed by the savings.
| Material / Item | Store-Bought Retail Cost (Set of 5) | Our DIY Cost (Set of 5) |
|---|---|---|
| Raw Materials (Cement/Water) | N/A | $2.50 |
| Molds (Recycled) | N/A | $0.00 (Trash to Treasure!) |
| Gold Paint & Tape | N/A | $4.00 (Prorated per use) |
| Finished Centerpiece Set | $250.00 – $400.00 | $6.50 |
Safety First: Always wear a well-fitting dust mask and protective gloves when working with dry cement powder. The silica dust can be harmful if inhaled, and wet cement can severely dry out and irritate your skin. Work in a well-ventilated area, preferably outdoors or in an open garage.
Scavenging the Recycling Bin: Choosing the Perfect Molds
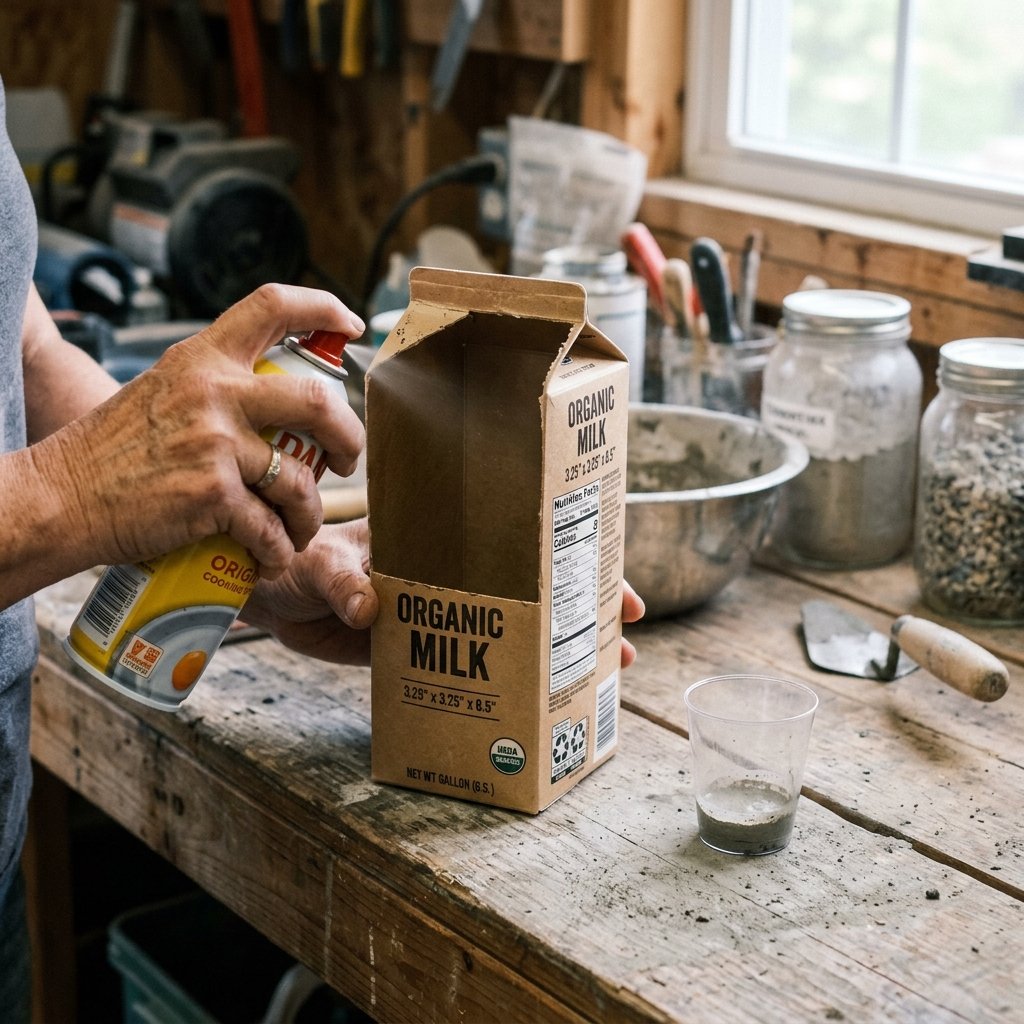
The secret to achieving that high-end, architectural look without spending a dime on silicone molds lies right in your kitchen recycling bin. Concrete will take the exact shape and texture of whatever you pour it into. If you pour it into a glossy, smooth plastic container, your cured concrete will have a glossy, smooth finish. If you pour it into a cardboard milk carton, it will adopt a slightly matte, industrial texture.
Top Trash-to-Treasure Mold Ideas:
- The Minimalist Cylinder: Empty Pringles cans, tall yogurt containers, or plastic water bottles with the tops cut off. These create sleek, modern pillars perfect for taper candles.
- The Brutalist Square: Empty juice or milk cartons. The sharp, folded corners of a cardboard carton create an incredibly handsome, geometric block.
- The Geometric Hexagon: Small, oddly shaped plastic packaging from electronics or cosmetics.
- The Inner Void: To make these functional centerpieces (to hold a candle, a succulent, or test-tube vases), you need a smaller container to press into the wet cement. Shot glasses, plastic Easter eggs, or tealight cups work perfectly.
Pro-Tip for Mold Prep: Once you have selected your outer mold and your inner void maker, you must lubricate them. Spray the inside of your main mold and the outside of your inner void container with a light, even coat of non-stick cooking spray. Use a paper towel to wipe away any excess pools of oil; you just want a micro-thin layer so the cement releases effortlessly later.
Mixing the Mud: The Art of the Perfect Cement Pour
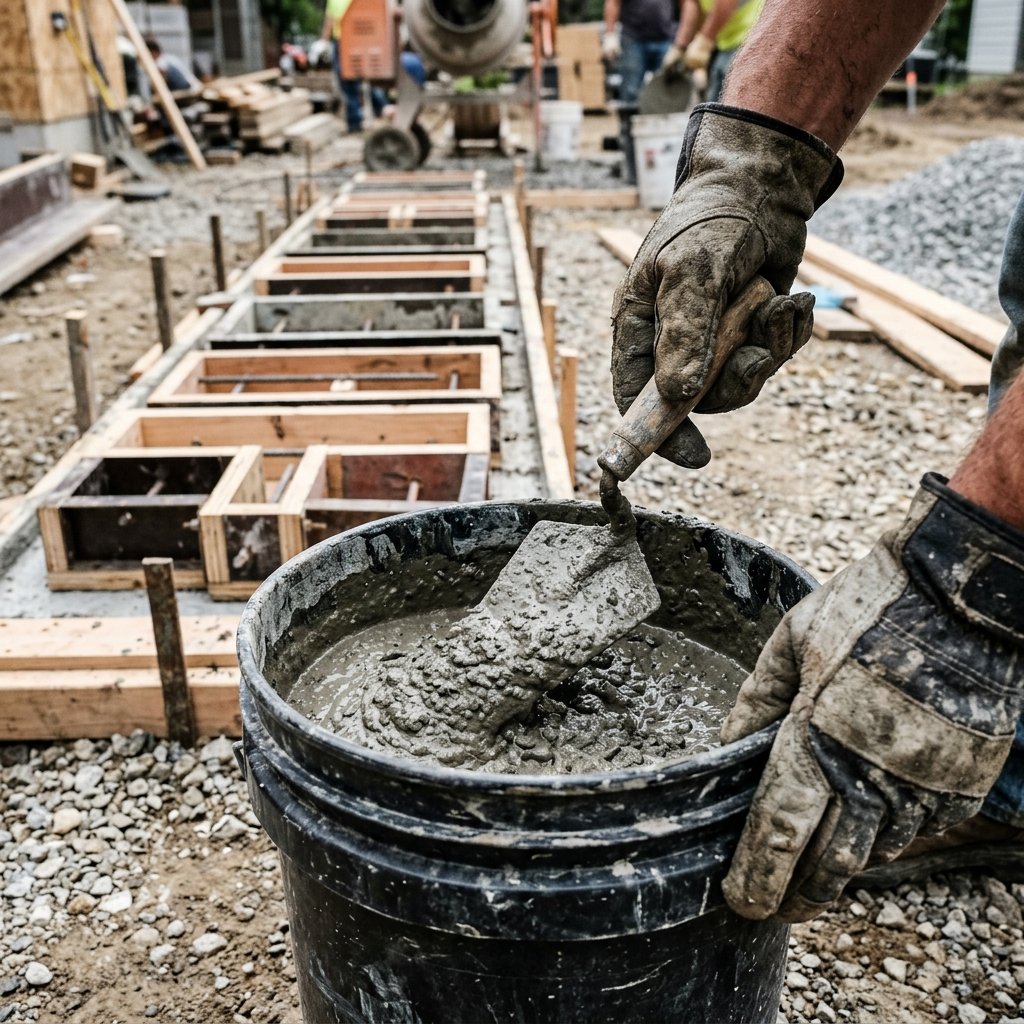
Now comes the rugged, satisfying part—mixing the mud. If you have ever baked a cake or made pancakes from scratch, you already possess the skills needed to mix concrete. The goal is to achieve a consistency that is thick enough to hold its composition, but fluid enough to pour and settle into the corners of your mold.
The Step-by-Step Pouring Guide:
- The Dry Pour: Wearing your mask and gloves, scoop your dry cement powder into your mixing bucket. Start with less than you think you need; it expands slightly when hydrated, and you can always mix more.
- The Hydration: Slowly add water, a little bit at a time, mixing continuously with your trowel. Scrape the bottom and sides of the bucket to ensure no dry pockets of powder remain hiding.
- The Consistency Check: You are aiming for a texture resembling thick pancake batter or creamy peanut butter. If it is too watery, the cement will be weak and crumbly. If it is too dry, it will not fill the mold properly and will leave massive, ugly air pockets.
- The Pour: Carefully spoon or pour the wet mixture into your prepared, oiled molds. Fill them to your desired height, keeping in mind that inserting the inner void will cause the concrete level to rise.
- The Vibration Technique: This is the most crucial step for a high-end finish! Tap the outside of your mold vigorously against your workbench for 2 to 3 minutes. You will see tiny air bubbles rise to the surface and pop. This vibration settles the concrete and ensures a smooth, stone-like exterior.
- Setting the Void: Press your oiled inner container (the shot glass or tealight cup) into the center of the wet concrete. To keep it from floating back up (concrete is dense!), weigh it down by filling the inner cup with a handful of pennies, small rocks, or sand.
Patience and Polish: Curing, Demolding, and Sanding
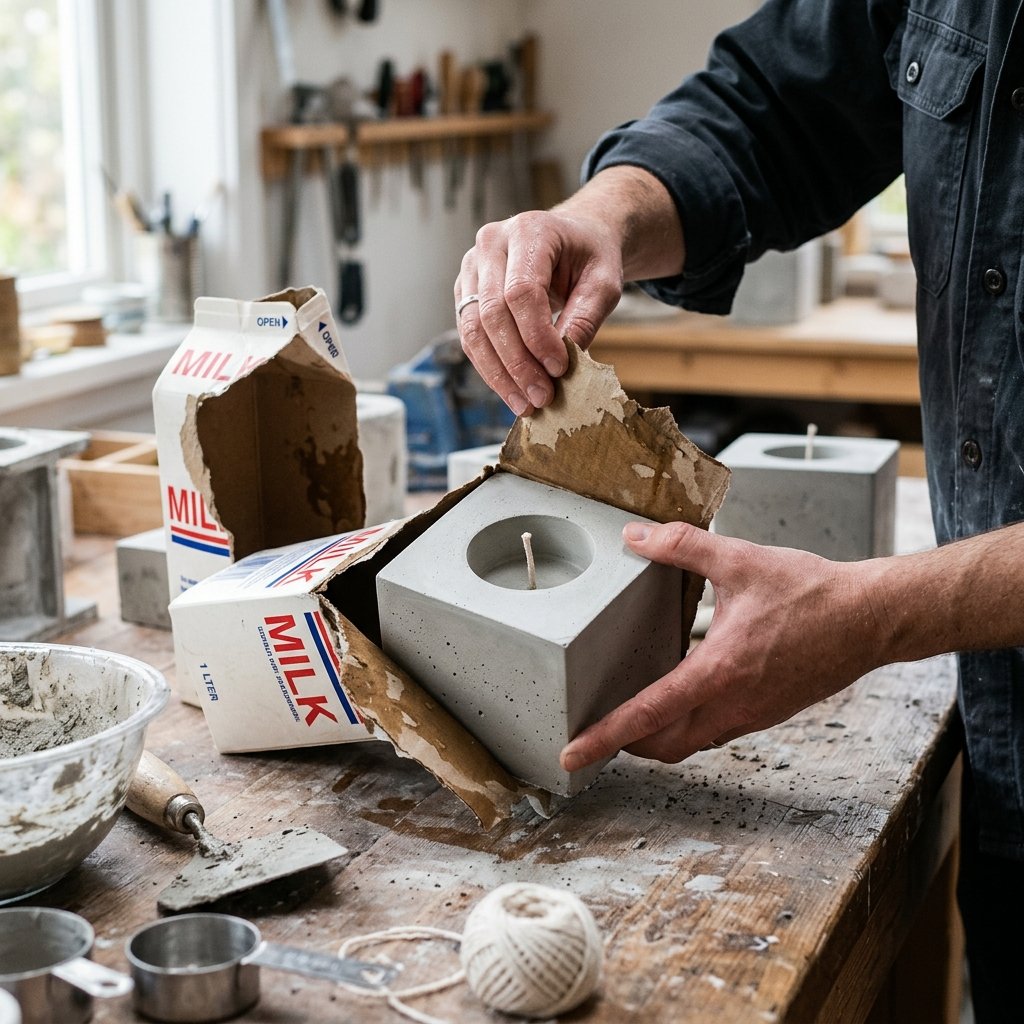
Once your molds are filled and vibrated, the hardest part begins: waiting. Concrete does not “dry” like paint; it cures through a chemical reaction called hydration. Rushing this process is the number one reason DIY cement crafts crack or crumble.
The Curing Timeline
Set your filled molds in a safe, dry place away from direct sunlight or extreme temperature shifts. Allow them to cure undisturbed for a minimum of 24 to 48 hours. The concrete will change from a dark, wet gray to a lighter, chalky, handsome gray as it hardens.
The Demolding Process
After 48 hours, it is time for the reveal. Remove the weights from your inner void container and gently twist it out. If you used adequate cooking spray, it should pop right out. Next, tackle the outer mold.
- Cardboard Molds: Simply tear the cardboard away. It will peel off like a satisfying wrapper, revealing the raw, industrial block beneath.
- Plastic Molds: Gently squeeze and massage the sides of the plastic container to break the suction. Turn it upside down and tap the bottom. If it is stubborn, carefully use a utility knife to slice down the side of the plastic to free your centerpiece.
Sanding for a Retail Finish
Right out of the mold, your centerpiece will have a beautifully raw texture, but the top edges might be sharp or uneven. Take a piece of medium 120-grit sandpaper and gently sand the top rim and any harsh corners. Follow up with a fine 220-grit sandpaper to polish the concrete until it feels smooth to the touch. Wipe away the dust with a slightly damp cloth. You now have a flawless, architectural concrete vessel!
The Midas Touch: Executing the Flawless Gold Dip
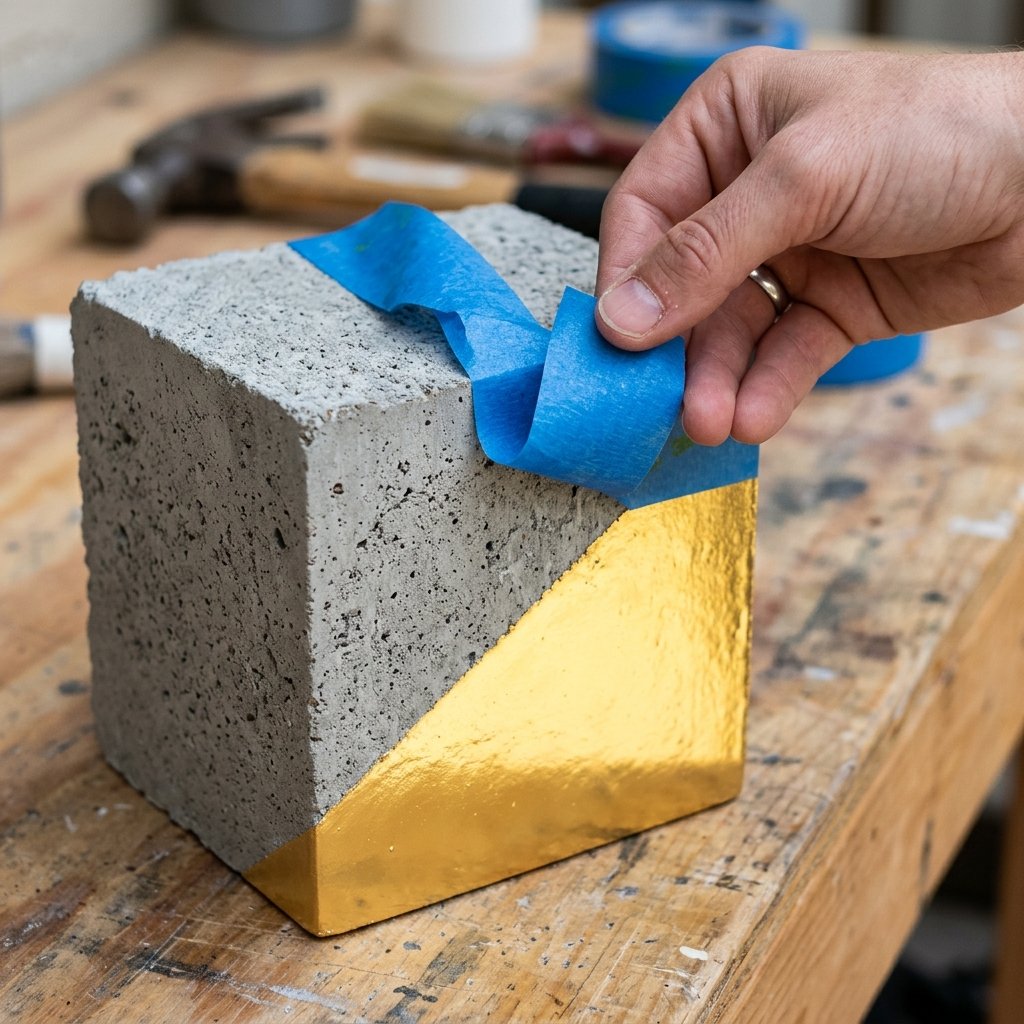
Now we elevate our rugged concrete from a simple construction material to a high-end, luxurious decor piece. The “dipped” look creates a striking, modern contrast between the matte, porous gray stone and the highly reflective, glamorous gold.
Creating the Perfect Line
The secret to a professional dip is sharp, crisp lines. This is where your high-quality painter’s tape comes into play. Decide on your angle. You can tape off a straight horizontal line across the bottom third of the centerpiece, or for a more dynamic, modern look, tape it off at a sharp diagonal angle.
Crafty Expert Tip: To prevent the gold paint from bleeding under the tape into the porous concrete, apply your tape firmly, and then run your thumbnail along the edge of the tape to burnish it down into the tiny crevices of the cement.
Applying the Gold
You have two fantastic options for the gold finish, depending on your budget and desired level of elegance:
- Option 1: Metallic Spray Paint (Fast & Budget-Savvy). Take your taped concrete blocks outside. Place them upside down on scrap cardboard. Apply 2 to 3 light, even coats of a premium metallic gold spray paint. Hold the can about 10 inches away to avoid drips. Let it dry for 15 minutes between coats.
- Option 2: Gold Leaf (Ultra-Luxurious & Textural). For a truly opulent, artisanal look, brush a thin layer of metal leaf sizing (adhesive) onto the exposed concrete. Wait 10 minutes until it becomes sticky. Gently lay sheets of imitation gold leaf over the adhesive, using a soft, dry brush to smooth it down and brush away the excess flakes. This creates an incredible, slightly distressed, high-end metallic texture.
The Pull: The most satisfying moment of this entire project is removing the tape. Do not wait for the paint to fully cure. Carefully peel the painter’s tape away while the paint is still slightly tacky (usually after 20 minutes). Pull the tape back on itself at a 45-degree angle to reveal a razor-sharp line separating the rugged concrete from the brilliant gold.
Styling Your Concrete Masterpieces on a Dime
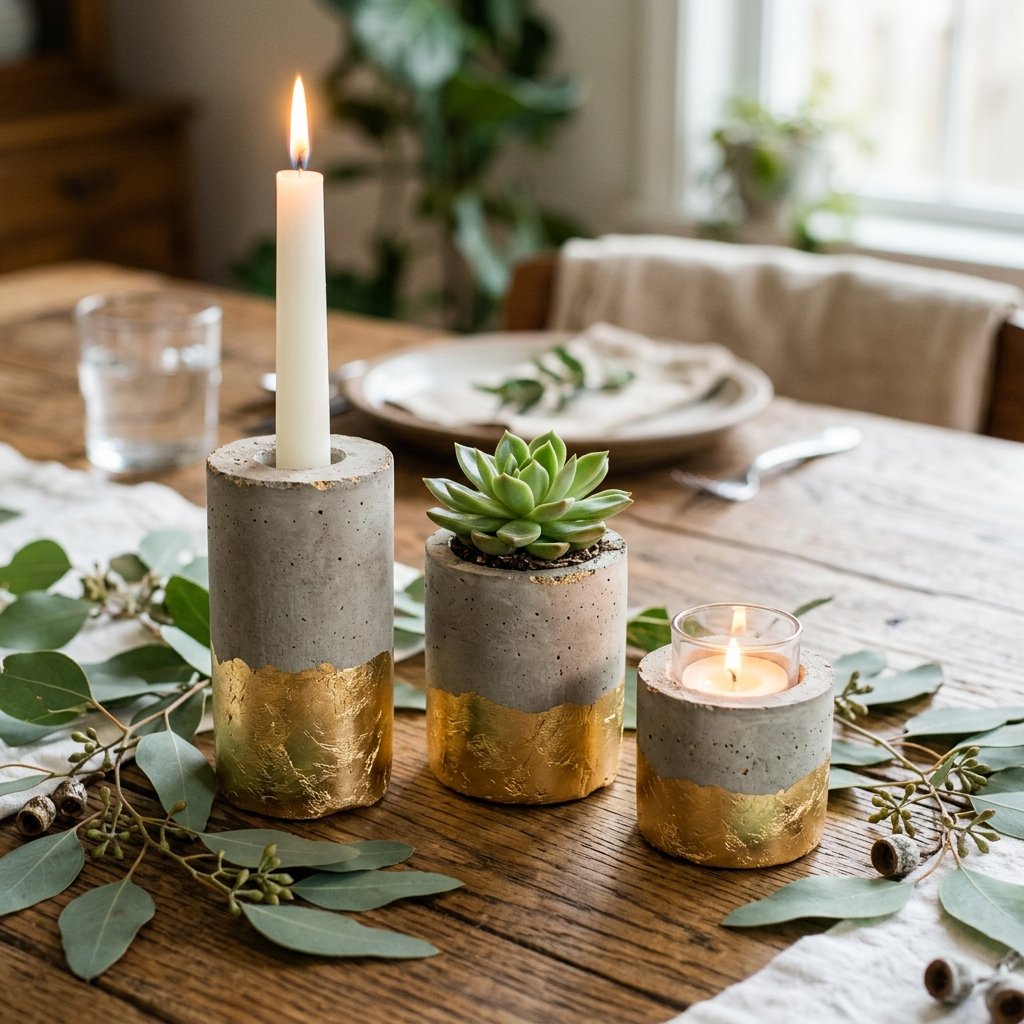
Congratulations! You have just manufactured a set of premium, heavy-weight centerpieces that look like they belong in a high-end boutique catalog, all for the cost of pocket change. Now, it is time to style them. Because of their versatile, masculine-elegant vibe, these pieces can transition seamlessly from a rustic-glam wedding reception to a sophisticated home office.
Budget Wedding Tablescapes
If you are a budget bride or event stylist, cluster three of these geometric blocks of varying heights in the center of your table. Place a simple, inexpensive white tealight or a tall, dramatic black taper candle in the void you created. Surround the concrete bases with a loose, sprawling runner of inexpensive seeded eucalyptus or foraged greenery. The heavy, industrial concrete anchors the delicate, organic greens, while the gold dip catches the romantic flicker of the candlelight.
The Masculine Desk Accessory
Looking for a thoughtful, rugged DIY gift for Father’s Day or a groomsman? Leave the inner void slightly wider and shallower during the pouring phase. Once cured and gold-dipped, this heavy concrete vessel becomes the ultimate masculine valet tray or desk caddy. It is perfect for holding heavy brass pens, loose change, or keys. You can even glue a piece of felt or cork to the bottom to protect wooden desk surfaces from scratches.
The Succulent Planter
Bring life to the stone! Add a small handful of gravel to the bottom of the void for drainage, top with a little potting soil, and nestle a $2 succulent into the centerpiece. The vibrant green of the plant against the gray concrete and gold metallic base is a classic, unbeatable color combination that instantly elevates any windowsill or patio table.
Conclusion
There is a profound sense of empowerment that comes from looking at a pile of recycling, a dusty bag of hardware-store powder, and a roll of tape, and knowing you possess the crafty expertise to turn it into something breathtaking. By mastering this simple, budget-savvy concrete casting technique, you have unlocked a lifetime skill for creating high-end decor on a literal shoestring budget.
These gold-dipped cement centerpieces prove that elegance is not defined by a price tag. It is defined by creativity, resourcefulness, and a little bit of rugged elbow grease. Whether you are illuminating a wedding reception for two hundred guests or simply adding a touch of industrial glamour to your living room coffee table, you can look at these heavy, handsome pieces with immense pride. You beat the retail markup, you upcycled your trash, and you created pure, heavy gold. Now, go wash that concrete dust off your hands and admire your brilliant handiwork!

Makenzie is the founder and lead writer at MoneyHackTips.com — a personal finance blog dedicated to delivering street-smart financial wisdom for real people on real budgets. With 300+ published articles covering everything from debt management to investing fundamentals, Makenzie’s mission is to make every dollar work harder. When not writing about money hacks, Makenzie is testing frugal living strategies, optimizing side hustles, and helping readers build financial freedom from scratch.