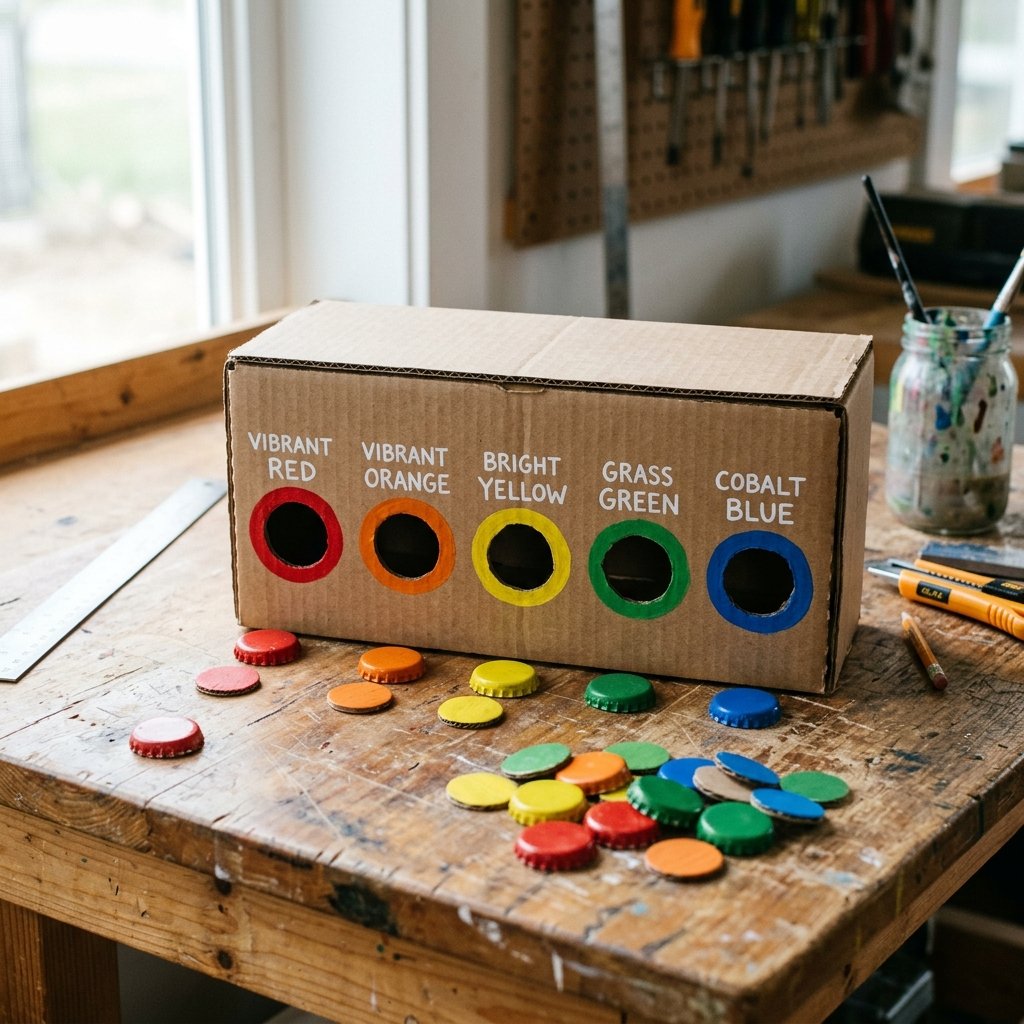

Let us face a hard, undeniable truth: the modern toy industry is engineered to drain your wallet. Every time you walk down the aisle of a big-box store, you are bombarded with overpriced, battery-operated plastic contraptions that promise to make your toddler a genius. But as resourceful, budget-savvy parents and crafty upcyclers, we know better. The secret to early childhood cognitive development does not cost $40. In fact, it costs absolutely nothing. Welcome to the ultimate frugal masterclass in creating Free Educational Toys!
Today, we are rolling up our sleeves and diving headfirst into the recycling bin to construct a rugged, highly functional, and aesthetically pleasing DIY Cardboard Sorting Game for Color Recognition. This is not your average flimsy craft; this is a structurally sound, masculine-elegant piece of homemade engineering designed to withstand the heavy-handed enthusiasm of a toddler. By harnessing the raw, industrial strength of corrugated cardboard and a few strategic drops of hot glue, you are going to build a Montessori-inspired learning station that rivals anything you could buy off a shelf.
Color recognition and fine motor skills are critical milestones in early childhood development. Sorting games force little minds to categorize, analyze, and physically manipulate objects, building essential neural pathways. But instead of buying a plastic sorter that will eventually end up in a landfill, you are going to use your crafty-expert skills to build one from the remnants of your latest online shopping delivery. It is time to turn trash into treasure, save your hard-earned cash, and give your child a handmade gift built with ingenuity and love. Grab your utility knife, clear off your workbench, and let us get to work.
The Frugal Parent’s Workshop: Scavenging Your Upcycled Arsenal
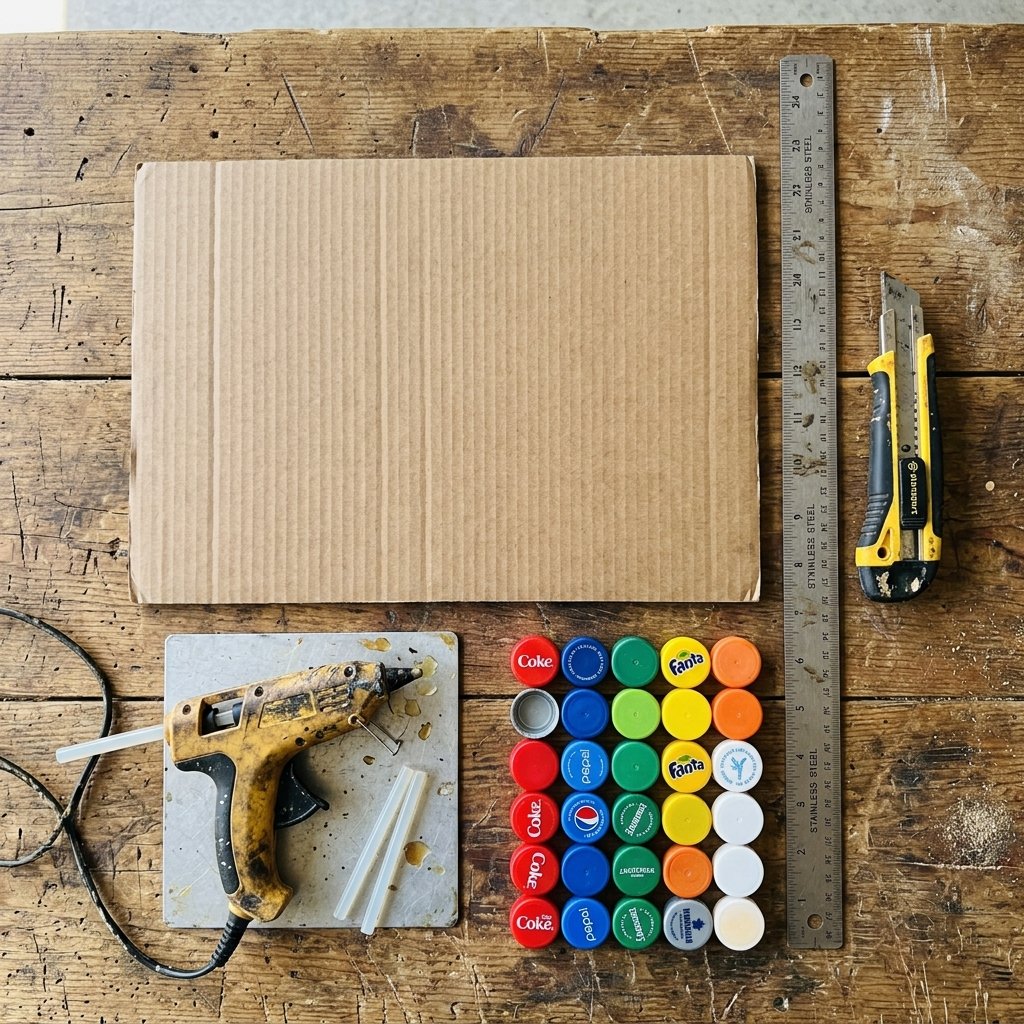
Before we make a single cut, we need to gather our materials. The beauty of this project lies in its zero-budget philosophy. You do not need to make a trip to the craft store; you simply need to look around your house with the trained eye of a resourceful upcycler. We are hunting for structural integrity and vibrant colors.
Selecting the Right Cardboard
Not all cardboard is created equal. For a toy that will endure the wrath of a toddler, you need rugged materials. Look for double-walled corrugated cardboard. This is the heavy-duty stuff usually reserved for shipping heavy electronics or appliances. It features two layers of fluting, providing incredible crush resistance. If you only have standard single-wall boxes (like standard Amazon boxes), do not panic. You can laminate two sheets together using a thin layer of wood glue or PVA glue to create a reinforced, armor-like board.
The Tool Kit
You do not need a full woodshop for this, but a few key tools will separate a sloppy craft from a masculine-elegant, high-end toy:
- A Heavy-Duty Utility Knife: Forget flimsy craft scissors. You need a sharp box cutter or X-Acto knife to make clean, precise cuts through thick corrugated layers.
- A Metal Cork-Backed Ruler: Essential for guiding your knife and ensuring your slots are perfectly straight.
- A Hot Glue Gun: The frugal DIYer’s welding torch. It provides instant, strong bonds for assembling the sorting station.
- Paint or Colored Paper Scraps: To designate the color zones. Leftover acrylic craft paint, markers, or even vibrant junk mail will work perfectly.
The Zero-Budget Breakdown
To truly appreciate the value of this project, let us look at the numbers. Here is a breakdown of what a premium wooden or plastic sorting toy costs compared to our rugged DIY approach.
| Item / Component | Store-Bought Montessori Sorter | Zero-Budget DIY Sorter |
|---|---|---|
| Base Structure | $25.00 (Wood/Plastic) | $0.00 (Upcycled Shipping Box) |
| Sorting Tokens | $10.00 (Pre-cut coins) | $0.00 (Bottle caps / Cardboard scraps) |
| Coloring / Finish | $5.00 (Non-toxic factory paint) | $0.00 (Leftover craft paint / markers) |
| Total Estimated Cost | $40.00+ | $0.00 (100% Free) |
Frugal Mantra: “Never pay for what you can build, and never throw away what you can transform. The best educational tools are born from imagination, not a credit card.”
Architectural Integrity: Blueprinting and Cutting the Sorting Base
Now that our arsenal is assembled, it is time to play architect. We are building a sorting box with a slanted top for easy access, featuring four to six distinct slots for the tokens to drop into. The goal here is precision and durability. A wobbly box will frustrate a toddler and quickly end up back in the recycling bin.
Step 1: Drafting the Blueprint
Take a medium-sized, sturdy box (roughly 10 inches by 6 inches). We are going to modify it into a wedge shape. Using your metal ruler and a pencil, draw a diagonal line on the two side panels, starting from the top back corner and sloping down to about halfway up the front edge. This slope makes it ergonomically perfect for a seated child to see the color slots and drop the tokens in.
Step 2: The Art of the Clean Cut
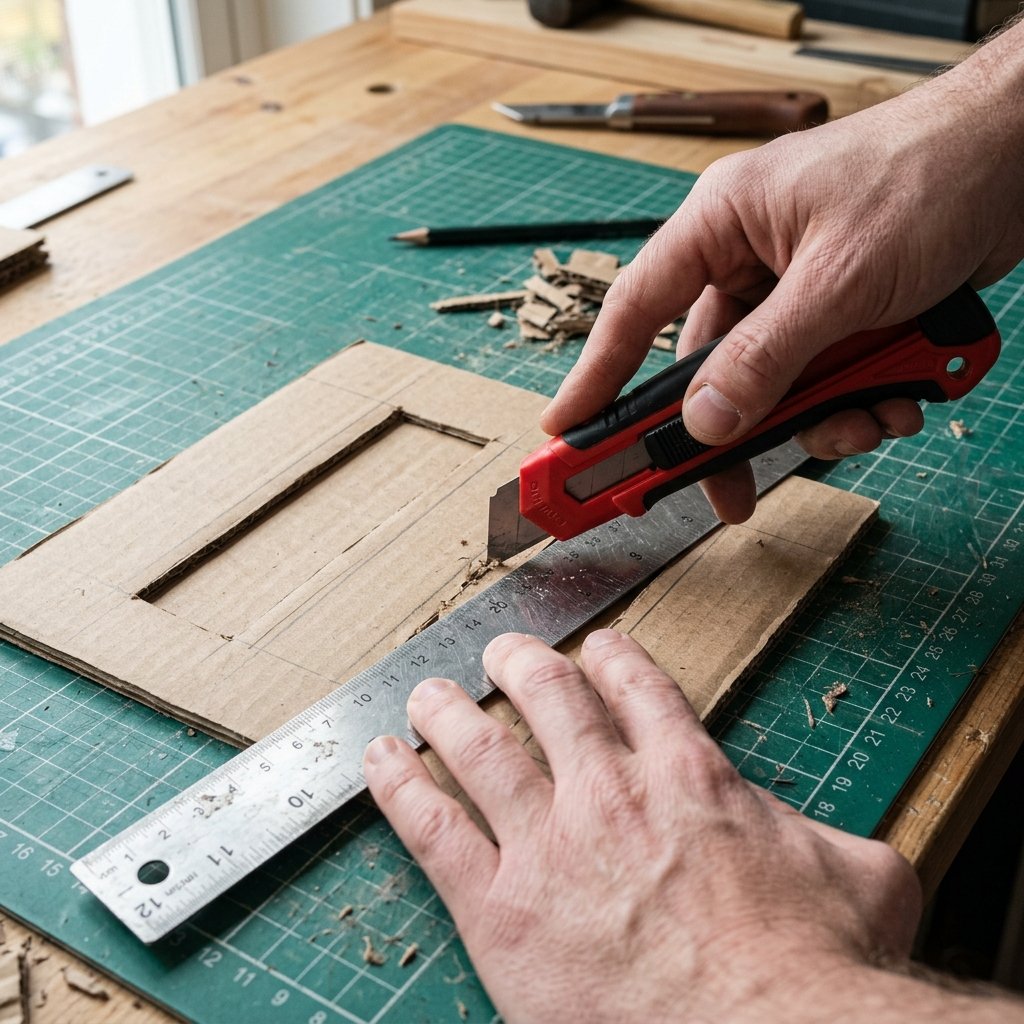
Cutting thick cardboard requires patience and technique. Do not try to hack through the board in one pass; this will crush the fluting and leave jagged, ugly edges.
- Place your cardboard on a self-healing cutting mat or a piece of scrap wood.
- Align your metal ruler along your pencil line.
- With your utility knife, make a light first pass, just scoring the top layer of paper.
- Make a second pass with medium pressure, cutting through the corrugated fluting.
- Make a final pass to slice through the bottom layer. This multi-pass technique guarantees a factory-smooth edge.
Safety First: A dull blade is more dangerous than a sharp one because it requires you to force the cut. Always snap off the dull tip of your utility blade or insert a fresh one before starting a precision cardboard project. Keep your non-cutting hand well behind the ruler.
Step 3: Creating the Drop Slots
On the slanted top panel of your box, you need to cut the sorting slots. Measure the diameter of your sorting tokens (we will discuss making these in the next section, but assume they are about 1.5 inches wide). Draw rectangles that are 2 inches wide and 0.5 inches thick. Space them evenly across the top panel. Use the same multi-pass cutting technique to carefully remove these rectangular slots. For an extra polished look, use a piece of fine-grit sandpaper to gently smooth the inner edges of the cut cardboard.
The Chromatic Masterplan: Applying Color and Protective Finishes
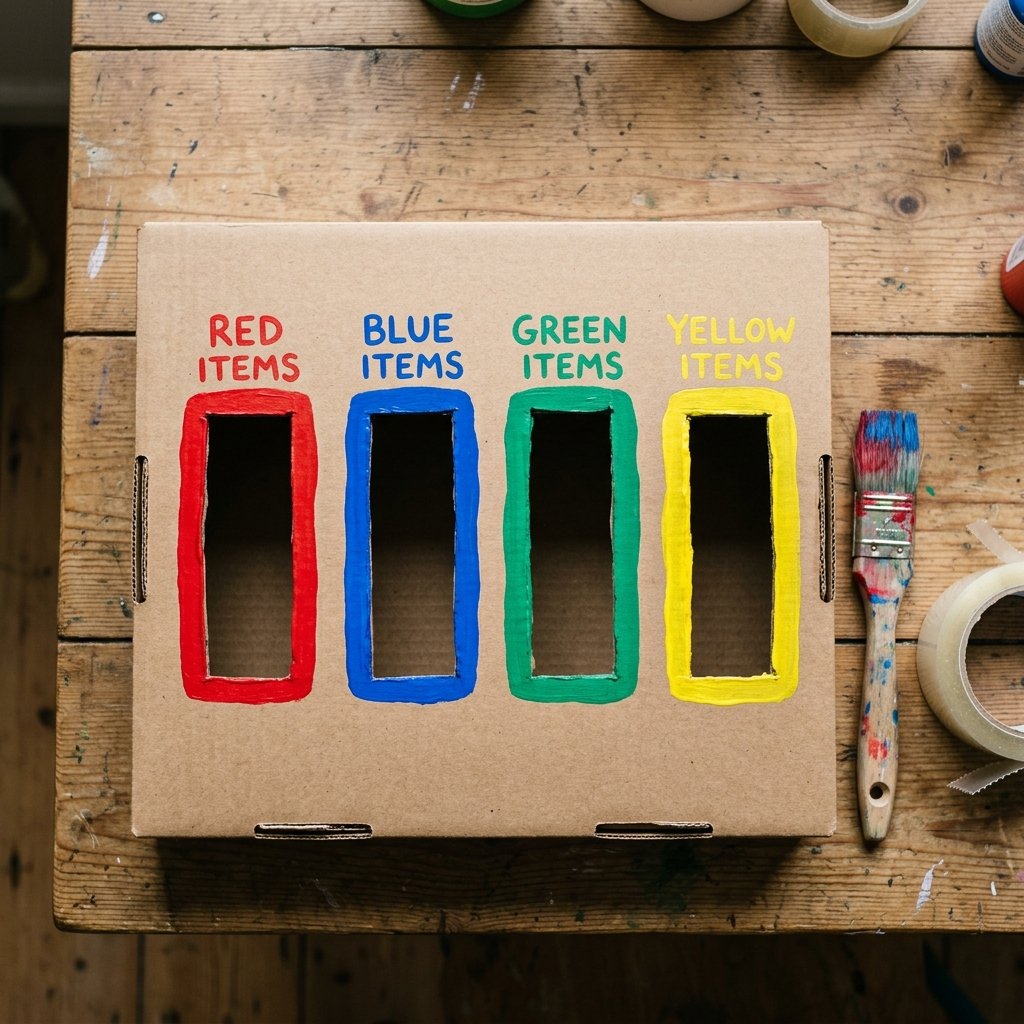
A color sorting game is useless without vibrant, easily distinguishable colors. But as budget-savvy crafters, we know that painting cardboard can be tricky. Water-heavy paints can soak into the paper, causing it to warp, bubble, and lose its structural integrity. We need to apply color smartly and efficiently.
Option 1: The Dry-Brush Paint Technique
If you are using leftover acrylic craft paint, the secret is minimizing moisture. Use a stiff-bristled brush and load it with a very small amount of paint. Apply the paint around the borders of each slot in a “dry-brush” fashion. You want to seal the color onto the top layer without soaking the paper underneath. Outline your four main slots in Red, Blue, Green, and Yellow. For a rugged, masculine aesthetic, you can leave the rest of the cardboard in its natural kraft brown state, creating a beautiful contrast between the raw industrial material and the bright primary colors.
Option 2: Upcycled Color Blocking
If you do not have paint, look to your recycling bin. Old magazines, junk mail, or scrap construction paper are goldmines for solid colors. Cut thick borders from these colored papers and use a glue stick (which has very low water content) to adhere them around the slots. This method is 100% free, zero-mess, and prevents any cardboard warping.
Sealing the Surface for Durability
Toddlers are notoriously sticky. To ensure your sorting game survives inevitable spills and grubby hands, you need to seal the colored areas. If you have Mod Podge or a clear acrylic sealer in your stash, give the top panel a quick coat. If you are strictly on a zero-budget, grab a roll of clear packing tape. Carefully lay strips of clear packing tape over the colored areas and fold the edges into the slots. This creates a waterproof, laminated finish that costs pennies and adds immense durability to the friction points where tokens will be dropped repeatedly.
Forging the Ammunition: Crafting Rugged Sorting Tokens
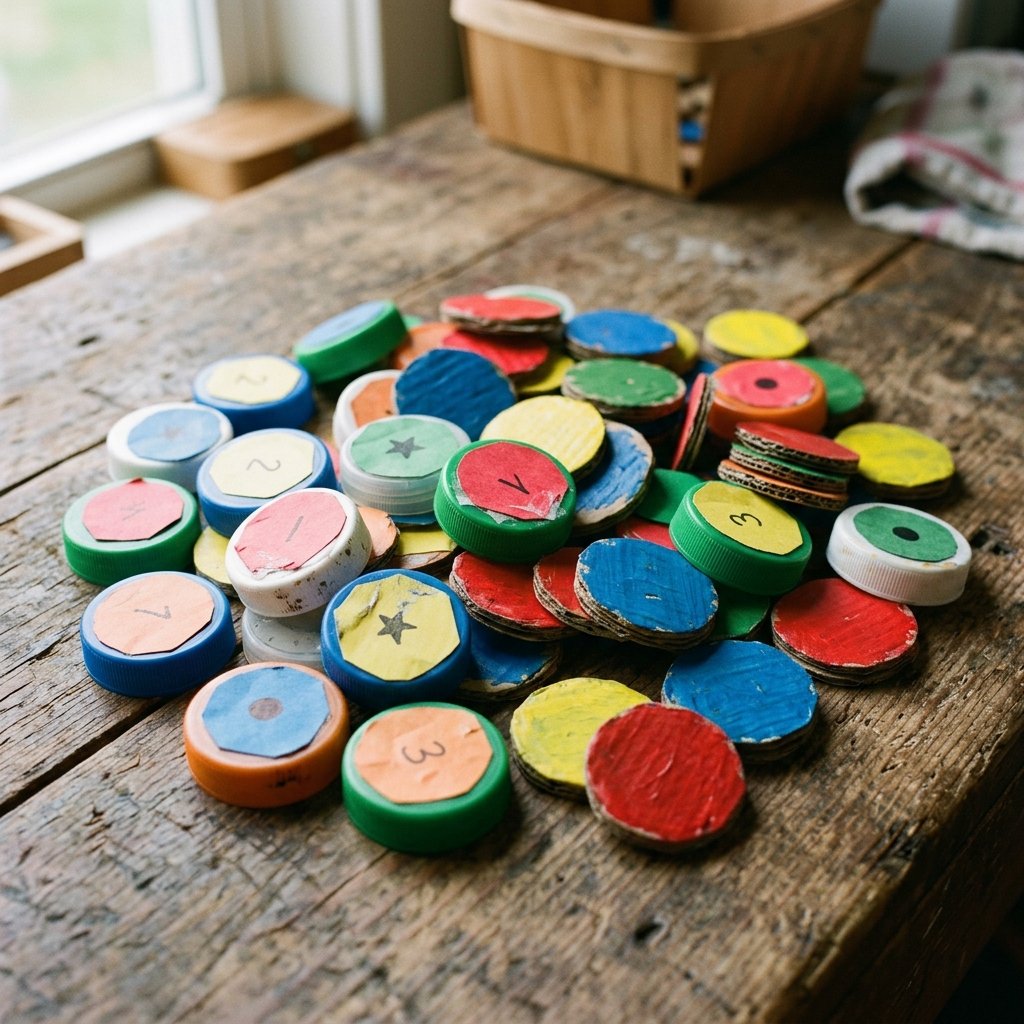
The sorting base is built; now we need the pieces that the child will manipulate. These tokens need to be large enough to avoid being a choking hazard (anything larger than 1.25 inches in diameter is generally safe, but always supervise play), satisfying to hold, and clearly color-coded to match the slots.
The Scavenger’s Approach: Milk Jugs and Bottle Caps
The absolute easiest and most durable sorting tokens are plastic bottle caps. Start saving the lids from milk jugs, juice bottles, and water bottles. Milk jug lids are the perfect size. If they are already the correct colors, you are done! If not, you can easily paint them. However, acrylic paint tends to chip off smooth plastic. To fix this, lightly scuff the top of the plastic cap with sandpaper, apply a dot of hot glue, and press a small circle of colored paper onto it. Instant, indestructible color token!
The Craftsman’s Approach: Heavy-Duty Cardboard Coins
If you want a cohesive, all-cardboard aesthetic, you can manufacture your own wooden-style coins from your scrap cardboard.
- Take your leftover double-walled cardboard scraps.
- Find a circular object to trace, like a shot glass or a small jar lid (aiming for 1.5 to 2 inches in diameter).
- Trace 20 circles onto the cardboard (5 for each color).
- Carefully cut them out using your utility knife. Do not worry if they are not perfectly round; the rugged, handmade look adds character.
- To make them feel heavy and substantial like expensive wooden tokens, glue two cardboard circles together.
- Paint one side of the coin to match your sorting slots.
Crafty Expert Tip: To give your cardboard coins a premium, finished feel, run a bead of hot glue around the exposed corrugated edge and smooth it out with a scrap piece of cardboard before it dries. This seals the edge, adds weight, and prevents the layers from peeling apart during heavy play.
Tactical Gameplay: Maximizing Cognitive Development
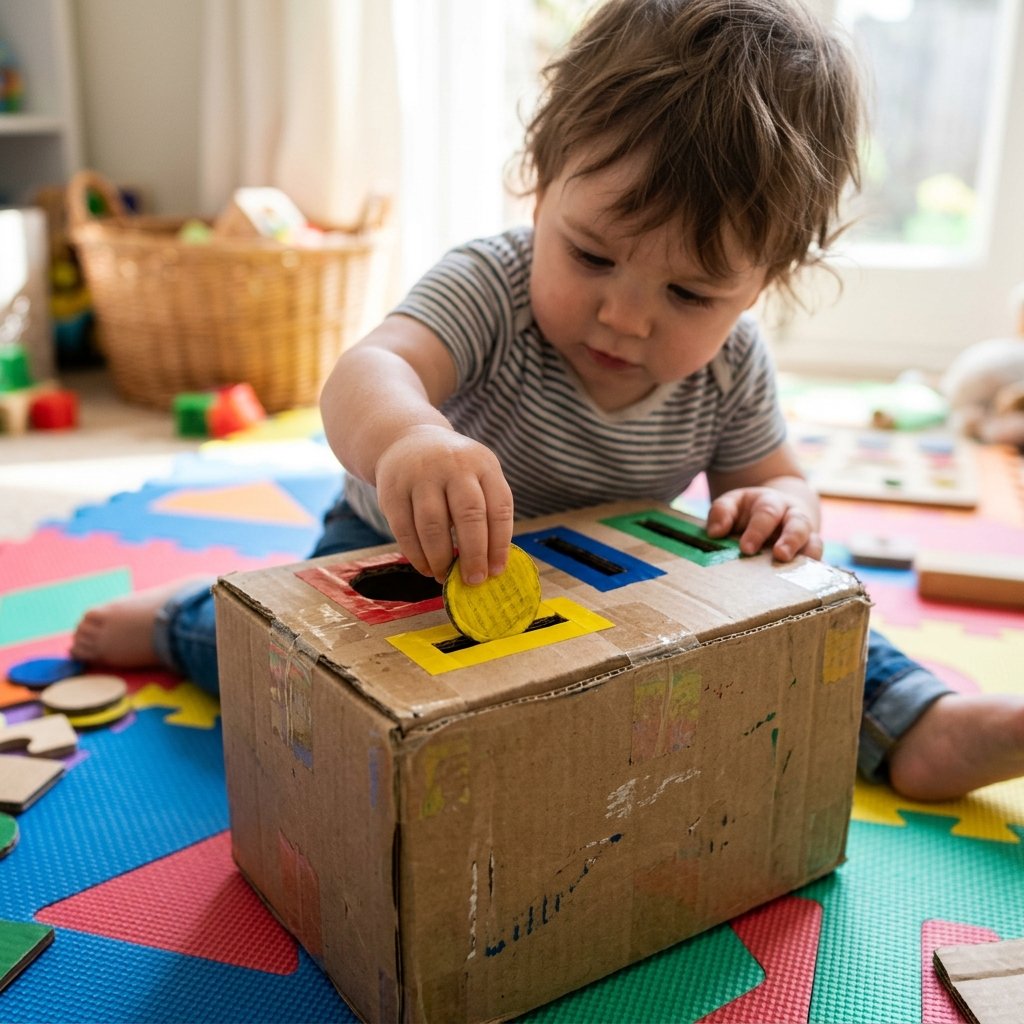
You have successfully engineered a high-end educational tool for $0.00. But the value of this DIY cardboard sorting game is not just in the building; it is in how you deploy it. To get the maximum developmental return on your time investment, you need to introduce the game strategically.
Phase 1: The Basic Drop and Match
For younger toddlers (around 18 months), start simple. Do not overwhelm them with all four colors at once. Tape over two of the slots, leaving only Red and Blue open. Hand them only Red and Blue tokens. Demonstrate the action: “Look, the red coin goes in the red hole.” The sound of the heavy cardboard coin hitting the bottom of the empty box provides instant, satisfying auditory feedback that encourages them to repeat the action.
Phase 2: Full Spectrum Sorting
Once they master two colors, open up all the slots. Dump a mixed pile of tokens in front of them. This forces their brain to pause, analyze the token in their hand, scan the board, and make a deliberate choice. If they make a mistake, do not correct them immediately. Let them figure out the mechanics of the game. The act of opening the back of the box (you did leave a flap open in the back to retrieve the tokens, right?) to retrieve the pieces is half the fun for them.
Phase 3: Advanced Tactical Challenges
As your child grows, this rugged little box can grow with them. Here are a few ways to upgrade the gameplay without spending a dime:
- Time Trials: Use the stopwatch on your phone. “Can you sort all 20 tokens in under 60 seconds?” This builds processing speed and adds an exciting element of pressure.
- Pattern Recognition: Instead of just matching colors, draw shapes on the tokens (a star on a red token, a square on a blue token) and add corresponding shapes next to the slots. Now they are sorting by two variables simultaneously.
- Texture Sorting: Glue different textures to the tokens (sandpaper, felt, smooth foil). Have them close their eyes and sort the tokens into different piles based purely on tactile feedback before dropping them into the box.
Conclusion
Building your own DIY Cardboard Sorting Game for Color Recognition is more than just a weekend craft project; it is a statement. It is a declaration that you refuse to pay premium prices for items you can engineer yourself with a little ingenuity and a sharp blade. By upcycling shipping boxes and bottle caps, you have kept waste out of the landfill, saved yourself a trip to the toy store, and created a rugged, customized educational tool that will genuinely benefit your child’s developing brain.
As frugal DIYers and handy parents, our greatest asset is not our wallet; it is our resourcefulness. Every time your child drops a token into that perfectly cut slot, you can take pride in knowing you built that experience with your own two hands. So keep saving those boxes, keep your utility blades sharp, and never underestimate the potential of what others consider trash. Now, go set up that sorting station, watch those little gears turn in your toddler’s head, and revel in the satisfaction of a zero-budget victory!

Makenzie is the founder and lead writer at MoneyHackTips.com — a personal finance blog dedicated to delivering street-smart financial wisdom for real people on real budgets. With 300+ published articles covering everything from debt management to investing fundamentals, Makenzie’s mission is to make every dollar work harder. When not writing about money hacks, Makenzie is testing frugal living strategies, optimizing side hustles, and helping readers build financial freedom from scratch.