
The Magic of the Humble Cardboard Box
In a world of flashing lights and plastic noise, there is something profoundly grounding about a cardboard box. To a child, it is not just packaging; it is a fortress, a spaceship, and today, a high-end kitchen appliance. As a frugal DIYer, you know that the best toys aren’t bought—they are built. Why spend $150 to $300 on a pre-fabricated wooden or plastic play kitchen when you can engineer a rugged, masculine-elegant refrigerator using materials currently sitting in your recycling bin? This project isn’t just about saving money; it’s about teaching your kids the value of resourcefulness and the joy of creating something from nothing. We are going to take ‘trash’ and turn it into a playroom centerpiece that looks like it walked out of a boutique toy catalog. Let’s grab our utility knives and get to work.
The Blueprint: Sourcing Your ‘Industrial’ Materials
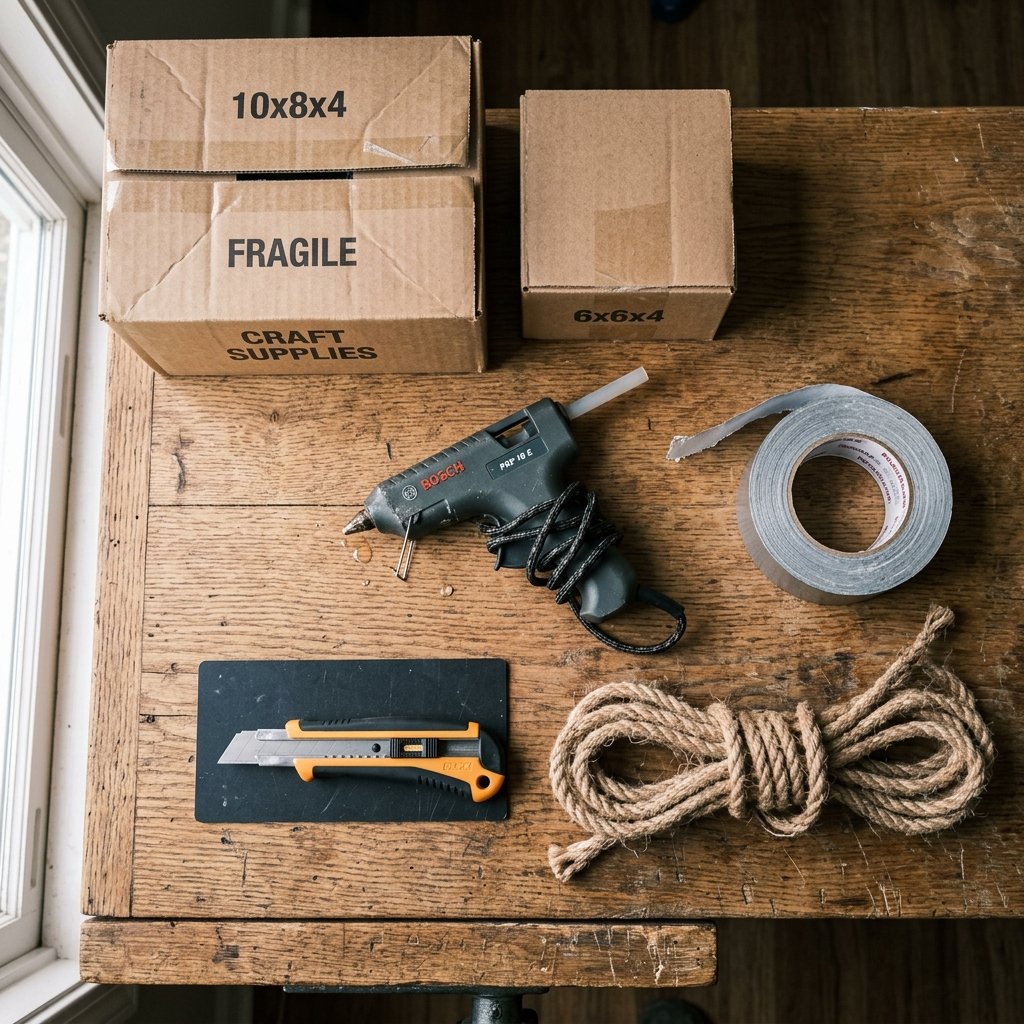
Scavenging Like a Pro
Before we cut a single flap, we need the right ‘lumber.’ Not all cardboard is created equal. For a toy that survives the rigors of toddler play, you need double-walled corrugated cardboard. These are typically found in appliance boxes or heavy-duty shipping containers. Check your local furniture stores or grocery outlets; they are usually more than happy to let you take these off their hands for $0.
The Ultimate Supply List
We are aiming for a ‘rugged-chic’ aesthetic. Here is what you will need to gather from around the house or your local hardware store:
| Material | Purpose | Estimated Cost |
|---|---|---|
| Large Wardrobe Box | Main Refrigerator Body | $0 (Upcycled) |
| Small Shipping Boxes | Internal Shelves and Drawers | $0 (Upcycled) |
| Duct Tape (Silver/Chrome) | Binding and ‘Stainless Steel’ Accents | $4.00 |
| Heavy-Duty Hot Glue | Structural Bonding | $2.50 |
| Rope or Old Leather Belt | Door Handles | $0 (Upcycled) |
| Plastic Yogurt Cups | Ice Dispenser Components | $0 (Upcycled) |
Budget Guru Mantra: Never buy what you can find. The beauty of this project is in the hunt. Look for textures—a piece of bubble wrap can become an ice tray; a plastic bottle cap can become a temperature dial.
Structural Engineering: Building a Fridge That Lasts
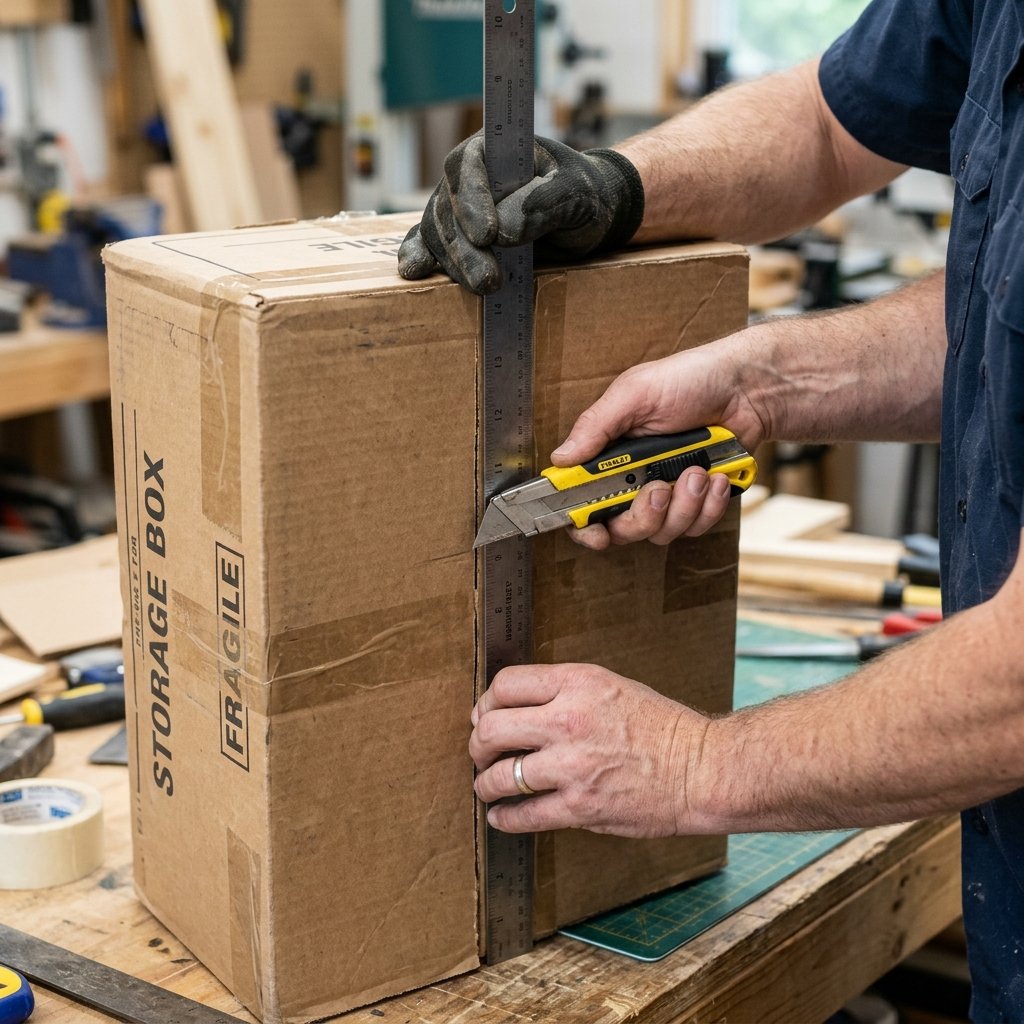
Framing the Beast
The secret to a long-lasting cardboard toy is internal reinforcement. We aren’t just taping boxes together; we are building a frame. Start by selecting your tallest box for the main body. If it feels flimsy, ‘sister’ the walls by gluing a second layer of cardboard inside. This adds the rugged durability needed for kids who tend to lean on their toys.
Step-by-Step Assembly
- Measure and Mark: Decide on the height of your freezer vs. fridge section. A 1/3 freezer to 2/3 fridge ratio usually looks most realistic.
- The Precision Cut: Using a fresh blade in your utility knife, cut the doors. Pro Tip: Only cut three sides of the door, leaving the fourth side as a ‘living hinge.’ This is much stronger than taping a separate door on later.
- Reinforce the Hinges: Apply a vertical strip of heavy-duty duct tape along the hinge line on both the inside and outside. This prevents the cardboard from creasing and eventually tearing after 1,000+ opens.
- Shelf Support: Cut strips of cardboard 2 inches wide and glue them horizontally to the interior side walls. These will act as the ‘cleats’ for your shelves to rest on.
Safety Note: Always use a straight edge when cutting with a utility knife. Keep your fingers well away from the path of the blade, and ensure you are cutting on a surface that can handle scratches, like a garage floor or a dedicated cutting mat.
The ‘Stainless Steel’ Finish: Dollar Tree Designer Tricks
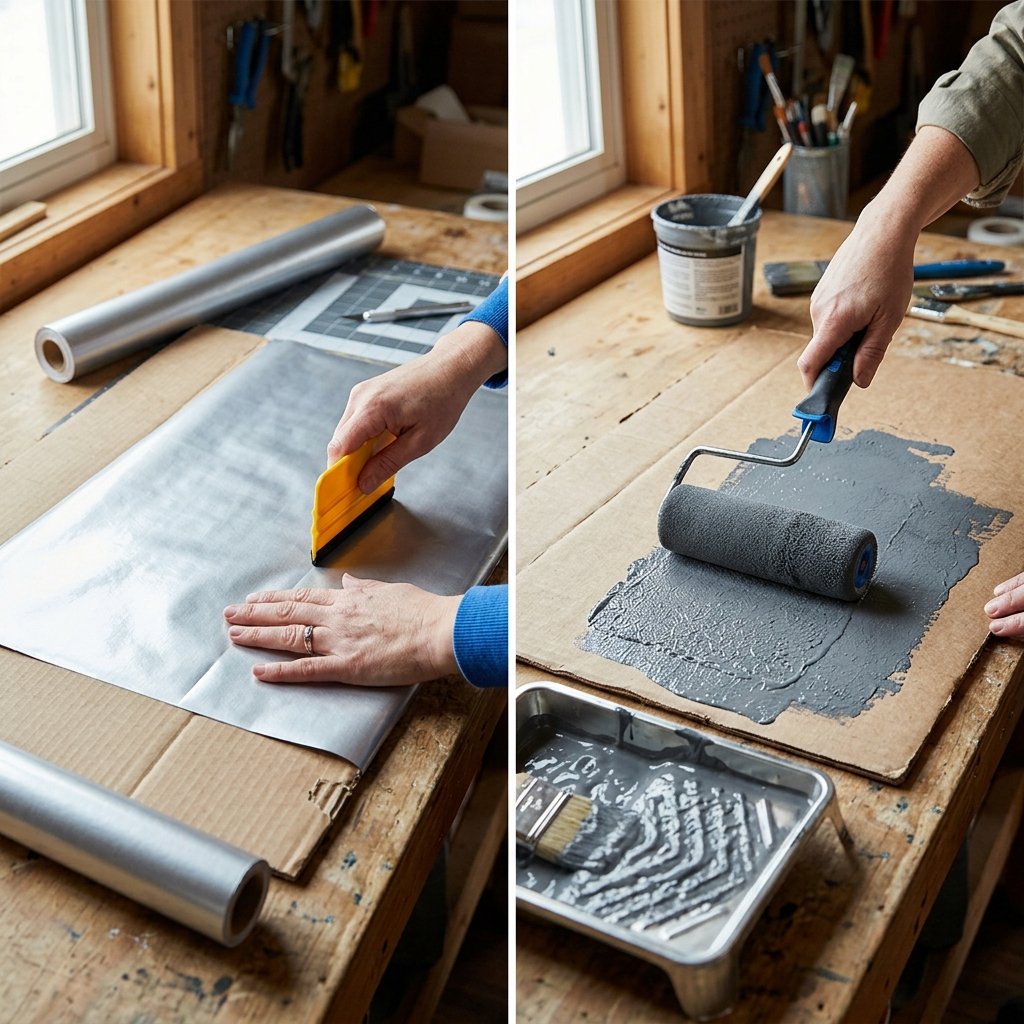
High-End Aesthetics on a Dime
We don’t want this to look like a pile of boxes in the living room; we want it to look like a professional-grade appliance. This is where the ‘Masculine-Elegant’ style comes in. You have two main options for the exterior finish: Contact Paper or the Baking Soda Paint Trick.
Option A: The Contact Paper Wrap
Visit your local dollar store and look for ‘brushed metal’ or ‘wood grain’ contact paper. It’s essentially a giant sticker. Smoothing this over the cardboard gives an instant, wipeable surface that looks remarkably like real steel. It costs about $1.25 per roll, and you’ll likely need three.
Option B: The Industrial Paint Finish
If you prefer paint, mix grey acrylic paint with a tablespoon of baking soda. This creates a thick, matte texture that hides the ‘ribs’ of the cardboard, giving it a stone or heavy metal appearance. Apply with a foam roller for a smooth, consistent finish.
| Method | Pros | Cons |
|---|---|---|
| Contact Paper | Wipeable, Very Realistic | Can be tricky to apply without bubbles |
| Baking Soda Paint | Hides cardboard texture perfectly | Can chip if hit with hard toys |
| Silver Duct Tape | Easiest and most ‘rugged’ | Visible seams between strips |
Hardware and Interaction: The Ice Dispenser Hack
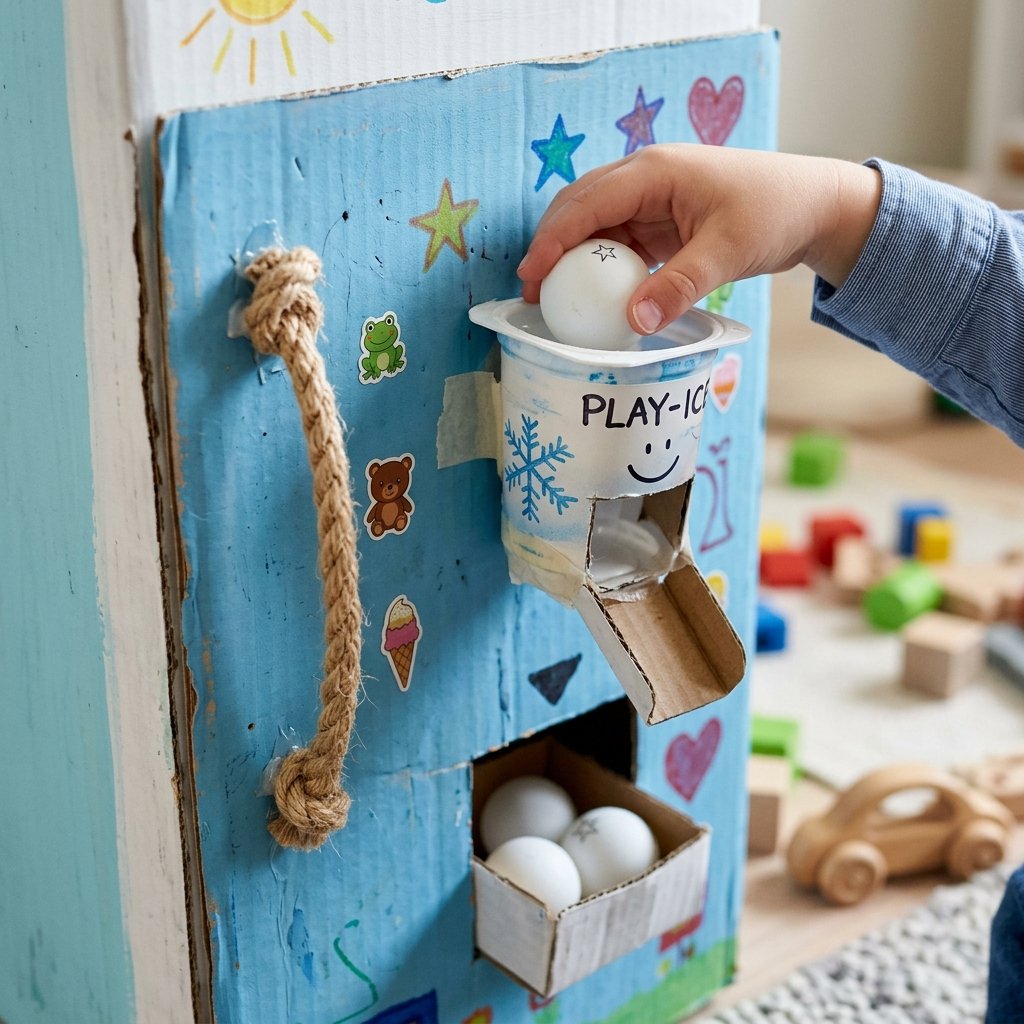
The Details That Delight
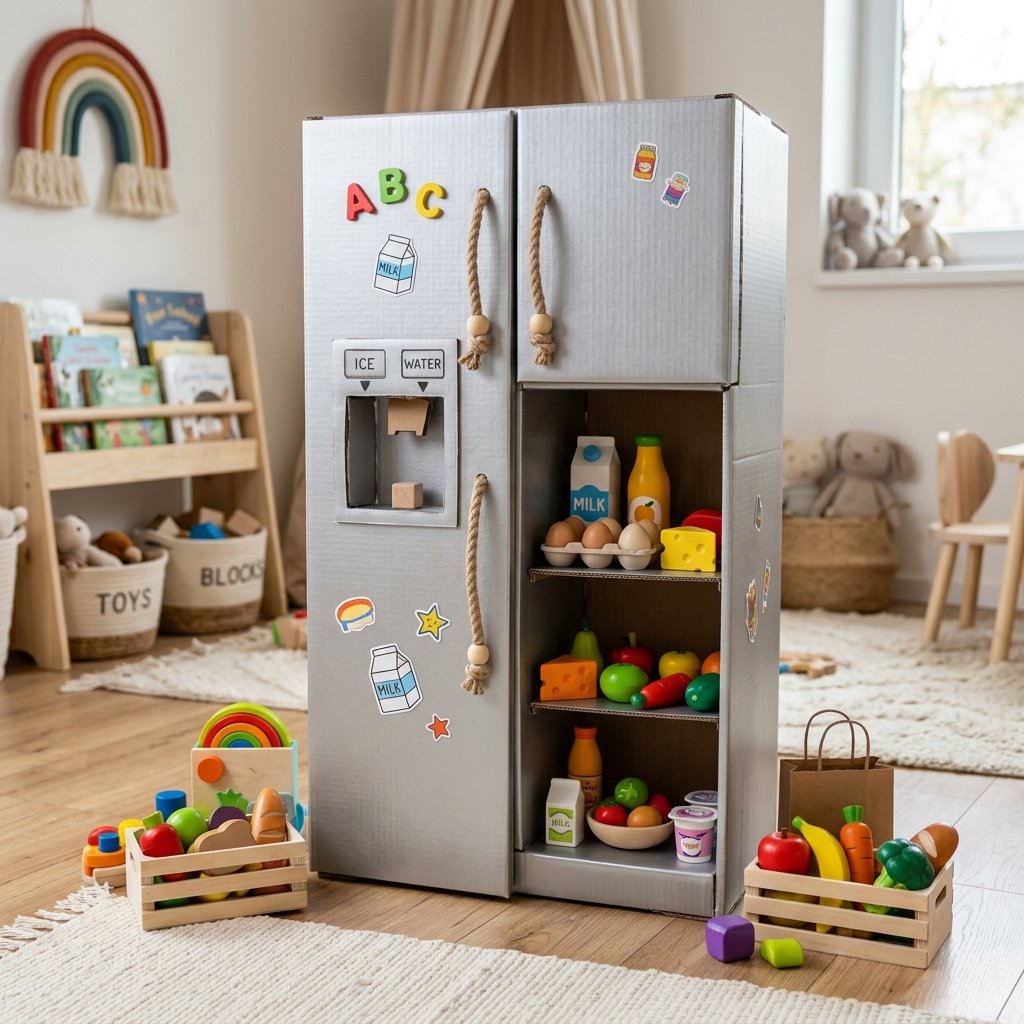
What separates a ‘box’ from a ‘refrigerator’ is the hardware. We are going to use upcycled household items to create functional-feeling details. For the handles, don’t use cardboard. Instead, use a thick rope or an old leather belt. Drill two small holes through the door, thread the rope through, and tie large knots on the inside. This adds a tactile, high-quality feel that kids love.
The ‘Working’ Ice Dispenser
This is the ‘wow’ factor. Follow these steps to create a gravity-fed ice dispenser:
- The Chute: Cut a hole in the freezer door and glue a cleaned yogurt container (with the bottom cut out) at a downward angle.
- The Catch: On the outside, glue a small ‘shelf’ made of cardboard to hold a play cup.
- The ‘Ice’: Use white ping pong balls or squares of white felt. When the child drops them into the top of the chute (inside the door), they slide down into their cup!
For the finishing touch, use bottle caps as ‘temperature dials.’ Glue them onto a small piece of cardboard painted black, and use a white paint pen to add numbers. This adds 100% more play value for $0.
Internal Organization: Shelves and Crisper Drawers
Maximizing Play Space
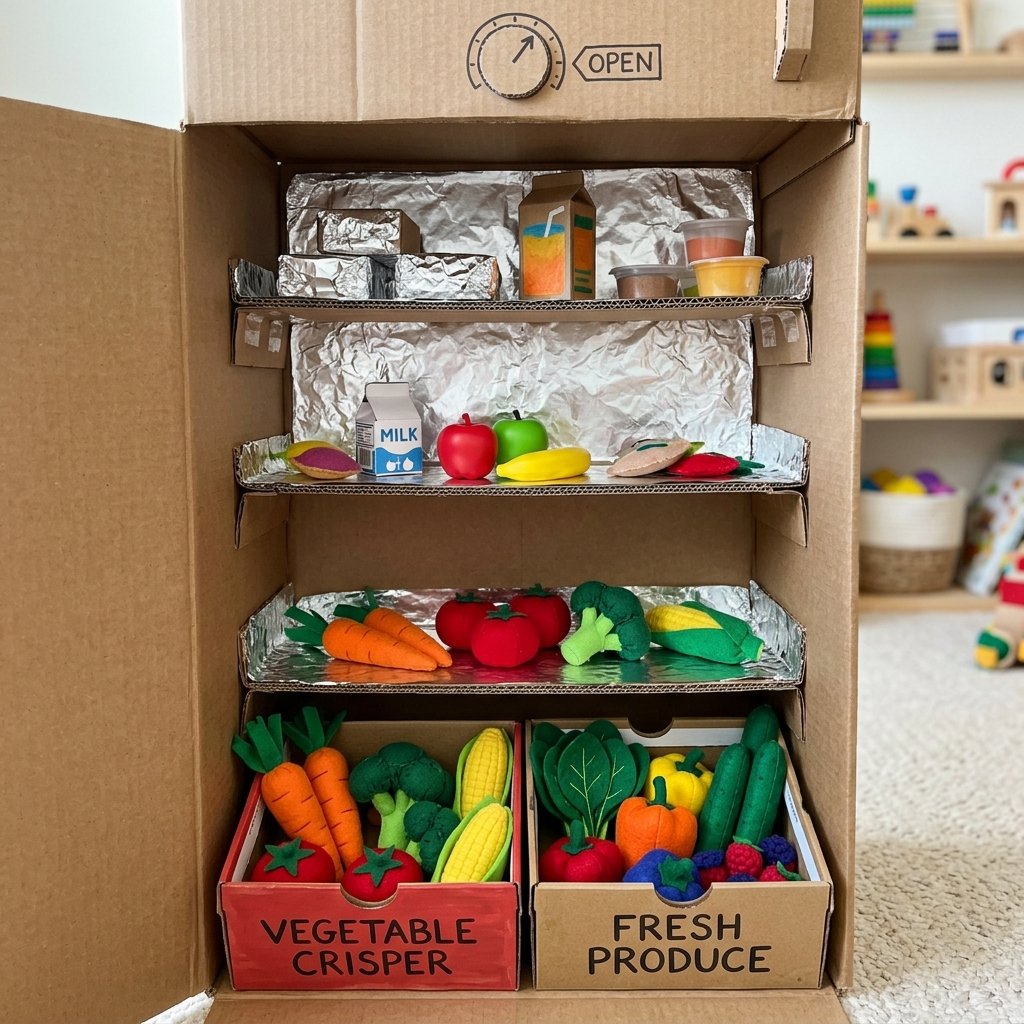
A fridge is only as good as what it can hold. To make the interior functional, we need to create reinforced shelving. Do not simply glue a flat sheet of cardboard in; it will sag the moment a wooden play-egg touches it. Instead, create a ‘box shelf’—a thin box that fits snugly inside the fridge frame.
The Crisper Drawer Logic
Every fridge needs a place for the ‘produce.’ Find two small shoe boxes. Paint the fronts a bright green or clear them with plastic wrap to mimic glass. These should slide in and out at the bottom of the fridge. This teaches children organizational skills and adds another layer of mechanical interaction.
Pro Tip: Use ‘industrial’ accents inside too. Line the shelves with aluminum foil (glued down flat) to mimic the look of high-end glass and metal shelving found in luxury appliances. It costs pennies but looks like a million bucks.
Value Comparison: DIY vs. Big Box Retail
The Frugal Win
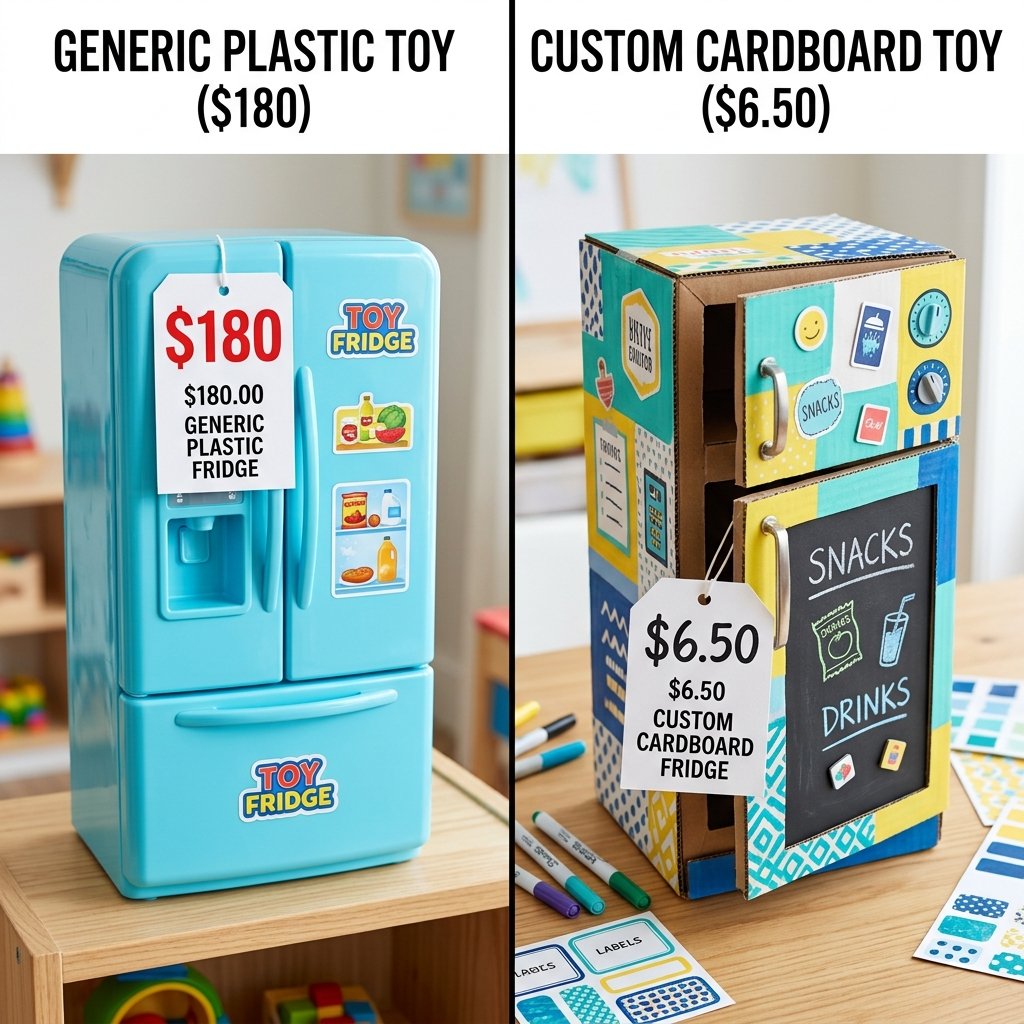
Let’s look at the numbers. When you choose to upcycle, you aren’t just being eco-friendly; you are being financially brilliant. The money saved here can be put toward a college fund, a family outing, or higher-quality play food to fill the fridge.
| Feature | High-End Store Bought | Our DIY Upcycled Version |
|---|---|---|
| Price | $180.00 | $6.50 (Tape/Glue) |
| Material | MDF or Plastic | Heavy-Duty Cardboard |
| Customization | None | Unlimited (Size, Color, Name) |
| Assembly Time | 2 Hours (Frustrating) | 3 Hours (Creative Bonding) |
| End of Life | Landfill | 100% Recyclable |
By building this yourself, you have achieved a 96% cost reduction while creating a toy that has more character and soul than anything found on a shelf in a big-box store.
Conclusion
The Ultimate Reward
Building a DIY cardboard refrigerator is more than just a craft project; it is a masterclass in resourceful parenting. You’ve taken items that were destined for the bin and engineered a durable, stylish, and interactive toy that will provide hundreds of hours of imaginative play. Your child won’t remember the price tag of their toys, but they will remember the time you spent together, the smell of the hot glue, and the magic of seeing a plain box transform into a kitchen masterpiece. So, keep those boxes, stay budget-savvy, and keep building. Your playroom (and your wallet) will thank you. Happy Upcycling!

Makenzie is the founder and lead writer at MoneyHackTips.com — a personal finance blog dedicated to delivering street-smart financial wisdom for real people on real budgets. With 300+ published articles covering everything from debt management to investing fundamentals, Makenzie’s mission is to make every dollar work harder. When not writing about money hacks, Makenzie is testing frugal living strategies, optimizing side hustles, and helping readers build financial freedom from scratch.