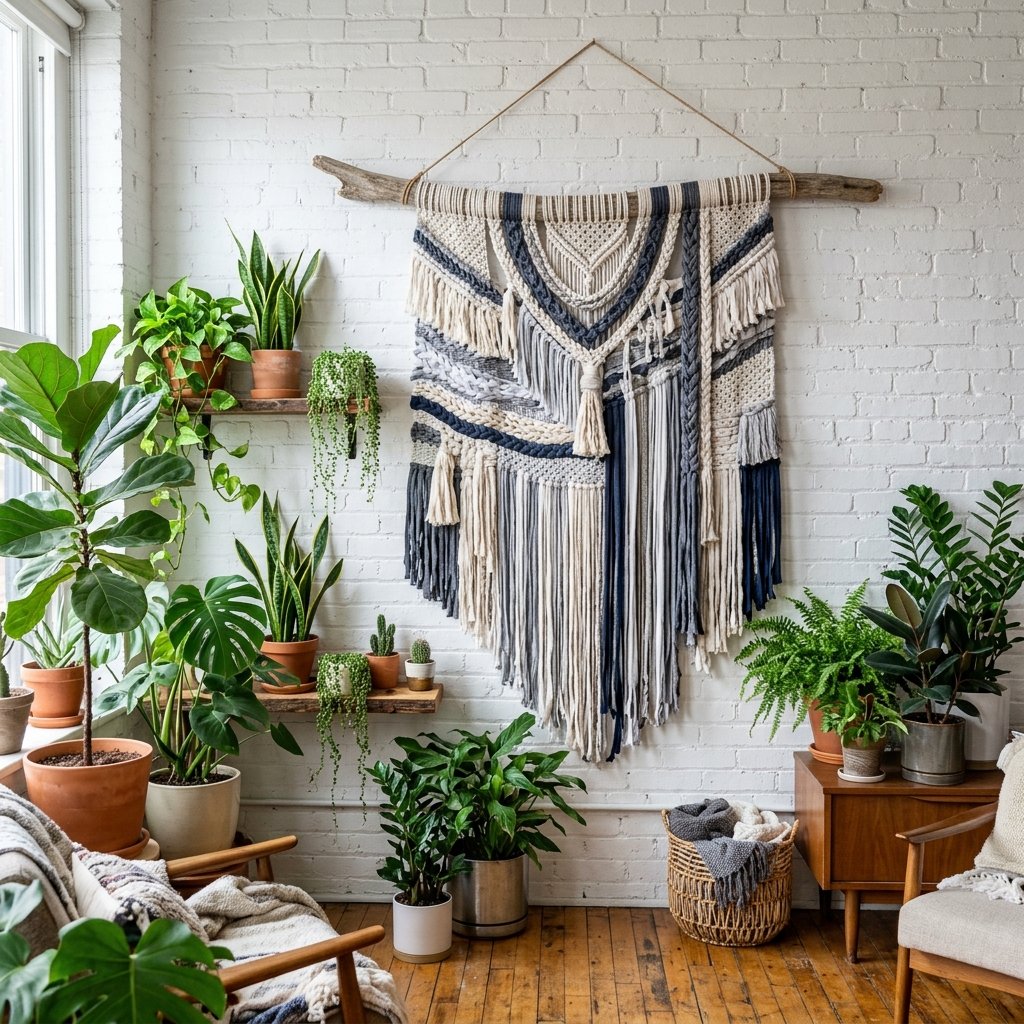

Listen, we all have that drawer. You know the one—the graveyard of oversized promotional tees, faded marathon shirts, and that one soft cotton shirt with the stubborn coffee stain. Instead of tossing them or letting them gather dust, we are going to engage in some resourceful alchemy. Weaving a boho wall tapestry isn’t just for high-end boutique owners or people with expensive floor looms. It is for the clever DIYer who sees a pile of rags and envisions a bespoke piece of gallery-quality art.
This project is the epitome of masculine-elegant design meeting rugged practicality. By repurposing what you already own, you are not just saving $50 to $150 on retail decor; you are creating a tactile, textured masterpiece that tells a story. We will be building our own loom from scrap cardboard and processing our own “tarn” (t-shirt yarn) to ensure this project costs you exactly $0. Let’s get to work.
The T-Shirt Audit: Selecting Your Palette and Fabric Types
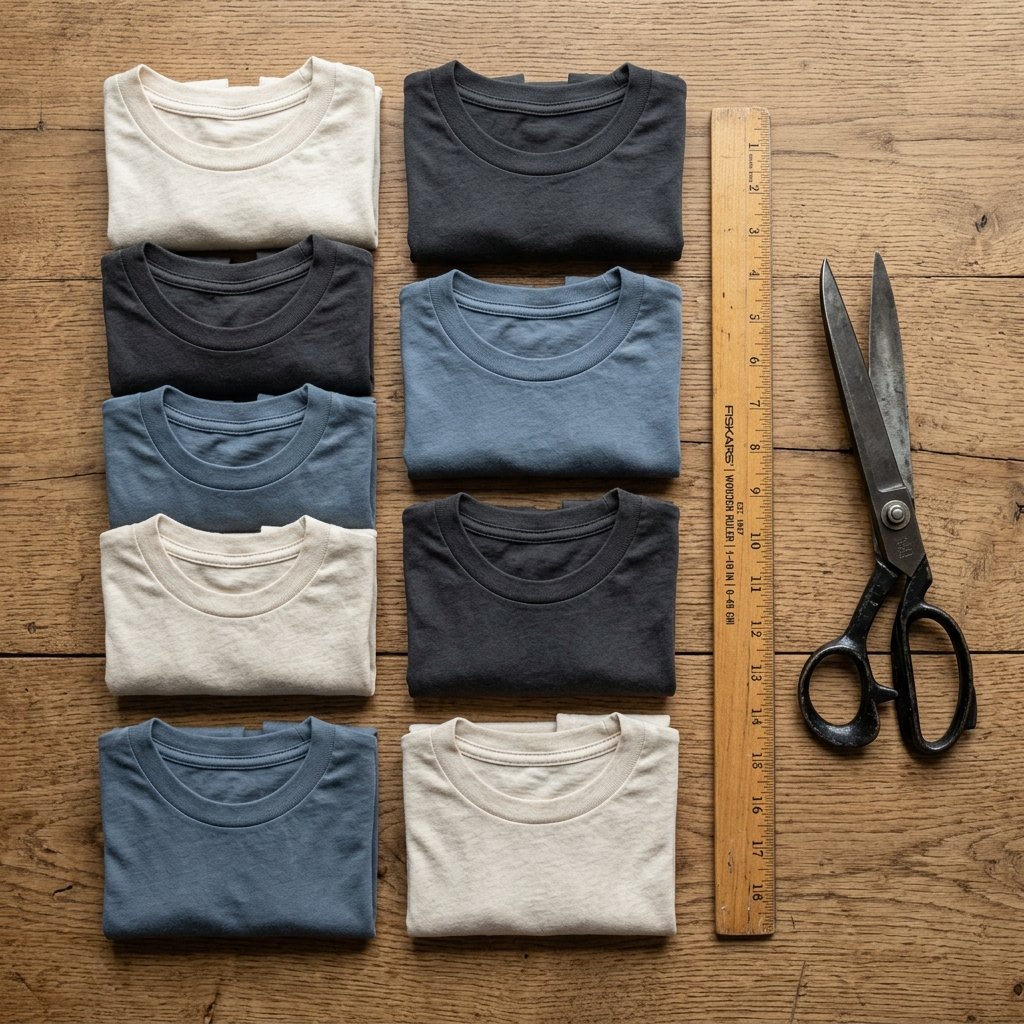
Before we start cutting, we need a plan. The beauty of a boho tapestry lies in its texture and color harmony. You want to look for shirts that are 100% cotton or a high-cotton blend. These provide the best “stretch and recovery” when turned into yarn. Avoid heavy graphics or thick screen prints if possible, as they can make the weaving stiff and difficult to manage.
Categorizing Your Materials
- The Neutrals: Whites, greys, and blacks serve as the structural foundation of your piece.
- The Accents: Muted blues, earthy greens, or deep burgundies add that sophisticated, rugged pop.
- The Texture: Thicker sweatshirts can be used for chunky braids, while thin undershirts are perfect for delicate fringe.
| Fabric Type | Best Use in Tapestry | Stretch Factor |
|---|---|---|
| 100% Cotton Jersey | Main Weft (The horizontal weave) | High |
| Cotton/Polyester Blend | Warp Threads (The vertical structure) | Low/Medium |
| Heavyweight Fleece | Chunky Braids (Soumak) | Very High |
| Ribbed Tank Tops | Textured Fringe (Rya Knots) | Medium |
The secret to a high-end look is a cohesive color palette. Stick to 3-4 shades that complement your room’s existing decor to ensure the finished piece looks intentional, not accidental.
The Tarn Factory: Turning Fabric into Continuous Fiber
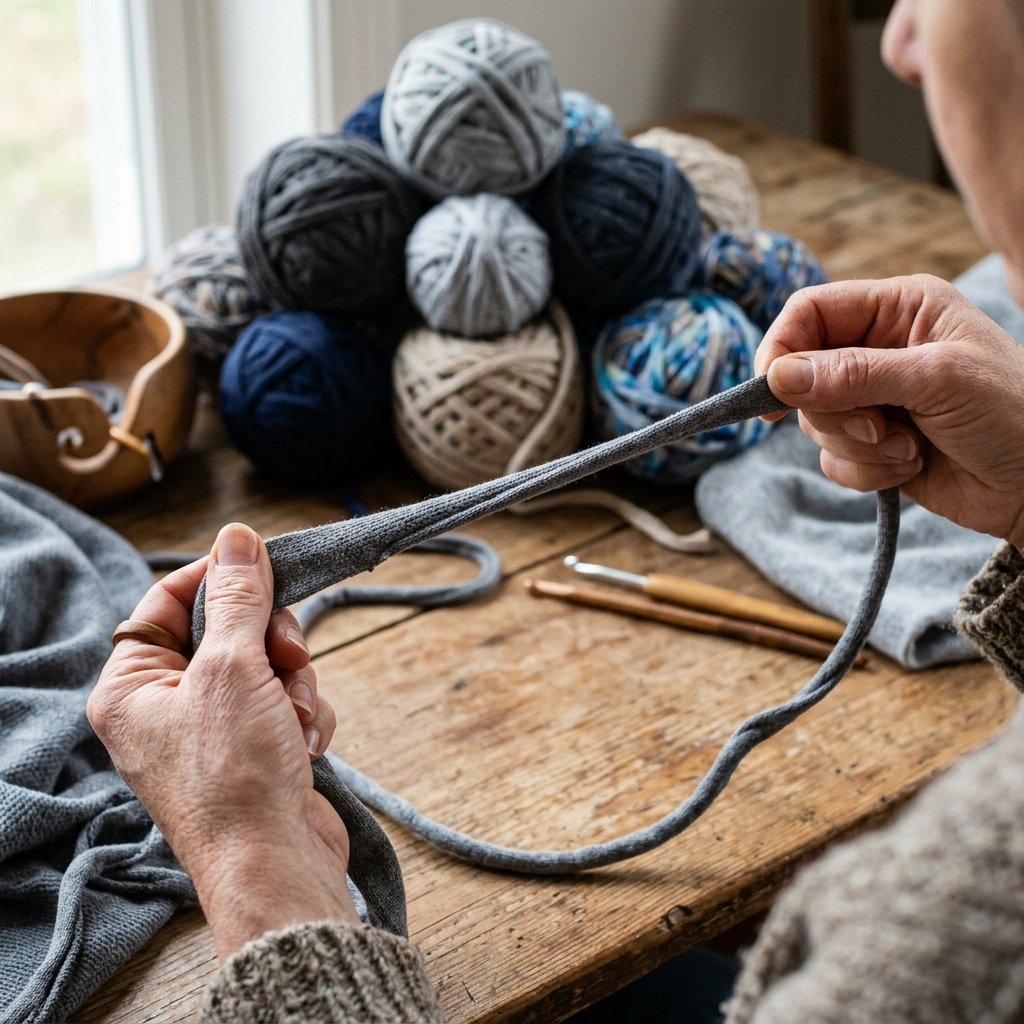
We aren’t just cutting strips; we are engineering yarn. To get the best results, you need long, continuous strands. This minimizes knots and keeps the back of your tapestry clean. We will use the “Spiral Cut” method to maximize every square inch of those old tees.
Step-by-Step Tarn Production
- Prep the Shirt: Lay the t-shirt flat on a table. Cut off the bottom hem and the top part (from the armpits up). You should be left with a rectangular tube of fabric.
- The Side Cut: Cut slits about 1 inch apart from one side of the tube toward the other, but stop 2 inches before the edge. Do not cut all the way through!
- The Diagonal Connection: Open the uncut 2-inch section. Cut diagonally from the first slit to the second, the second to the third, and so on. This creates one long, continuous strand.
- The Stretch: This is the magic step. Take your long strip and pull it firmly. The edges will curl inward, creating a rounded, professional-looking cord.
| T-Shirt Size | Estimated Yarn Yield | Time to Process |
|---|---|---|
| Small | 15-20 yards | 5 minutes |
| Medium | 25-30 yards | 7 minutes |
| Large/XL | 40+ yards | 10 minutes |
The Blueprint: Constructing Your Zero-Budget Cardboard Loom
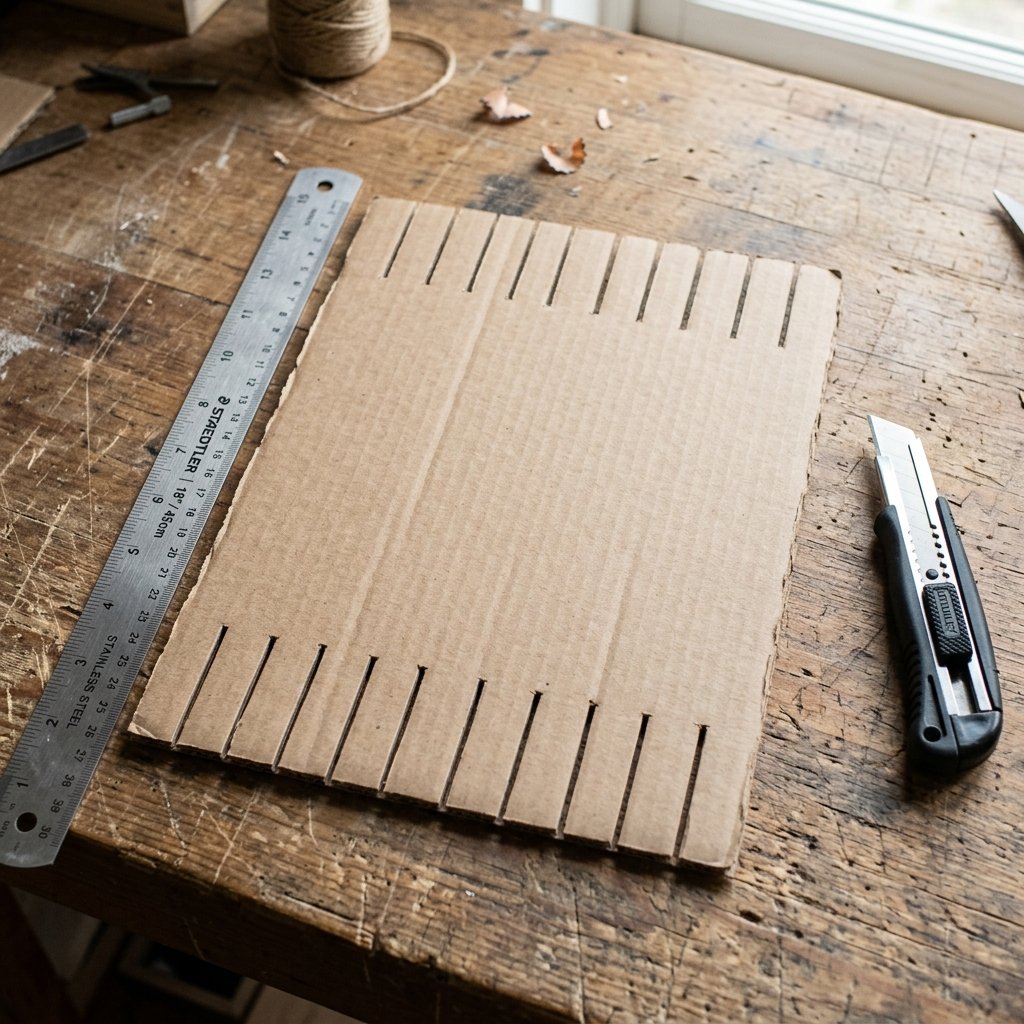
You don’t need a $100 wooden loom to create a masterpiece. A sturdy piece of shipping cardboard is actually superior for beginners because it allows for custom sizing. Find a box that is at least 2 inches wider than your desired tapestry width.
Building the Frame
- Measure: Use a ruler to mark a line 1 inch from the top and bottom edges of the cardboard.
- The Notches: Along those lines, make marks every 1/2 inch. These will be your “teeth.”
- The Cut: Use a utility knife or sharp scissors to cut 1/2-inch deep slits at every mark.
Pro Tip: If you want a more dense, intricate weave, space your notches 1/4 inch apart. For a chunkier, faster project, 1/2 inch to 3/4 inch is ideal.
| Loom Component | Material Requirement | Budget Saving |
|---|---|---|
| Loom Frame | Scrap Shipping Box | $45.00 |
| Shuttle (Yarn Holder) | Popsicle Stick or Cardboard Scrap | $5.00 |
| Beater (Tension Tool) | Kitchen Fork | $3.00 |
Warping and Weaving: The Structural Foundation
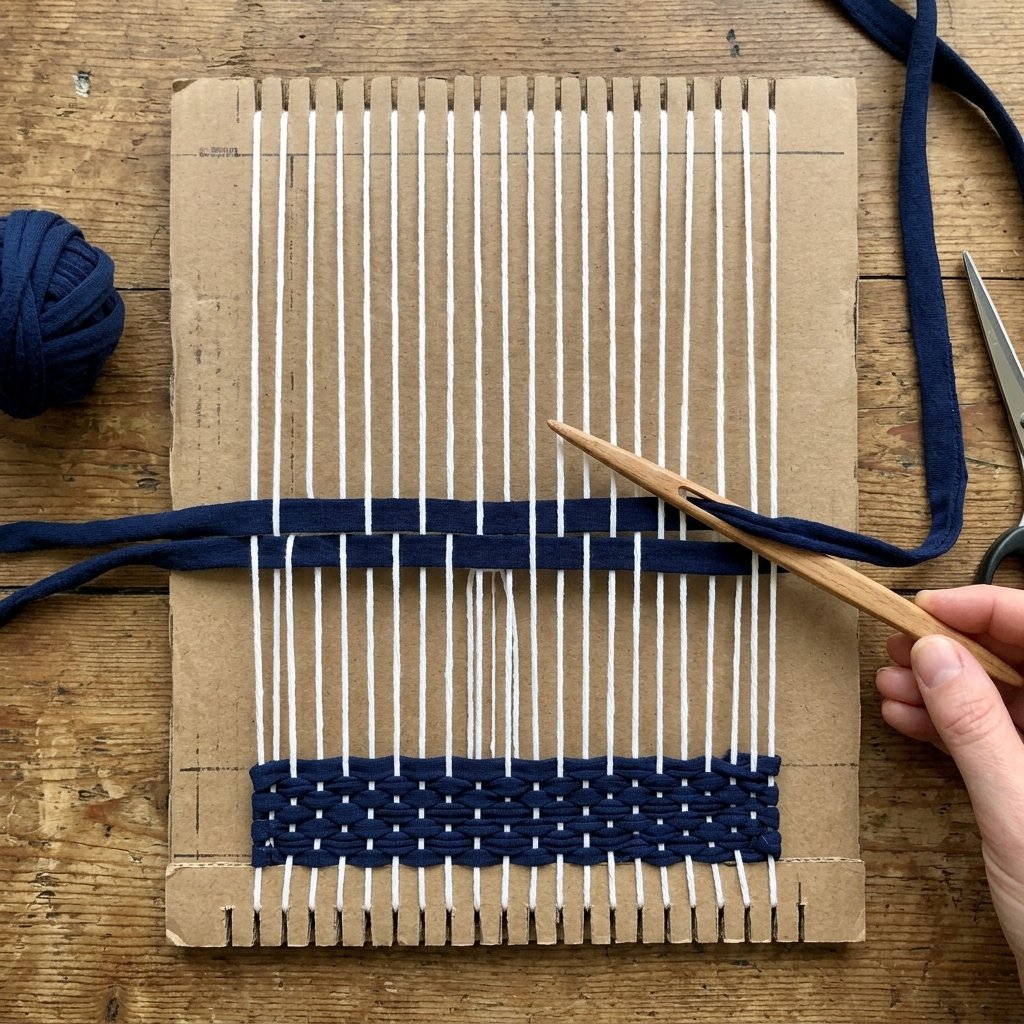
Now we begin the meditative process of weaving. First, we must “warp” the loom. This involves running a continuous string vertically through the notches to create the skeleton of the tapestry. Use your strongest, least-stretchy t-shirt yarn for this step.
The Basic Tabby Weave
The Tabby Weave is the most fundamental technique. It’s a simple over-under-over-under pattern. When you reach the end of a row, wrap around the last warp thread and head back the other way, this time going under-over-under-over.
Adding the ‘Boho’ Flair with Rya Knots
To get that iconic shaggy fringe at the bottom, we use Rya Knots. Cut several 10-inch strips of yarn. Fold a bundle in half, tuck the loop under two warp threads, and pull the ends through the loop. Tighten it at the base of your loom. Repeat this across the entire bottom row for a rugged, textured look.
Keep your tension loose! If you pull the horizontal threads (the weft) too tight, your tapestry will start to look like an hourglass. Leave a small ‘rainbow’ arch of yarn before pushing it down with your fork.
Advanced Textures: The Soumak Braid and Bubbling
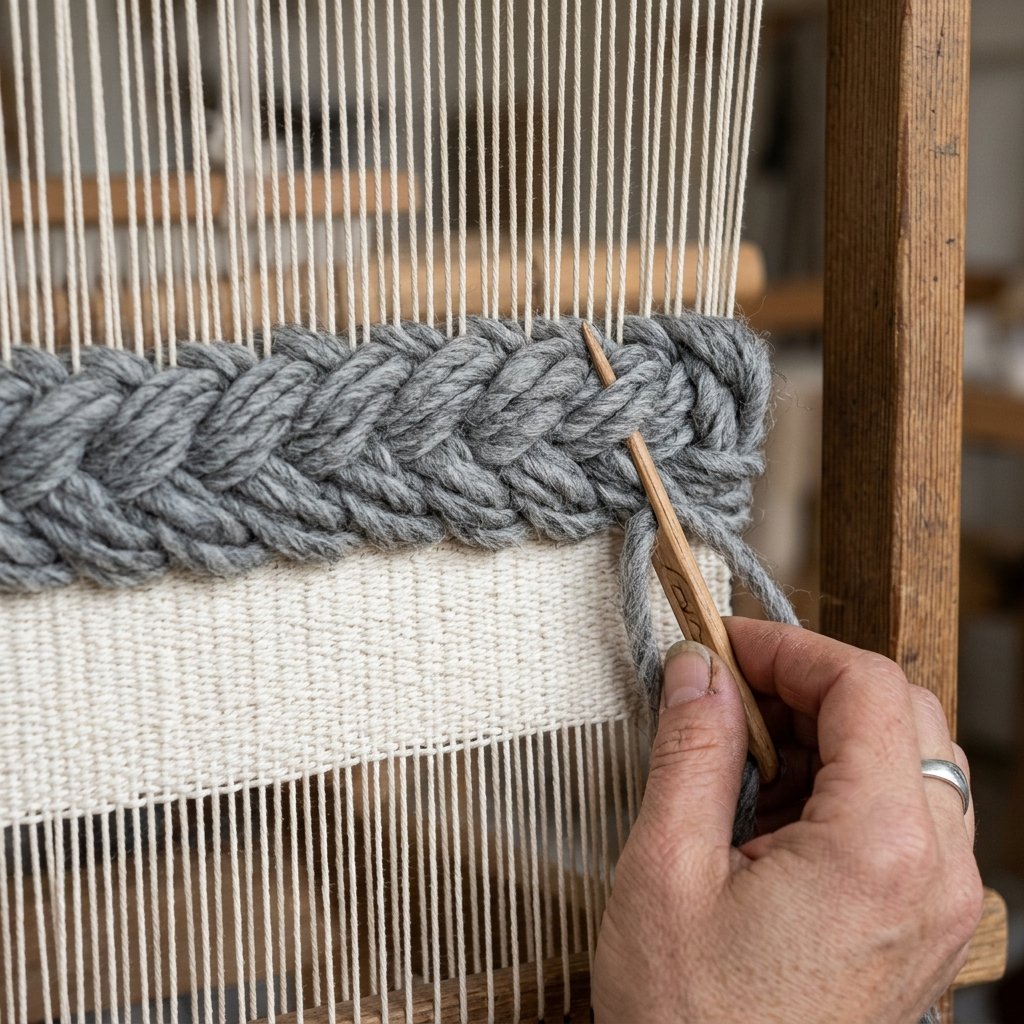
To take your tapestry from “craft project” to “artisan decor,” you need to vary your stitches. The Soumak technique creates a raised, braided effect that looks like thick wool roving but can be done entirely with t-shirt scraps.
How to Soumak
- Wrap your yarn over two warp threads, then loop it back under one.
- Repeat this across the row to create a diagonal, rope-like texture.
- Reverse the direction on the next row to create a herringbone pattern.
The Bubbling Technique
For a cloud-like, organic feel, use the bubbling technique. Instead of pulling your weft thread flat, pull up small loops between the warp threads. This adds 3D depth and a sense of luxury to the piece.
| Technique | Visual Effect | Difficulty |
|---|---|---|
| Tabby Weave | Flat, solid color blocks | Beginner |
| Rya Knots | Long, shaggy fringe | Beginner |
| Soumak | Raised, braided texture | Intermediate |
| Bubbling | Soft, puffy volume | Intermediate |
Finishing and Mounting: The Gallery Presentation
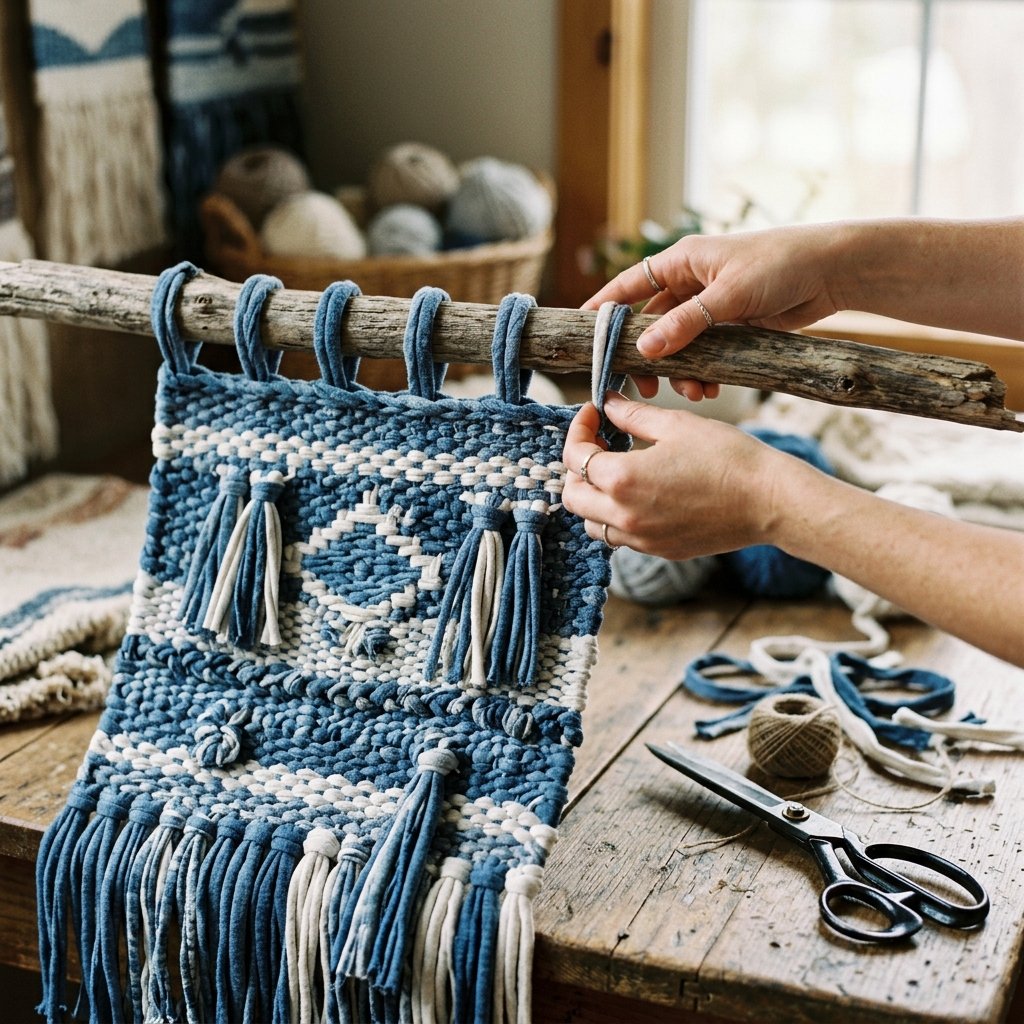
Once you’ve reached the top of your loom, it’s time for the final reveal. Carefully pop the warp loops off the cardboard notches. You will be left with loops at the top. To give your piece a rugged, masculine-elegant finish, we are going to mount it on a natural element.
The Mounting Process
- Find Your Branch: Go for a walk and find a sturdy, dried branch or a piece of driftwood. For a more modern look, use a $1.00 wooden dowel from the hardware store.
- Secure the Loops: Slide the top loops of your tapestry onto the branch. If the loops are too loose, tie them in pairs around the branch using a simple overhand knot.
- Trim the Fringe: Lay the tapestry flat and use sharp shears to trim the bottom fringe into a V-shape, a straight edge, or an asymmetrical slant.
- The Hanger: Tie a final piece of t-shirt yarn to both ends of the branch to create the hanging cord.
Safety Note: When foraging for branches, ensure the wood is completely dry and free of pests. You can bake small branches in the oven at 200°F for 30 minutes to sanitize them before bringing them into your home.
Cost Comparison: DIY vs. High-End Retail
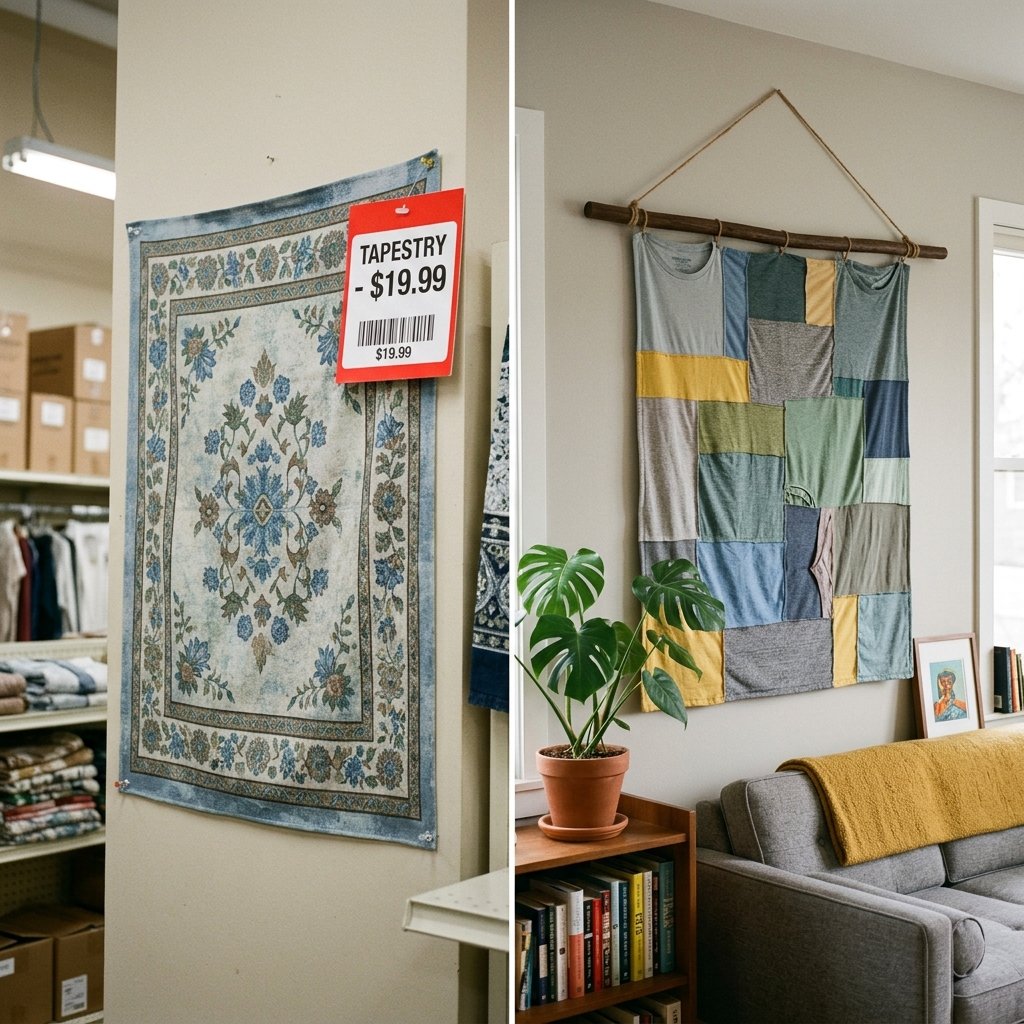
The satisfaction of this project comes not just from the creativity, but from the incredible savings. Weaving your own decor is a power move for any budget-savvy homeowner.
| Item | Retail Price (Boutique) | DIY Upcycled Cost |
|---|---|---|
| Large Wall Tapestry | $85.00 – $210.00 | $0.00 |
| Hanging Hardware | $15.00 | $0.00 (Found Branch) |
| Materials (Cotton Yarn) | $40.00 | $0.00 (Old Tees) |
| Total | $140.00 – $265.00 | $0.00 |
By investing about 4 to 6 hours of your time, you are essentially “earning” over $30 per hour in home equity and decor savings. That is clever living at its finest.
Conclusion
You have successfully turned a pile of forgotten clothing into a sophisticated piece of interior design. This boho wall tapestry is more than just decor; it is a testament to your resourcefulness and craft. Whether you hang it in your home office, give it as a thoughtful, handmade gift, or use it to add warmth to a nursery, you’ve proven that style doesn’t have to come with a high price tag.
Don’t stop here. Now that you’ve mastered the basic weave and the cardboard loom, the possibilities are endless. Try experimenting with different fabrics like old denim strips or fleece blankets. Remember, in the world of the frugal DIYer, nothing is trash—everything is just a masterpiece waiting to happen. Happy weaving!

Makenzie is the founder and lead writer at MoneyHackTips.com — a personal finance blog dedicated to delivering street-smart financial wisdom for real people on real budgets. With 300+ published articles covering everything from debt management to investing fundamentals, Makenzie’s mission is to make every dollar work harder. When not writing about money hacks, Makenzie is testing frugal living strategies, optimizing side hustles, and helping readers build financial freedom from scratch.