
The Secret to a 5-Star Spa Bathroom on a Frugal Budget
Have you ever walked into the bathroom of a boutique hotel or a high-end restaurant and felt instantly relaxed? The secret isn’t just the lighting or the expensive tiles; it is the complete absence of visual clutter. Instead of a chaotic graveyard of mismatched, brightly colored plastic drugstore bottles, luxury bathrooms feature cohesive, heavy, and elegant containers. Brands like Aesop or Le Labo charge upwards of $40 to $100 for a single bottle of hand wash. But as resourceful, budget-savvy crafters and frugal DIYers, we know a secret: those expensive bottles are just glass and a pump. You already have the foundational materials sitting in your recycling bin right now.
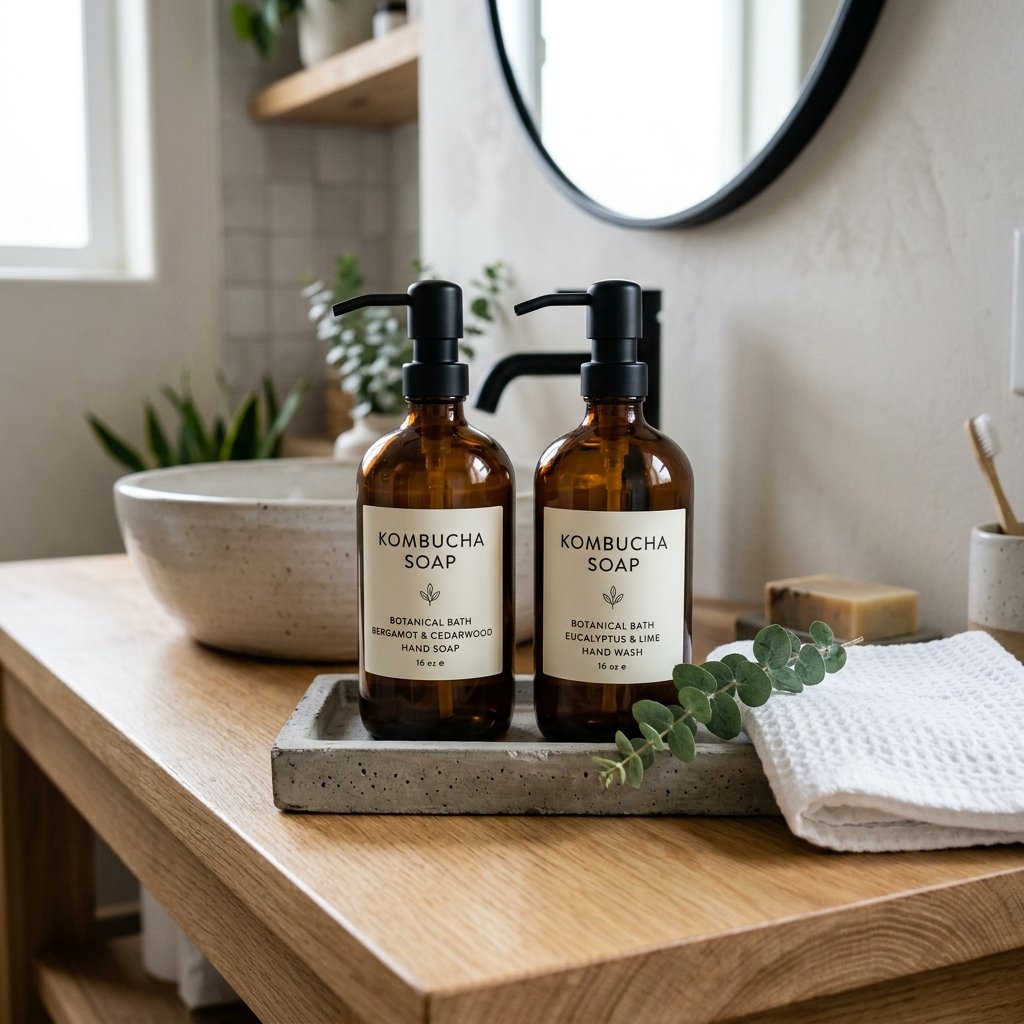
Welcome to the ultimate trash-to-treasure masterclass. In this comprehensive guide, we are going to take everyday empty glass bottles—think kombucha, sparkling water, and even rugged liquor bottles—and upcycle them into breathtaking, heavy-duty bathroom accessories that look incredibly expensive. Whether you are a handy parent trying to organize a chaotic family bathroom, a budget-conscious homeowner wanting an aesthetic upgrade, or someone looking to craft a thoughtful, masculine-elegant gift set for Father’s Day, this genius glass bottle upcycle is your golden ticket.
We will cover everything from the chemistry of removing stubborn commercial adhesives without harsh chemicals, to the exact thread sizes needed for replacement pumps, to the viral baking soda paint trick that turns clear glass into faux-stone pottery. By the end of this project, you will have transformed your vanity for under $5, proving once again that true style isn’t bought—it is resourcefully crafted.
Section 1: The Anatomy of High-End Design (Why Glass Wins)
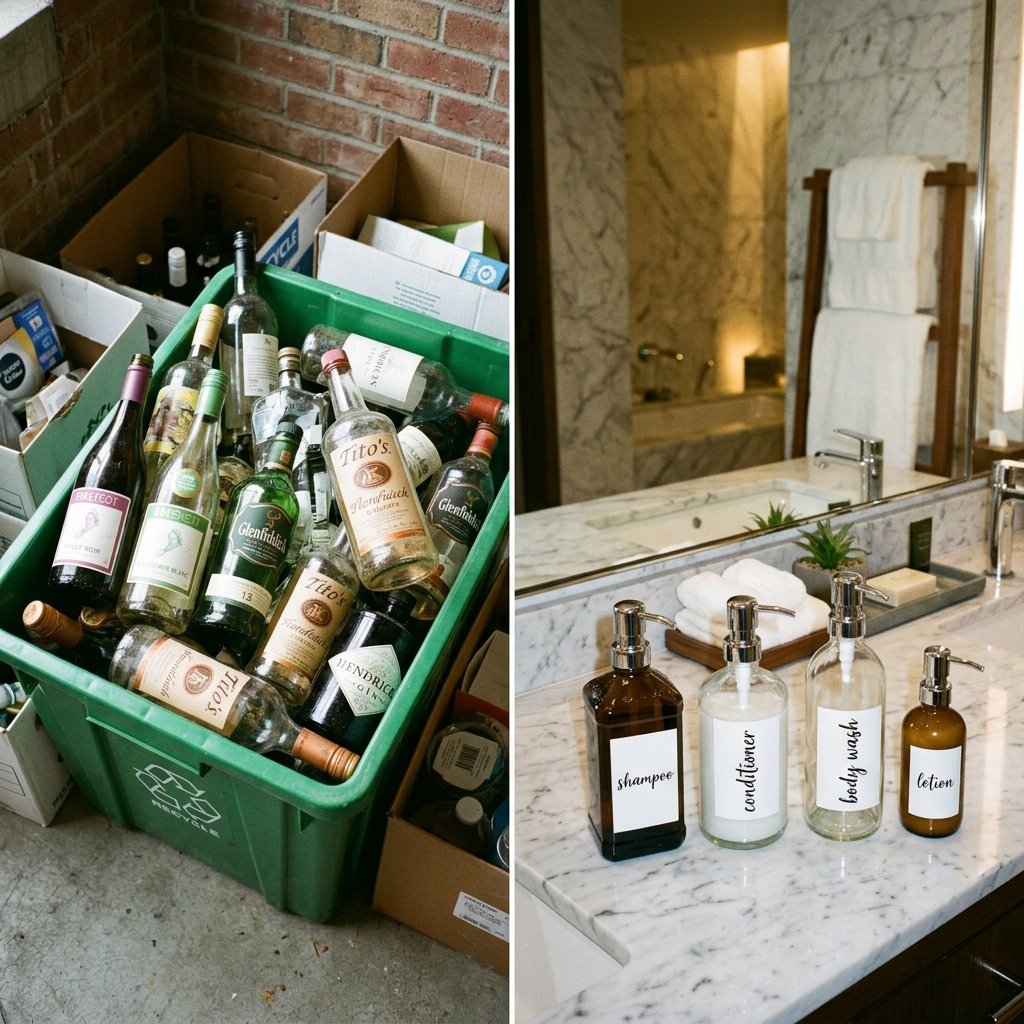
Before we dive into the elbow grease of upcycling, we need to understand the psychology of luxury design. Why does a glass bottle feel so much more premium than a plastic one? It comes down to weight, texture, and light. Glass has a substantial, grounding weight that feels permanent and intentional. When you press down on a glass soap dispenser, it doesn’t tip over or squish; it stays firmly planted on your vanity.
The Power of Amber and Matte Black
Amber glass is a staple in high-end apothecaries and luxury skincare brands. Originally designed to protect sensitive essential oils and botanical ingredients from UV light degradation, amber glass has become synonymous with organic, premium wellness. Matte black or frosted glass, on the other hand, leans into a more rugged, industrial, and masculine-elegant aesthetic. By choosing the right base bottle from your recycling bin, you dictate the entire vibe of your bathroom.
Store-Bought Luxury vs. Zero-Budget DIY
Let us break down the actual cost of achieving this look. The savings are not just pennies; they are astronomical. When you upcycle, you are paying only for the hardware (the pump) and a few cents for paint or labels.
| Item / Component | High-End Retail Cost | Our Frugal DIY Cost |
|---|---|---|
| Amber Glass Soap Dispenser (16oz) | $35.00 – $65.00 | $0.00 (Upcycled Kombucha Bottle) |
| Matte Black Stainless Steel Pump | $12.00 | $1.50 (Bulk online or salvaged) |
| Waterproof Minimalist Label | $5.00 | $0.10 (DIY Packing Tape Trick) |
| Luxury Essential Oil Hand Wash | $40.00 | $3.00 (DIY Castile Soap Blend) |
| Total Estimated Cost | $92.00 – $122.00 | $4.60 |
By saving nearly $100 per bottle, you can outfit your kitchen, guest bathroom, and master bath for less than the cost of a single fast-food meal. That is the power of clever, budget-savvy crafting.
Section 2: Sourcing and Prepping the Perfect Glass Bottles
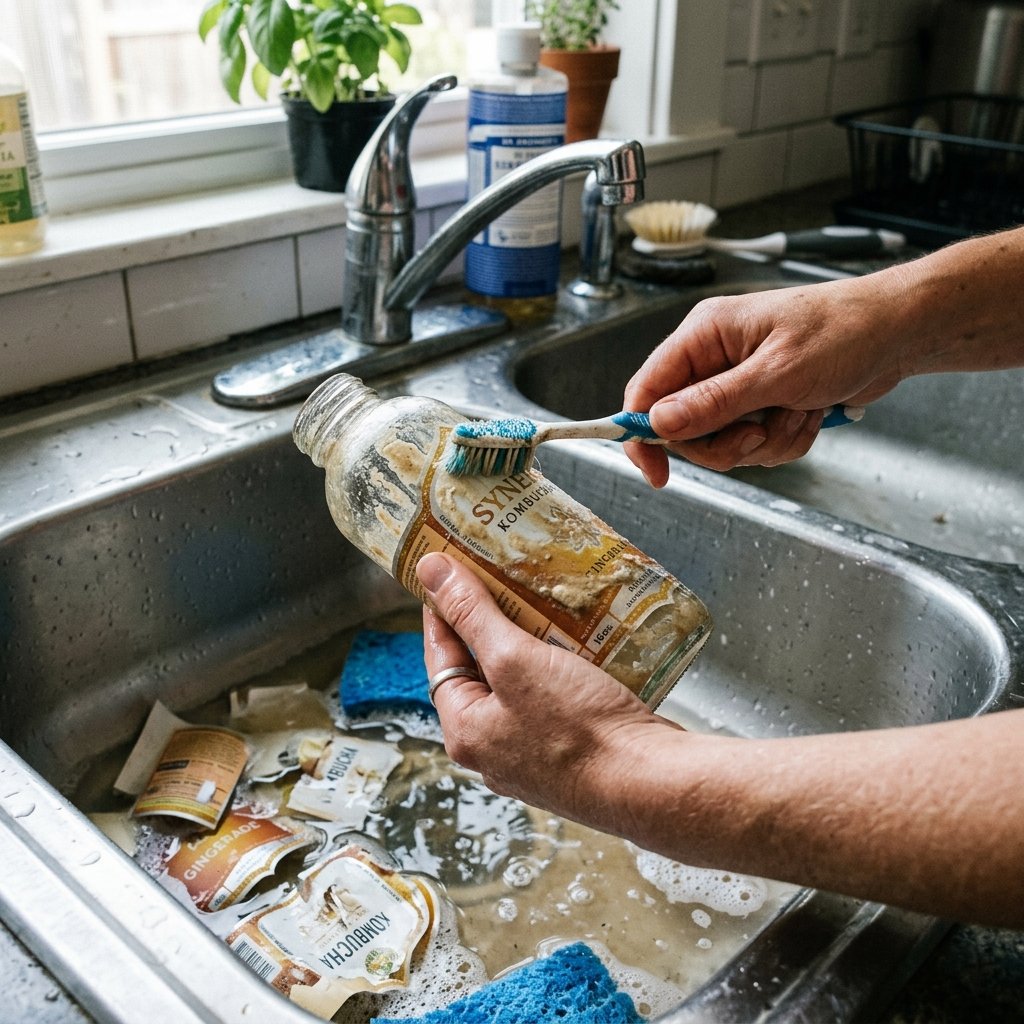
Not all glass bottles are created equal when it comes to bathroom upcycling. You want to look for bottles that have a sturdy base, a visually pleasing silhouette, and a standard neck size (which we will discuss in the hardware section). The best part? You get to enjoy the contents of the bottle before starting your project. It is a win-win.
The Best Grocery Store Bottles for Upcycling
Keep an eye out for these specific bottles during your next grocery run. They offer the best shapes and structural integrity for DIY bathroom decor:
- GT’s Kombucha (16oz): The holy grail of upcycling. These bottles are sturdy, come in clear or occasionally limited-edition colored glass, and have a perfect apothecary-style silhouette.
- Topo Chico Mineral Water: Excellent for a tall, slender, vintage look. The pale green glass is beautiful for mouthwash decanters.
- Kraken Rum or Jack Daniels: Perfect for a rugged, masculine-elegant aesthetic. Their heavy, squared, or uniquely shaped bottles make incredible rustic mouthwash or lotion dispensers.
- Starbucks Frappuccino (Small): These stout, clear bottles are phenomenal for DIY bath salt jars or Q-tip holders.
- Olive Oil Bottles: Often dark green or amber, these are tall and elegant, perfect for bath oils or bubble bath liquids.
The Ultimate De-Labeling Masterclass
The biggest hurdle in upcycling glass is dealing with industrial-strength adhesive. Scraping it with a knife will only scratch the glass and ruin your manicure. Instead, we use a crafty-expert kitchen chemistry trick.
Safety Note: When working with hot water and glass, never plunge a cold glass bottle directly into boiling water, as the thermal shock can cause it to shatter. Always warm the glass gradually.
- The Hot Soak: Fill your sink with very hot water and a generous squirt of dish soap. Submerge the empty bottles and let them soak for 30 minutes. This softens the paper and the top layer of glue.
- The Peel: Peel off as much of the paper label as you can with your fingers. You will likely be left with a sticky, gummy residue.
- The Magic Slurry: In a small bowl, mix equal parts baking soda and cheap cooking oil (vegetable or canola oil works perfectly). Rub this thick paste directly onto the sticky residue.
- The Wait and Scrub: Let the paste sit for 15 minutes. The oil breaks down the adhesive bonds, while the baking soda acts as a gentle abrasive. Scrub it away with a coarse sponge or an old toothbrush.
- The Final Polish: Wash the bottle with regular dish soap to remove the oil, then wipe it down with a cotton ball soaked in rubbing alcohol. This ensures the glass is squeaky clean and ready for paint or labels.
Section 3: The Faux-Stone & Matte-Black Paint Hacks
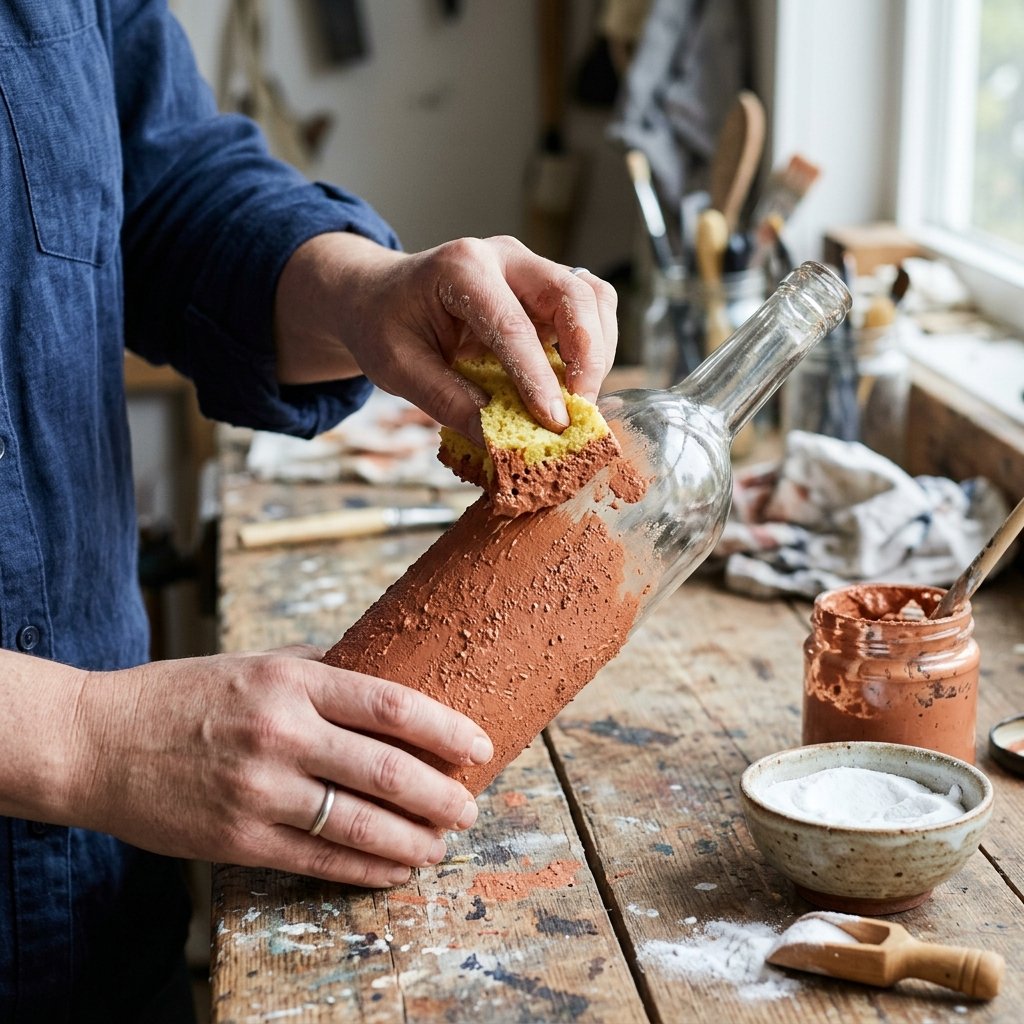
If you love the look of amber glass, you can skip this step. But if you want to elevate a standard clear glass bottle into a piece of high-end, textured pottery (think Anthropologie or Pottery Barn), the baking soda paint trick is your best friend. This technique adds a gritty, matte texture that completely masks the fact that the object underneath is a recycled beverage bottle.
The Baking Soda Paint Recipe
This is a resourcefully-creative way to use cheap acrylic craft paint. The baking soda reacts slightly with the paint, thickening it and giving it a beautiful, chalky, clay-like finish.
| Ingredient | Measurement | Purpose |
|---|---|---|
| Acrylic Craft Paint (Matte Black, Taupe, or Terracotta) | 1 Cup | Provides the base color and adhesion. |
| Baking Soda | 1/4 Cup to 1/2 Cup | Creates the faux-stone texture. More powder = rougher texture. |
| Water (Optional) | 1 Teaspoon | Only if the mixture becomes too thick to spread. |
Step-by-Step Texture Painting
- Step 1: Prep the Surface. Ensure your bottle is completely wiped down with rubbing alcohol. Oils from your fingers will prevent the paint from sticking.
- Step 2: Mix the Paint. In a disposable cup, mix your paint and baking soda until it reaches the consistency of thick frosting or mousse.
- Step 3: The Dabbing Technique. Do not use a standard paintbrush; strokes will ruin the stone illusion. Instead, use a cheap foam brush or a piece of an old kitchen sponge. Dip the sponge into the paint and dab it onto the glass in up-and-down motions. This stippling effect creates a porous, concrete-like texture.
- Step 4: Dry and Repeat. Let the first coat dry completely (about 1 hour). Apply a second coat using the same dabbing method to ensure full coverage and maximum texture.
- Step 5: Seal It. Since this bottle will live in a wet bathroom environment, you must seal it. Spray the completely dried bottle with a clear, matte, waterproof acrylic sealer. This protects your faux-stone finish from water spots and soap drips.
For a rugged, industrial look, you can skip the baking soda and simply spray paint the bottle with a high-heat matte black spray paint, lightly distressing the raised glass lettering with fine-grit sandpaper.
Section 4: Upgrading the Hardware (Pumps and Pourers)
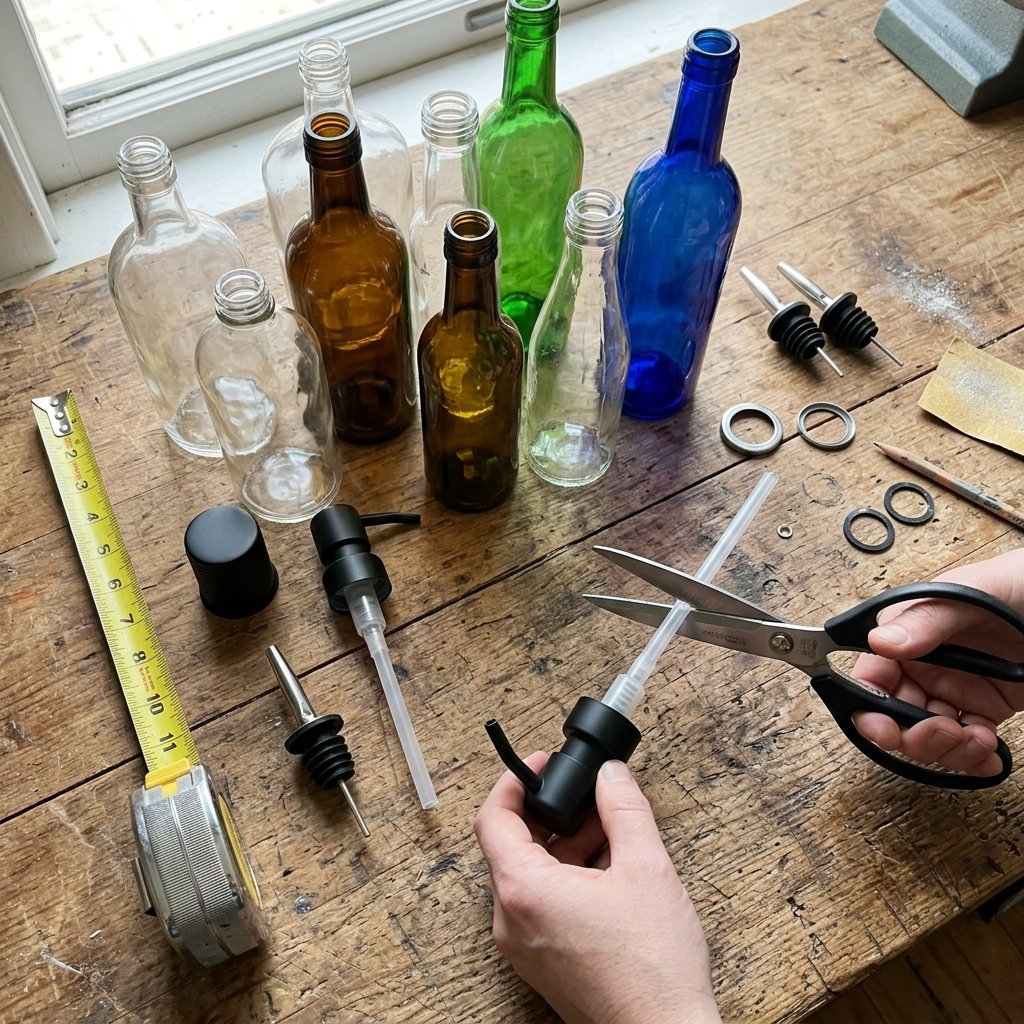
A beautiful bottle is useless without the right hardware. The pump is what turns your upcycled glass into a functional luxury item. You can either salvage pumps from empty plastic soap bottles you are throwing away, or buy a pack of high-quality stainless steel pumps online for a few dollars.
Understanding Thread Sizes
To ensure your pump fits your bottle perfectly, you need to know about thread sizes. The industry standard is written as two numbers (e.g., 28/400). The first number is the diameter of the bottle opening in millimeters, and the second number refers to the thread style (how many twists it takes to close).
| Bottle Type | Common Thread Size | Best Pump/Lid Match |
|---|---|---|
| Kombucha Bottles (16oz) | 28/400 | Standard Lotion/Soap Pump |
| Boston Round Apothecary Bottles | 28/400 or 24/400 | Standard Pump or Fine Mist Sprayer |
| Liquor Bottles (Jack Daniels/Kraken) | Varies (Often Corked) | Liquor Pour Spouts (for mouthwash) |
| Small Frappuccino Bottles | 43mm Lug | Original lid (painted) for bath salts |
Customizing and Fitting Your Pump
If you are salvaging a pump from a cheap plastic bottle, it is probably white or bright blue. To make it look expensive, gently sand the plastic pump head, wipe it with alcohol, and spray paint it with an oil-rubbed bronze or matte black spray paint made specifically for bonding to plastic.
Pro Tip: When cutting the plastic dip tube of your pump to fit your new glass bottle, always cut the bottom at a sharp 45-degree angle. If you cut it straight across, it can suction flat against the bottom of the glass bottle, preventing the soap from pumping out.
For mouthwash decanters, skip the pump entirely. Head to a Dollar Tree or a restaurant supply store and buy a metal liquor pour spout. Pressing one of these into a heavy glass bottle creates an incredibly sophisticated, speakeasy-style mouthwash dispenser.
Section 5: The “Aesop-Inspired” Waterproof Labeling Guide
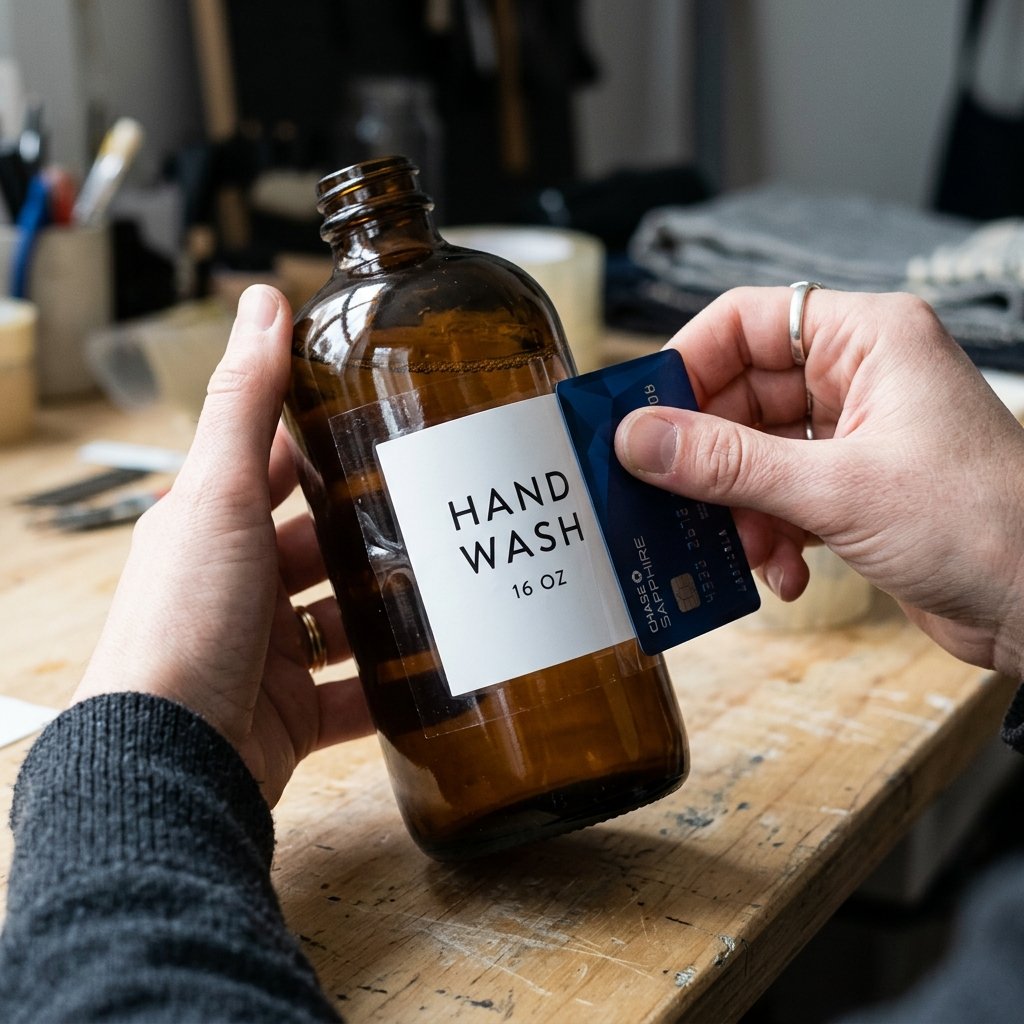
The defining characteristic of high-end apothecary brands is their minimalist labeling. You want clean lines, lots of negative space, and elegant typography. But a paper label in a steamy, wet bathroom will disintegrate in days. Here is how to create 100% waterproof labels on a zero budget.
Designing the Label
Use a free design program like Canva. Set your canvas to 2×2 inches or 3×3 inches depending on your bottle. Stick to a stark white or soft cream background. Use a crisp, sans-serif font like Helvetica or a classic serif like Garamond. Keep the text simple: HAND WASH, BODY LOTION, or MOUTHWASH. Add small, subtle details like the liquid volume (e.g., 16 FL OZ / 473 ML) at the bottom to mimic commercial packaging.
The Packing Tape Lamination Trick
If you don’t want to buy expensive waterproof vinyl sticker paper, you can use this brilliant, frugal crafter hack:
- Print your minimalist labels on standard computer paper using a laser printer (inkjet ink can bleed if moisture gets in, so laser is best).
- Cut out your label precisely.
- Take a piece of heavy-duty, crystal-clear packing tape that is slightly wider than your label. Carefully lay the tape over the front of the printed label, smoothing out any air bubbles with the edge of a credit card.
- Leave a small border of sticky tape exposed around all four edges of the paper label.
- Press the label onto your clean, dry glass bottle. The exposed tape border will seal the paper completely against the glass, making it entirely waterproof and giving it a high-gloss, professional finish.
If you prefer a matte look, invest in a few sheets of matte waterproof vinyl printable sticker paper. It costs about $1.00 per sheet, but one sheet can yield 10-15 labels, keeping your budget incredibly low.
Section 6: Filling & Styling Your New Dispensers
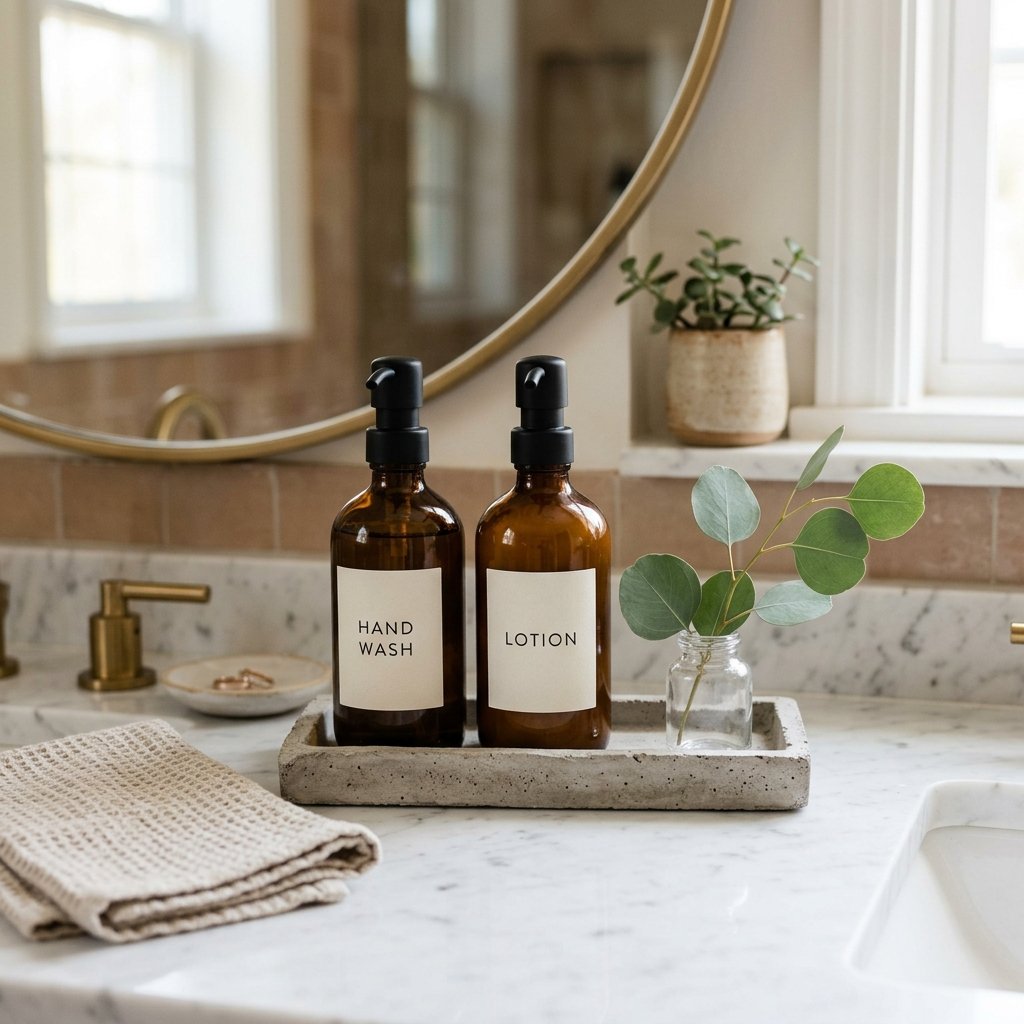
Now that your hardware and exterior look like a million bucks, it is time to fill them. You can easily buy bulk refill bags of soap from the grocery store to save plastic, but if you want to lean fully into the luxury spa experience, making your own custom-scented hand wash is incredibly easy and budget-friendly.
DIY Luxury Hand Wash Formulas
Using liquid unscented Castile soap as a base is frugal and natural. You can customize the scent profile to match your desired aesthetic. Here are three ratios to try (mix directly in your 16oz bottle):
| Scent Profile | Base Ingredients | Essential Oil Blend (Per 16oz) |
|---|---|---|
| The Rugged Woodsman | 1/4 Cup Castile Soap, Distilled Water | 15 drops Cedarwood, 10 drops Pine, 5 drops Bergamot |
| The 5-Star Spa | 1/4 Cup Castile Soap, Distilled Water | 12 drops Eucalyptus, 12 drops Lavender, 5 drops Peppermint |
| The Bright Citrus | 1/4 Cup Castile Soap, Distilled Water | 15 drops Sweet Orange, 10 drops Grapefruit, 5 drops Lemon |
Safety Note: Essential oils are highly concentrated. Always dilute them properly in a carrier soap or oil before applying them to the skin. Never put undiluted essential oils directly into plastic pumps, as they can degrade the plastic over time; glass is the perfect, safe vessel for essential oil recipes.
Styling Your Vanity on a Dime
To complete the 5-star hotel look, your beautiful new bottles need a stage. Do not just place them directly on the porcelain sink. Grouping them on a tray elevates the visual impact.
- The Dollar Tree Bamboo Hack: Buy a cheap bamboo cutting board from the dollar store. Sand it lightly and seal it with mineral oil. Place your amber glass hand wash and lotion side-by-side on this board for a warm, organic spa look.
- The DIY Concrete Valet Tray: For a masculine-elegant, industrial vibe, mix a small batch of quick-set concrete and pour it into a cardboard shoebox lid lined with a plastic bag. Once dry, peel away the cardboard. You now have a heavy, brutalist concrete tray that perfectly complements matte black or faux-stone bottles.
- Add Greenery: Snip a small sprig of eucalyptus or rosemary from your garden (or buy a cheap faux sprig) and place it in a tiny upcycled hot sauce bottle next to your soap. The pop of green against the amber or black glass is the ultimate designer touch.
Conclusion
Elevate Your Everyday for Pennies
Transforming your bathroom into a 5-star hotel sanctuary doesn’t require a massive renovation budget, a professional interior designer, or expensive shopping sprees at luxury boutiques. As we have seen, the secret lies right in your recycling bin. By looking at everyday trash through the lens of a resourceful, crafty upcycler, an empty kombucha bottle becomes a bespoke apothecary dispenser, and a discarded liquor bottle becomes a rugged, masculine mouthwash decanter.
You have learned the chemistry of removing labels, the artistry of faux-stone painting, the mechanics of pump thread sizes, and the frugal genius of packing-tape lamination. For less than $5, you have upgraded your home’s aesthetic, reduced plastic waste, and created something truly beautiful with your own hands. So grab that empty bottle from the kitchen, mix up your baking soda paste, and start crafting. Your luxurious, budget-savvy spa oasis awaits!

Makenzie is the founder and lead writer at MoneyHackTips.com — a personal finance blog dedicated to delivering street-smart financial wisdom for real people on real budgets. With 300+ published articles covering everything from debt management to investing fundamentals, Makenzie’s mission is to make every dollar work harder. When not writing about money hacks, Makenzie is testing frugal living strategies, optimizing side hustles, and helping readers build financial freedom from scratch.