
There is a unique kind of heartbreak that happens when you pull your favorite, impeccably tailored wool coat out of storage on the first crisp day of autumn, only to discover a jagged moth hole right on the lapel. For a moment, you might think it is ruined. You might picture the astronomical bill a professional tailor would charge for French reweaving, or worse, you might consider donating this handsome, expensive garment to the thrift store. Stop right there! As a resourceful, budget-savvy upcycler, you possess the power to resurrect that heirloom piece for absolutely $0.
Welcome to the lost art of invisible mending. In an era of fast fashion, repairing our high-quality garments is not just a frugal triumph; it is a rugged act of rebellion. Whether it is a classic naval peacoat, an elegant camel trench, or a thick tweed blazer, wool is a miraculously forgiving fiber. Because wool fibers naturally interlock, we can use a genius, centuries-old trick—combining fiber harvesting with dry needle felting or invisible darning—to seamlessly bridge that gap. No sewing machine required. No clunky, puckered patches. Just you, a needle, and a clever trick that will save you $150 or more. Let us roll up our sleeves, reclaim our wardrobe, and turn that tragic hole into a testament of your crafty expertise.
The Anatomy of Wool: Why Traditional Sewing Fails
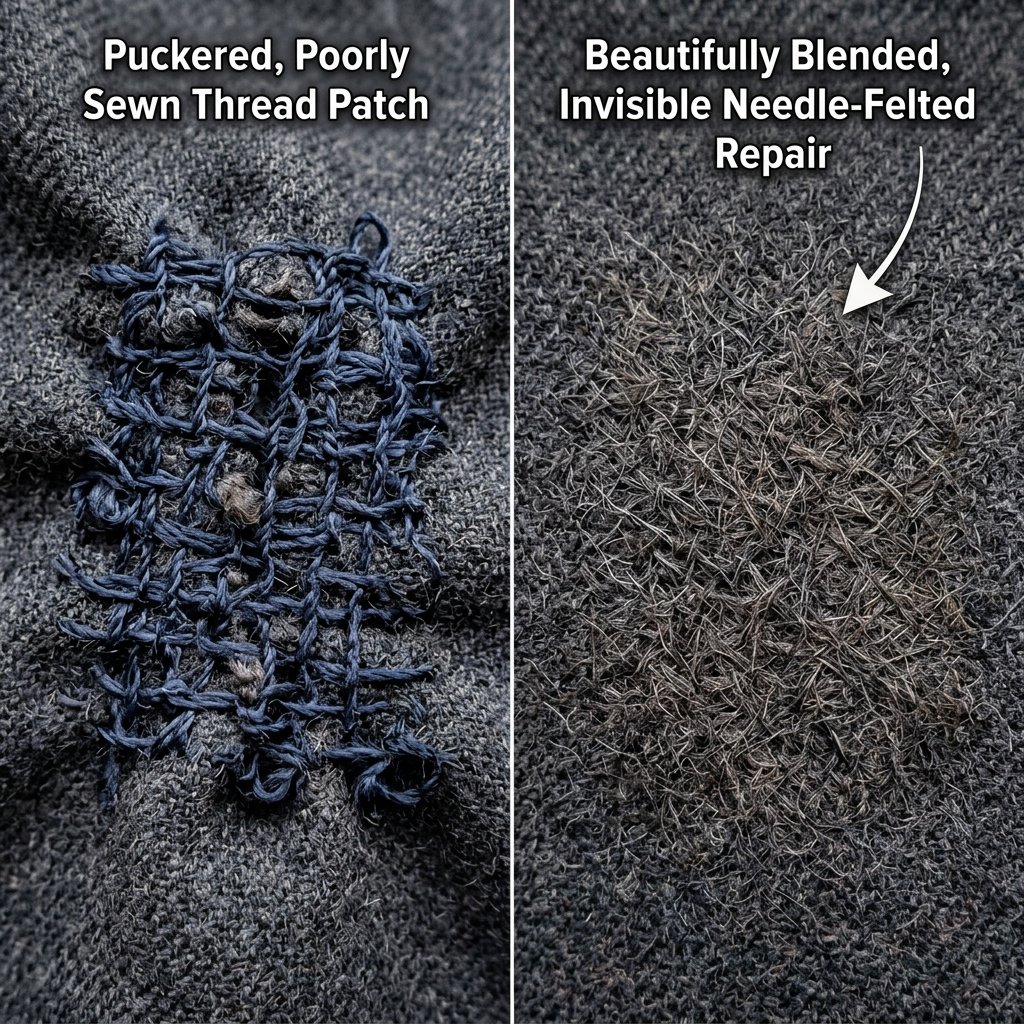
Before we dive into the repair, we must understand our canvas. Wool is not like cotton or synthetic polyester; it is a natural, microscopic marvel covered in tiny scales. When you try to fix a hole in a heavy wool coat using a standard needle and thread, pulling the edges together creates a visible, puckered scar. It looks pinched, cheap, and ruins the elegant drape of the garment.
The genius of invisible mending lies in replacing the missing fabric rather than cinching the existing fabric together. By mimicking the woven or felted structure of the coat, we fill the void seamlessly. Depending on your coat’s texture, we will either use a needle-felting technique (ideal for boiled wool, melton, and fuzzy winter coats) or a meticulous reweaving technique (best for worsted wool suits and smooth gabardines).
The True Cost of Coat Repair
Let us look at the numbers. Taking a high-end coat to a professional for reweaving is a luxury service. By learning this rugged, practical skill, you are keeping hard-earned money in your pocket while preserving a garment that might have cost hundreds of dollars.
| Repair Method | Estimated Cost | Time Required | Visual Result |
|---|---|---|---|
| Professional French Reweaving | $80 – $150+ | 1 – 3 Weeks | Virtually Seamless |
| Standard Tailor Patch/Darn | $25 – $45 | 1 Week | Visible, functional |
| DIY Sewing Machine Zig-Zag | $2 | 10 Minutes | Puckered, messy scar |
| DIY Invisible Mending (Our Trick) | $0 – $8 | 30 – 45 Minutes | Virtually Seamless |
“Mending is not a chore; it is an act of rebellion against a disposable society. Take your time, trust the fibers, and weave your story into the garment.”
The Arsenal: Gathering Your Mending Supplies

To execute this genius trick, you do not need a massive, expensive sewing kit. You need a few specialized, highly affordable tools that will pay for themselves ten times over with just one use. If you are a frugal DIYer, you might already have these in your craft bin.
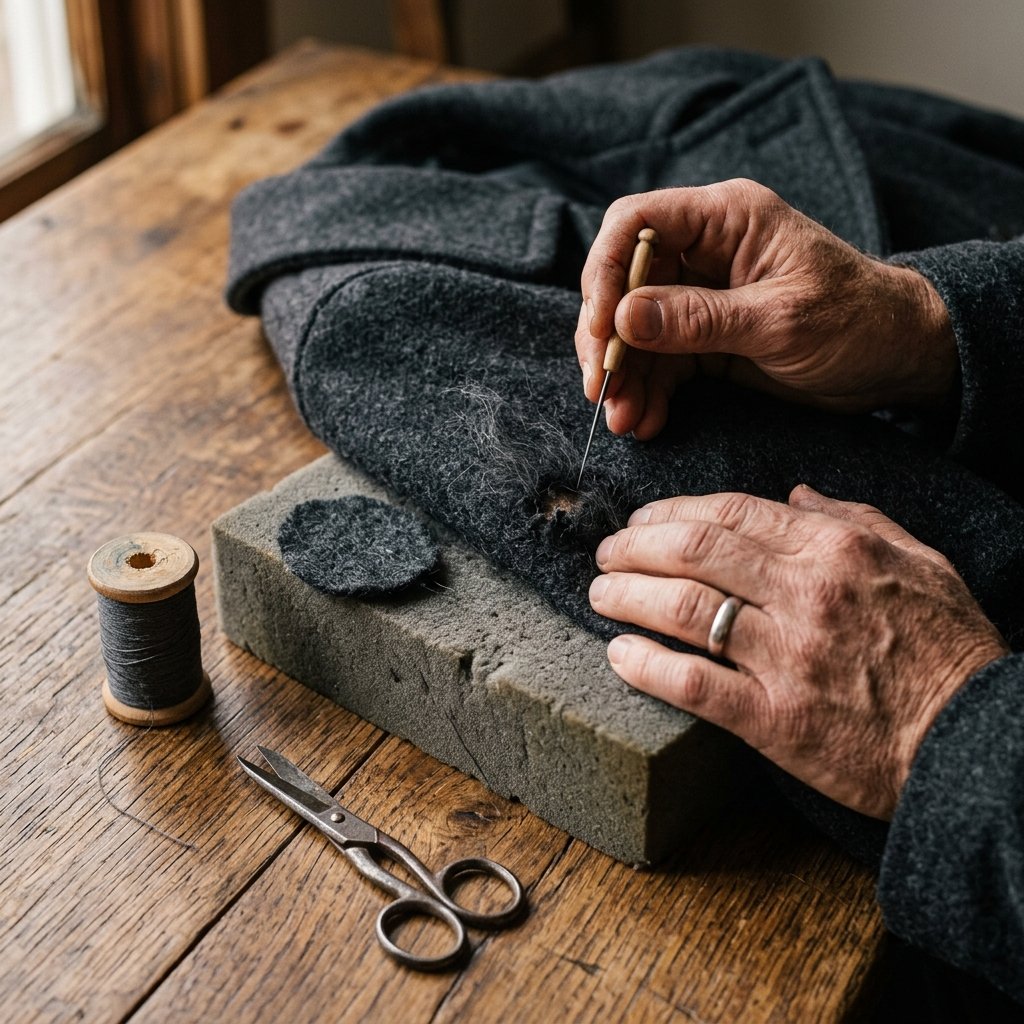
- A Felting Needle (Sizes 38 or 40): This is the magic wand. Unlike a sewing needle, a felting needle has tiny barbs on the shaft. When you punch it through wool, it catches the fibers and tangles them together, creating a solid piece of fabric. Cost: Under $5 for a multi-pack.
- A Dense Foam Block or Felting Mat: You need a surface to absorb the needle punches without breaking the needle. A high-density sponge from the dollar store works perfectly in a pinch!
- The “Donor” Fibers: This is the secret to a 100% color match. We will be harvesting fibers directly from the coat itself.
- A Darning Needle and Thread (Optional): Required only if your coat is a smooth, tightly woven worsted wool that requires traditional reweaving instead of felting.
- Small Embroidery Snips: For precise trimming.
Safety Note: Felting needles are incredibly sharp and barbed. Always keep your fingers clear of the punching zone, and never work with the coat resting directly on your lap. Always use your foam block!
The Secret Sauce: Harvesting “Donor” Fibers
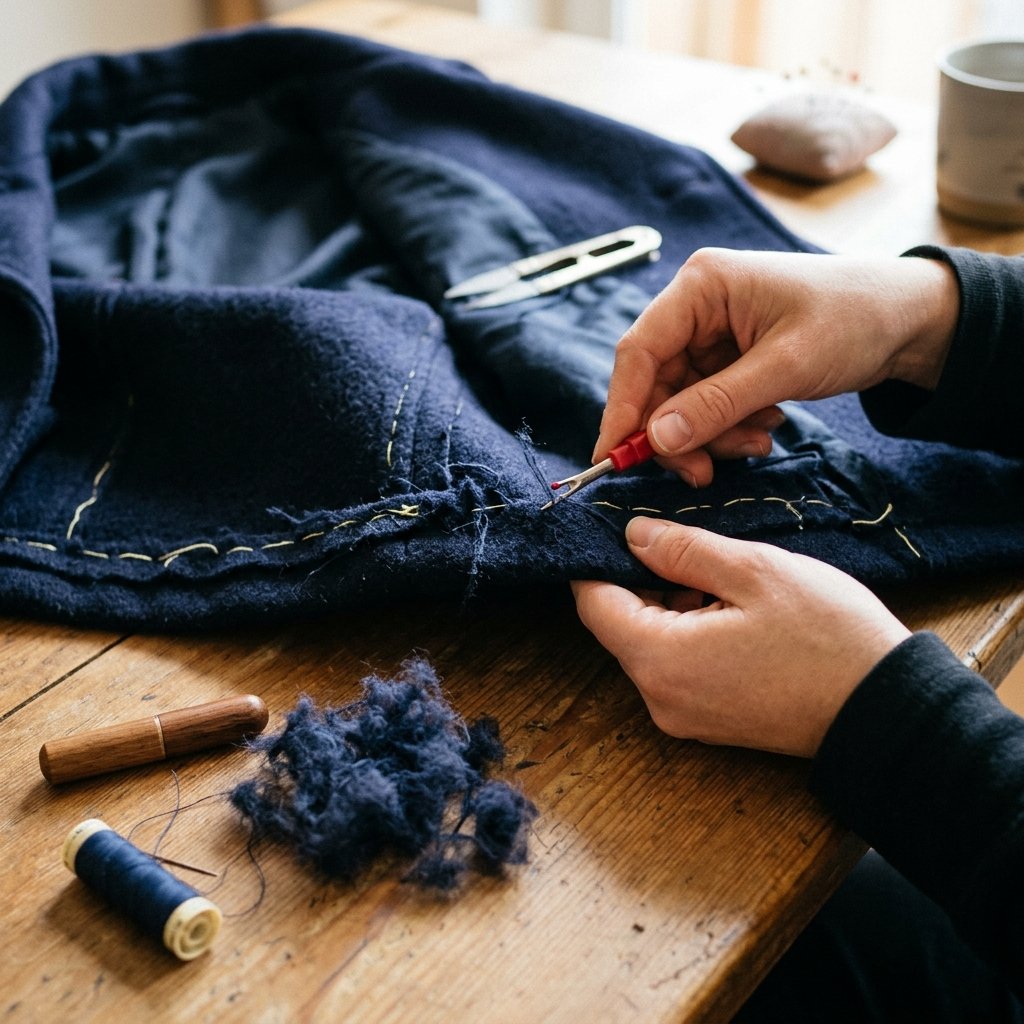
The biggest challenge in mending a hole is finding thread or yarn that exactly matches the color and texture of your coat. Even buying a spool of “charcoal grey” at the craft store will likely result in a patch that is just a shade too blue or too brown. The clever, budget-savvy solution? Steal from the coat itself!
Where to Harvest Fibers
- The Hem Allowance: Turn your coat inside out. At the very bottom, there is usually a generous 1 to 2 inches of fabric folded up and sewn behind the lining. This is prime real estate.
- Inside the Pockets: Check the seam allowances deep inside the pocket bags.
- Under the Collar: The underside of the collar often has excess fabric hidden by the fold.
How to Extract the Fibers
Using your small snips or a seam ripper, gently tease out individual threads from the raw edge of the seam allowance. If you are repairing a fluffy, melton wool peacoat, you can actually use a clean razor blade or a sweater shaver to gently scrape the hidden fabric, collecting a small pile of wool “fuzz.” You only need a pinch—about the size of a cotton ball—to fill a standard moth hole. This ensures your patch will be an absolute, undeniable 100% color match. It is a zero-budget trick that yields high-end results.
The Genius Trick: Step-by-Step Invisible Needle Felting

If your coat is made of boiled wool, melton, flannel, or any fuzzy winter wool, needle felting is your best friend. It is incredibly satisfying, exceptionally durable, and surprisingly fast. Here is how to perform the magic.
Step 1: Prep the Canvas
Lay your coat flat on a well-lit table. Place your dense foam block directly underneath the hole, inside the coat or between the lining and the outer wool. Ensure the fabric is resting naturally, not stretched tight.
Step 2: Clean the Edges
Moth holes often have weak, chewed-up edges. Gently trim away any dangling or severely thinned threads around the perimeter of the hole using your snips. You want a clean, stable edge to anchor your new fibers.
Step 3: Place the Donor Fluff
Take a small pinch of the wool fuzz you harvested. Roll it lightly between your fingers to create a loose, flat web of fiber. Lay this web directly over the hole. It should overlap the healthy edges of the hole by about 1/4 inch on all sides.
Step 4: The Punching Process
Hold your felting needle perfectly straight up and down. Begin punching the needle through the donor fluff, into the coat, and down into the foam block. Use rapid, shallow, straight motions.
- Start by punching around the perimeter of the hole to anchor the patch to the healthy coat fibers.
- Slowly work your way into the center of the hole.
- As you punch, the barbs on the needle will force the fibers to tangle and lock together, creating new fabric right before your eyes.
- If the patch looks thin or you can see light through it, add another tiny pinch of fluff and repeat.
Step 5: Steam and Press
Once the hole is completely filled and the new fiber is dense and flush with the coat, remove the foam block. The mended area might look slightly fuzzy. Take a steam iron, place a damp pressing cloth (a clean cotton dish towel works perfectly) over the mend, and press down firmly for 5 to 10 seconds. The heat and steam will permanently set the wool fibers, shrinking them slightly to lock the patch in place. The result? A flawless, invisible mend.
Alternative Method: Traditional Invisible Darning for Woven Wool
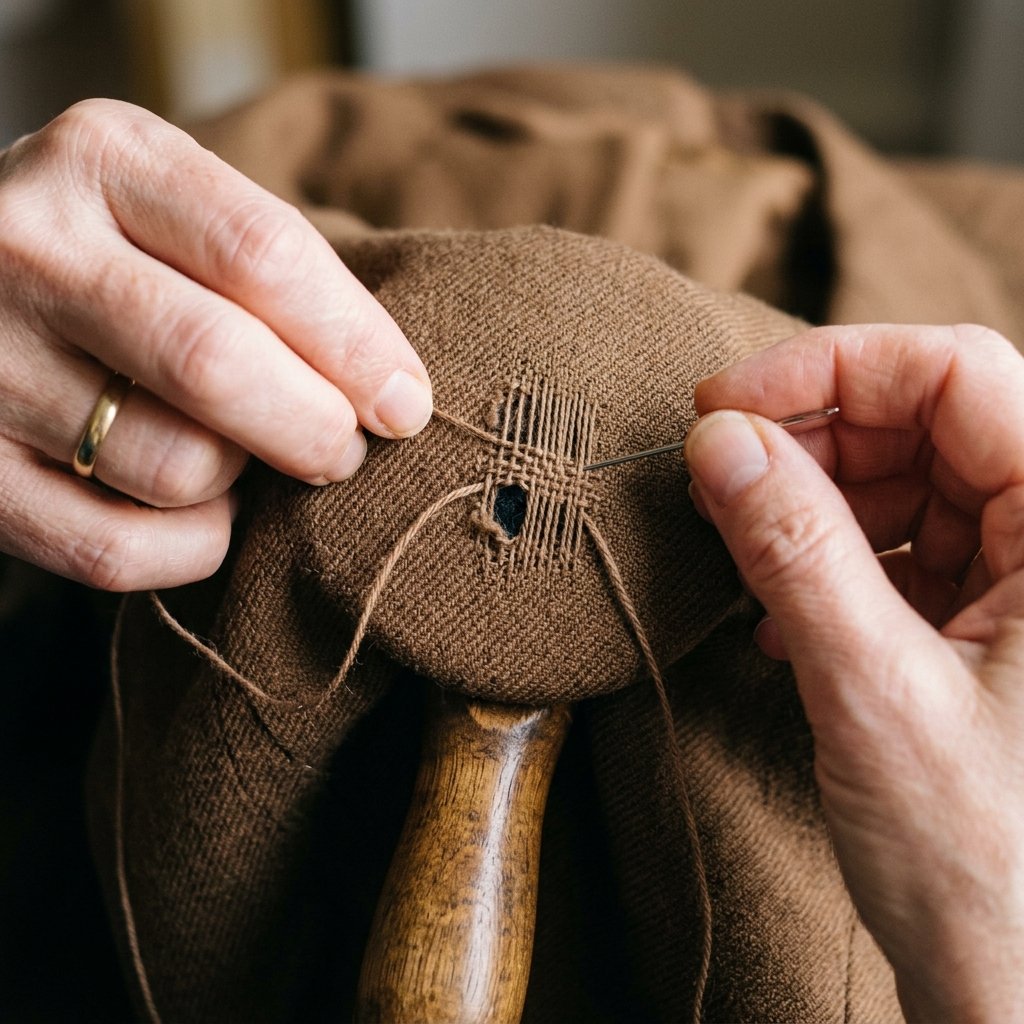
What if your coat is a sleek, tightly woven worsted wool trench or a vintage suit jacket? Needle felting will not work on smooth, hard-finished fabrics because there is no “fuzz” to tangle. For this, we must pivot to the elegant, age-old skill of invisible darning (reweaving).
Fabric Type Compatibility Guide
| Fabric Texture | Examples | Best Mending Technique |
|---|---|---|
| Fuzzy, Dense, Thick | Peacoats, Boiled Wool, Melton, Flannel | Needle Felting (Fastest & Most Invisible) |
| Smooth, Flat, Tightly Woven | Suit Jackets, Gabardine, Worsted Wool | Invisible Darning / Reweaving |
| Loosely Woven, Chunky | Tweed, Houndstooth, Bouclé | Pattern Darning (Matching the weave) |
The Reweaving Process
For this technique, you will use the long, individual threads you harvested from the hem. Thread a fine darning needle with a single strand of the donor thread.
- Place a darning mushroom (or a smooth tennis ball!) under the hole to keep the tension even.
- Starting about 1/2 inch outside the hole, run your needle through the back of the existing fabric to anchor the thread.
- Create the “warp” (vertical threads) by stitching straight across the hole, anchoring into the healthy fabric on the opposite side. Keep the threads parallel and spaced exactly like the original weave.
- Once the hole is covered vertically, begin weaving horizontally (the “weft”). Go over one vertical thread, under the next, over, under, straight across the hole.
- Use the tip of your needle to pack the horizontal threads tightly together so no gaps remain.
This requires patience, a strong cup of coffee, and good lighting. But the satisfaction of watching a hole vanish into a perfect grid of your own making is a truly empowering, ruggedly handsome craft.
Protecting Your Investment: Moth Prevention & Coat Care

You have successfully saved your favorite coat, kept your hard-earned cash, and learned a master tailor’s secret. Now, let us ensure you never have to do this again. Moths do not actually eat wool; their larvae do, and they are attracted to moisture, sweat, and food particles trapped in the fibers.
The Frugal DIYer’s Guide to Coat Storage
- Brush It Down: Invest in a stiff-bristled garment brush. Brushing your coat after wearing removes microscopic dirt and disrupts any moth eggs before they can hatch. It takes 30 seconds and extends the life of the coat by years.
- DIY Cedar & Lavender Sachets: Skip the expensive chemical mothballs that leave you smelling like a dusty attic. Go to the dollar store, buy a pack of small organza bags, and fill them with cedar shavings (often found in the pet aisle for pennies) and dried lavender. Toss these into the pockets of your coat before storing.
- Breathable Storage: Never store wool in plastic dry-cleaning bags. Plastic traps moisture and breeds mildew. Use a breathable cotton canvas garment bag, or resourcefully upcycle an old cotton bedsheet by cutting a hole for the hanger!
By treating your garments with this level of practical, masculine-elegant care, you transform them from mere clothing into lifelong companions. A well-mended coat doesn’t just look good; it carries the story of your resourcefulness.
Conclusion
There is an immense, quiet pride that comes from fixing something with your own two hands. In a world that constantly tells us to throw away the old and buy the new, taking 45 minutes to invisibly patch a hole in a beautiful wool coat is a profound statement. You have bypassed the expensive tailor, utilized brilliant zero-budget harvesting tricks, and breathed new life into a favorite garment using nothing but a needle and your own crafty ingenuity.
Whether you used the rapid needle-felting trick for your rugged winter peacoat or the meticulous reweaving method for a sharp suit jacket, you now possess a skill that will serve you, your family, and your wardrobe for a lifetime. So, the next time you find a snag or a moth hole, don’t panic. Grab your foam block, harvest those hidden threads, and get to work. Stay resourceful, stay budget-savvy, and wear your invisibly mended coat like a badge of honor!

Makenzie is the founder and lead writer at MoneyHackTips.com — a personal finance blog dedicated to delivering street-smart financial wisdom for real people on real budgets. With 300+ published articles covering everything from debt management to investing fundamentals, Makenzie’s mission is to make every dollar work harder. When not writing about money hacks, Makenzie is testing frugal living strategies, optimizing side hustles, and helping readers build financial freedom from scratch.