
We have all been there: you find the perfect pair of vintage denim or high-quality work pants at a thrift store, only to realize the waist has that dreaded ‘gap’ in the back. Or perhaps, through your own hard work and fitness journey, your favorite pair of rugged jeans is starting to slide down your hips. You could reach for a belt, but belts add bulk, can be uncomfortable during a long day of movement, and often ruin the clean silhouette of a well-fitted outfit. What if I told you that you could achieve a bespoke, tailored fit in less time than it takes to brew a pot of coffee, using nothing more than a needle, some thread, and a bit of rugged ingenuity? Welcome to the ultimate guide on the ‘Invisible Dart’—a genius hand-sewing trick that will save you $20-$50 in tailoring fees and keep you looking sharp without the need for a belt.
The Philosophy of the Rugged Mender
In a world of fast fashion and disposable goods, there is something deeply satisfying about maintaining your own gear. This isn’t just about saving money (though we love a 100% free fix); it is about the masculine-elegant art of self-reliance. Whether you are a busy parent, a frugal crafter, or someone who simply appreciates the longevity of high-quality denim, mastering this 10-minute hack is a rite of passage. We are going to treat your denim with the respect it deserves, using a technique that is both durable and entirely reversible should you ever need to let the waist back out.
The Essential Gear: Your 10-Minute Tailoring Kit
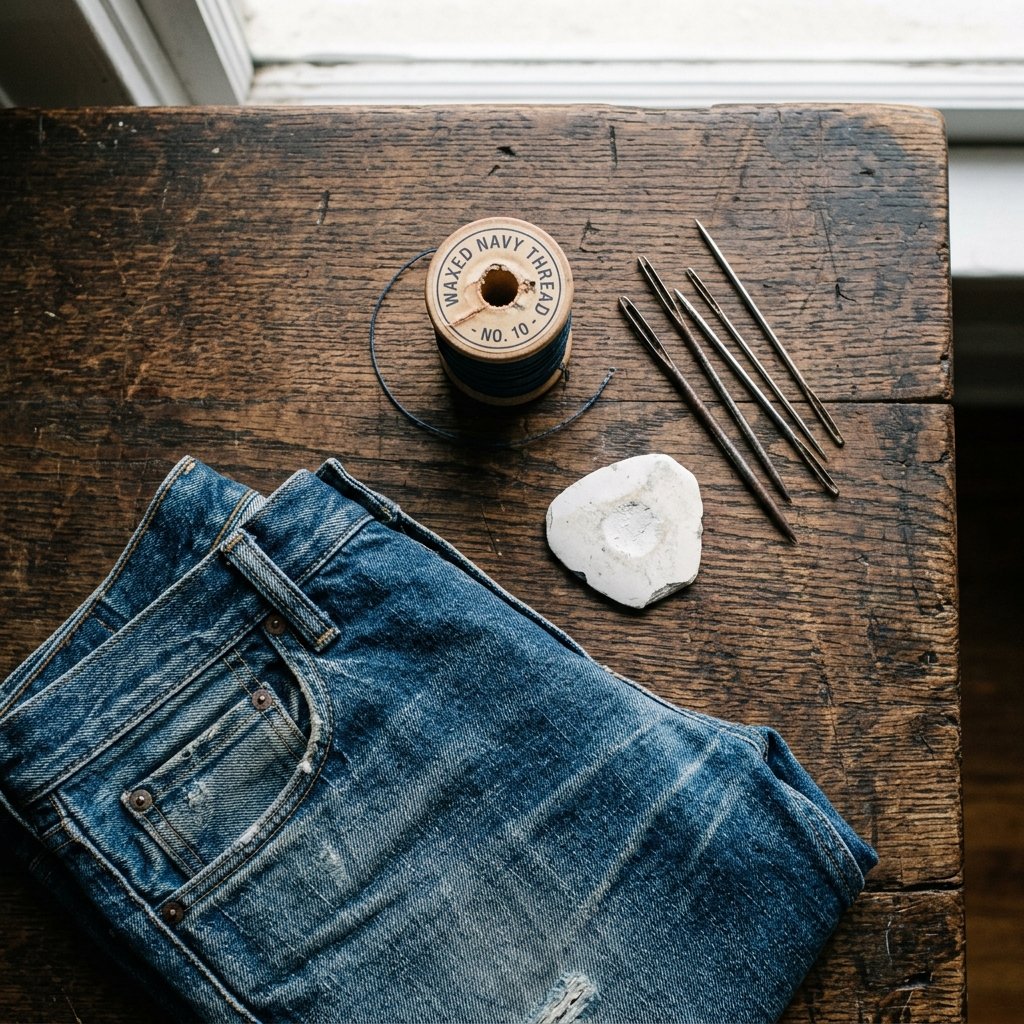
Before we dive into the stitching, we need to gather our supplies. Since we are working with heavy denim, you cannot just use any flimsy needle from a travel kit. You need tools that match the grit of the fabric. To keep this project budget-friendly, you likely already have these items in a junk drawer or a basic sewing kit. If not, a quick trip to a local craft store or even a dollar store will provide everything you need for under $5.
| Material | Purpose | Estimated Cost |
|---|---|---|
| Heavy-Duty Needle | Must be sharp enough to pierce multiple layers of denim. | $1.00 |
| Upholstery or Topstitch Thread | Thicker than standard thread for maximum durability. | $2.00 |
| Tailor’s Chalk or a Pencil | To mark exactly where the tension needs to be. | $0.50 |
| Sewing Pins or Clips | To hold the ‘pinch’ in place while you work. | $0.50 |
| Thimble (Optional) | Protects your thumb when pushing through thick seams. | $1.00 |
Pro Tip: If you don’t have heavy-duty thread, you can ‘double up’ standard polyester thread by threading your needle and tying the ends together, giving you four strands of strength in every stitch.
The Strategic Pinch: Marking Your Darts

The secret to a natural-looking fit is where you take in the fabric. Never try to take it all from the center back seam, as this can distort the seat of the pants. Instead, we use two strategic darts located between the center back belt loop and the side seams. This mimics the natural contour of your lower back and ensures the pockets remain symmetrical.
Step 1: The Fit Test
Put your jeans on inside out. This is a crucial step because we will be doing our marking and sewing on what will eventually be the ‘hidden’ side of the fold. Pinch the excess fabric at the waistband on both the left and right sides of the back. You want the waistband to feel snug but not restrictive. Aim for a 1-inch pinch on each side if you have a 2-inch gap.
Step 2: Marking the V-Shape
Using your chalk or pencil, mark the top of the pinch at the very edge of the waistband. Then, draw a line tapering down about 2 to 3 inches toward the back pocket. This creates a ‘V’ or triangle shape. The goal is to have the widest part of the fix at the top (the waistband) and have it blend seamlessly into the original seam of the jeans at the bottom.
- Precision is key: Ensure both sides are even by measuring the distance from the center back seam to your marks.
- Safety Note: Be careful with pins while the jeans are on! Use clips if you are worried about pricking yourself.
The Ladder Stitch: The Invisible Powerhouse
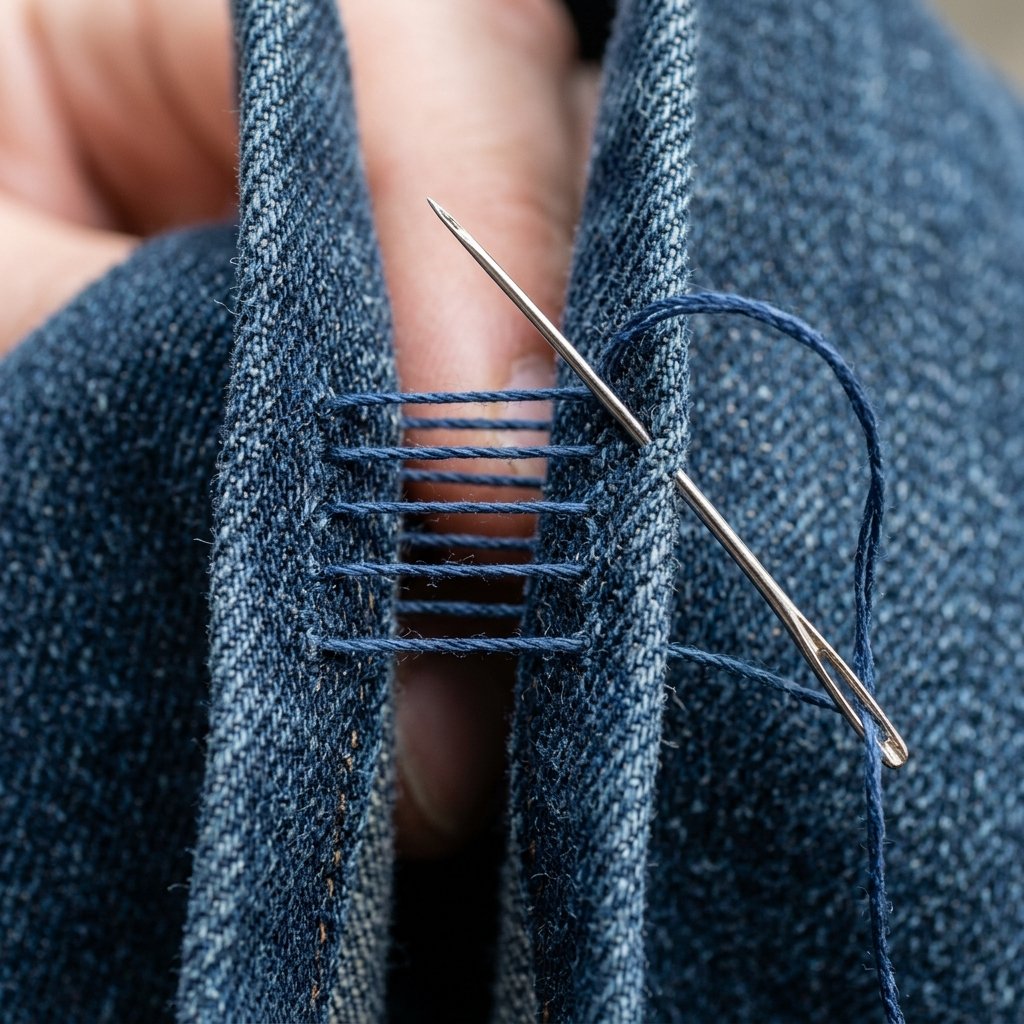
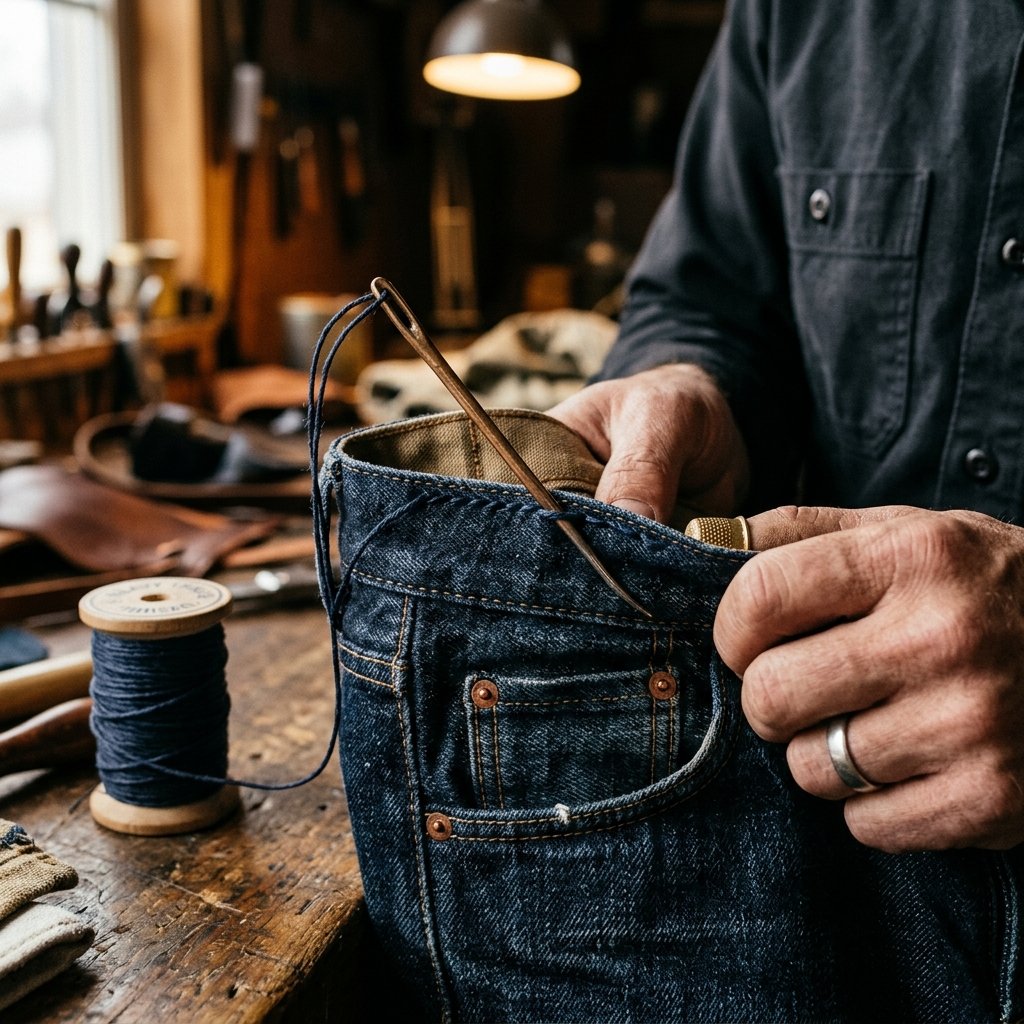
To make this look professional, we use the Ladder Stitch (also known as the invisible stitch). This technique allows the two sides of the fabric to be pulled together so that the thread remains hidden inside the fold. It is the gold standard for hand-tailoring.
How to Execute the Perfect Ladder Stitch
- Anchor your thread: Start at the bottom of your V-mark (near the pocket). Knot your thread and bring the needle up from the inside of the fabric to hide the knot.
- The Horizontal Bridge: Take the needle across to the opposite side of your chalk mark. Insert the needle and slide it forward through the denim about 1/8th of an inch before bringing it back out.
- Cross Over: Move back to the first side and repeat the process, inserting the needle directly across from where it just exited.
- The Tension Pull: After every 3 or 4 stitches, gently pull the thread taut. You will see the two sides of the denim zip together, hiding the stitches completely.
- The Waistband Anchor: When you reach the thickest part of the waistband, perform two extra ‘locking’ stitches to ensure the tension of your movement doesn’t snap the thread.
“Measure twice, stitch once, and pull tight. A well-placed dart is the difference between ‘hand-me-downs’ and ‘hand-tailored’.”
Fabric Compatibility & Troubleshooting
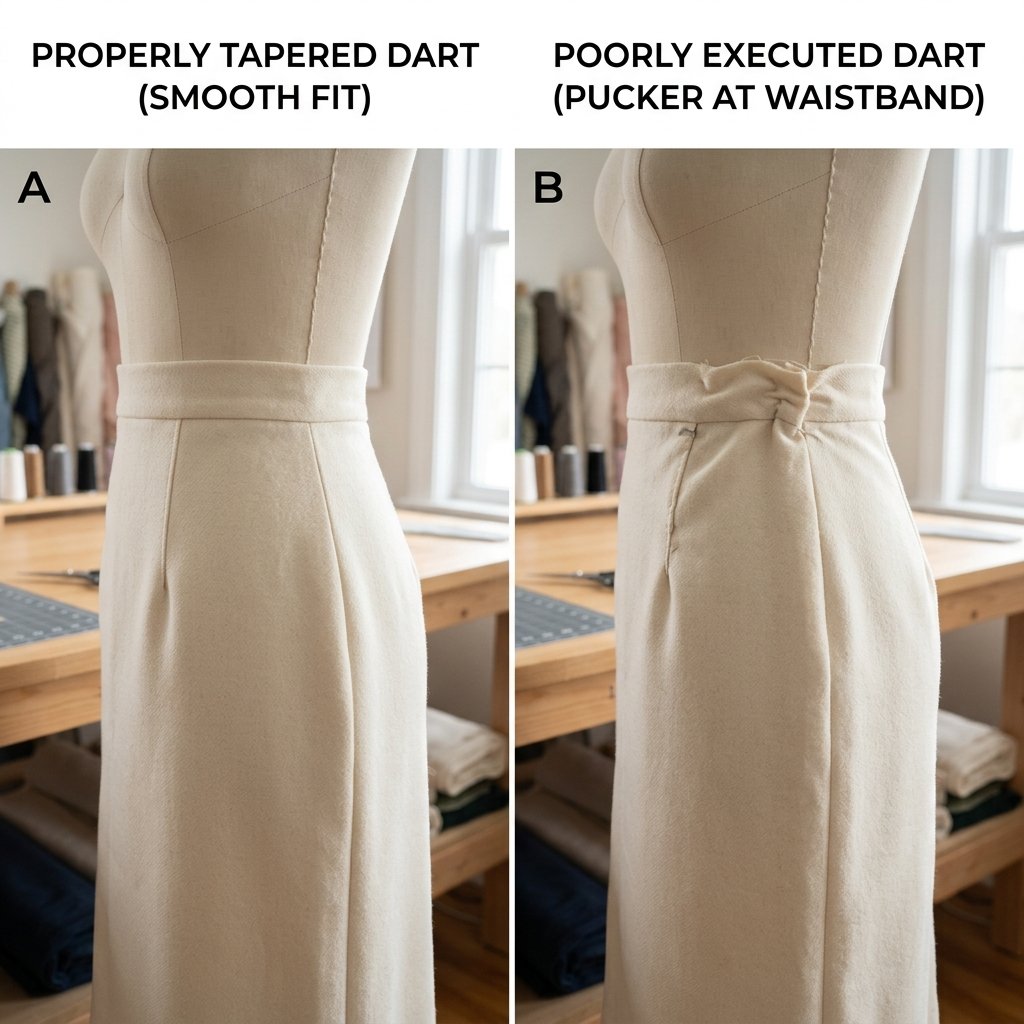
Not all denim is created equal. A vintage 100% cotton pair of Levi’s will behave differently than a modern ‘stretch’ denim blend. Understanding your fabric will prevent puckering and ensure your 10-minute fix lasts for years.
| Fabric Type | Challenge | Pro Solution |
|---|---|---|
| 100% Raw Denim | Very stiff and hard to pierce. | Use a thimble and a ‘Size 10’ sharp needle. |
| Stretch Denim (Spandex blend) | Can pucker if pulled too tight. | Keep stitches slightly looser; use polyester thread for ‘give’. |
| Lightweight Summer Denim | Fabric may ‘bleed’ or show marks. | Use a thinner needle and matching color thread. |
| Heavy Workwear (Carhartt/Dickies) | Multiple layers at the waistband. | Stitch through the inner waistband layer only to hide the bulk. |
Common Mistakes to Avoid
- Starting too high: If you don’t taper the stitch down into the seat of the pants, you will end up with a ‘horn’ or a sharp point of fabric sticking out at the waist.
- Using weak thread: Standard cotton thread will snap the first time you sit down. Always opt for heavy-duty polyester or upholstery thread.
- Skipping the knot: Ensure your starting and ending knots are substantial. Denim is a high-friction environment!
The Result: Bespoke Fit in Record Time

Once you have finished both sides, turn your jeans right-side out and try them on. You will notice immediately that the gap is gone, the waistband sits flush against your lower back, and the best part—no belt is required. This hack doesn’t just improve the look; it improves the comfort. No more hitching up your pants every time you stand up or deal with a bulky belt buckle digging into your stomach when you sit.
Maintenance and Care
Because you used heavy-duty thread and a locking ladder stitch, these darts are incredibly durable. You can wash and dry your jeans as you normally would. If you ever find that you’ve gained a bit of ‘holiday weight’ and need that extra inch back, simply snip the threads with a pair of embroidery scissors, and the jeans will return to their original size with no permanent damage to the fabric. That is the beauty of frugal, clever upcycling.
Conclusion
Mastering the 10-minute jeans waist hack is more than just a quick fix; it is a gateway into the world of sustainable fashion and self-sufficiency. By taking the time to mend and tailor your own clothing, you are rebelling against the cycle of waste and embracing a more thoughtful, rugged lifestyle. You’ve saved yourself a trip to the tailor, kept $50 in your pocket, and ensured your favorite gear fits exactly the way it should. So next time you find a pair of ‘almost perfect’ jeans at the thrift store, don’t put them back on the rack. Grab your needle and thread, and remember: with a little bit of craftiness, the perfect fit is always within reach. Happy mending!

Makenzie is the founder and lead writer at MoneyHackTips.com — a personal finance blog dedicated to delivering street-smart financial wisdom for real people on real budgets. With 300+ published articles covering everything from debt management to investing fundamentals, Makenzie’s mission is to make every dollar work harder. When not writing about money hacks, Makenzie is testing frugal living strategies, optimizing side hustles, and helping readers build financial freedom from scratch.