The Hidden Treasure in Your Closet
We all have that one pair of jeans. The pair that has seen us through countless weekend projects, rugged hikes, and cozy evenings, only to finally surrender to an irreparable rip in the knee or a blown-out thigh. Your first instinct might be to toss them in the trash or donate them to a textile recycling bin. But hold on! As a resourceful, budget-savvy crafter, you are looking at a goldmine of durable, high-quality fabric. Denim is legendary for its robust, hard-wearing nature, making it the absolute perfect material for heavy-duty accessories. Instead of contributing to the fast-fashion landfill crisis, we are going to embark on a wildly creative upcycling journey. We are going to transform those tragic, unwearable pants into an ultra-trendy, masculine-elegant, and incredibly practical DIY denim tote bag.
Why spend upwards of $50 to $150 on a boutique canvas or denim market bag when you already possess the raw materials to craft a custom, heirloom-quality piece for absolutely 100% free? This project isn’t just about saving pennies; it’s about reclaiming materials, flexing your crafty-expert muscles, and creating something with a genuine story. Whether you need a sturdy bag for the farmer’s market, a rugged tool carrier for your workshop, or a thoughtful, budget-friendly handmade gift for a loved one, this upcycled denim tote is the ultimate trash-to-treasure triumph. Grab your fabric scissors, summon your inner tailor, and let’s turn that fashion casualty into your new favorite everyday carry.
The Upcycler’s Arsenal: Gathering Your Materials and Tools

Equipping Your Workshop for Denim Rescue
Before we make a single cut, we need to gather our tools. Working with denim requires a bit more structural respect than your average cotton project. You don’t need a high-end industrial sewing machine, but you do need the right accessories to ensure your stitches hold up to the heavy lifting this tote bag is destined for. The beauty of this project lies in its frugal nature; you likely already have everything you need lying around your house or workshop.
The Essential Supply List
- One pair of old jeans: Adult sizes work best to yield enough fabric. Non-stretch or low-stretch denim (like classic 100% cotton) is ideal for a sturdy bag structure.
- Heavy-duty fabric scissors: Do not use paper scissors! You need a sharp blade to slice through thick denim seams cleanly.
- Denim sewing machine needles: Size 90/14 or 100/16 are mandatory if using a machine. Standard needles will snap instantly on the thick hems.
- Heavy-duty thread: Look for upholstery thread or topstitching thread in a classic golden-yellow or rugged navy blue.
- Pins or sewing clips: Sewing clips are often better for thick layers of denim where pins might bend.
- A ruler or measuring tape: For ensuring your cuts are straight and your bag is symmetrical.
- Tailor’s chalk or a washable fabric marker: To map out your cuts directly on the jeans.
Let’s take a look at the sheer economic brilliance of this project. When you compare the cost of a store-bought, trendy denim tote to our resourceful DIY version, the savings are undeniable.
| Expense Category | Boutique Store-Bought Tote | Zero-Budget DIY Upcycled Tote |
|---|---|---|
| Base Material (Denim/Canvas) | $45.00 (Included in retail price) | $0.00 (Repurposed from closet) |
| Straps & Hardware | $20.00 (Leather/Canvas straps) | $0.00 (Using jean waistbands/seams) |
| Labor & Manufacturing | $35.00 (Brand markup) | $0.00 (Your crafty expertise) |
| Environmental Cost | High (New water/dye usage) | Zero (Saving items from landfill) |
| Total Estimated Cost | $100.00+ | $0.00 – $5.00 (Thread/Needles) |
Frugal Guru Safety Note: When cutting through thick denim seams or using heavy-duty needles, always wear safety glasses if using a sewing machine. Needles can and will break if forced through too many layers of fabric. Let the machine do the work, and hand-crank the wheel over the thickest junctions!
Strategic Deconstruction: Harvesting the Denim
Maximizing Your Fabric Yield
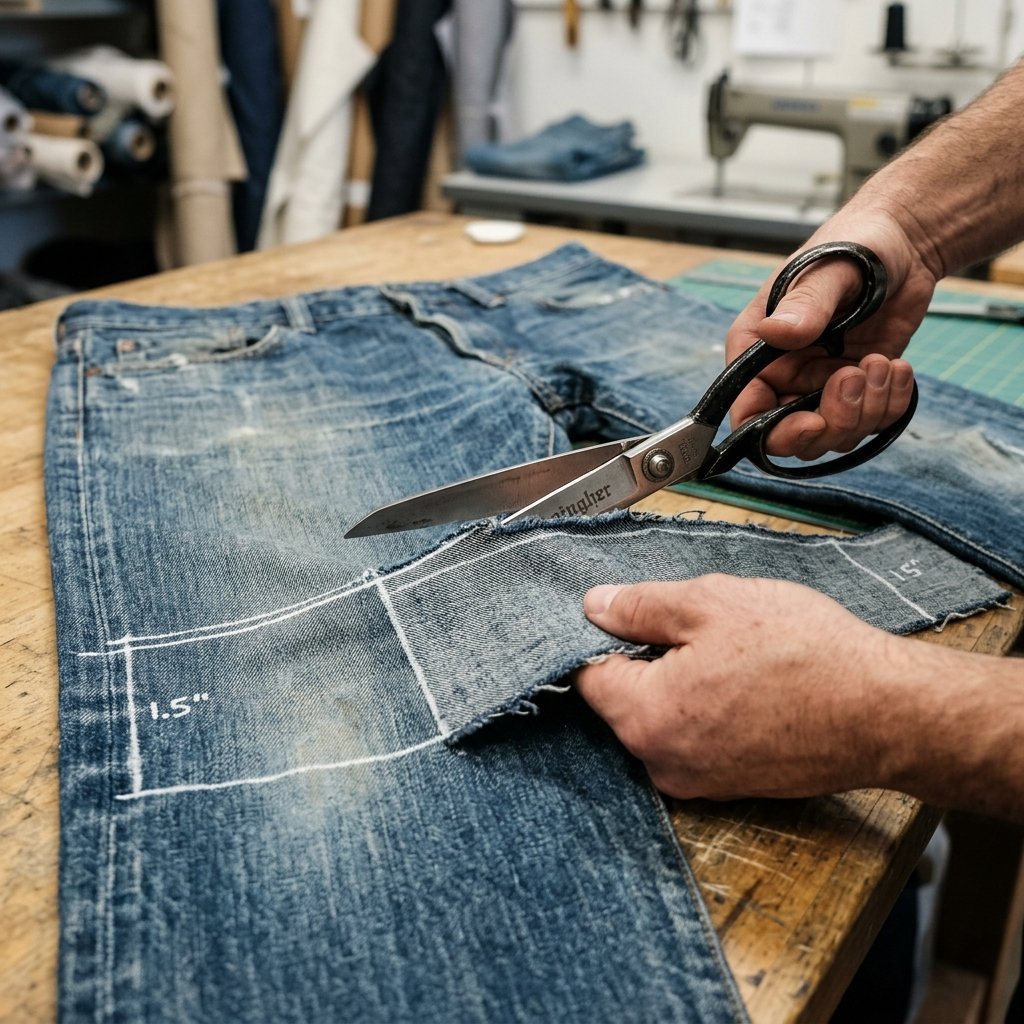
The secret to a professional-looking upcycled project is strategic deconstruction. We aren’t just hacking away at the pants; we are carefully harvesting the fabric to maximize our usable yardage while preserving the unique, rugged details that make denim so visually appealing—like the pockets, the thick flat-felled seams, and the hemlines. Think of yourself as a master butcher, but for textiles; every part of the jean has a purpose.
Step-by-Step Dismantling
- The Leg Chop: Lay your jeans completely flat on your work surface. Using your tailor’s chalk and ruler, draw a straight line across both legs, just below the crotch seam. Take your heavy-duty scissors and cut straight across. You now have two denim tubes (the legs) and the top “shorts” section.
- Opening the Canvas: Take the cut legs. You will notice each leg has two seams: the inner seam (usually a thick, double-stitched flat-felled seam) and the outer seam (usually a simple straight stitch). Cut up the outer seam of both legs. When you open them up, you will have two large, flat rectangular panels of denim. These are the main front and back panels of your tote bag.
- Salvaging the Hardware and Details: Turn your attention to the leftover “shorts” section. Carefully cut out the back pockets, leaving a small 1/4 inch border of fabric around them if you plan to appliqué them later, or carefully seam-rip them off to keep them intact. Cut off the waistband entirely—this thick, sturdy strip of fabric makes an absolutely incredible, pre-finished bag strap!
- Trimming and Squaring: Lay your two large leg panels flat. Depending on the style of the jeans (bootcut, skinny, straight), the fabric might be irregularly shaped. Use your ruler and chalk to draw the largest possible perfect rectangle on each piece. A standard, highly functional tote size is roughly 16 inches tall by 14 inches wide. Cut out your two identical rectangles.
Crafty Mantra: Measure twice, cut once, and never throw away the scraps! Even the smallest strips of leftover denim can be braided into keychains, used for invisible mending patches, or turned into rugged dog toys later.
Rugged Construction: Sewing the Body of the Tote
Building a Foundation That Lasts
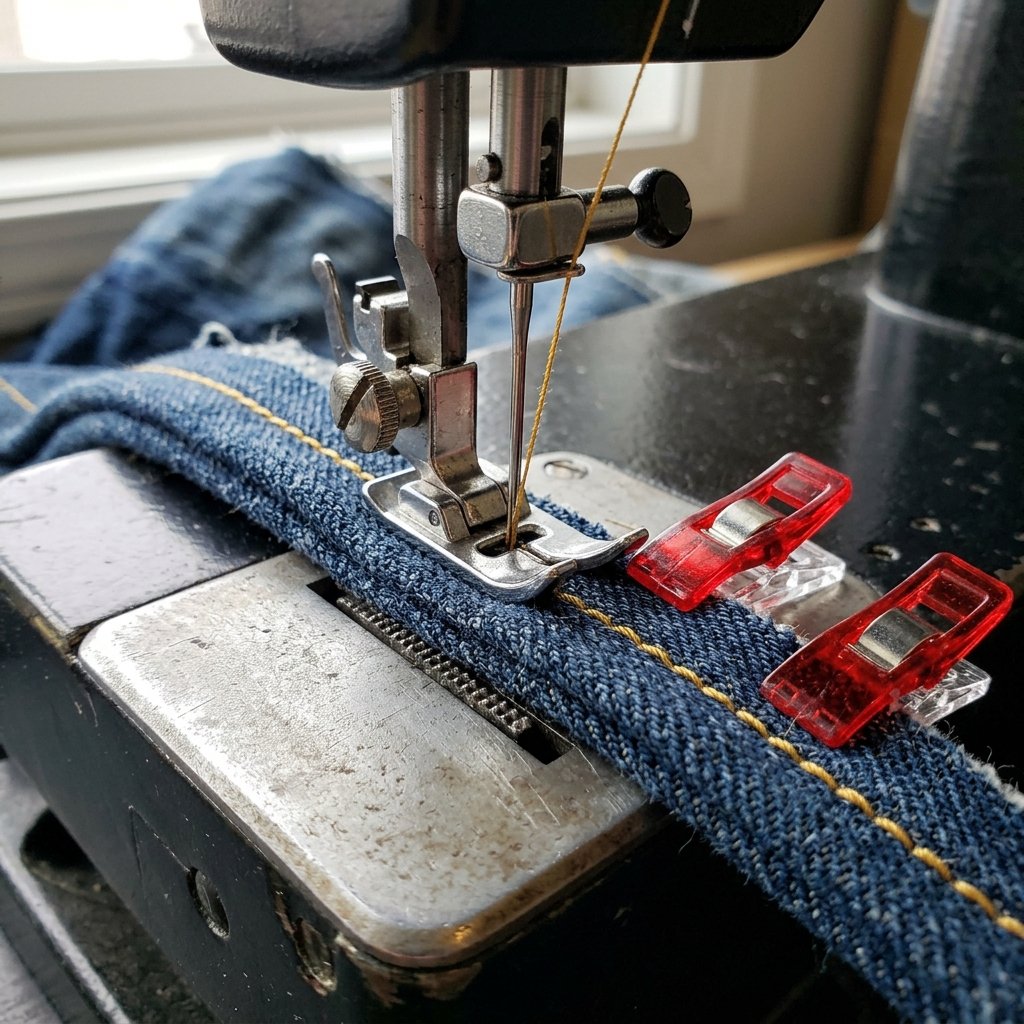
Now that we have our raw materials prepped and squared off, it is time for the construction phase. The goal here is durability. A tote bag needs to carry groceries, heavy library books, or workshop tools without the bottom falling out. To achieve this, we will utilize strong stitching techniques. If you are using a sewing machine, ensure it is threaded with your heavy-duty thread and your denim needle is securely in place. If you are hand-sewing, you will want to use a thick embroidery needle and employ a tight backstitch for maximum strength.
Assembling the Panels
- Pinning the Core: Place your two large rectangular denim panels together, right sides facing each other (the faded, nice-looking side of the denim should be touching). Pin or clip along the two long sides and the bottom edge. Leave the top edge open.
- The First Pass: Sew a straight stitch along the pinned edges, leaving a generous 1/2 inch seam allowance. Remember to backstitch at the beginning and end of your sewing to lock the threads in place. This prevents the seams from unraveling under stress.
- Reinforcing for Rugged Use: Denim frays easily. To prevent your bag from deteriorating on the inside, we need to finish the raw edges. You can use a zigzag stitch along the raw edges you just sewed, or if you have a serger, serge the edges. For an ultra-clean, tailored look, you can bind the inner seams with bias tape, though a simple zigzag is perfectly functional and budget-friendly.
- Creating a Flat Bottom (Boxing the Corners): A flat tote bag is okay, but a tote bag with a flat, stand-up bottom is practical and professional. To box the corners, keep the bag inside out. Pull the front and back panels apart at the bottom corners so the side seam aligns perfectly with the bottom seam, creating a triangle. Measure 2 inches down from the point of the triangle and draw a line straight across with your chalk. Sew along this line, then trim off the excess triangle point, leaving a 1/2 inch seam allowance. Finish the raw edge with a zigzag stitch. Repeat on the other corner.
Grandma’s Secret Tailoring Tip: If your sewing machine is struggling to get over the bulky seams where the side and bottom meet, grab a scrap piece of folded denim. Place it under the back of your presser foot to level it out. This ‘hump jumper’ trick keeps your stitches even and prevents broken needles!
Masculine-Elegant Details: Crafting Sturdy Straps

The Finishing Touches That Elevate the Design
The body of your tote is built, but a bag is only as good as its handles. This is where we inject that masculine-elegant, high-end aesthetic while maintaining our zero-budget philosophy. You have a few brilliant options for straps, depending on what you salvaged from your jeans and what you have in your crafting stash.
Option 1: The Waistband Method (Maximum Frugality)
Remember that waistband we cut off earlier? It is already reinforced, double-stitched, and perfectly finished. Cut the waistband in half to create two straps of equal length (usually around 18 to 22 inches each). To attach them, fold the top raw edge of your tote bag down by 1/2 inch, then fold it down again by 1 inch to hide the raw edge inside. Pin this top hem in place. Tuck the raw ends of your waistband straps under this folded hem, spacing them about 4 to 5 inches apart from the center of the bag. Sew all the way around the top hem of the bag, securing the straps in place. For extra strength, sew an “X” inside a square over the base of each strap.
Option 2: Upcycled Leather Belts (Rugged Sophistication)
If you have an old, worn-out leather belt in your closet, you can elevate this denim tote to an Anthropologie-level masterpiece. Cut the leather belt into two equal lengths. Because leather is too thick for most standard home sewing machines, we will use hardware. You can purchase cheap metal rivets from a craft store for a few dollars. Punch holes through the leather and the denim bag, insert the rivet, and hammer it flat. This creates an incredibly strong, industrial-chic handle that looks expensive and rugged.
| Strap Material | Durability Level | Aesthetic Vibe | Estimated Time to Attach |
|---|---|---|---|
| Repurposed Waistband | High | Casual, Utilitarian, Upcycled | 15 minutes |
| Leftover Denim Seams | Medium-High | Minimalist, Seamless | 20 minutes |
| Old Leather Belt + Rivets | Extremely High | Rugged, High-End, Masculine | 10 minutes |
| Thick Cotton Rope | Medium | Nautical, Summery | 15 minutes |
Whichever method you choose, ensure the straps are anchored securely. A tote bag is meant to be abused, tossed into the back of a truck, and stuffed with heavy items. The reinforced “X” box stitch or heavy-duty metal rivets will guarantee your straps never blow out.
The Crafter’s Flair: Adding Pockets and Customization
Turning a Basic Bag into a Custom Masterpiece
You now have a fully functional, incredibly durable denim tote bag. But as Frugal DIYers and Creative Gift-Givers, we know that the magic is in the details. Customization takes a project from “homemade” to “artisan-crafted.” Because we are working with upcycled jeans, we have built-in elements just waiting to be utilized.
The Power of the Pocket
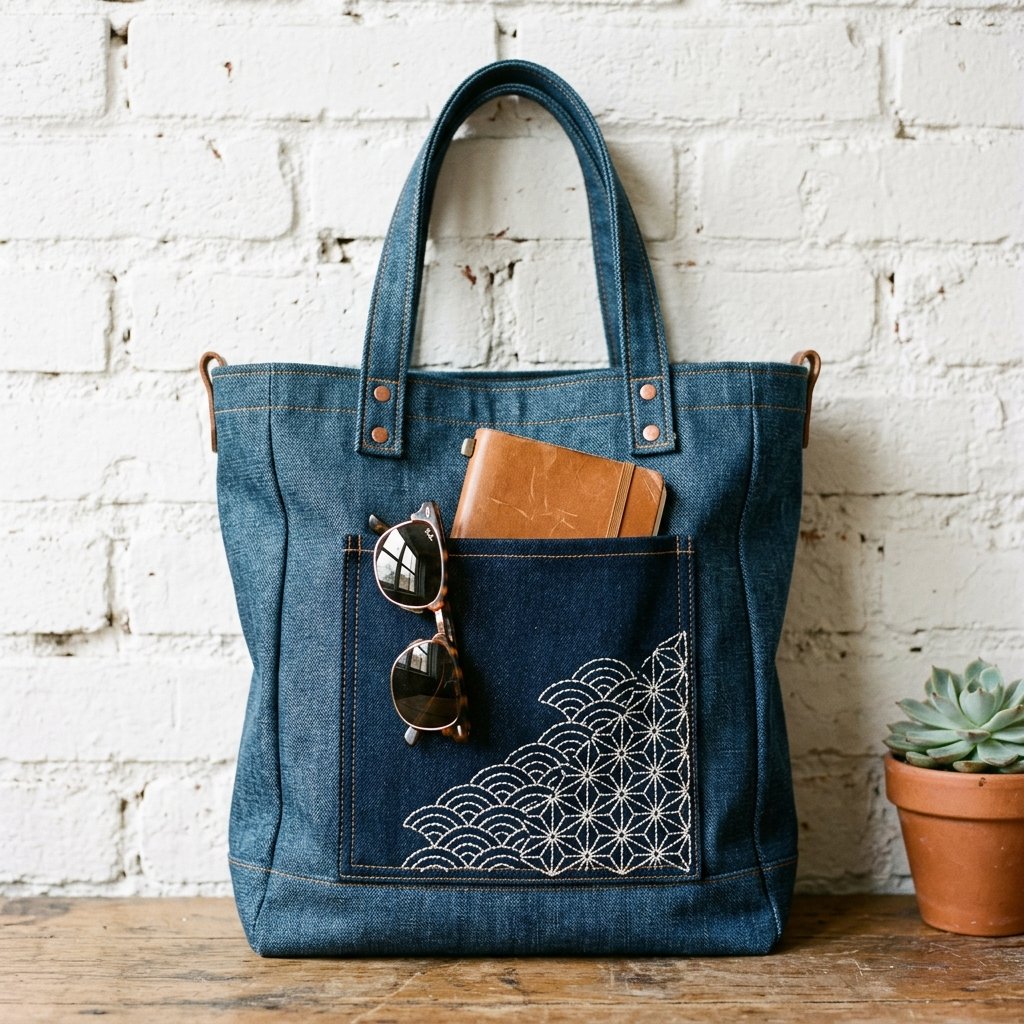
Those back pockets you saved? They are the perfect size for holding your smartphone, keys, or a pair of sunglasses. Before you sew the bag completely closed (or by carefully maneuvering it under your machine now), pin a back pocket onto the front center of your tote bag. Sew around the sides and bottom, leaving the top open. If you want a two-tone look, use a pocket from a different pair of jeans in a contrasting wash (e.g., a black denim pocket on a light blue denim bag).
Personalization and Embellishments
- Hand-Sewn Sashiko Embroidery: Channel your inner master mender by adding traditional Japanese Sashiko stitching to the front panel. Using thick white cotton thread, stitch simple geometric patterns (like running stitches or crosses) over the denim. This not only looks incredibly sophisticated and bespoke but also reinforces the fabric.
- Fabric Painting or Stenciling: Use a budget-friendly acrylic craft paint mixed with a fabric medium to stencil a bold geometric design, a favorite quote, or a rugged outdoor motif (like pine trees or mountains) onto the bag.
- Hardware Upgrades: Add a magnetic snap closure to the top inside hem of the bag to keep your belongings secure. You can salvage these snaps from old, discarded purses or buy a pack for under $3.00 at a craft store.
- Frayed Edges for a Distressed Look: If you prefer a more grunge, rugged aesthetic, you can intentionally fray the top edge of the bag or the edges of your applied pockets by rubbing them vigorously with a piece of rough sandpaper or a stiff wire brush.
By investing just a few extra minutes into these thoughtful details, you transform a simple upcycling project into a highly coveted item. If you are gifting this to a handy dad for Father’s Day (perfect for carrying jumper cables or small tools) or a budget bride (as a rustic bridesmaid gift bag), these custom touches show an immense level of care and resourceful creativity.
Conclusion
Wear Your Resourcefulness with Pride
Congratulations! You have successfully rescued a torn, forgotten pair of jeans from the landfill and engineered them into an ultra-trendy, heavy-duty DIY denim tote bag. By applying basic tailoring logic, a bit of elbow grease, and your inherent crafty-expert intuition, you have created a functional piece of art that costs absolutely nothing but your time. This project perfectly encapsulates the spirit of frugal, resourceful living: seeing the hidden potential in everyday items and transforming them into something beautiful and enduring.
Every time you sling this rugged tote over your shoulder, you aren’t just carrying your groceries or tools; you are carrying a testament to sustainable crafting. You saved money, you learned valuable textile manipulation skills, and you crafted an heirloom-quality accessory that will only look better as the denim continues to age and fade. So, the next time someone compliments your expensive-looking bag, you can smile, puff out your chest with frugal pride, and say, ‘Thanks, I made it out of my old pants.’ Now, go dig through your closet—what other trash is waiting to be turned into treasure?

Makenzie is the founder and lead writer at MoneyHackTips.com — a personal finance blog dedicated to delivering street-smart financial wisdom for real people on real budgets. With 300+ published articles covering everything from debt management to investing fundamentals, Makenzie’s mission is to make every dollar work harder. When not writing about money hacks, Makenzie is testing frugal living strategies, optimizing side hustles, and helping readers build financial freedom from scratch.