The Tragedy of the Shrunken Sweater Meets Its Match
We have all been there: a momentary lapse of judgment in the laundry room, a high-heat drying cycle, and suddenly your favorite $80 merino wool sweater has transformed into a garment sized for a large housecat. Before you let out a sigh of defeat and toss that dense, matted wool into the bin, stop. That ‘accident’ is actually a high-performance textile miracle in disguise. Through the process of agitation and heat, the wool fibers have undergone felting, creating a thick, wind-resistant, and incredibly durable fabric that is the gold standard for footwear. In this guide, we aren’t just making ‘crafty’ house shoes; we are engineering rugged, masculine-elegant, and ultra-insulating slippers that rival high-end boutique brands. Best of all? The cost of materials is effectively $0. Let’s reclaim your wardrobe and keep your feet toasty with some clever, budget-savvy upcycling.
“Frugality is not about doing without; it is about doing more with what you already have. A shrunken sweater isn’t a loss—it’s a raw material for a masterpiece.”
The Science of Felting: Why Shrunk is Better

To build a slipper that lasts, you need a fabric that won’t fray when cut. This is where your laundry mishap becomes your greatest asset. When wool is washed in hot water and agitated, the microscopic scales on the hair fibers lock together permanently. This is called fulling or felting. The resulting fabric is dense, warm, and doesn’t unravel.
Is Your Sweater Ready?
- Check the Fiber: Only animal fibers (wool, cashmere, alpaca) will felt. If your sweater is 100% acrylic, this project won’t work as well because the edges will fray.
- The Pinch Test: Pinch the fabric. If you can see the individual knit stitches clearly, it might need one more trip through a hot wash cycle. If it feels like a solid sheet of felt, it’s perfect.
- Thickness: A thicker sweater makes a better sole. If your sweater is thin, we will simply double-layer the material for extra cushion.
| Material Type | Felting Ability | Durability Rating |
|---|---|---|
| 100% Lambswool | Excellent | High |
| Cashmere | Good | Medium (Ultra Soft) |
| Cotton/Poly Blend | Poor | Low |
| Boiled Wool | Already Felted | Professional Grade |
The Essential Tool Kit: Gathering Your Supplies
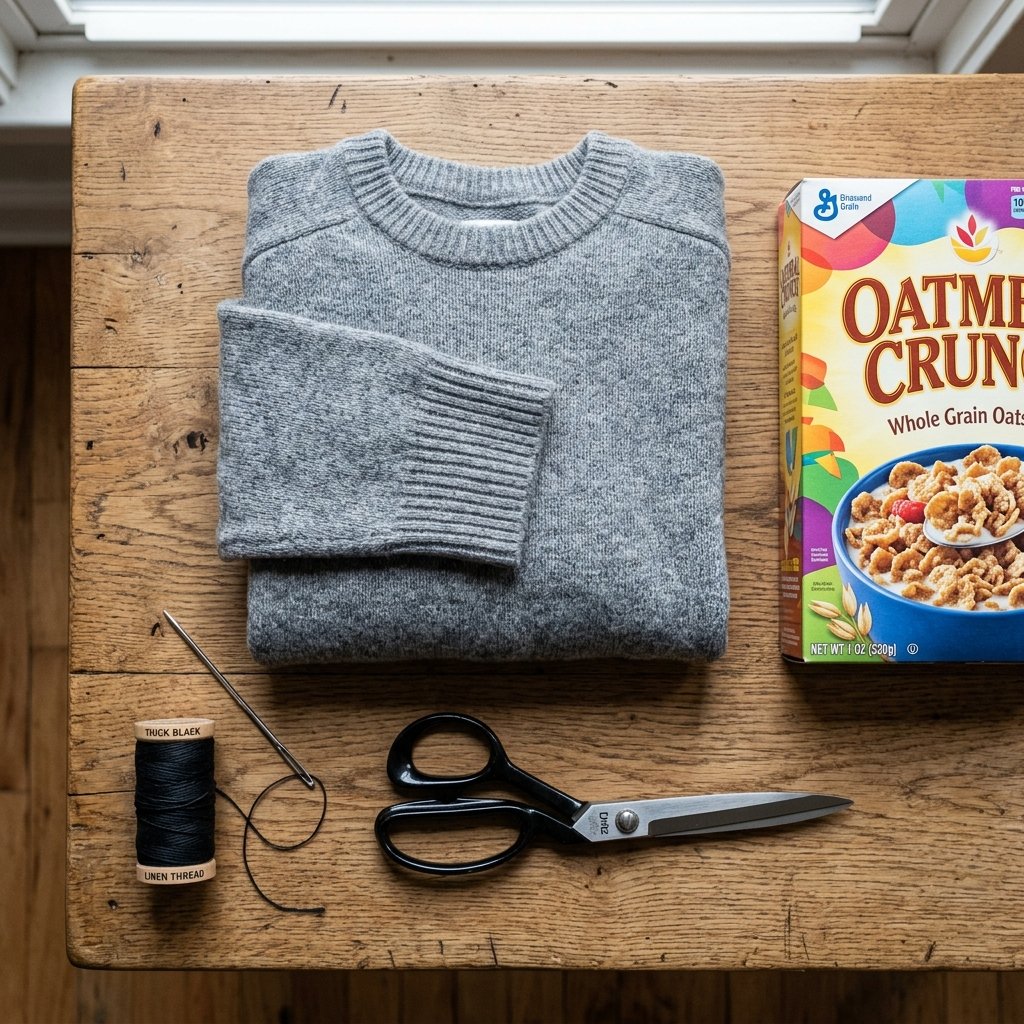
You don’t need a fancy sewing machine to create professional-grade slippers. In fact, hand-sewing allows for more precision through thick wool layers. Most of these items are already in your junk drawer or mending kit.
- The Shrunken Sweater: One adult-sized sweater provides enough material for 2 pairs of slippers.
- Heavy-Duty Needle: Look for a ‘tapestry’ or ’embroidery’ needle with a large eye.
- Embroidery Floss or Waxed Thread: Use a contrasting color for a rugged, ‘hand-stitched’ look, or a matching color for an invisible finish. Waxed dental floss works in a pinch for indestructible seams!
- Cardboard: For creating your custom-fit template.
- Pins or Binder Clips: To hold the thick layers together while you sew.
| Item | Recommended Source | Estimated Cost |
|---|---|---|
| Wool Sweater | Your closet / Thrift Store | $0 – $5 |
| Embroidery Thread | Craft Store / Sewing Kit | $0.50 |
| Cardboard Template | Cereal Box | $0 |
| Total Project Cost | Budget-Savvy | Under $6 |
Drafting the Pattern: The Custom-Fit Blueprint
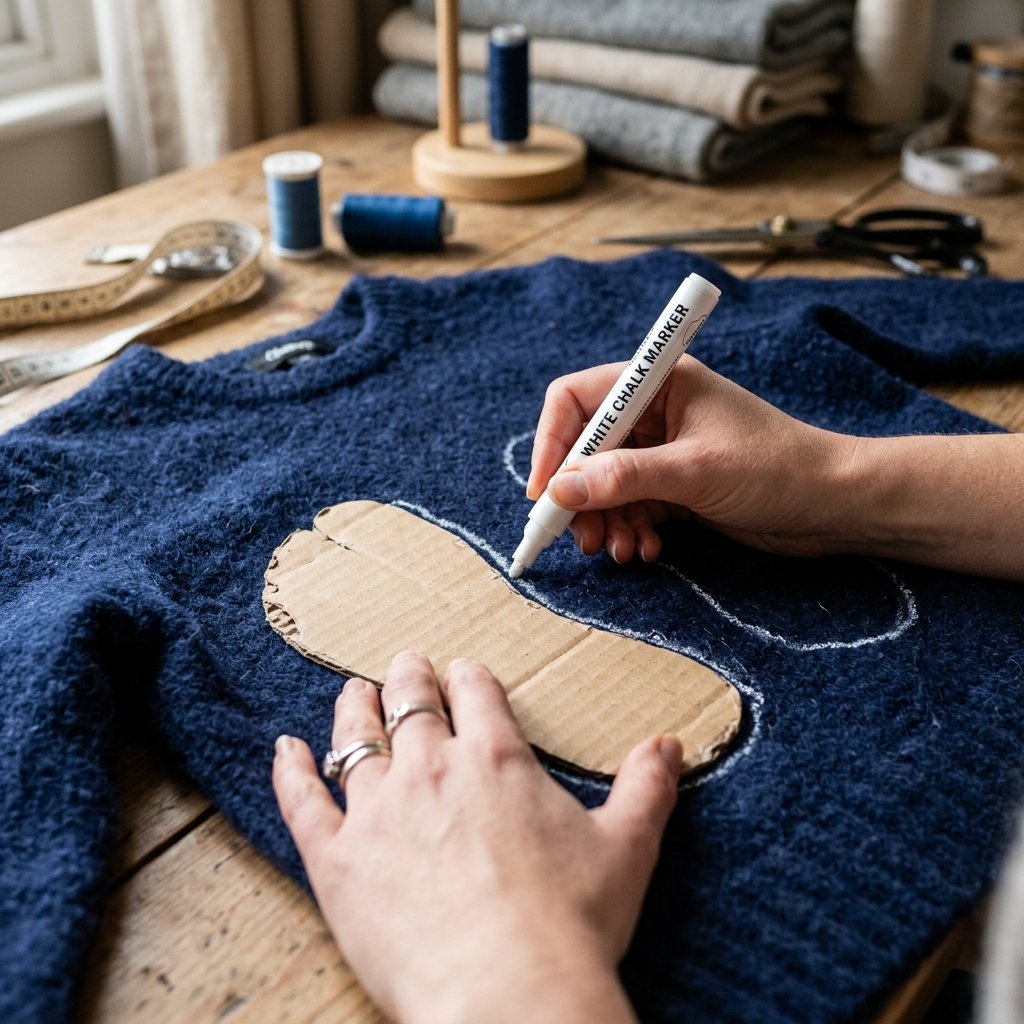
Forget generic sizing. We are creating a bespoke pattern based on your actual foot. This ensures maximum comfort and prevents the ‘floppy slipper’ syndrome.
- Trace the Sole: Stand on your cardboard with your weight evenly distributed. Trace around your foot with a pencil.
- Add Seam Allowance: Draw a second line 1/2 inch outside your original trace. This provides room for the thickness of the wool and the seam.
- The Upper Piece: This is the ‘hood’ of the slipper. Measure from your toes to the top of your instep. Cut a semi-circle shape that is slightly wider than your sole template.
- The Heel/Ankle: If you want a bootie-style slipper, use the cuffs of the sweater. They already have the perfect elastic tension to stay on your ankle!
“Measure twice, cut once, and always leave a little extra room for thick wool socks!”
The Assembly: Mastering the Blanket Stitch
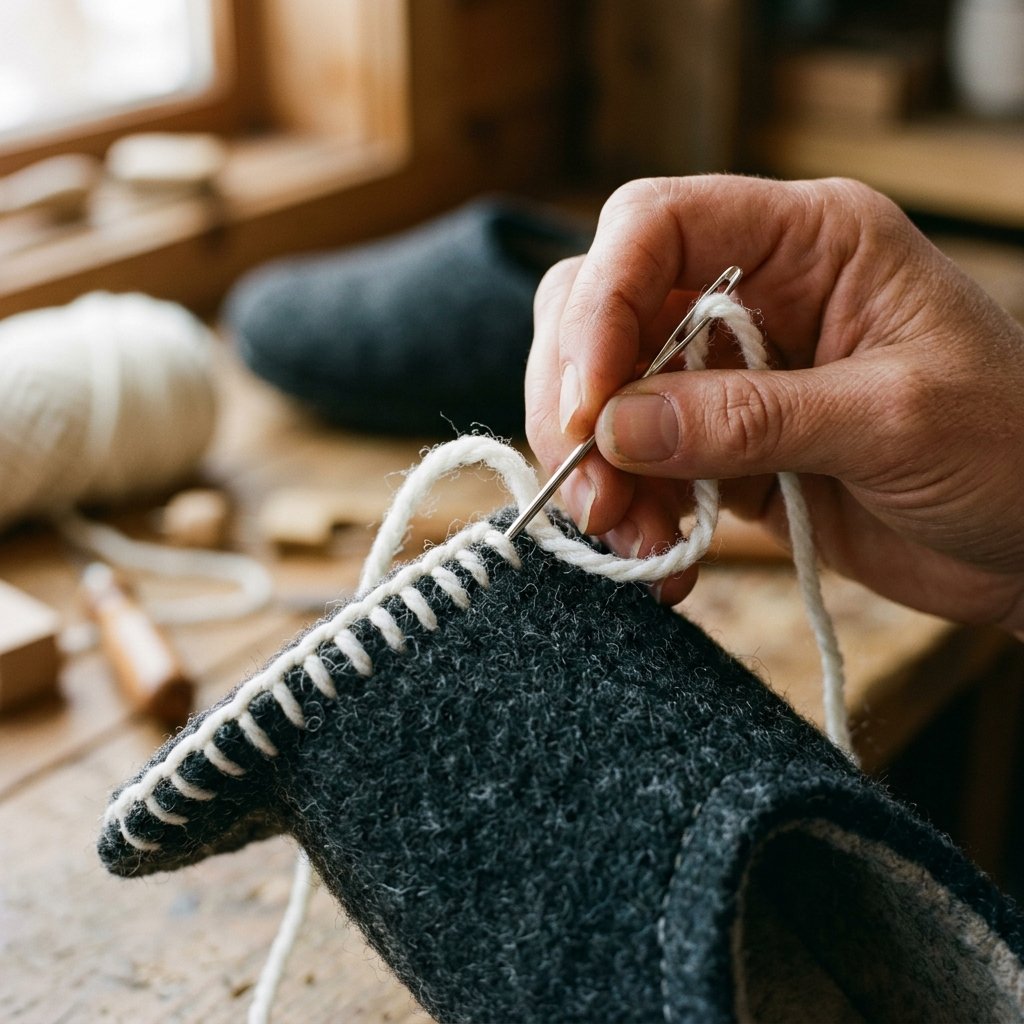
To join the pieces, we will use the Blanket Stitch. This stitch is not only decorative but also incredibly strong, wrapping around the raw edges of the wool to prevent any future wear.
How to Perform the Blanket Stitch:
- Thread your needle and tie a sturdy knot at the end.
- Push the needle through the sole and the upper piece from the bottom up, about 1/4 inch from the edge.
- Before pulling the thread tight, bring your needle through the loop created by the thread.
- Pull the thread upward to ‘lock’ the stitch on the edge of the fabric.
- Repeat every 1/4 inch. Keep your tension consistent for a professional, rugged look.
For the sole, I recommend double-layering the wool. Cut two sole pieces for each foot and stitch them together first before attaching the upper. This provides 100% more cushion and extends the life of your slippers by years.
Rugged Reinforcements: Making Them Non-Slip

Felted wool can be slippery on hardwood or tile floors. To make these safe and durable, we need to add a ‘tread’ to the bottom. Here are three budget-friendly ways to do it:
- The Puff Paint Trick: Apply small dots of fabric puff paint (or clear silicone sealant) to the bottom. Once dry, these provide excellent grip.
- Upcycled Suede: If you have an old leather jacket or purse that’s beyond repair, cut a sole shape from the leather and sew it onto the bottom of your wool slipper. This creates a high-end ‘moccasin’ style.
- Shelf Liner Scraps: A small piece of non-slip rug pad or shelf liner can be glued or stitched to the heel and ball of the foot.
| Method | Grip Level | Complexity |
|---|---|---|
| Silicone Dots | High | Easy |
| Leather/Suede | Medium | Advanced |
| Yoga Mat Scraps | Maximum | Moderate |
Finishing Touches: Masculine-Elegant Details
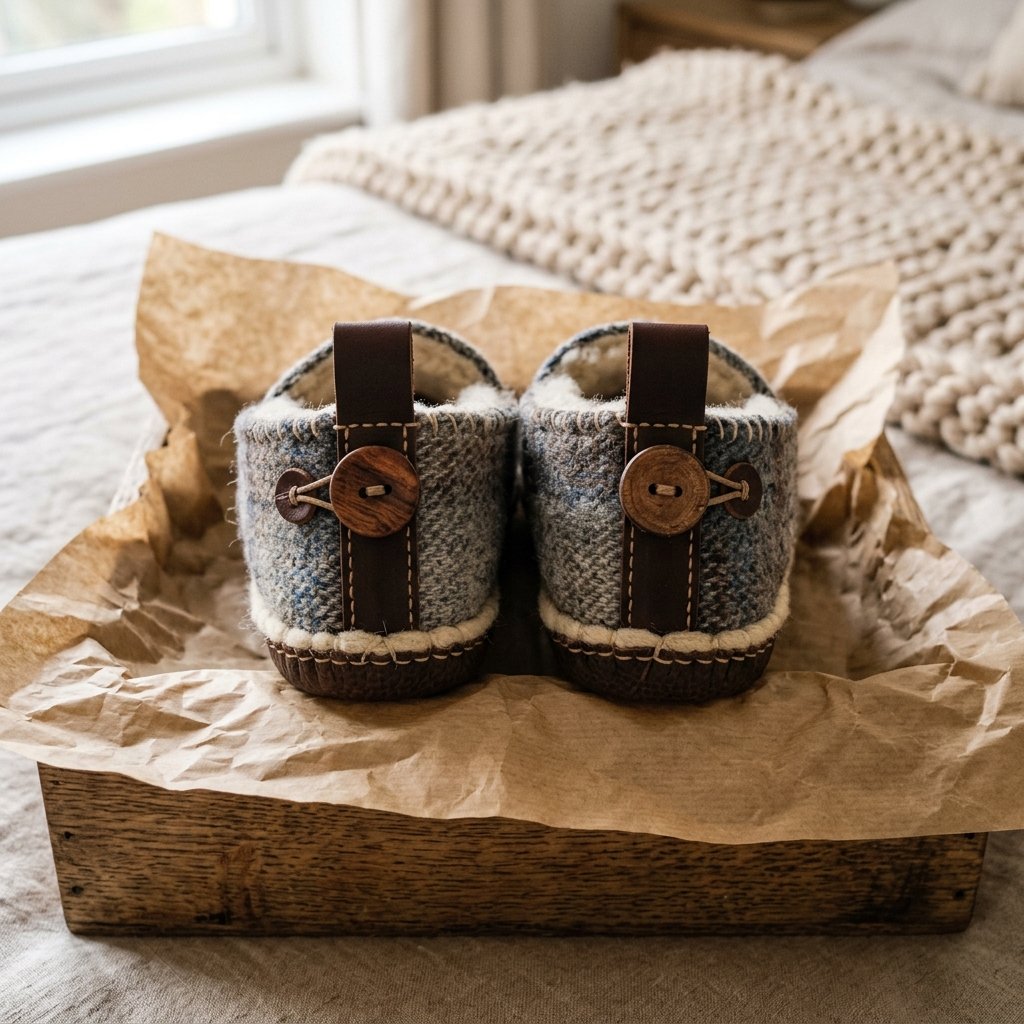
To elevate these from ‘homemade’ to ‘hand-crafted,’ add a few simple details that show off your crafty expertise. These small touches make them perfect for gifting.
Styling Ideas:
- Leather Pull-Tabs: Sew a small loop of leather or twill tape to the heel to help pull the slippers on.
- Contrast Stitching: Use a bold color like burnt orange or deep red against a grey or navy sweater.
- Wooden Buttons: If the sweater had buttons, reuse them! Sew one onto the outer side of each ankle for a rustic, sophisticated look.
- Cedar Liners: When not in use, tuck a small sachet of cedar chips inside to keep the wool fresh and deter moths.
By spending an extra 10 minutes on these details, you turn a scrap project into a piece of luxury loungewear that would retail for $60 or more in boutique shops.
Conclusion
Warm Feet, Full Heart, Zero Waste
You have successfully turned a laundry disaster into the coziest DIY slippers ever. By choosing to upcycle rather than replace, you’ve saved a high-quality material from the landfill and saved yourself at least $40-$50 on premium wool footwear. These slippers are breathable, moisture-wicking, and custom-molded to your feet. Whether you’re brewing your morning coffee or settling in by the fire, you can take pride in the fact that your comfort was resourcefully crafted by your own hands. Now, go find another shrunken sweater and make a pair for a friend—it’s the ultimate thoughtful, frugal gift!

Makenzie is the founder and lead writer at MoneyHackTips.com — a personal finance blog dedicated to delivering street-smart financial wisdom for real people on real budgets. With 300+ published articles covering everything from debt management to investing fundamentals, Makenzie’s mission is to make every dollar work harder. When not writing about money hacks, Makenzie is testing frugal living strategies, optimizing side hustles, and helping readers build financial freedom from scratch.