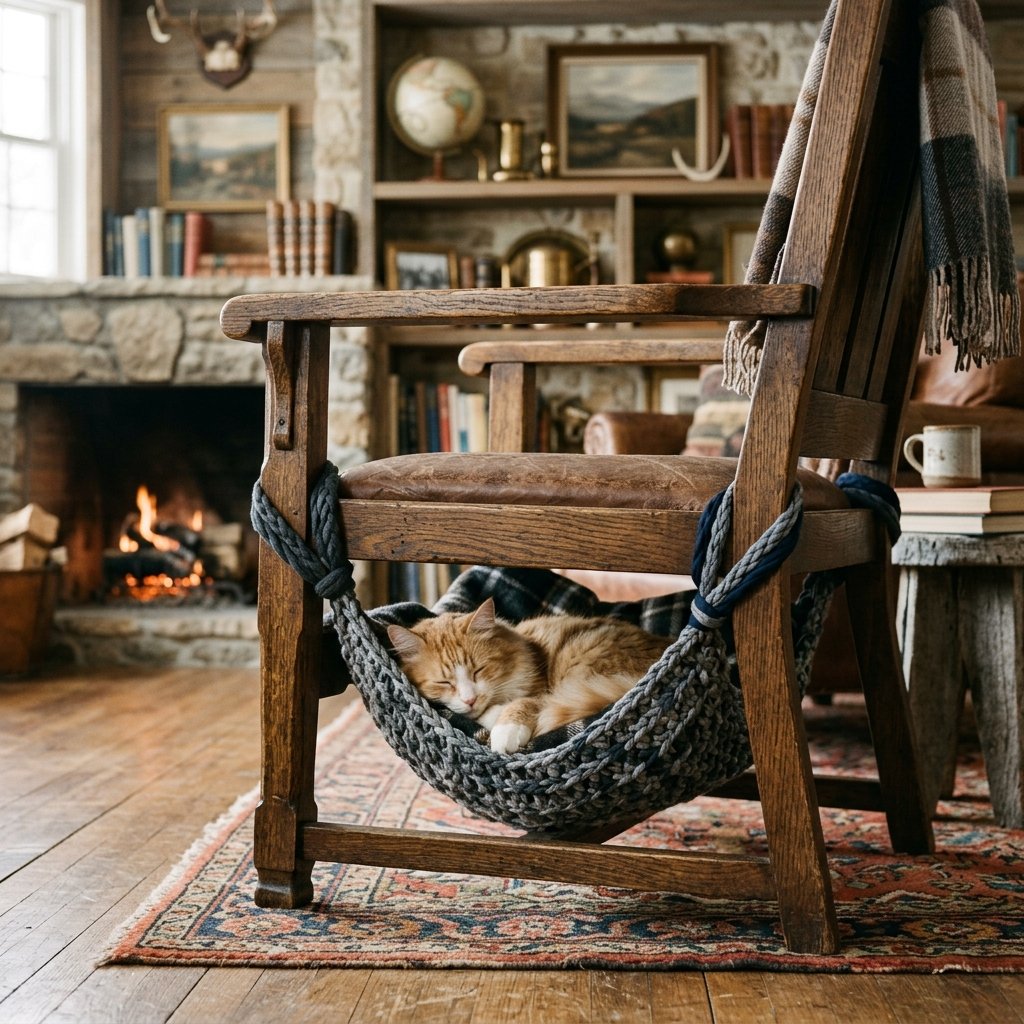

If there is one universal truth about feline companions, it is that they possess an unparalleled talent for ignoring expensive, store-bought pet furniture in favor of the cardboard box it came in. As frugal DIYers, resourceful upcyclers, and handy pet parents, we know the sting of dropping $50 on a plush cat bed only to watch it gather dust. But what if you could craft a rugged, stylish, and incredibly comfortable lounging spot for your cat using materials you already have taking up space in your closet? Enter the ultimate trash-to-treasure project: the DIY T-Shirt Yarn Cat Hammock.
This is not just another flimsy craft project; this is a practical, budget-savvy masterclass in textile upcycling. By repurposing old, worn-out cotton tees into thick, durable ‘tarn’ (T-shirt yarn), you are stepping into the realm of smart, zero-dollar home engineering. You are saving textiles from the landfill, keeping your hard-earned cash in your wallet, and building a custom piece of pet furniture that rivals the high-end boutique options. Whether you are a seasoned macrame artist or a handy dad looking for a clever weekend project, this step-by-step guide will arm you with the techniques to weave a sturdy, suspended oasis that your cat will actually use. Roll up your sleeves, grab those vintage band tees you have been hoarding, and let us build something brilliant.
The Frugal Feline Economy: Why We Upcycle
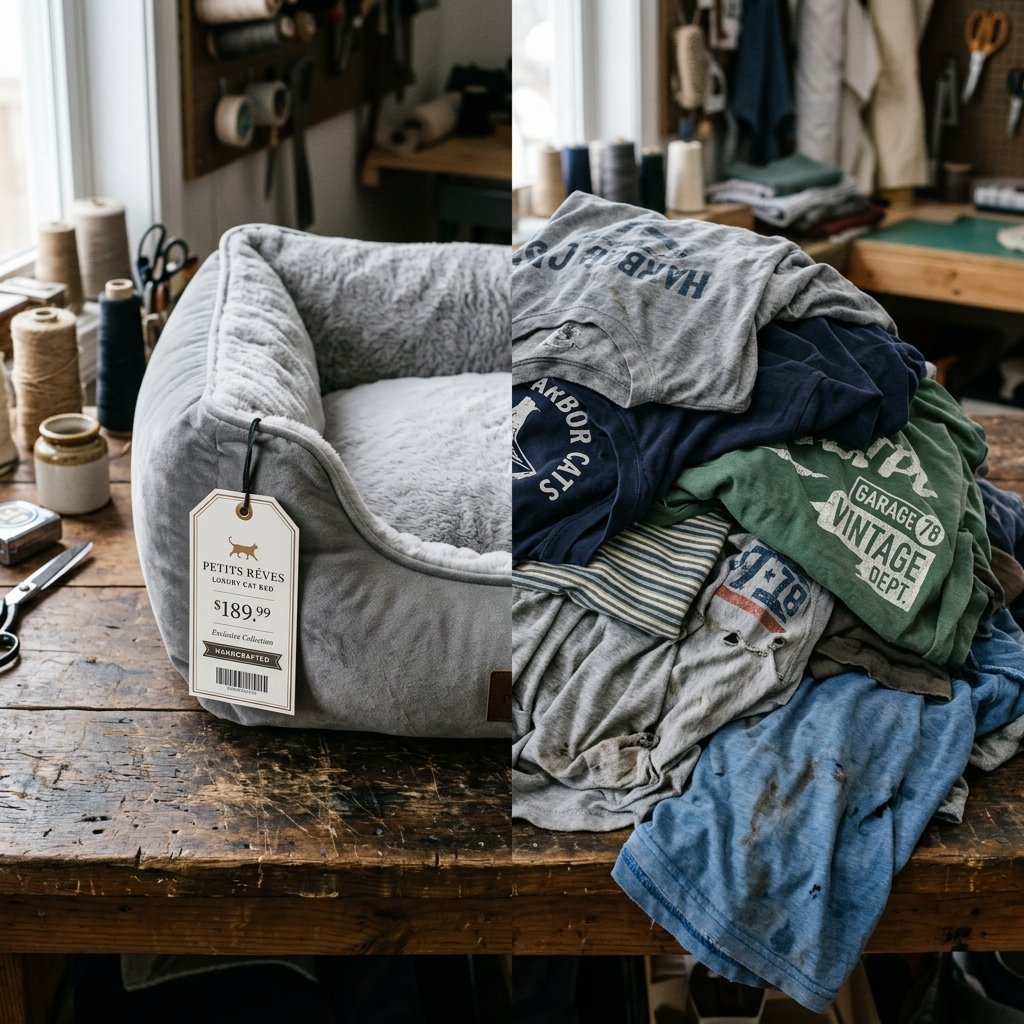
The pet industry is a booming market, and unfortunately, it is built on massive retail markups. A basic, machine-made cat hammock can easily run you anywhere from $35 to $75 at a big-box pet store. When you break down the materials, you are essentially paying premium prices for cheap synthetic fabrics and flimsy plastic PVC pipes. As resourceful crafters, we refuse to play that game. Upcycling your own textiles is the ultimate rebellion against disposable consumerism.
The most budget-savvy tool in your arsenal is your own creativity. Why buy new when you can build better with what you already own?
By transforming old clothing into a functional pet toy, you are achieving a 100% savings rate. Not only does this keep your project budget at exactly $0, but it also infuses the final product with your unique scent, which significantly increases the likelihood that your cat will actually adopt the hammock as their new favorite sleeping spot. Let us look at the hard numbers.
| Hammock Type | Average Cost | Material Quality | Lifespan |
|---|---|---|---|
| Big-Box Pet Store | $45.00 | Synthetic Fleece & Plastic | 6-12 Months |
| Boutique Online Shop | $85.00 | Cotton Macrame & Wood | 1-3 Years |
| Zero-Budget DIY T-Shirt Hammock | $0.00 | Upcycled 100% Cotton | Years (Washable & Repairable) |
The math is undeniable. By investing just 60 minutes of your time, you are crafting a superior product that costs absolutely nothing.
Scavenging Your Arsenal: Materials and Tools
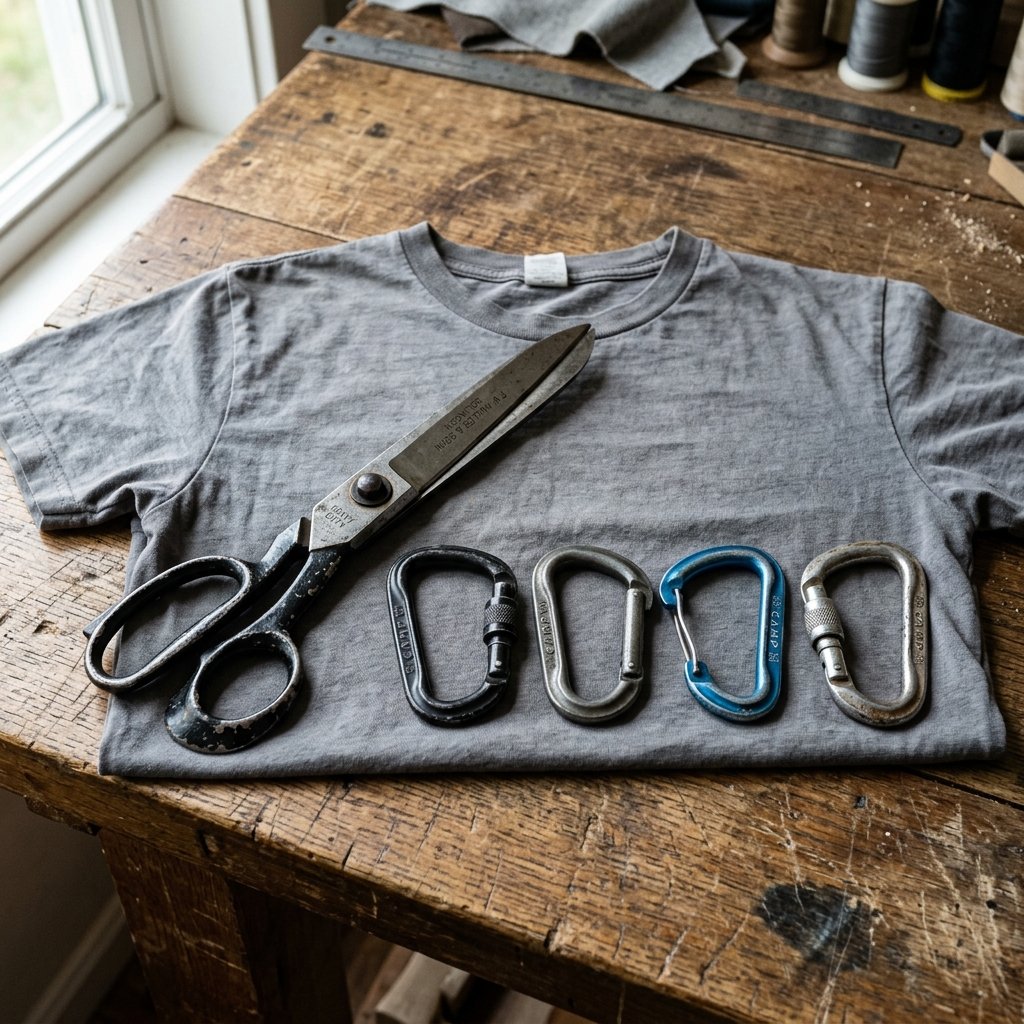
Before we dive into the construction phase, we need to gather our materials. The beauty of this project lies in its rugged simplicity. You do not need a sewing machine, expensive hardware, or advanced tailoring skills. You just need a few basic household items and the willingness to repurpose them.
The Ultimate Zero-Cost Material List
- Old T-Shirts: You will need 3 to 4 large or extra-large adult T-shirts. Look for 100% cotton or a high-cotton blend. Shirts without side seams (tubular knit) are the absolute best for creating continuous yarn, but seamed shirts will work in a pinch.
- Heavy-Duty Scissors: A sharp pair of fabric shears or rugged utility scissors. Precision is key to getting clean cuts that will curl properly.
- An Anchor Point: A sturdy wooden dining chair, a small side table, or a custom PVC/wooden frame to suspend the hammock.
- Optional Hardware: 4 heavy-duty metal carabiners or S-hooks (if you want the hammock to be easily removable for washing).
| Material | Source | Estimated Cost |
|---|---|---|
| 3-4 Cotton T-Shirts | Your Closet / Donation Bin | $0.00 |
| Fabric Scissors | Toolbox | $0.00 |
| Sturdy Chair or Table | Living Room | $0.00 |
| Carabiners (Optional) | Hardware Drawer | $0.00 – $4.00 |
When selecting your shirts, consider the aesthetic. Solid, muted colors like charcoal gray, olive green, or navy blue can give the finished hammock a sophisticated, masculine-elegant vibe that blends seamlessly with modern home decor. Avoid shirts with massive, thick rubberized graphics, as these sections will not stretch or curl into yarn properly.
The Craft of Making Tarn (T-Shirt Yarn)
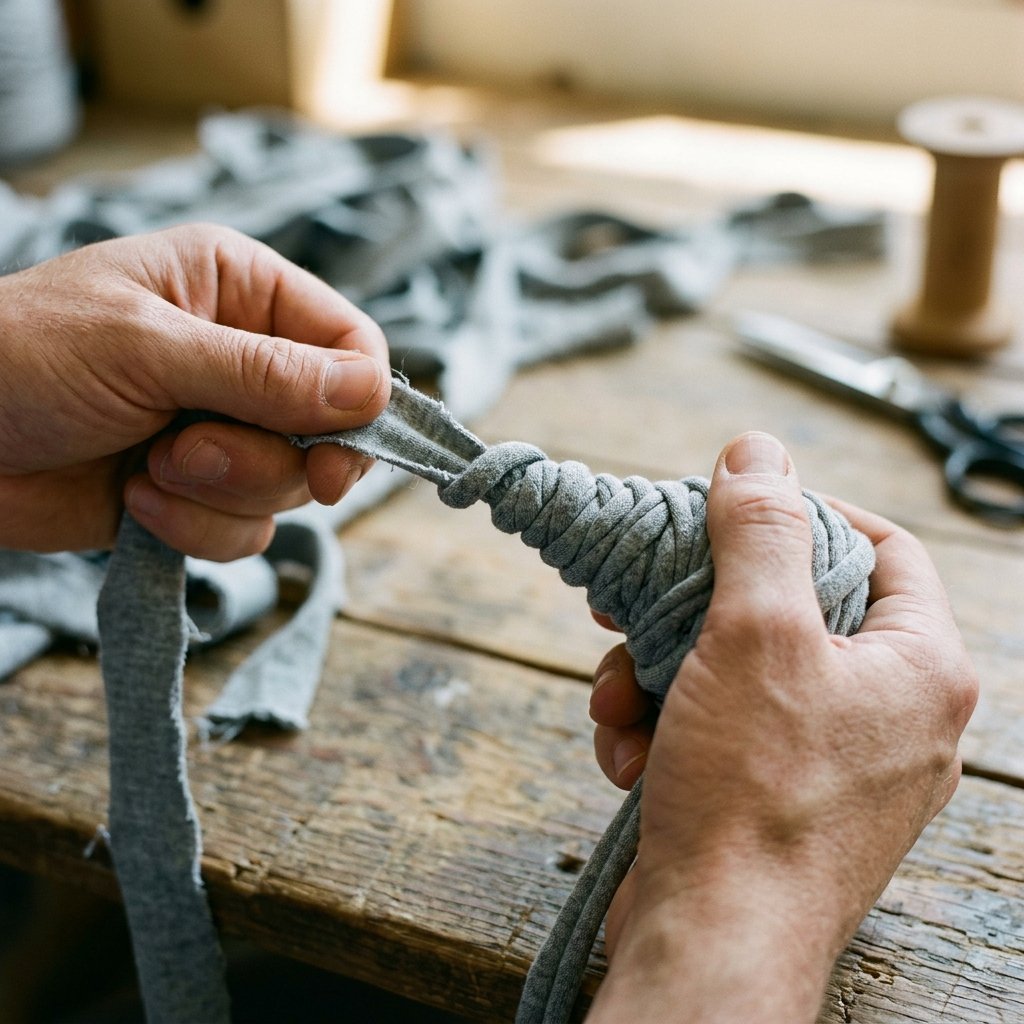
Creating your own T-shirt yarn is a foundational upcycling skill that every handy crafter should master. It is a brilliant way to turn a flat, woven garment into a continuous, heavy-duty spool of workable cord. The secret to perfect tarn lies in the ‘stretch and pull’ technique, which forces the raw cut edges of the jersey cotton to roll inward upon themselves, hiding any jagged cuts and creating a neat, tubular yarn.
The Continuous Cut Method
- Prep the Canvas: Lay your T-shirt perfectly flat on a large table or the floor. Smooth out any wrinkles. Using your heavy-duty scissors, cut off the bottom hem and discard it (or save it for shop rags). Next, cut straight across the chest, just under the armpits. You are now left with a large fabric tube.
- The Strategic Fringes: Fold one side of the tube over toward the other side, leaving about a 1-inch gap at the top edge (do not fold it entirely in half). Begin cutting 1-inch wide strips from the bottom fold up to the top, cutting *past* the first fold but stopping *before* you cut through that 1-inch gap at the top edge. You should have a piece of fabric that looks like a hula skirt attached to a solid waistband.
- The Diagonal Connection: Open up the uncut 1-inch gap area so it lays flat on your arm. To create a single, continuous string, you must cut diagonally. Cut from the outside edge into the first slit. Then, cut from the first slit diagonally across to the second slit. Continue this diagonal pattern all the way down. This clever tailoring trick yields one massive, unbroken strip of fabric!
- The Magic Pull: Now for the fun part. Take the long strip of fabric and pull it firmly between your hands, stretching it out section by section. As you stretch the cotton, the edges will magically curl inward, transforming the flat strip into a sturdy, rope-like yarn. Roll it into a ball, and you are ready to weave.
Safety Note: When stretching the yarn, pull with firm, steady pressure. Jerking the fabric too aggressively can cause thinner spots to snap. Treat the material with respect, and it will yield a heavy-duty cord.
Structural Integrity: Weaving the Hammock Mesh
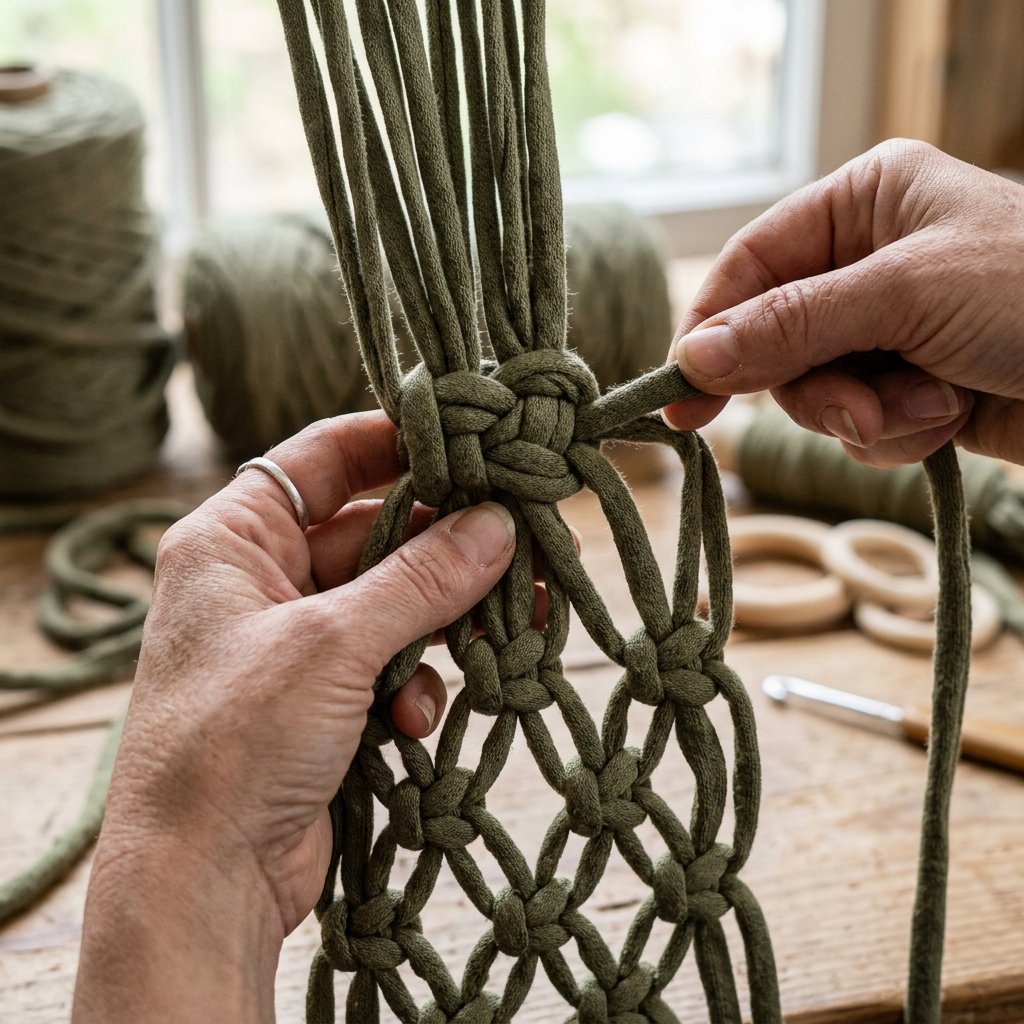
Now that we have our tactical supply of tarn, it is time to build the hammock. We will be using a basic macrame technique. Do not let the word ‘macrame’ intimidate you; at its core, this is just strategic knot-tying. It is the same principle used in building fishing nets or survival gear. We are going to rely heavily on the Square Knot, a rugged, symmetrical knot that will not slip under the weight of a 15-pound feline.
Setting the Foundation
- Cut the Anchor Cords: Cut two pieces of T-shirt yarn, each about 4 feet long. These will be your anchor cords (the edges of the hammock). Tie them securely between two fixed points (like two chair legs or two door knobs) to keep them taut while you work.
- Attach the Weaving Cords: Cut 10 to 12 pieces of yarn, each about 6 feet long. Fold each piece in half. Attach them to the top anchor cord using a Larks Head Knot (loop the folded center over the anchor cord, then pull the two tails through the loop and pull tight). Space them evenly.
Executing the Square Knot Mesh
To create the mesh body, you will take four strands of yarn at a time. The two outer strands are your working cords, and the two inner strands are your filler cords.
- Take the left outer cord, cross it *over* the two middle cords, and *under* the right cord.
- Take the right cord, pass it *under* the two middle cords, and bring it up *through* the loop created by the left cord. Pull tight. That is a half-knot.
- To finish the Square Knot, do the exact reverse: take the right cord over the middle and under the left, then take the left cord under the middle and up through the right loop. Pull tight.
- Continue this process, tying square knots across the entire row. For the next row, drop the first two strands on the far left, and tie square knots using the next four strands. This offsets the knots, creating a beautiful, rugged diamond mesh pattern.
- Keep weaving until the hammock reaches your desired length (usually about 18 to 24 inches for a standard adult cat). Tie the loose ends securely to the bottom anchor cord.
Mounting and Cat-Testing the Rig
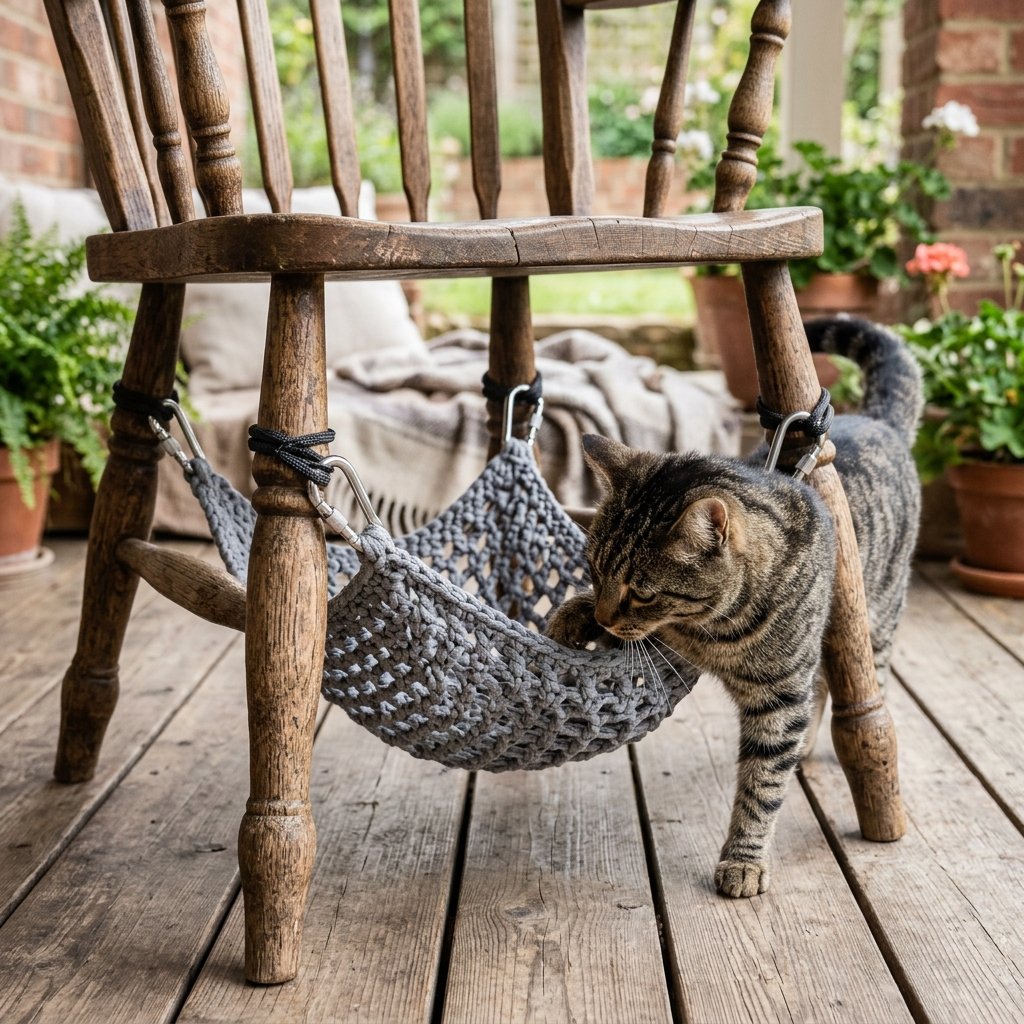
The final phase of our frugal engineering project is installation. The structural integrity of your mounting points is critical. Cats love high vantage points and secure hideaways. The ‘Under-Chair Bunker’ is a highly recommended setup. By tying the four corners of your newly woven hammock to the four legs of a sturdy dining chair or side table, you create a suspended, shaded oasis that takes up zero additional floor space in your home.
Installation Tactics
- The Direct Tie: The simplest zero-budget method is to leave the four corner anchor cords long enough to wrap around the chair legs multiple times, finishing with a heavy-duty double knot.
- The Carabiner Quick-Release: For the handy parent who anticipates frequent washing, tie sturdy loops at the four corners of your hammock. Attach a metal carabiner to each loop, and clip them to eye-hooks screwed into the underside of a wooden table, or wrap a separate piece of yarn around the chair leg and clip the carabiner to that.
Pro-Tip for Pet Parents: Cats can be suspicious of new furniture. To encourage immediate adoption of the hammock, sprinkle a pinch of organic catnip onto the T-shirt yarn, or place one of their favorite worn-out toys in the center. The familiar scent of your old T-shirts will also act as a massive comfort factor.
Maintenance is incredibly straightforward. Because you utilized 100% cotton T-shirts, the entire rig is machine washable. If you used the carabiner method, simply unclip the hammock, toss it in the washing machine on a cold, gentle cycle, and let it air dry to prevent the knots from shrinking or tightening unevenly. You have now successfully engineered a high-quality, durable piece of pet furniture that cost you absolutely nothing.
Conclusion
Creating a DIY T-shirt yarn cat hammock is the ultimate testament to resourceful, budget-savvy living. By looking at a pile of discarded clothing and seeing the potential for a rugged, highly functional piece of pet furniture, you have bypassed the overpriced retail market and built something truly custom. You have saved money, reduced textile waste, and engaged in a deeply satisfying hands-on craft.
This project proves that you do not need a massive budget or a professional workshop to elevate your home and spoil your pets. With a pair of scissors, a few old shirts, and the willingness to learn a few sturdy knots, you have engineered a masterpiece. So, enjoy the satisfaction of a zero-dollar victory, watch your cat lounge in their new custom bunker, and keep your eyes peeled for your next trash-to-treasure triumph. Happy crafting!

Makenzie is the founder and lead writer at MoneyHackTips.com — a personal finance blog dedicated to delivering street-smart financial wisdom for real people on real budgets. With 300+ published articles covering everything from debt management to investing fundamentals, Makenzie’s mission is to make every dollar work harder. When not writing about money hacks, Makenzie is testing frugal living strategies, optimizing side hustles, and helping readers build financial freedom from scratch.