The Denim Renaissance: Why Upcycling is the Ultimate Power Move
Let’s be honest: we all have that one pair of jeans. You know the ones—the denim that fits perfectly in the waist but has a tragic blowout in the inner thigh, or perhaps a pair of vintage flares that just don’t match your current aesthetic. Before you toss them into the donation bin or, heaven forbid, the landfill, consider this: you are sitting on the raw materials for a $150 high-end fashion piece. The denim corset is currently dominating social media feeds, from high-fashion runways to viral street-style reels. But you don’t need a $500 sewing machine or a degree in pattern making to master this look. As a resourceful DIYer, you already have the most important tool: your creativity.
In this guide, we are going to bypass the needle and thread entirely. We’re using industrial-strength fabric adhesives and rugged hardware to create a structured, flattering, and incredibly durable corset top. This isn’t just a craft project; it’s a masterclass in budget-savvy engineering. We’re going to take the rugged durability of workwear denim and transform it into a piece of masculine-elegant couture that screams ‘expensive’ while costing you less than a latte. Ready to turn that ‘trash’ into a viral treasure? Let’s get to work.
The Blueprint: Sourcing Your Materials and Tools

The Anatomy of the Perfect Pair of Jeans
Not all denim is created equal when it comes to no-sew construction. For a corset, you want 100% cotton denim with little to no stretch. Why? Because we are relying on fabric glue and grommets, and stretchy spandex-blends can warp or pull away from the adhesive over time. Look for ‘rigid’ denim—think vintage Levi’s 501s or heavy-duty work pants. The thicker the fabric, the more ‘structure’ your corset will have without needing traditional boning.
Your No-Sew Arsenal
To achieve a professional finish, you need the right chemistry and hardware. Forget school glue; we are going for industrial-strength fabric adhesives like E6000 Fabri-Fuse or Tear Mender. These bonds are permanent, flexible, and washable.
| Material/Tool | Purpose | Estimated Cost |
|---|---|---|
| Old Jeans (Rigid) | The Main Body | $0.00 (Upcycled) |
| Fabric Glue (E6000) | Seam Bonding | $7.00 |
| Grommet/Eyelet Kit | Lacing Points | $10.00 |
| Heavy-Duty Scissors | Precision Cutting | $5.00 |
| Ribbon or Paracord | The Closure | $2.00 |
| Total Project Cost | High-End Look | $24.00 |
Budget Guru Mantra: A designer label is just a markup on someone else’s labor. Your labor is free, and your style is priceless.
Precision Drafting: Measuring and Cutting for the Perfect Fit
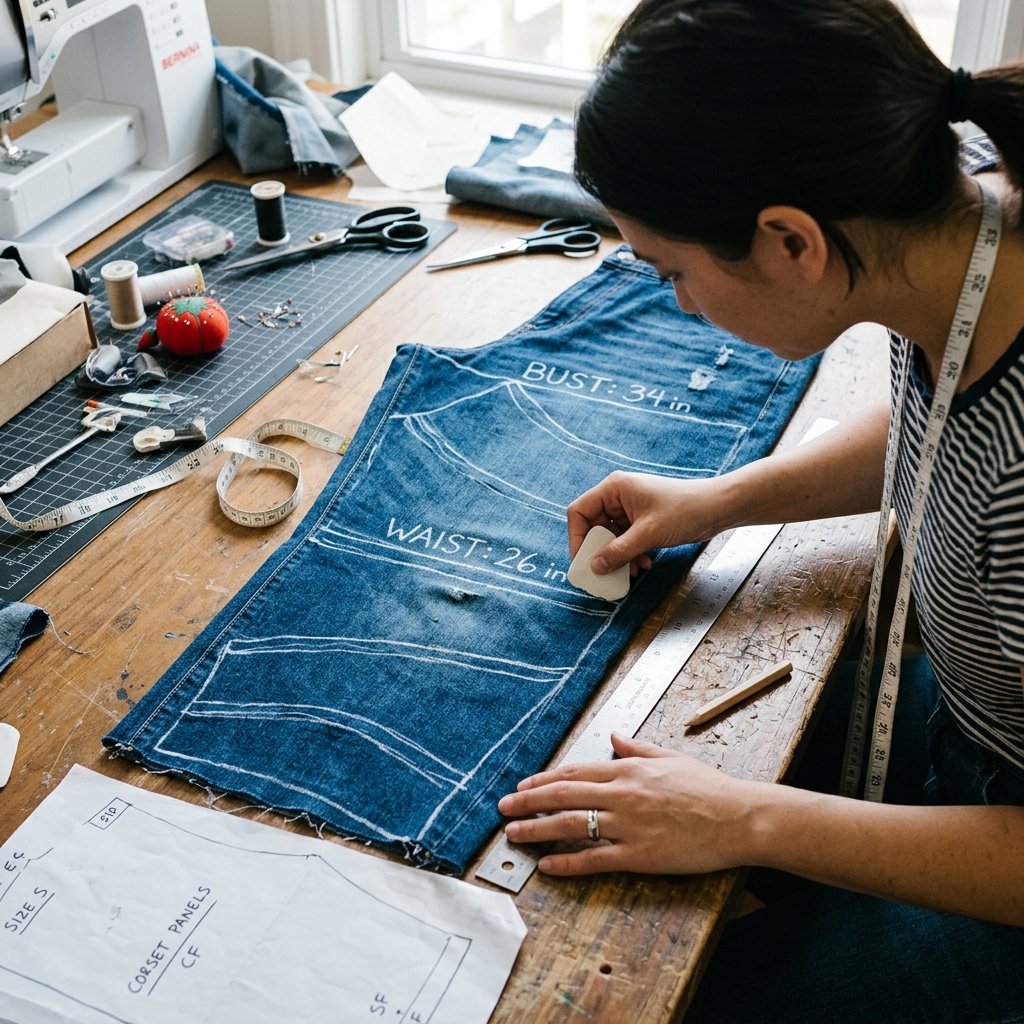
The ‘Leg-to-Bodice’ Strategy
The cleverest way to make a corset without a pattern is to use the existing shape of the jean legs. The wider part of the thigh naturally tapers toward the ankle, which mimics the curve from the bust to the waist. For a standard corset, you will need three main panels: one large front panel and two back panels where the lacing will live.
- Step 1: Measure your waist and subtract 2 inches (this gap allows the lacing to show). Divide this number by two for your front and back measurements.
- Step 2: Lay your jeans flat and cut the legs off at the crotch. Slit the leg open along the inner inseam to create a wide flat sheet of denim.
- Step 3: Use tailor’s chalk to mark your panels. Pro tip: Use the original hem of the jeans as the top edge of your corset for a ‘finished’ look with zero effort.
Calculating the Curve
To get that viral ‘snatched’ look, you want the waist area of your panels to be slightly narrower than the bust area. Aim for a 15-degree inward angle from the chest to the waistline. This creates a natural hourglass silhouette once the grommets are tightened.
The No-Sew Assembly: Bonding and Reinforcing
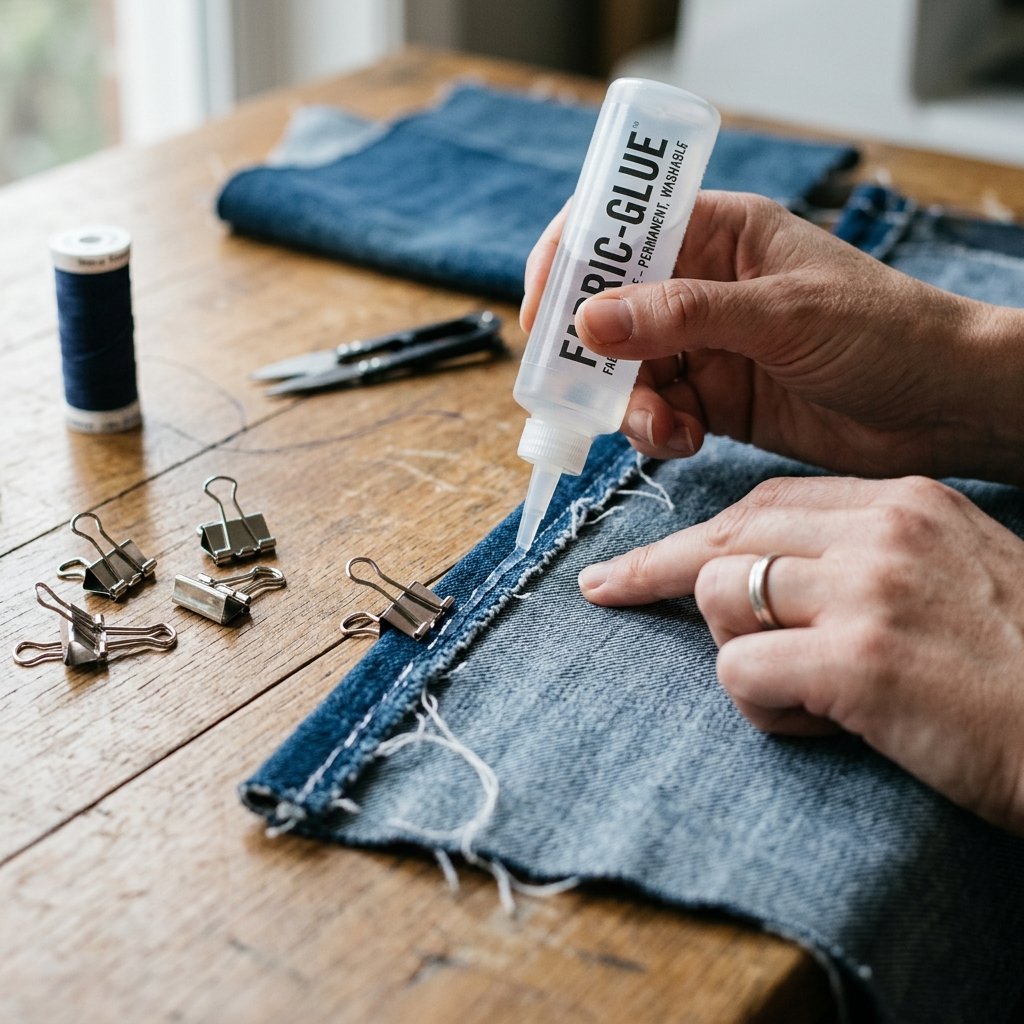
Mastering the Adhesive Seam
Since we aren’t using a sewing machine, our ‘seams’ will be created by folding and bonding. This is where the masculine-elegant ruggedness comes in. We want clean, crisp edges that won’t fray.
- Hemming the Edges: Apply a thin bead of fabric glue 1/2 inch from the raw cut edge. Fold the denim over and press firmly. Time-Saving Tip: Use binder clips to hold the fold in place while the glue sets (usually 24 hours for a full cure, but 30 minutes to be tacky).
- Joining Panels: If you are making a multi-panel corset, overlap the edges by 1 inch. Apply glue between the layers. This ‘lap joint’ is incredibly strong—much stronger than a standard butt-joint.
- Reinforcing the Lacing Edge: The back panels will take the most stress. Fold the denim over twice on the back edges to create a triple-layer thickness. This ensures the grommets won’t rip through the fabric when you pull the laces tight.
“Glue is just liquid thread. Apply it with the same precision you would use for a stitch, and it will never let you down.”
Hardware Installation: Giving Your Corset an Industrial Edge
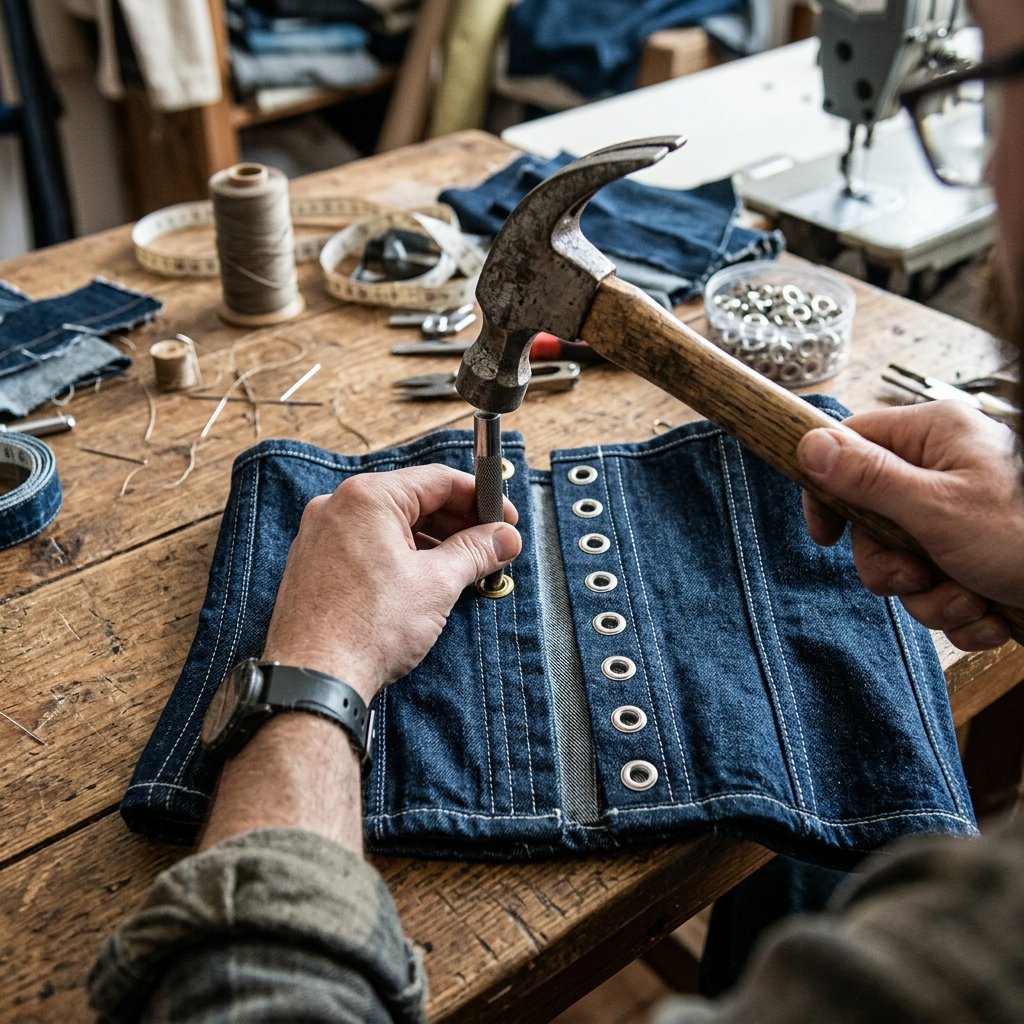
Setting the Grommets
This is the step that transforms a piece of scrap fabric into a garment. Grommets (or eyelets) provide the structural holes for your laces. You don’t need a press; a simple hammer and the setting tool included in most $10 kits will do the trick.
- Spacing: Space your grommets 1 inch apart along the reinforced back edges. Use a ruler to ensure they are perfectly symmetrical.
- The Punch: Use the hole-punch tool from your kit. Place a scrap piece of wood under the denim to protect your table. Give it one sharp, heavy blow with a hammer.
- The Set: Insert the ‘male’ side of the grommet through the hole, place the ‘female’ washer on top, and use the setting tool to mushroom the metal down.
Comparison: DIY vs. Professional Tailor
| Feature | DIY No-Sew Version | Professional Tailor Shop |
|---|---|---|
| Turnaround Time | 2 Hours | 2-3 Weeks |
| Hardware Customization | Unlimited | Limited to Stock |
| Labor Cost | $0 | $75 – $120 |
| Skill Level Required | Beginner/Crafty | Advanced |
Styling and Longevity: Rocking Your Creation

The Final Flourish: Lacing Up
The choice of lace changes the entire vibe of the piece. For a rugged, tactical look, use black paracord. For a feminine, viral aesthetic, use a wide cream-colored satin ribbon. For a monochromatic look, cut a long strip of denim from the remaining scraps and fray the edges for a ‘distressed’ cord.
Maintenance and Care
Because we used high-quality fabric glue, your corset is technically washable. However, to preserve the crispness of the denim and the integrity of the adhesive, I recommend spot cleaning only. If you must wash it, hand wash in cold water and air dry. Never put a glued garment in the dryer, as the heat can reactivate the adhesive and cause it to shift.
Styling Tips for the Frugal Fashionista
- The Layered Look: Wear your denim corset over an oversized white button-down shirt for a sophisticated, structured silhouette.
- The Double Denim: Pair it with high-waisted jeans in a slightly different wash for a trendy ‘Texas Tuxedo’ vibe.
- The Summer Edge: Wear it as a standalone top with linen trousers for a high-contrast, budget-luxury outfit.
Conclusion
Your Trash-to-Treasure Victory
You’ve done it! You’ve taken a pair of ‘unwearable’ jeans and, through the power of resourceful upcycling, created a piece of clothing that looks like it stepped off a boutique shelf. This project proves that you don’t need expensive equipment or specialized training to have a high-fashion wardrobe. All it takes is a clever eye for materials and the willingness to get a little ‘rugged’ with a hammer and some glue.
By choosing to upcycle, you aren’t just saving over $100; you’re also keeping textiles out of the waste stream and creating a one-of-a-kind piece that no one else in the world owns. That is the true essence of the crafty, budget-savvy lifestyle. Now, put on your new creation, head out the door, and prepare for everyone to ask: ‘Where did you buy that?’ You can tell them the truth with a smile: ‘I made it.’

Makenzie is the founder and lead writer at MoneyHackTips.com — a personal finance blog dedicated to delivering street-smart financial wisdom for real people on real budgets. With 300+ published articles covering everything from debt management to investing fundamentals, Makenzie’s mission is to make every dollar work harder. When not writing about money hacks, Makenzie is testing frugal living strategies, optimizing side hustles, and helping readers build financial freedom from scratch.