
The Art of the Upcycle: Why Your Trash is Your Best Resource
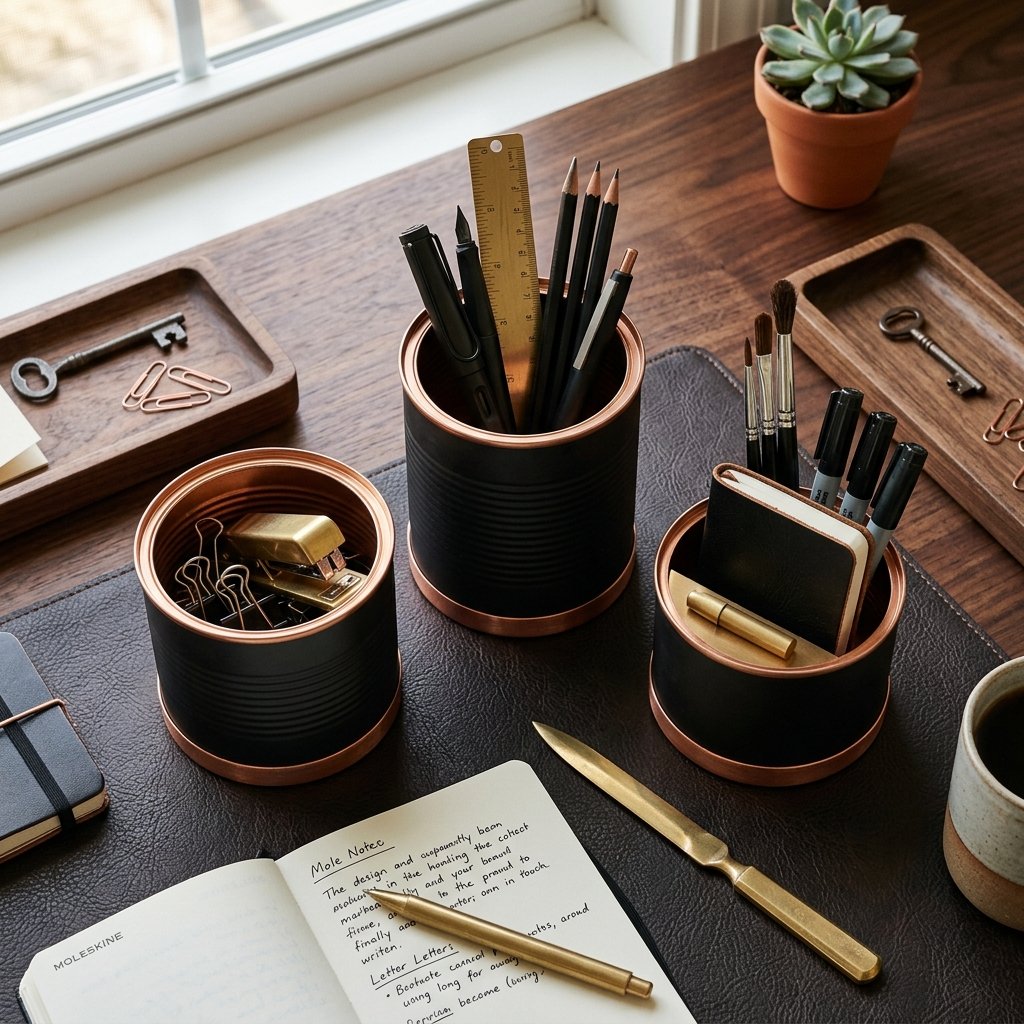
In a world of fast-furniture and disposable plastic, there is something profoundly satisfying about looking at a piece of literal garbage and seeing a high-end office accessory. As a frugal DIYer, you know that the secret to a curated, masculine-elegant workspace isn’t a massive credit card limit—it’s resourcefulness. Those tin cans currently sitting in your recycling bin are not waste; they are the structural foundation for a rugged, custom-built desktop organization system that would look right at home in a boutique design studio.
By choosing to upcycle, you are not just saving money; you are keeping metal out of landfills and creating a one-of-a-kind piece that reflects your personal style. Whether you are a handy parent looking to organize a student’s desk or a crafty gift-giver searching for a rugged, practical present for Father’s Day, this project hits the sweet spot of minimal cost and maximum impact. We aren’t just slapping some wrapping paper on a can; we are using texture, paint, and hardware to create a ‘trash-to-treasure’ miracle.
The Inventory: Scavenging and Budgeting for Success
Sourcing Your Silos
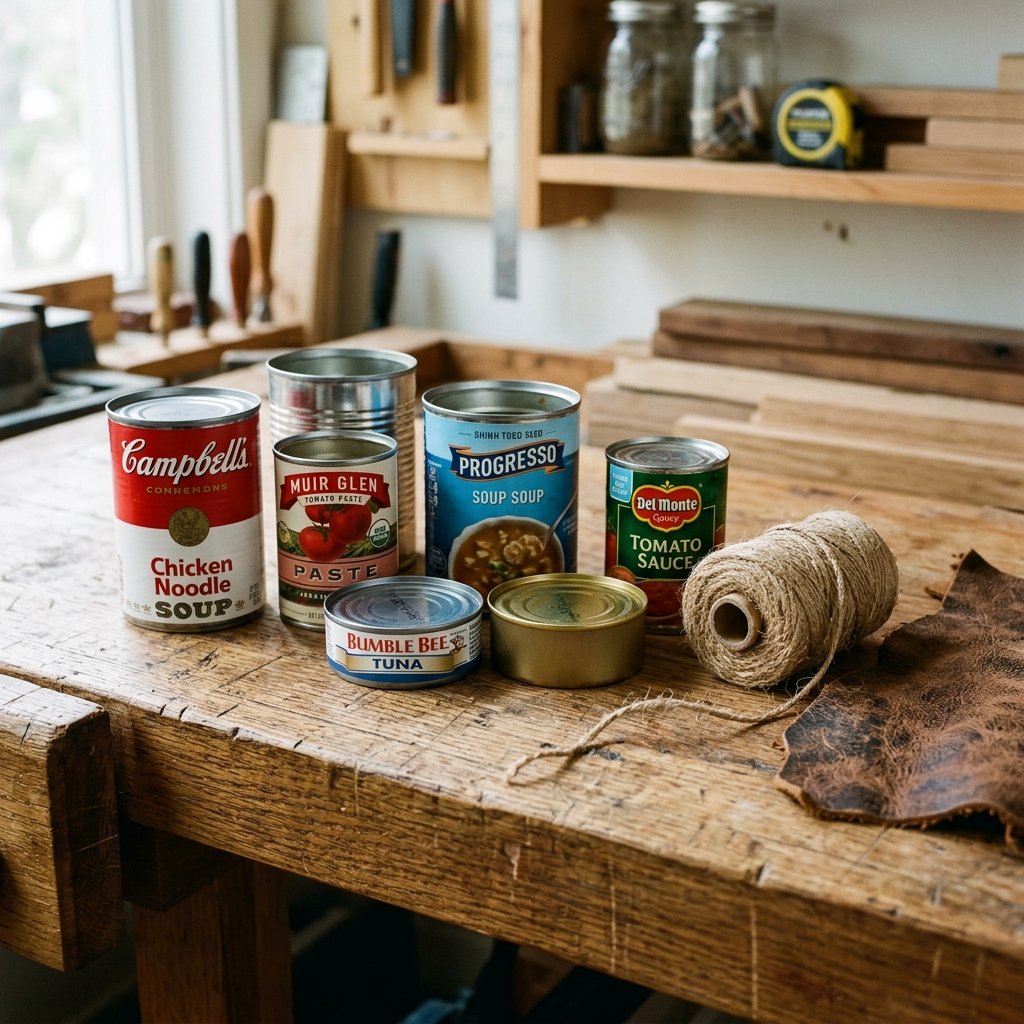
The first step in any great build is the gathering of materials. For this project, variety is your best friend. Look for cans of different heights and diameters to create a dynamic, tiered look. A large tomato juice can makes a perfect ruler holder, while a small tuna tin is ideal for paperclips or guitar picks.
| Material Item | Source | Estimated Cost |
|---|---|---|
| Empty Tin Cans (3-5 sizes) | Kitchen Pantry / Recycling | $0.00 |
| Matte Spray Paint (Black or Charcoal) | Hardware Store / Leftovers | $1.50 (pro-rated) |
| Baking Soda (for texture) | Pantry | $0.10 |
| Leather Scraps or Jute Twine | Old belt / Craft scraps | $0.00 |
| Hot Glue / E6000 | Craft Stash | $0.50 |
| Total Project Cost | – | $2.10 |
The Frugal Mantra: Use what you have before you buy what you think you need. A half-used can of spray paint from a previous project is better than a new one.
Step 1: The Prep – Safety and Surface Tension
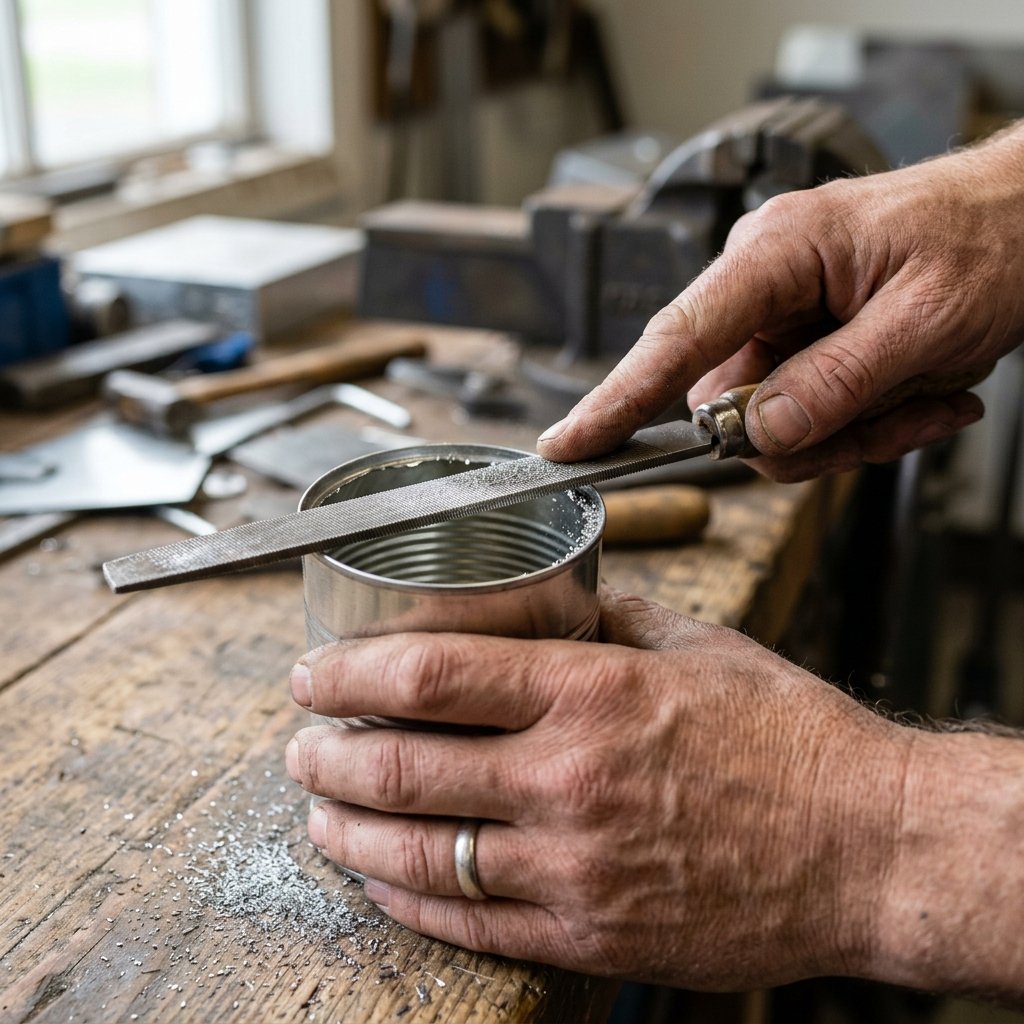
Removing the Evidence
To turn a soup can into a ‘chic organizer,’ you must first remove its identity. Start by soaking your cans in hot, soapy water to loosen the labels. For stubborn adhesive, a mixture of equal parts baking soda and vegetable oil acts as a natural, non-toxic ‘Goo Gone’ that works in minutes.
Smoothing the Edges
Safety is paramount when working with metal. If your can opener left a jagged edge, you have two options: use a pair of needle-nose pliers to crimp the edge down, or use a metal file to sand it smooth. A smooth rim is the difference between a professional finish and a dangerous craft project.
Safety Note: Always wear work gloves when filing metal. A tiny burr can cause a deep cut. Once filed, run a cotton ball along the rim; if it catches, keep filing.
Step 2: The ‘Faux Ceramic’ Texture Trick
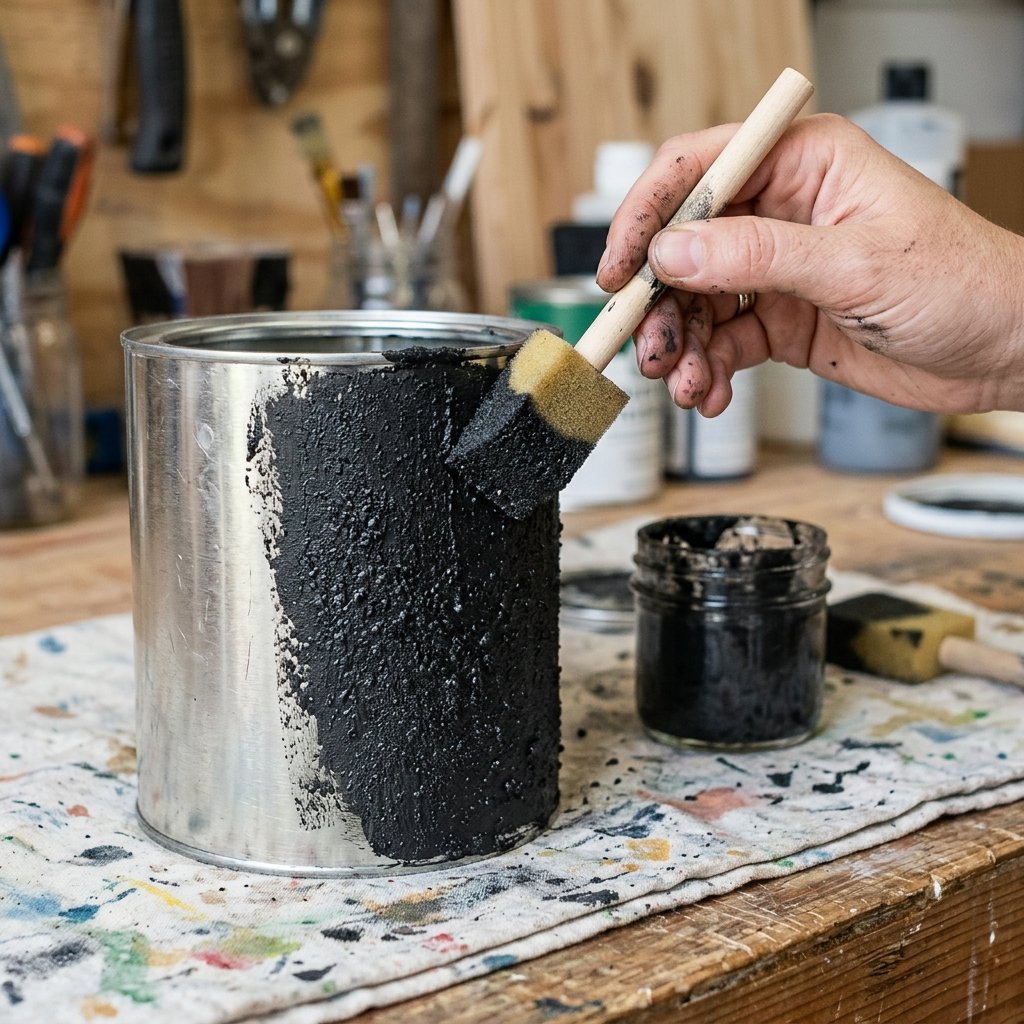
The Secret Ingredient
Plain spray paint on metal often looks… well, like spray-painted metal. To achieve a high-end ceramic or cast-iron look, we use the baking soda trick. This adds a rugged, matte grit that mimics expensive stoneware found in luxury home stores.
- The Formula: Mix 1/2 cup of acrylic paint with 2 tablespoons of baking soda until it reaches a thick, mousse-like consistency.
- The Application: Use a sponge brush to ‘stipple’ the paint onto the can rather than brushing it. This creates a hammered texture that hides any dings or imperfections in the metal.
- The Dry Time: Allow 45 minutes between coats. Two coats are usually sufficient for total opacity.
Step 3: Rugged Accents – Leather and Industrial Hardware
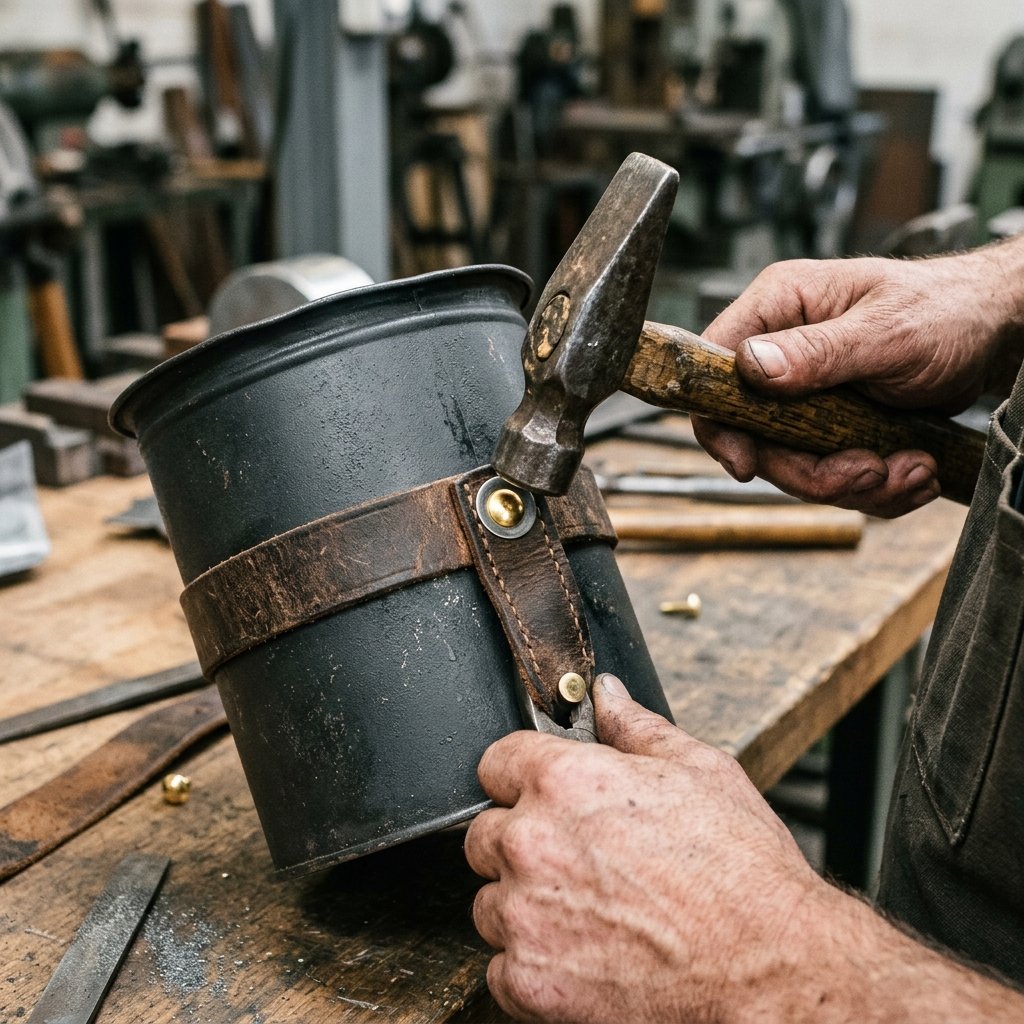
Adding Masculine Elegance
Once your base texture is dry, it’s time to elevate the design. This is where we move from ‘crafty’ to ‘designer.’ Adding a natural element like leather or wood provides a beautiful contrast to the cold metal and dark paint.
Technique: The Leather Wrap
- Cut a strip of leather from an old belt or scrap piece (about 1/2 inch wide).
- Wrap it around the center or the base of the can.
- Secure with E6000 adhesive or a heavy-duty hot glue gun.
- For an extra industrial touch, use a hammer and a small nail to punch a hole through the leather and can, then insert a brass fastener or rivet.
Technique: The Jute Border
If you prefer a more coastal or rustic vibe, wrap jute twine tightly around the bottom third of the can. This not only looks great but provides a non-slip grip and protects your desk surface from scratches.
Step 4: Creating the Unified System

The Power of Three
A single can is a pencil cup; three cans are an organizer system. To make your set look intentional, you should mount them to a base or join them together. This prevents them from sliding around your desk and creates a singular ‘piece’ of decor.
| Arrangement Style | Best For | Vibe |
|---|---|---|
| Linear Row | Narrow Desks | Modern & Minimalist |
| Triangular Cluster | Corner Spaces | Rugged & Robust |
| Tiered (on a wood block) | Art Supplies | Professional Studio |
The Magnetic Secret
For a truly clever hack, glue a small neodymium magnet to the inside of one can. This allows you to ‘stick’ paperclips or a small pocket knife to the outside of the can, keeping them within reach but off the desk surface. It is a practical, space-saving feature that feels like a high-end design choice.
Step 5: Final Polish and Styling
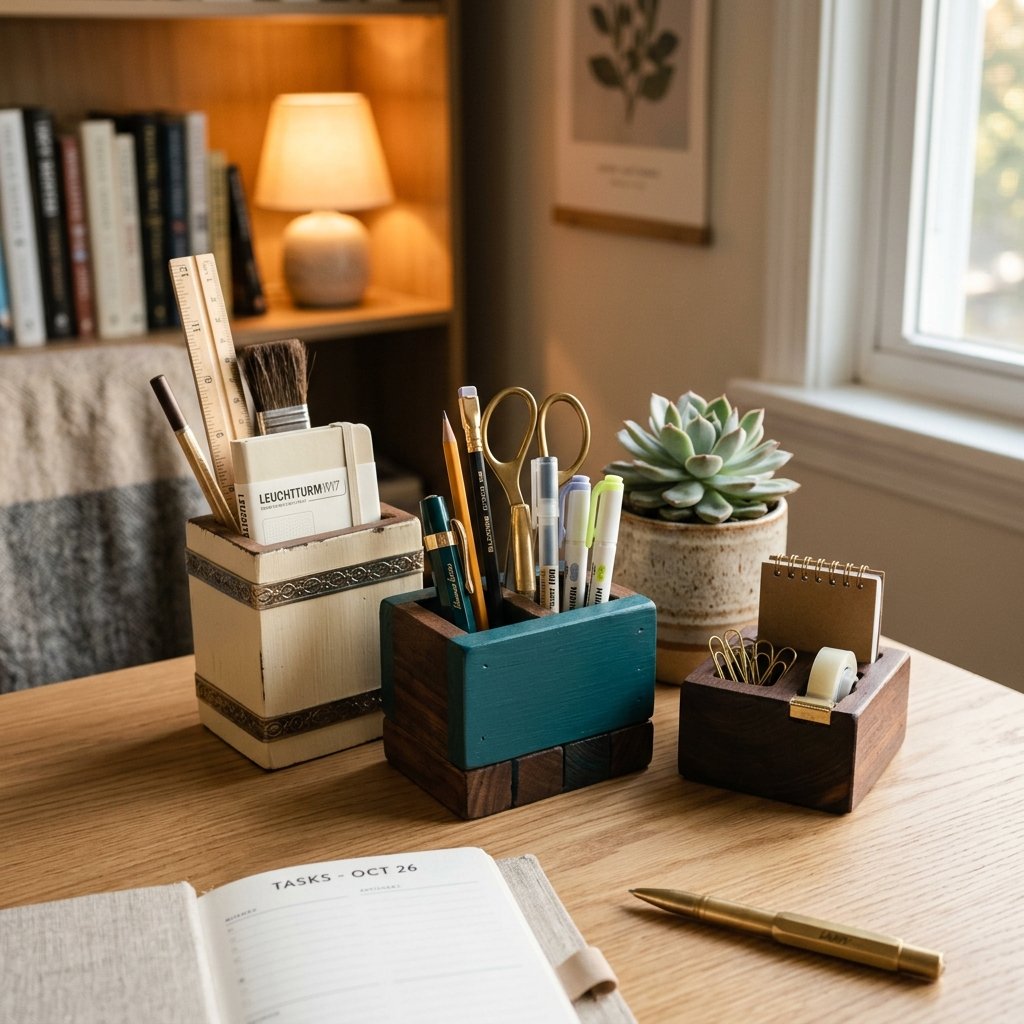
The Finishing Touch
To ensure your organizers last for years, apply a quick coat of matte clear sealer. This prevents the ‘ceramic’ paint from chipping and protects the metal from any humidity that might cause rust over time.
Desktop Curation
When placing your new organizers, think about the tools you use most. Handy parents might fill one with markers and another with a glue stick for school projects. Rugged professionals might use them for architectural scales, calipers, and a favorite fountain pen. The beauty of this DIY is that the dimensions are custom-fit to your life.
Budget Tip: If you don’t have a base, use a scrap piece of wood from a pallet. Sand it down, stain it with leftover coffee for a deep brown hue, and glue your cans directly to it. Total cost: $0.00.
Conclusion
From Waste to Workspace Wonder
You have successfully turned a handful of pantry scraps into a sophisticated, industrial-chic desktop organizer. This project is a testament to the power of the frugal mindset: with a little bit of paint, some scrap leather, and a few clever techniques, you can bypass the big-box stores and create something superior in both style and sentiment. You’ve saved roughly $40.00 compared to buying a similar set from a high-end retailer, and you’ve done your part for the planet.
Now that you’ve mastered the tin can, what’s next? The same logic applies to glass jars, cardboard shipping boxes, and old textiles. Keep your eyes open, your glue gun ready, and your budget tight. Happy crafting!

Makenzie is the founder and lead writer at MoneyHackTips.com — a personal finance blog dedicated to delivering street-smart financial wisdom for real people on real budgets. With 300+ published articles covering everything from debt management to investing fundamentals, Makenzie’s mission is to make every dollar work harder. When not writing about money hacks, Makenzie is testing frugal living strategies, optimizing side hustles, and helping readers build financial freedom from scratch.