
The Art of the High-End Hustle: Turning Trash into Treasure
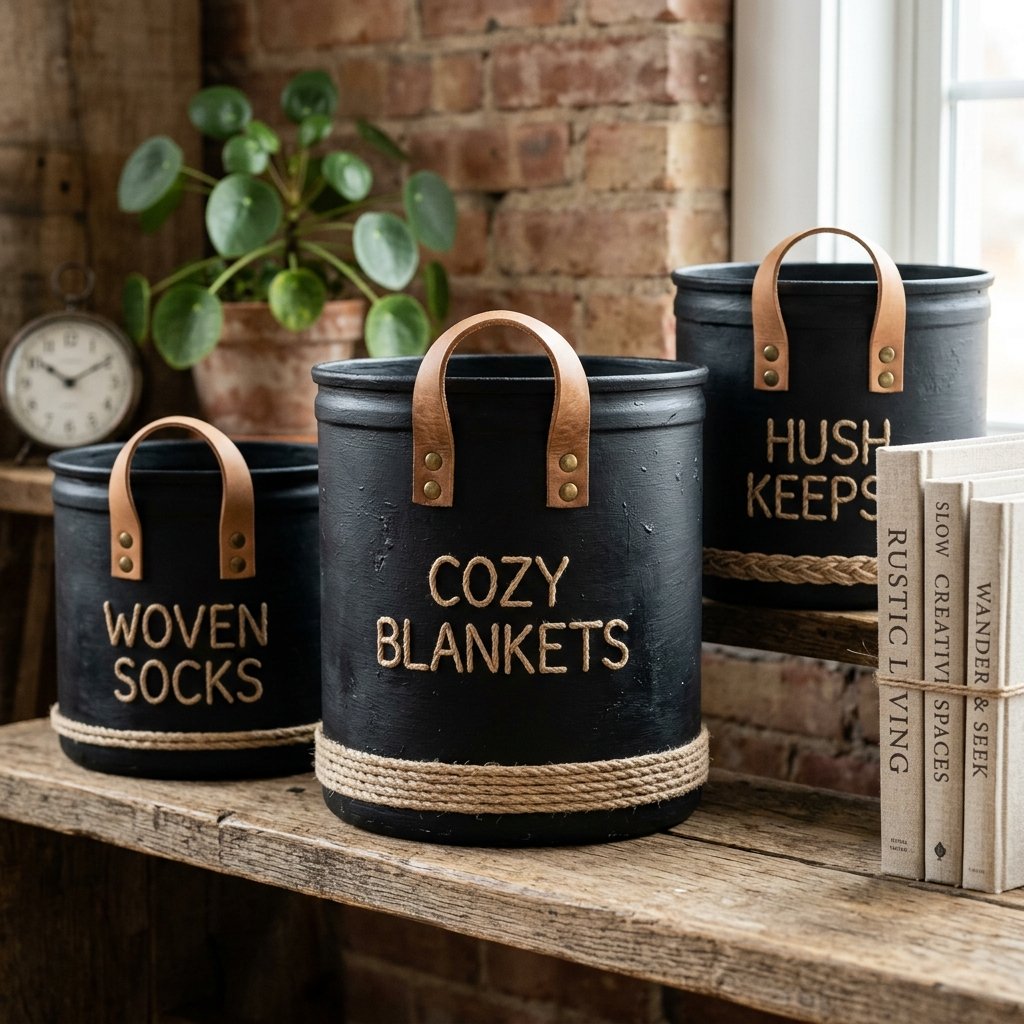
Let’s be honest: we’ve all stood in the aisles of high-end home decor stores, staring at a $45 cylindrical storage bin and thinking, ‘I could probably make that.’ Well, today is the day we stop thinking and start doing. Those sturdy cardboard oatmeal containers you’ve been tossing in the recycling bin are actually structural gold mines. With their uniform shape and rigid walls, they provide the perfect canvas for creating sophisticated, masculine-elegant organization solutions that look like they were plucked straight from a boutique catalog.
As a frugal DIYer, you know that luxury isn’t about the price tag; it’s about the execution. By combining rugged materials like leather, twine, and textured paint, we can elevate humble cardboard into something truly substantial. In this guide, we are going to dive deep into the world of upcycling, teaching you how to reinforce, texture, and detail these canisters so they look less like ‘repurposed trash’ and more like ‘bespoke artisanal storage.’ Whether you need a place for your coffee pods, craft supplies, or even a sleek desktop trash can, these bins are about to become your favorite weekend project.
The Blueprint: Materials, Costs, and the DIY Advantage
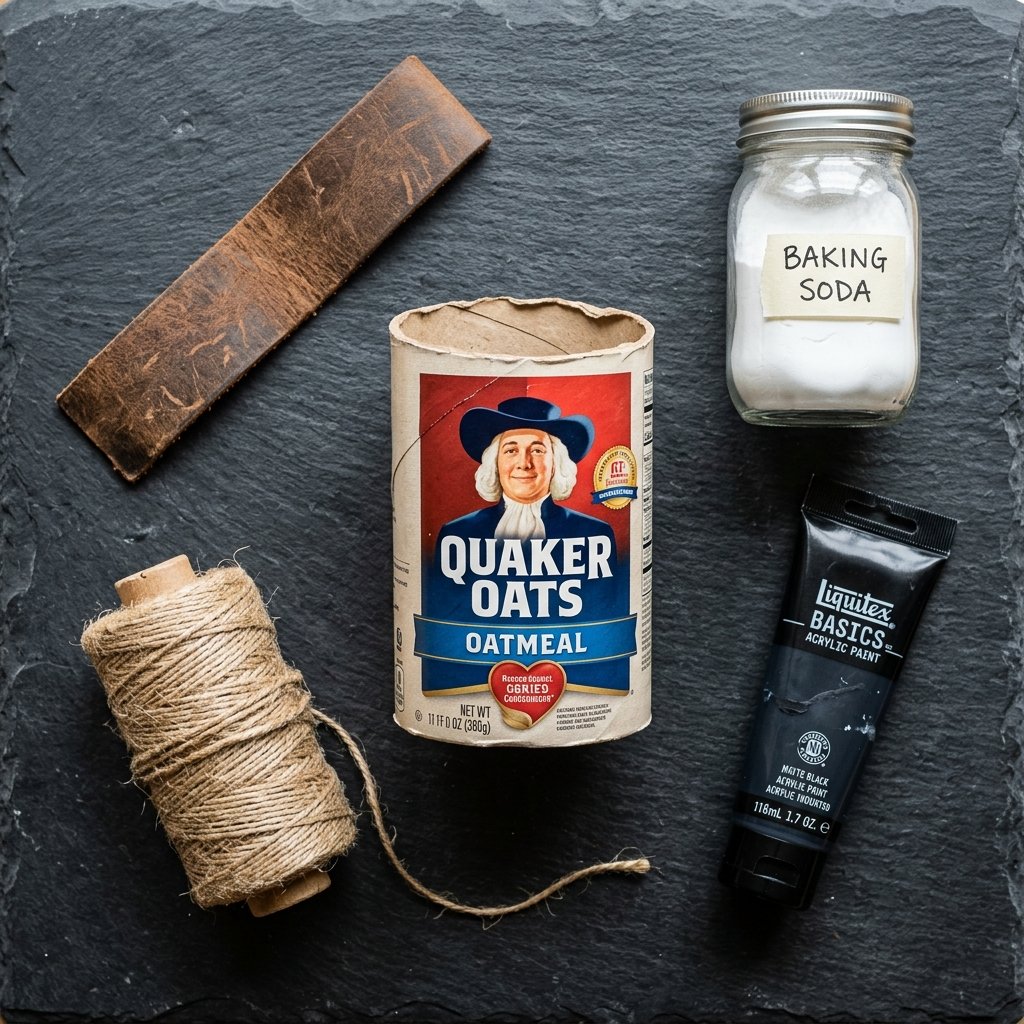
Before we pick up a glue gun, let’s look at the numbers. The goal of this project is to achieve a high-end aesthetic while spending as close to $0 as possible. Most of these materials are likely already in your garage or junk drawer. If you have to buy them, a single trip to the dollar store will cover your needs for multiple bins.
| Material Item | Estimated Cost | Source/Note |
|---|---|---|
| Oatmeal Containers (Large) | $0.00 | Salvaged from pantry |
| Baking Soda & Acrylic Paint | $1.25 | Dollar Store or existing stash |
| Scrap Leather or Old Belt | $0.00 | Upcycled from old accessories |
| Hot Glue & E6000 | $0.50 | Proportional cost of stock |
| Jute Twine or Cotton Rope | $1.25 | Dollar Store or hardware store |
| Total Project Cost | $3.00 | Savings of $30+ vs Store-bought |
When you compare this to the $25 – $60 you would spend at a luxury home goods store, the value is undeniable. Not only are you saving money, but you are also keeping cardboard out of the landfill and creating a custom piece that fits your specific style profile.
Preparation and Reinforcement: Building a Solid Foundation
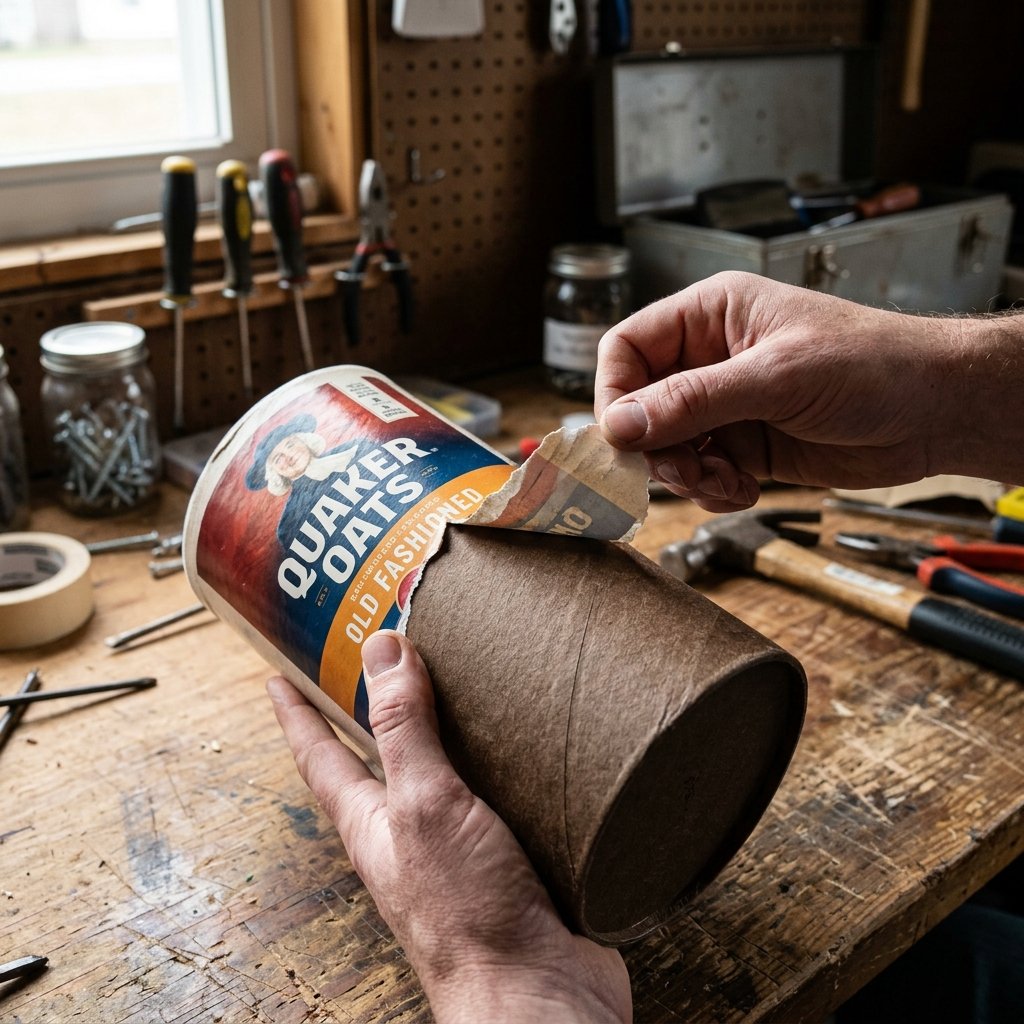
Stripping and Cleaning
The first step to a high-end look is removing the ‘trash’ evidence. Most oatmeal containers have a plastic-coated paper label. Carefully peel this off to reveal the raw cardboard underneath. If the label is stubborn, you can leave it, but ensure any oily residue from the oatmeal is wiped clean with a dry cloth. Do not use water, as it will warp the cardboard.
Structural Integrity
If you plan on using these for heavier items like tools or large kitchen utensils, you need to reinforce the base. Cut a circle of corrugated cardboard from a shipping box and glue it into the bottom of the canister using E6000 adhesive. This adds weight and prevents the bottom from bowing over time.
Pro-Tip: For a truly rugged, high-end feel, glue a small flat stone or a few heavy washers to the inside bottom before adding your lining. This gives the bin ‘heft,’ making it feel like expensive ceramic rather than light cardboard.
The Secret Sauce: Achieving the Faux-Ceramic Texture
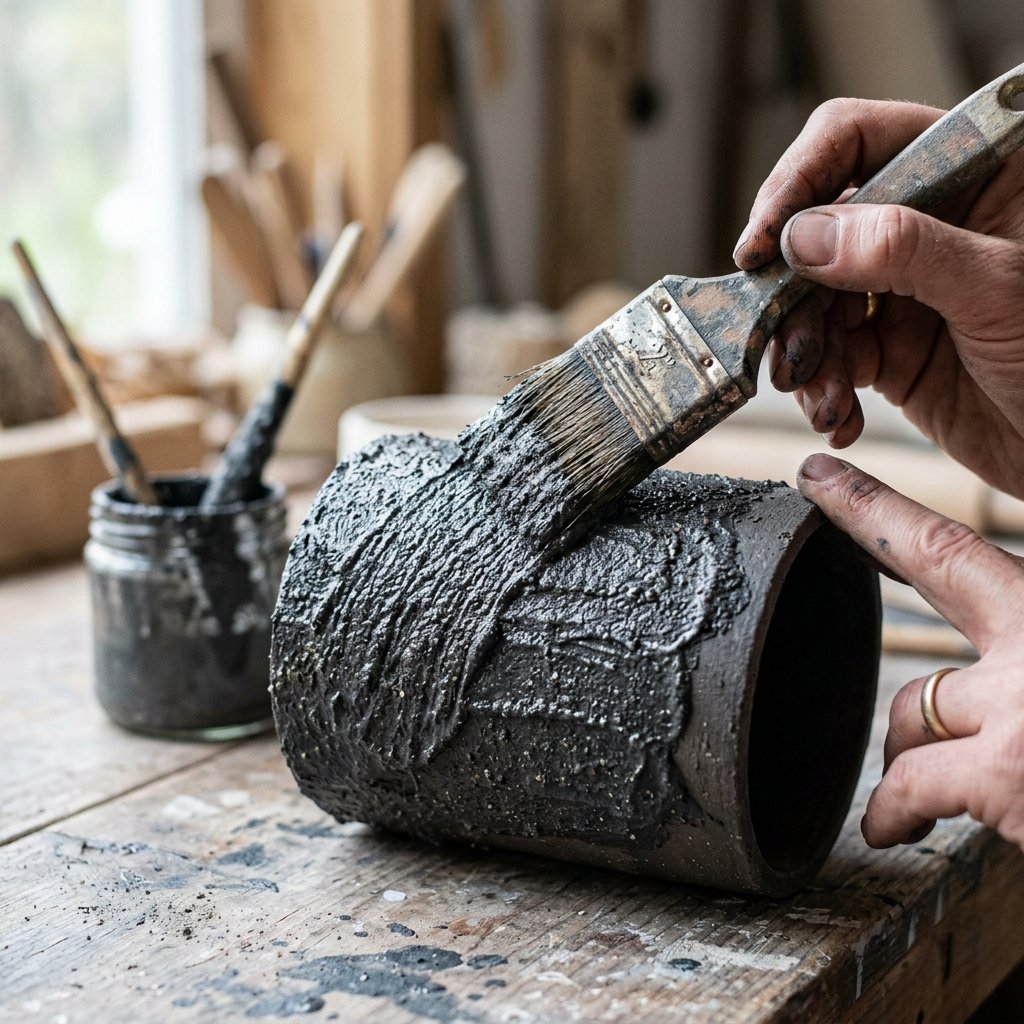
The biggest giveaway that an item is DIY is a ‘flat’ paint job. To get that high-end, stone-ware or matte ceramic look, we use the Baking Soda Paint Trick. This creates a gritty, organic texture that mimics expensive pottery.
The Recipe for Success
- Pour 1/2 cup of matte acrylic paint (charcoal, forest green, or terracotta work best for a masculine-elegant look) into a mixing bowl.
- Slowly stir in 2-3 tablespoons of baking soda.
- The mixture will begin to puff up and look like thick mousse. This is exactly what you want.
Application Techniques
Using a stiff-bristled brush, apply the paint in a ‘stippling’ or ‘criss-cross’ motion rather than long, smooth strokes. This adds depth and hides the seams of the cardboard. Allow the first coat to dry for 30 minutes, then apply a second coat for full coverage. The result will be a bone-dry, stone-like finish that looks incredibly sophisticated.
Budget Mantra: Texture hides a multitude of sins. If your cardboard has a dent, more baking soda is your best friend.
Hardware and Detailing: The ‘Designer’ Finishing Touches

Adding Leather Handles
Nothing says ‘high-end’ like the combination of matte textures and natural leather. You don’t need to buy expensive leather; an old belt from a thrift store or an old handbag will work perfectly. Cut two strips approximately 1 inch wide and 4 inches long.
Installation Steps
- Mark two spots on opposite sides of the container, about 1 inch from the top rim.
- Use a leather punch or a sharp nail to create a hole through the leather and the cardboard.
- Insert a brass paper fastener (brad) or a chicago screw through the leather and the container.
- Open the prongs inside and cover them with a small piece of duct tape to prevent them from snagging the contents.
Rope Accents
If leather isn’t your style, consider a ‘nautical-industrial’ look. Wrap the bottom 2 inches of the container in jute twine, securing it with hot glue every few inches. This provides a rugged contrast to the painted surface and adds another layer of visual interest.
Interior Linings: Luxury You Can Feel
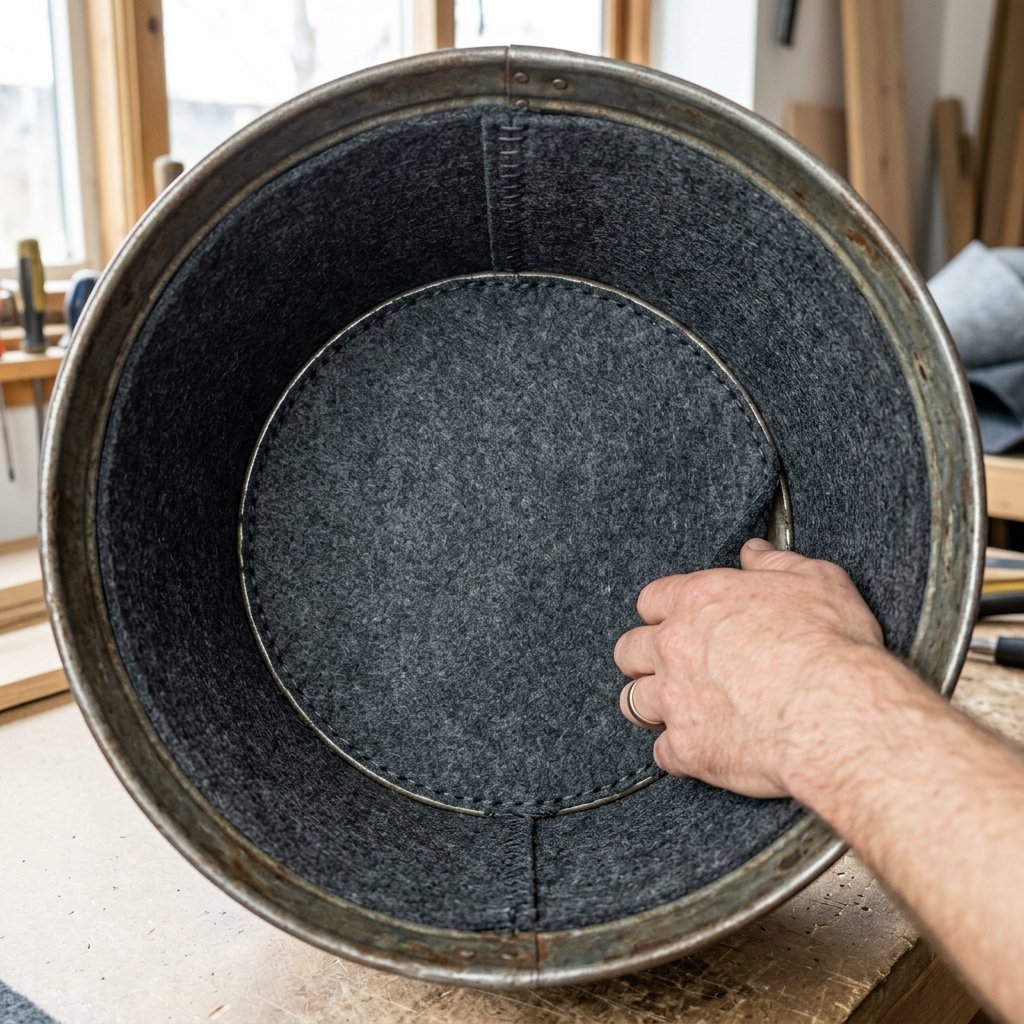
A true ‘Trash to Treasure’ project is finished on the inside as well as the outside. Opening a beautiful bin only to see ‘Oatmeal Residue’ ruins the illusion. We recommend two budget-friendly lining options:
| Lining Material | Difficulty Level | Best Use Case |
|---|---|---|
| Contact Paper (Marble/Wood) | Easy | Kitchen or Bathroom (Water resistant) |
| Felt or Flannel Scraps | Medium | Jewelry, Tech Gear, or Delicate Items |
| Brown Paper Bag (Crinkled) | Easy | Rustic, Industrial look |
To install a fabric lining, cut a circle for the bottom and a rectangle for the sides. Use spray adhesive for a smooth, bubble-free finish. If using felt, choose a dark color like navy or burgundy to enhance the masculine-elegant aesthetic. This small step adds 100% more perceived value to your finished product.
Safety Note: When using spray adhesives, always work in a well-ventilated area or outdoors to avoid inhaling fumes.
Style Guide: Three Ways to Finish Your Bins
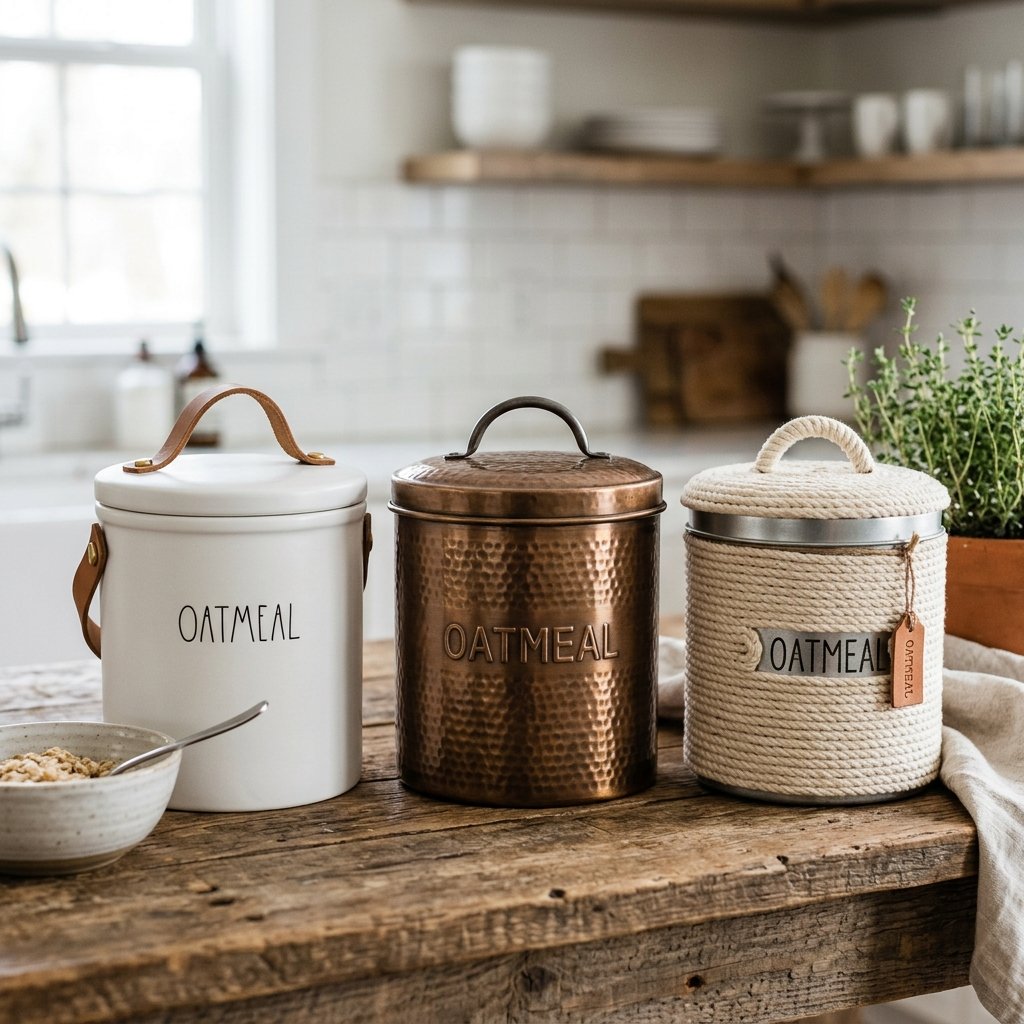
1. The Modern Minimalist
Use matte white paint with the baking soda trick and a single black leather loop handle on the lid. Perfect for a clean, Scandinavian-style office.
2. The Industrial Workshop
Use metallic spray paint in ‘Oil Rubbed Bronze.’ Instead of leather, use a small $1.00 drawer pull handle from the hardware store bolted through the side. This looks incredible on a workbench for holding screws or drill bits.
3. The Boho Chic Organizer
Leave the cardboard raw but wrap the entire container in alternating colors of cotton cord (cream and tan). This mimics the look of expensive woven baskets found in high-end nursery boutiques.
Conclusion
The Final Reveal: From Pantry to Pedestal
By following these steps, you’ve successfully transformed a piece of literal garbage into a functional work of art. These upcycled oatmeal container storage bins prove that with a little bit of baking soda, some scrap leather, and a resourceful mindset, you can furnish your home with high-end style on a shoestring budget.
Don’t stop at just one! Create a graduated set by using different sized canisters (like breadcrumb containers or coffee tins) to create a cohesive storage system. You’ve saved nearly $40 per bin, kept waste out of the environment, and honed your crafting skills. Now, go forth and upcycle—your shelves (and your wallet) will thank you!

Makenzie is the founder and lead writer at MoneyHackTips.com — a personal finance blog dedicated to delivering street-smart financial wisdom for real people on real budgets. With 300+ published articles covering everything from debt management to investing fundamentals, Makenzie’s mission is to make every dollar work harder. When not writing about money hacks, Makenzie is testing frugal living strategies, optimizing side hustles, and helping readers build financial freedom from scratch.