
We have all been there. You pull your favorite, expensive wool sweater out of the dryer, only to discover it has shrunk to a size suitable only for a small toddler. Or perhaps you are staring at a stack of moth-eaten cashmere pullovers, vintage cardigans with unfixable stains, or outgrown winter wear that you simply cannot bring yourself to throw away. Before you bag them up for the donation bin—or worse, the landfill—stop right there. You are holding a goldmine of high-quality textiles.
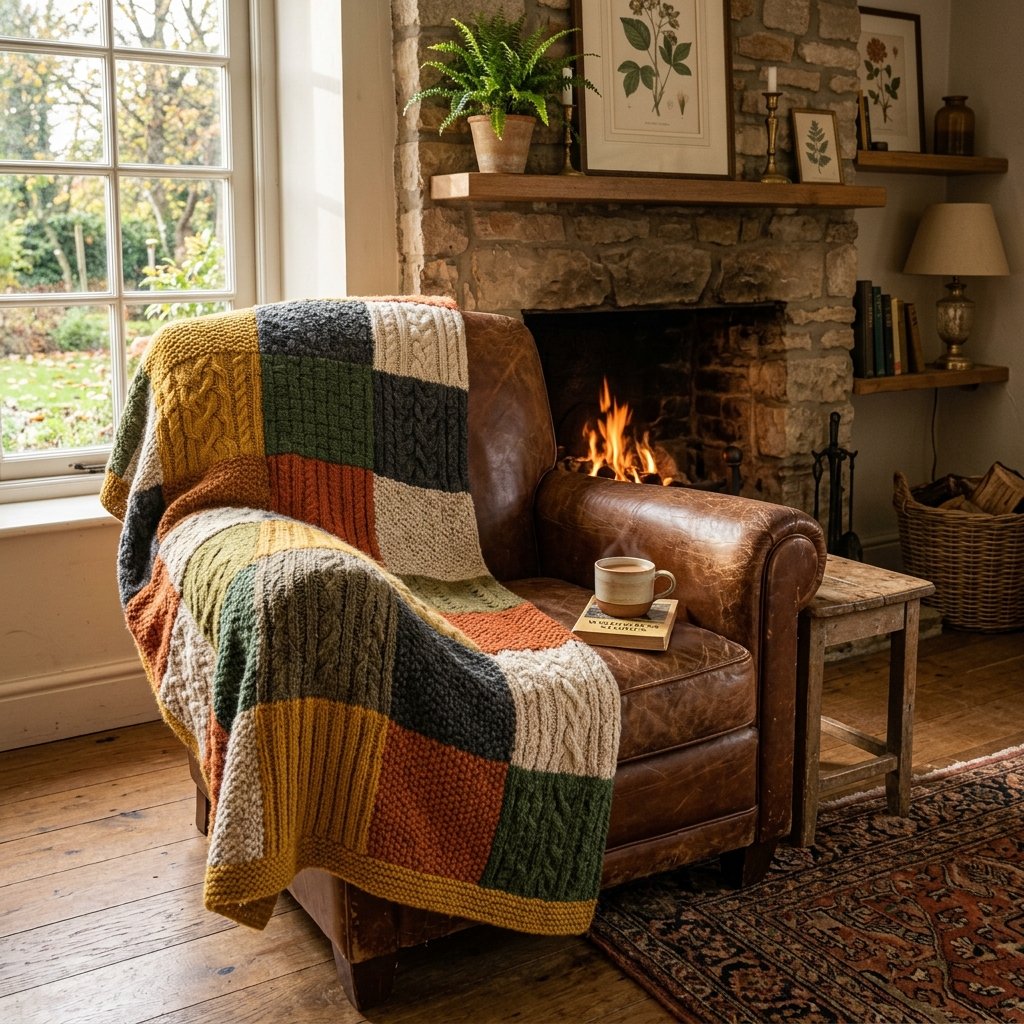
Welcome to the ultimate frugal crafter’s masterclass. Today, we are turning that pile of textile tragedy into a rugged, handsome, and incredibly cozy patchwork blanket. High-end, heavy-weight wool throws from boutique home goods stores can easily set you back anywhere from $150 to $350. By tapping into your resourceful, upcycling spirit, you can create a custom, heirloom-quality piece for under $15—or absolutely $0 if you shop your own closet.
This project is the perfect weekend endeavor for handy parents, frugal DIYers, and anyone who appreciates a masculine-elegant, cabin-core aesthetic. Not only is this a brilliant way to practice zero-waste living, but the resulting blanket is heavy, warm, and visually stunning. Whether you plan to drape it over a leather reading chair, toss it in the back of your truck for chilly tailgate nights, or give it as a deeply thoughtful, crafty gift, this sweater upcycle is a game-changer. Let us roll up our sleeves, grab our scissors, and turn trash into absolute treasure.
The Frugal Crafter’s Guide to Sourcing and Felting Wool
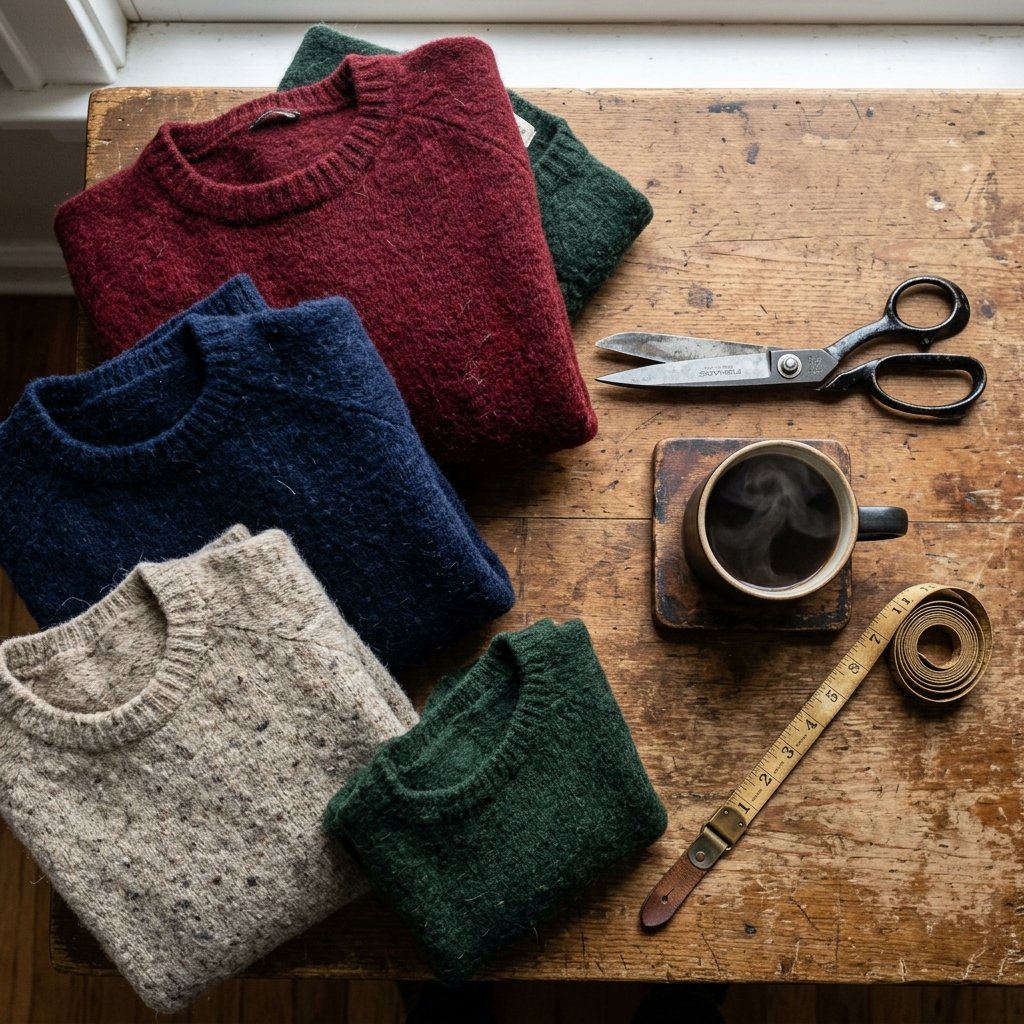
The secret to making a sweater blanket that does not unravel into a frayed, stringy mess lies in a magical process called felting. Felting occurs when animal fibers (like wool, alpaca, or cashmere) are exposed to heat, moisture, and agitation. The tiny scales on the fibers lock together, creating a dense, solid fabric that you can cut with scissors without any fear of fraying. It is a tailor’s best-kept secret for upcycling.
Finding the Right Materials
If your own closet is looking sparse, hit the thrift store bins. Look for the ugliest, most out-of-style sweaters you can find, provided they have great texture—think chunky cable knits, ribbed textures, and fair isle patterns. The key is to check the tags. You need sweaters that are at least 80% to 100% animal fiber (wool, merino, alpaca, or cashmere). Acrylic, cotton, and polyester will not felt, meaning they will unravel when cut.
| Material Sourcing | Estimated Cost | Pros & Cons |
|---|---|---|
| Your Own Closet (Shrunken/Stained) | $0.00 | Free and sentimental, but limited color palette. |
| Thrift Store Clearance Bins | $1.00 – $3.00 per sweater | Highly budget-savvy; requires hunting for 100% wool. |
| Boutique Store-Bought Wool Throw | $150.00 – $300.00+ | Zero effort, but extremely expensive and lacks character. |
The Felting Process: Step-by-Step
Once you have gathered your sweaters (you will need about 6 to 10 sweaters for a standard throw), it is time to felt them. This is the one time you are actually trying to ruin your clothes in the wash!
- Wash on High Heat: Toss your sweaters into the washing machine. Add a small amount of heavy-duty laundry detergent. Set the machine to the hottest water setting and the longest, most agitating cycle available.
- Add Friction: For extra felting power, throw in a pair of heavy denim jeans or a few tennis balls. The friction helps the wool fibers bind together.
- Dry on High Heat: Transfer the wet sweaters to the dryer. Run them on the hottest setting for about 45 to 60 minutes.
- Inspect and Repeat: Pull them out and check the fabric. You should not be able to see the individual knitted stitches clearly, and the fabric should feel dense and thick. If it still looks loose, run it through the wash and dry cycle one more time.
Frugal Crafter’s Mantra: “Never pay for what you can shrink, salvage, and stitch. Every stain is just a cutting line waiting to happen.”
The Master Tailor’s Prep: Squaring Up Your Scraps
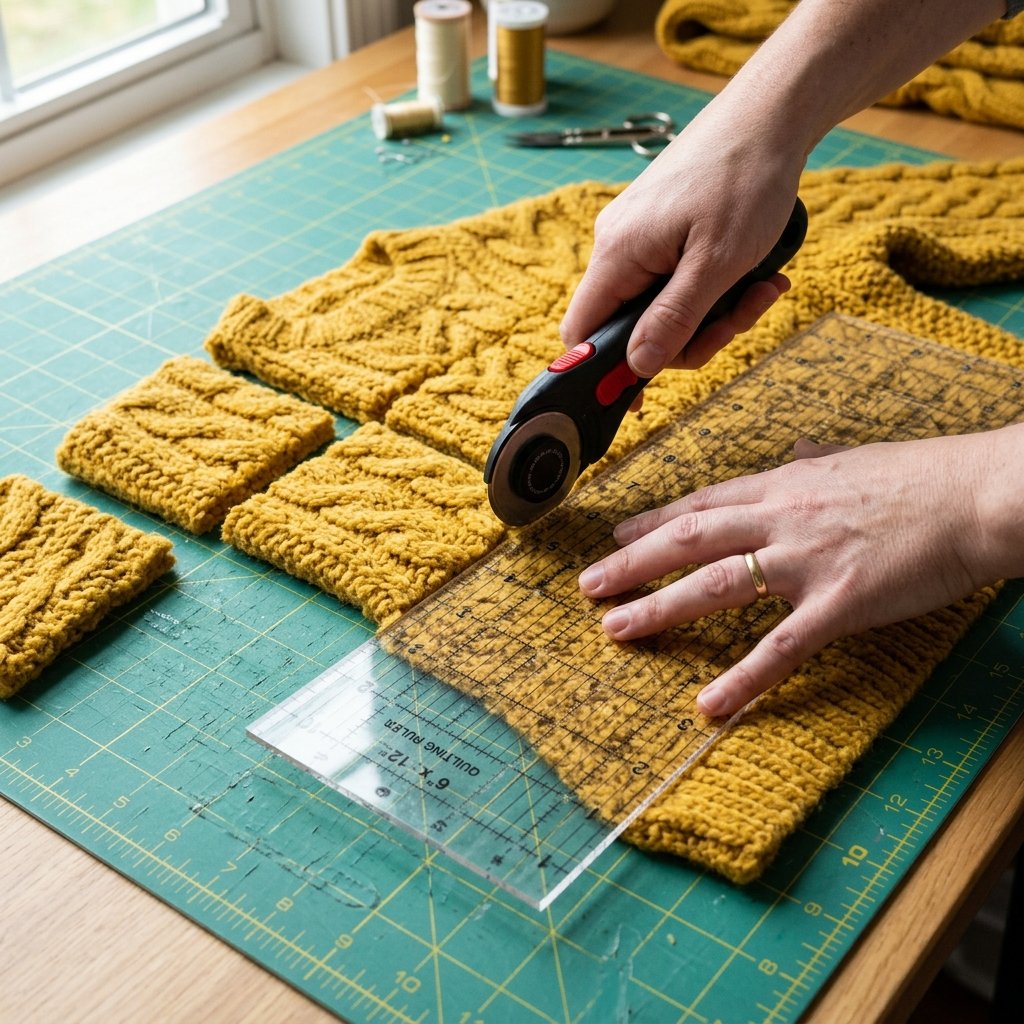
Now that you have a pile of dense, felted wool, it is time to process your materials. Precision is key here. While we are going for a rugged, handmade look, wildly uneven squares will make the sewing process a nightmare and result in a wonky, distorted blanket. We want masculine-elegant, not messy.
Creating Your Template
Decide on the size of your squares. A standard, easy-to-work-with size is 10 inches by 10 inches. If you are working with smaller sweaters or want a more intricate patchwork look, 8-inch by 8-inch squares work beautifully. Cut a template out of a sturdy piece of scrap cardboard or use a clear acrylic quilting ruler.
Deconstructing the Sweaters
Grab your heavy-duty fabric shears or a sharp rotary cutter. A rotary cutter paired with a self-healing cutting mat will give you the crispest, most professional edges, saving you hours of frustration.
- Step 1: Cut off the sleeves, the ribbed bottom hem, and the neckline. Do not throw these away! The sleeves can be cut into smaller rectangles for a border, and the ribbed hems make excellent rugged cuffs for future mitten-making projects.
- Step 2: Slit the sweater up the side seams to separate the front panel from the back panel. Lay the panels flat on your cutting surface.
- Step 3: Place your cardboard template or acrylic ruler over the flattest, most textured parts of the sweater. Avoid the armpit areas, as they tend to be bulky and warped.
- Step 4: Press down firmly and cut around your template. Maximize your fabric by cutting as many squares as possible from the main body.
Safety Note: Rotary cutters are incredibly sharp. Always cut away from your body, keep your fingers clear of the ruler’s edge, and engage the safety guard immediately after every single cut.
Designing Your Layout: Color Theory on a Dime
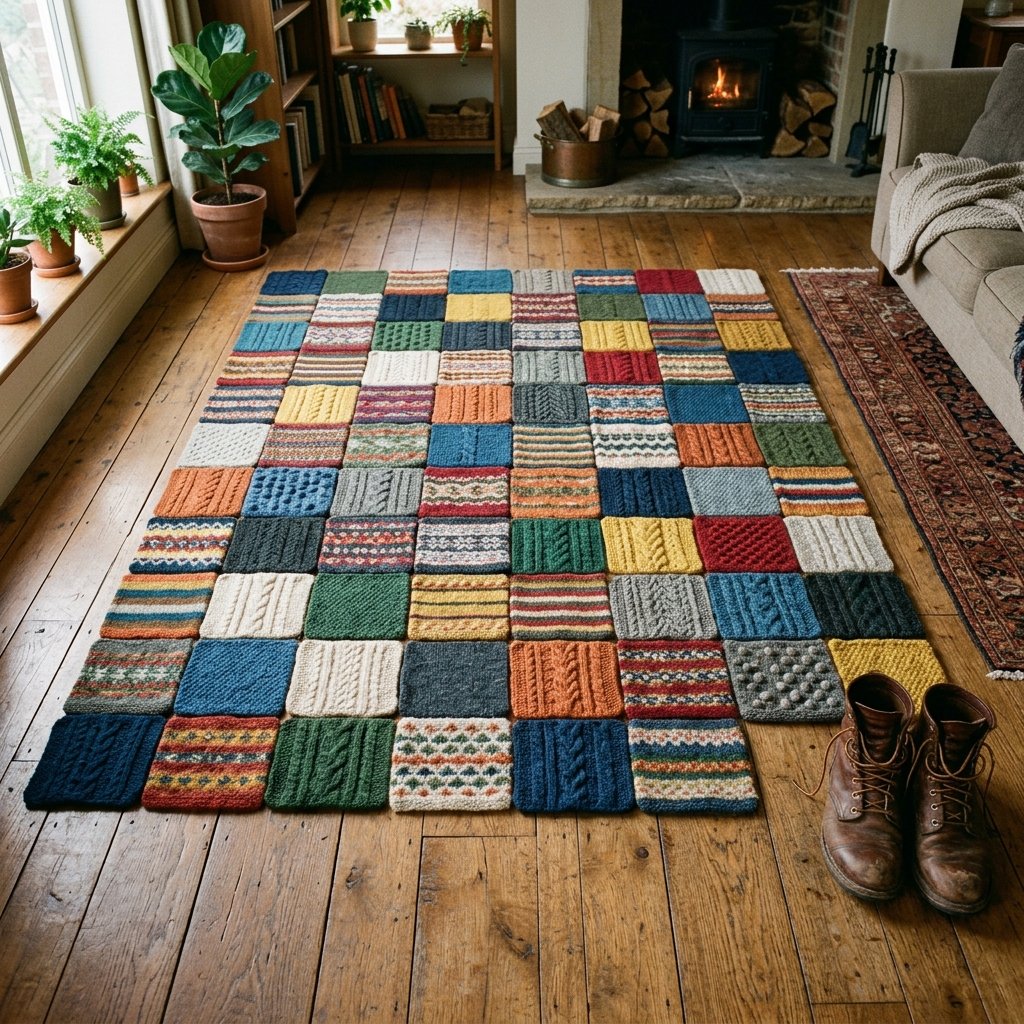
With a stack of freshly cut wool squares ready to go, you have reached the most creative part of the process: the layout. This is where your pile of upcycled laundry truly transforms into a bespoke, high-end piece of home decor.
The Floor is Your Canvas
Clear a large space on your living room floor. Begin laying out your squares in a grid. For a standard throw blanket (approximately 50 inches by 60 inches), you will need a grid that is 5 squares wide by 6 squares long (assuming 10-inch squares, accounting for seam allowances).
Balancing Texture and Color
To achieve that sophisticated, cohesive look, you need to balance the visual weight of the blanket. Here are a few expert styling tips:
- Distribute the Textures: If you have a few squares with heavy cable-knit patterns, do not clump them all together in one corner. Spread them out evenly across the blanket like anchor points. Surround them with flat-weave or lightly ribbed squares to let the cables pop.
- Contrast is King: Alternate dark, moody colors (like charcoal, navy, or forest green) with lighter, softer tones (like cream, oatmeal, or heather gray). This creates a striking, rugged contrast that looks incredibly intentional.
- The “Squint Test”: Step back and squint your eyes at the layout. If any one area looks too dark, too bright, or too busy, swap a few squares around until the overall pattern feels balanced and harmonious.
Once you are completely satisfied with your layout, take a photo with your phone. This is your foolproof map. Stack the squares row by row, labeling each stack with a scrap of paper (e.g., “Row 1,” “Row 2”) so you don’t lose your meticulously planned design during the sewing phase.
The Stitching Process: Sewing Machine vs. Rugged Hand-Sewing
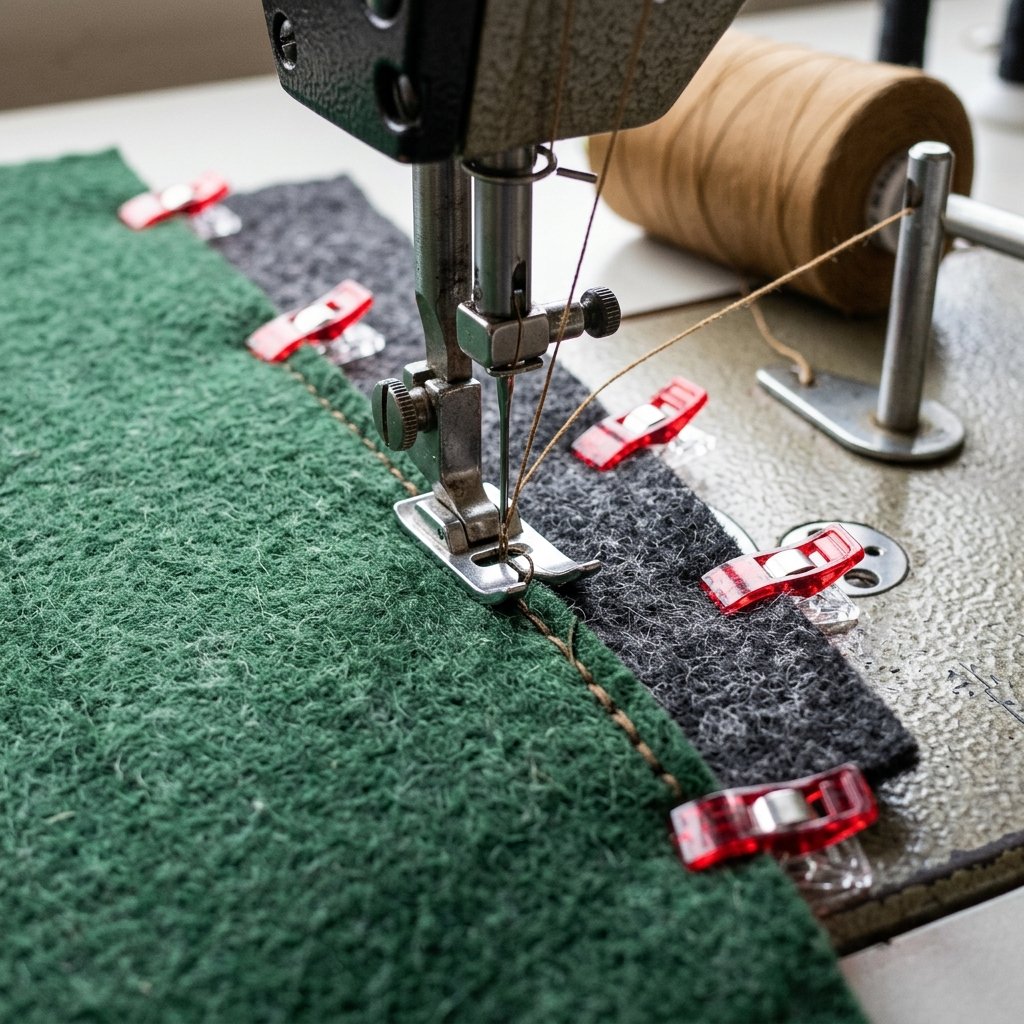
It is time to bind these salvaged scraps into a functional masterpiece. Because felted wool is thick and heavy, you need to use the right techniques to ensure your blanket survives years of use, washing, and being dragged around by the kids or the dog.
Method 1: The Machine-Sewn Method (Fast & Durable)
If you have a sewing machine, this weekend project can easily be completed in a single afternoon. However, standard needles will snap under the pressure of thick wool.
- Equip Your Machine: Swap your standard needle for a heavy-duty denim or leather needle (Size 90/14 or 100/16). Use a high-quality, heavy-duty polyester thread. Cotton thread will snap under the weight of the wool.
- Pinning: Take the first two squares of Row 1. Place them right sides together. Pin the edges securely.
- Sewing the Rows: Use a standard straight stitch with a slightly longer stitch length (around 3.0 to 3.5 mm) to accommodate the bulk. Leave a 1/2-inch seam allowance. Sew all the squares of Row 1 together into a long strip. Repeat for all rows.
- Pressing the Seams: This is a crucial tailoring secret! Take an iron set to the “wool” setting with plenty of steam, and press all the seams open flat on the back. This reduces bulk and makes joining the rows much easier.
- Joining the Rows: Pin Row 1 to Row 2, right sides together, carefully matching up the intersecting seams so your grid looks perfectly aligned. Sew them together, and repeat until the entire blanket top is assembled.
Method 2: The Hand-Sewn Blanket Stitch (Rugged & Heirloom)
If you don’t own a sewing machine, or if you want an ultra-rugged, masculine, “cabin in the woods” aesthetic, hand-sewing is the way to go. This method takes longer but requires zero electricity and looks incredibly bespoke.
- The Tools: You will need a large-eye tapestry needle and thick embroidery floss, crochet thread, or thin yarn in a contrasting color (like a bright mustard thread against navy wool).
- The Technique: Instead of placing right sides together, place the edges of two squares side-by-side, slightly overlapping them by about 1/4 inch.
- The Stitch: Use a classic blanket stitch or a heavy whipstitch to bind the edges together. The visible, chunky thread becomes a design feature, highlighting the patchwork nature of the upcycled craft. It is the perfect project to work on slowly while watching a game or sitting by the fire.
Safety/Disclaimer: When sewing through multiple layers of felted wool on a machine, go slowly over the intersecting seams. Forcing the fabric can cause the heavy-duty needle to break and potentially cause injury. Let the feed dogs do the work.
Backing, Binding, and Finishing Touches on a Dime
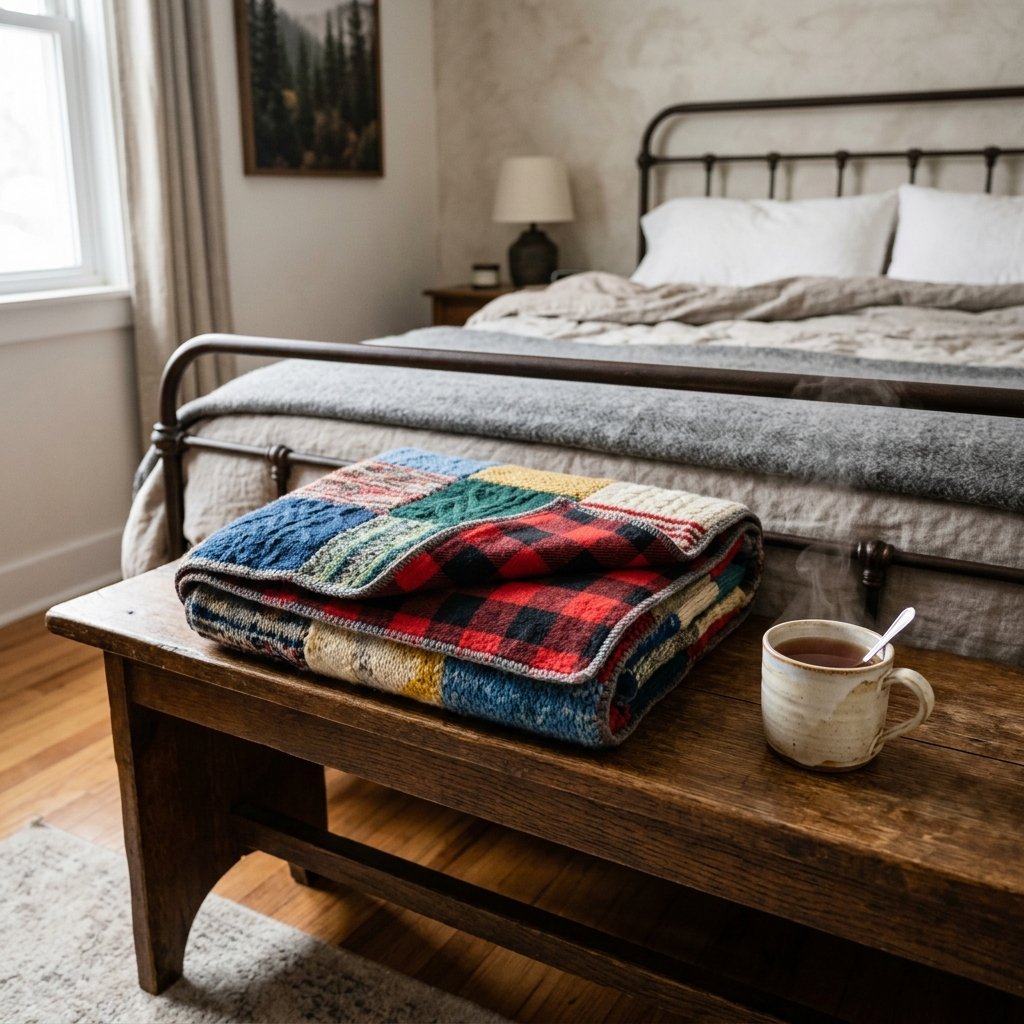
Your sweater patchwork top is complete, and it likely looks fantastic. But to make it a true, heavy-weight winter blanket—and to hide all those raw seams on the back—you need to add a backing. This is where our budget-savvy upcycling skills shine once again.
Choosing a Frugal Backing
Do not go to the fabric store and spend $40 on yardage! Shop your linen closet or the thrift store for a soft, cozy backing material. An old flannel bed sheet, a large fleece throw you already own, or even a pair of upcycled velvet curtains make incredible, zero-budget backings.
| Backing Material Options | Warmth Level | Estimated Cost (Upcycled) |
|---|---|---|
| Thrifted Flannel Bed Sheet (King/Queen) | Medium-High (Breathable) | $2.00 – $5.00 |
| Old Microfleece Blanket | Very High (Ultra Cozy) | $0.00 |
| Store-bought Quilt Cotton Yardage | Low (Decorative) | $25.00 – $40.00 |
Assembling the Final Blanket
- Lay it Out: Lay your backing fabric flat on the floor, right side up. Smooth out all wrinkles. Lay your heavy wool patchwork top directly over it, right side down. (The right sides should be facing each other, kissing).
- Pin the Perimeter: Pin all the way around the outside edge of the blanket, through both layers.
- Sew the Edge: Using your sewing machine, sew around the entire perimeter with a 1/2-inch seam allowance. Crucial step: Leave a gap of about 8 to 10 inches unsewn on one side.
- Turn it Inside Out: Reach into that 10-inch gap, grab the far corner of the blanket, and pull the whole thing right-side out. It is like turning a giant, heavy sock. Poke the corners out so they are sharp and square.
- Topstitching for a High-End Finish: Fold the raw edges of the 10-inch gap inward and pin it closed. Now, sew a topstitch around the entire outer edge of the blanket, about 1/4 inch from the edge. This closes the gap, flattens the edges, and gives the blanket a crisp, professional, store-bought finish.
The Final Frugal Flourish
If you want to go the extra mile, use some leftover yarn to tie the quilt. Take a tapestry needle, thread it with yarn, and push it down through the top of the blanket and back up, right at the corners where your patchwork squares intersect. Tie the yarn in a tight, double square knot and trim the ends to about an inch. This prevents the heavy wool top from separating from the backing when you wash it, and it adds a charming, traditional touch to your modern upcycled masterpiece.
Conclusion
And there you have it—a stunning, heavy-weight, heirloom-quality throw blanket born entirely from items destined for the donation bin or the trash. By combining a little master-tailor ingenuity with a frugal, zero-waste mindset, you have rescued premium wool textiles and transformed them into functional art. This project proves that you do not need a massive budget to have a home filled with rich textures and cozy, masculine-elegant decor; you just need a bit of resourcefulness and a free weekend.
The next time you accidentally shrink a sweater or find a moth hole in your favorite cardigan, you will not feel a pang of guilt. Instead, you will see the beginning of your next great upcycling project. So brew a pot of coffee, lay out those scraps, and get stitching. Your couch—and your wallet—will thank you.

Makenzie is the founder and lead writer at MoneyHackTips.com — a personal finance blog dedicated to delivering street-smart financial wisdom for real people on real budgets. With 300+ published articles covering everything from debt management to investing fundamentals, Makenzie’s mission is to make every dollar work harder. When not writing about money hacks, Makenzie is testing frugal living strategies, optimizing side hustles, and helping readers build financial freedom from scratch.