
In a world of fast-paced consumption, the most resourceful act a crafter can perform is looking at a piece of ‘trash’ and seeing a bespoke piece of functional art. If you have been tossing your 20-ounce soda bottles or 1-liter water bottles into the recycling bin, you are throwing away the raw materials for a high-end desk organization system. Why spend $15 to $25 at a big-box stationery store for plastic bins when you can engineer your own for literally zero dollars? This guide is for the frugal DIYer who values precision, the parent who wants a rainy-day project that actually yields something useful, and the creative gift-giver who knows that a handmade, upcycled item carries more weight than a store-bought trinket. We aren’t just cutting bottles in half; we are using advanced techniques like heat-finishing and textural wrapping to create holders that look like they belong in a high-end boutique. Get ready to transform your workspace with a project that is as rugged as it is refined.
The Anatomy of an Upcycled Masterpiece: Choosing Your Materials
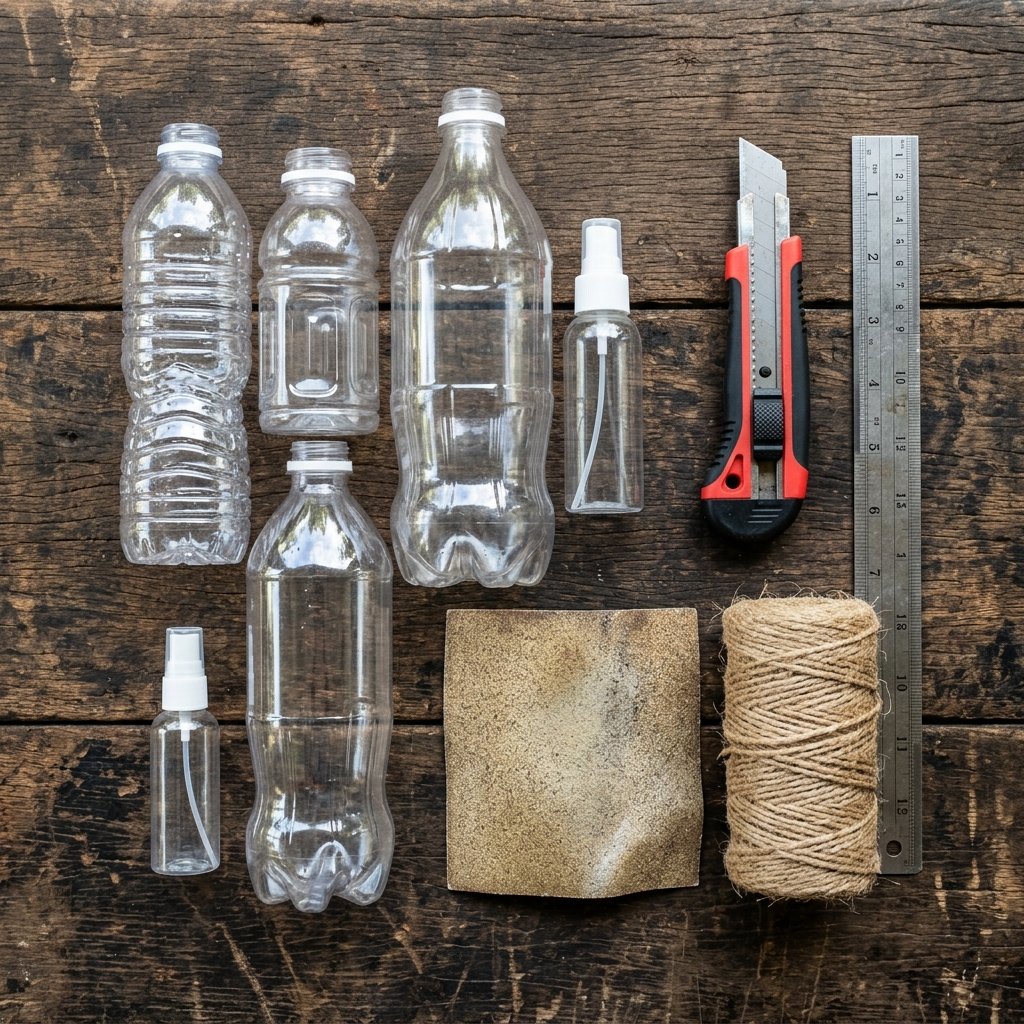
Not all plastic bottles are created equal. For a sturdy, professional-looking pencil holder, you need to understand the material you are working with. Most beverage containers are made from PET (Polyethylene Terephthalate), which is lightweight and clear, but can be flimsy if not handled correctly. For a more rugged, industrial look, search for HDPE (High-Density Polyethylene) bottles, often found in milk jugs or laundry detergent containers, which offer a thicker, opaque wall that mimics ceramic when painted.
Essential Supply List & Budget Breakdown
| Item | Source | Estimated Cost |
|---|---|---|
| Empty Plastic Bottles | Recycling Bin | $0.00 |
| Utility Knife or X-Acto | Toolbox | $0.00 |
| Sandpaper (120-220 grit) | Workshop | $0.50 |
| Decorative Elements (Twine/Paint) | Craft Scraps | $1.00 |
| Total Project Cost | Resourceful DIY | $1.50 |
Before you begin, ensure your bottles are thoroughly cleaned. Any residual sugar or oils will prevent adhesives and paints from bonding to the surface. Use warm, soapy water and a splash of white vinegar to remove labels and adhesive residue. If the label is stubborn, a small dab of cooking oil or rubbing alcohol will dissolve the ‘sticky’ without damaging the plastic.
Precision Cutting: The Foundation of a Professional Finish
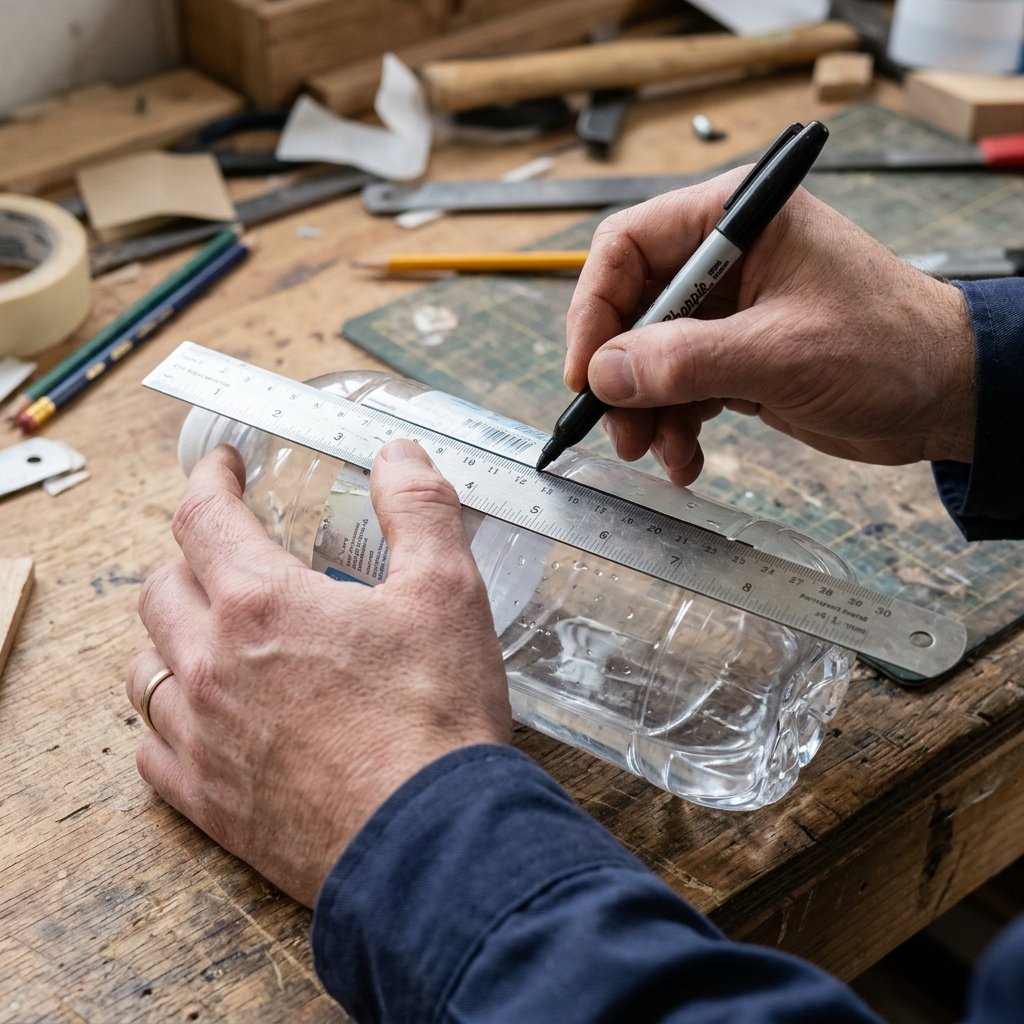
The difference between a ‘kids’ craft’ and a ‘professional upcycle’ lies in the straightness of the cut. A jagged edge is a dead giveaway of a rushed job. To achieve a perfectly level rim, do not eyeball it. Instead, create a cutting jig or use a simple masking tape trick. Wrap a piece of tape around the circumference of the bottle at your desired height. The edge of the tape serves as a visual guide for your blade.
Pro-Tip: For maximum stability, choose a height of 4 to 5 inches for standard pens and 3 inches for paperclips or erasers.
Step-by-Step Cutting Guide
- Mark Your Line: Use a permanent marker or masking tape to indicate the cut line.
- The Entry Cut: Carefully puncture the plastic with your utility knife. Always cut away from your body.
- The Rotation: Instead of moving the knife around the bottle, hold the knife steady and rotate the bottle into the blade. This ensures a more consistent pressure.
- Refining: Use sharp scissors to trim any minor imperfections after the initial cut is made.
Safety First: Always perform cutting tasks on a stable surface. Use a self-healing cutting mat or a scrap piece of plywood to protect your table. If you are working with children, the adult should handle all blade work.
The Heat-Smoothing Secret: Using an Iron for Professional Rims
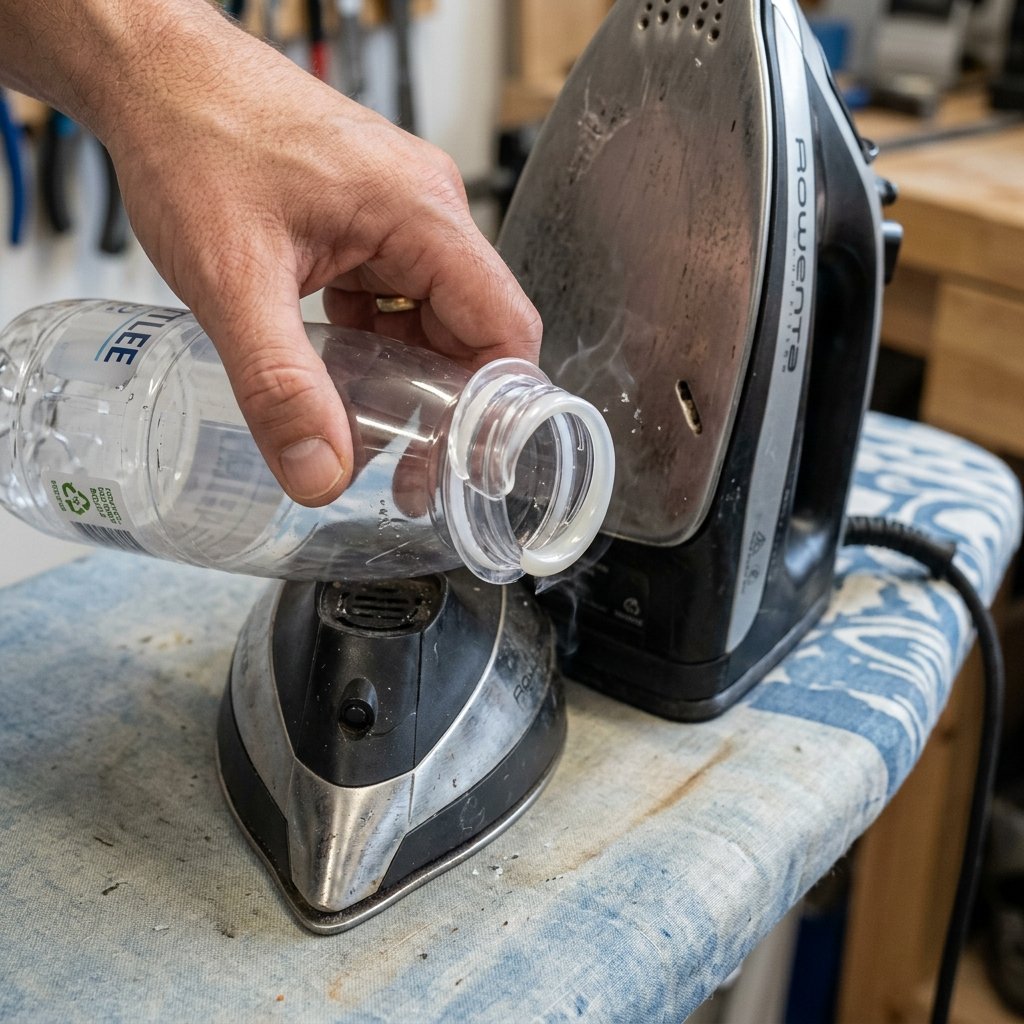
This is the ‘crafty-expert’ secret that transforms a sharp, dangerous plastic edge into a smooth, rounded, professional-looking rim. By applying controlled heat, we can slightly melt the plastic, causing it to curl inward. This not only makes the holder safer to use but also adds structural integrity to the top of the container, preventing it from collapsing under the weight of heavy markers or tools.
The Ironing Technique
- Set the Heat: Turn your clothes iron to a medium-high setting (the ‘wool’ or ‘silk’ setting usually works best). Ensure the steam function is turned off.
- The Protective Layer: If you are worried about plastic residue on your iron, place a piece of parchment paper over the heating plate, though most PET plastic will not stick if you keep the bottle moving.
- The Press: Take your cut bottle and press the raw edge directly onto the hot iron. Use circular motions for about 5 to 10 seconds.
- Check and Repeat: Lift the bottle to see the edge curling inward. Continue until you have a uniform, smooth lip around the entire top.
This technique creates a finished look that rivals store-bought acrylic organizers. It is a 100% free way to elevate your project from ‘trash’ to ‘treasure’.
Rugged Aesthetics: Masculine-Elegant Decorating Techniques
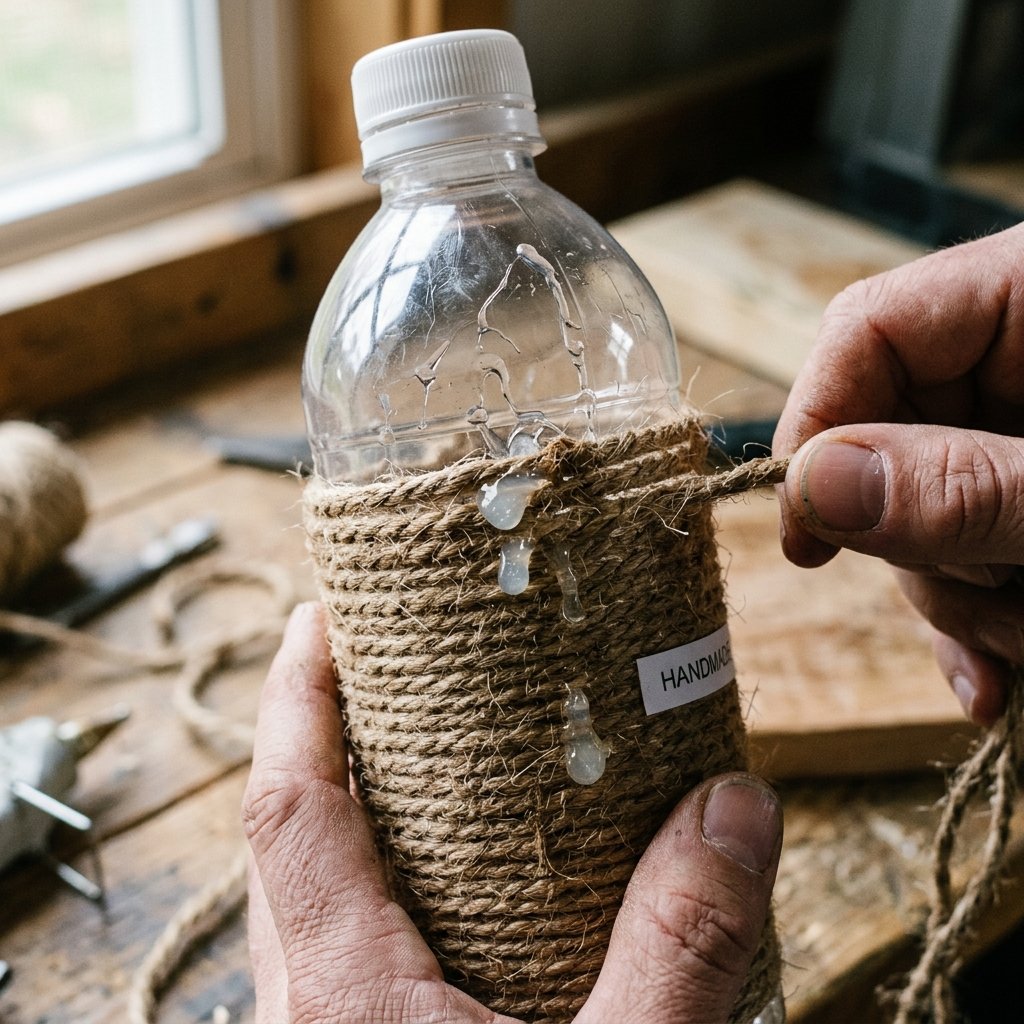
Once you have your structural base, it is time to apply a finish that matches your personal style. For a rugged, masculine-elegant look, we move away from glitter and neon and toward textures like leather, twine, and matte metallics. This is where your resourcefulness shines. Look through your scrap bins for leftover materials from previous projects.
Style Comparison: DIY vs. High-End Retail
| Style | DIY Method | Retail Equivalent | Savings |
|---|---|---|---|
| Rustic Industrial | Wrapped in Jute Twine | $18.00 | 95% |
| Modern Minimalist | Matte Black Spray Paint | $22.00 | 98% |
| Executive Leather | Faux Leather Scraps | $45.00 | 99% |
Technique: The Twine Wrap
Apply a thin bead of hot glue at the base of the bottle. Anchor your twine and begin wrapping upward, ensuring each layer sits tightly against the previous one. This adds significant weight and stability to the bottle, making it feel substantial. For a ‘sophisticated’ touch, stop the twine halfway up and leave the top half clear or paint it a contrasting matte color. This creates a ‘dipped’ effect that is very popular in modern interior design.
Engineering a Multi-Tiered Desk Caddy
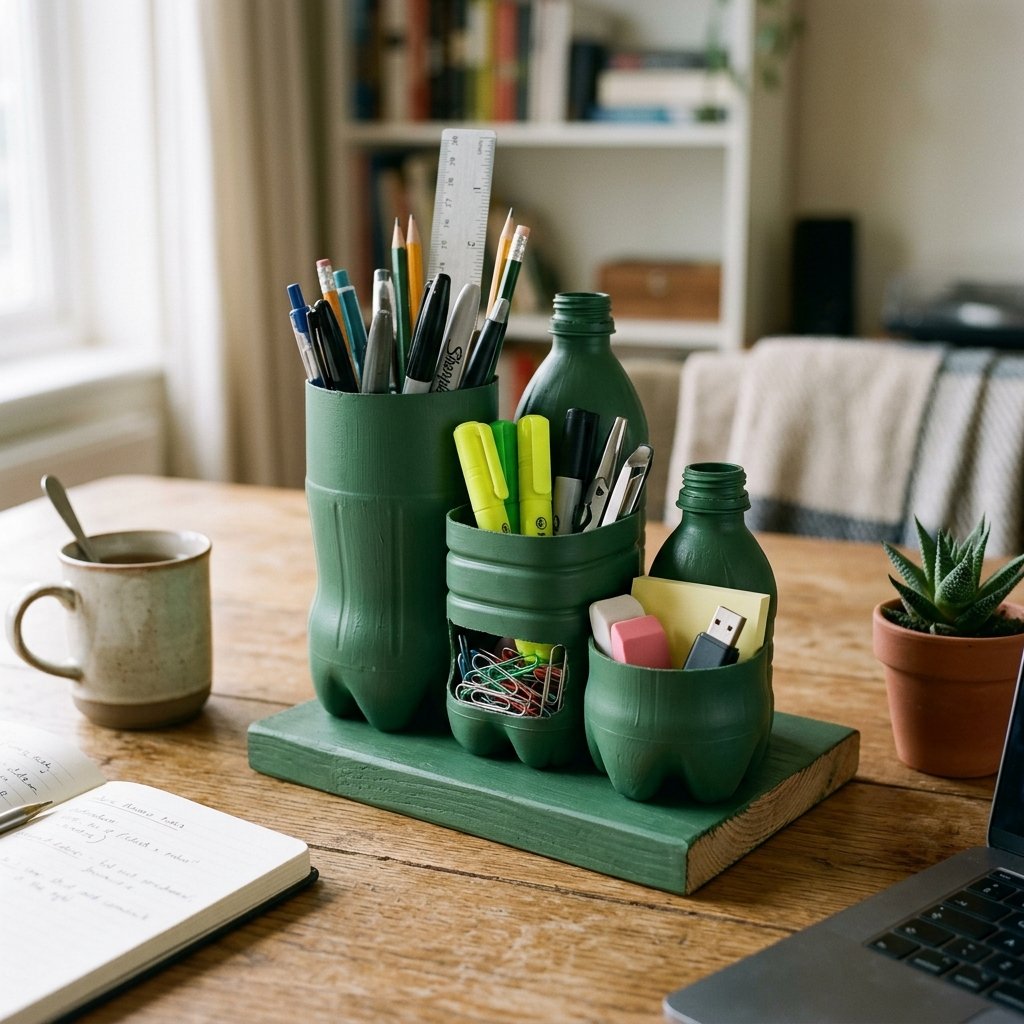
Why stop at one holder when you can build a complete organization station? By grouping bottles of different heights and diameters, you can create a bespoke caddy tailored to your specific needs. This is perfect for the ‘handy parent’ who needs to organize a kid’s art station or the ‘frugal DIYer’ who has a massive collection of specialized tools.
Assembly Instructions
- Selection: Choose three bottles of varying sizes (e.g., a 2-liter base, a 20-oz middle, and a small juice bottle).
- Leveling: Cut them to heights of 6 inches, 4 inches, and 2.5 inches respectively.
- The Base: Cut a flat piece of heavy cardboard or a scrap piece of wood to serve as the foundation.
- Bonding: Use a generous amount of hot glue or E6000 industrial adhesive to secure the bottles to each other and then to the base.
- Unifying: Paint the entire assembly a single solid color (like Navy Blue or Gunmetal Gray) to make the different plastic shapes look like a single, cohesive unit.
This multi-tiered approach provides a dedicated spot for everything from tall rulers to tiny paperclips, all while keeping your budget at $0.
Conclusion
Transforming plastic bottles into adorable, functional desk pencil holders is more than just a craft; it is a masterclass in resourceful living. By applying simple engineering principles—like the heat-smoothing rim technique and strategic weight distribution—you can create office accessories that are as durable as they are stylish. You have saved money, reduced waste, and exercised your creative muscles. Whether you choose the rugged look of twine-wrapped containers or the sleek finish of a multi-tiered matte caddy, your desk is now a testament to your ability to find value where others see none. Don’t throw away that next bottle; you’re looking at the future home of your favorite pens. Happy crafting!

Makenzie is the founder and lead writer at MoneyHackTips.com — a personal finance blog dedicated to delivering street-smart financial wisdom for real people on real budgets. With 300+ published articles covering everything from debt management to investing fundamentals, Makenzie’s mission is to make every dollar work harder. When not writing about money hacks, Makenzie is testing frugal living strategies, optimizing side hustles, and helping readers build financial freedom from scratch.