
The Heart-Stopping Snag: A Call to Arms for the Resourceful Wardrobe
We have all been there. You are reaching for a coffee, navigating a crowded hallway, or perhaps just playing with the dog, when—snap—a stray nail or a sharp corner catches your favorite wool sweater. Suddenly, a perfect expanse of knitwear is marred by a protruding loop of yarn. Your first instinct might be panic. Your second might be to grab a pair of scissors and snip that offending thread away. Stop right there. Cutting a loose thread in a knit garment is the textile equivalent of pulling the pin on a grenade; once that structural loop is severed, the entire garment begins a slow, agonizing unraveling that leads to a permanent hole.
As a frugal DIYer and a guardian of quality goods, you know that a high-quality sweater is an investment—one that deserves a clever, rugged approach to maintenance. Whether it is a chunky fisherman’s knit or a sleek merino wool cardigan, the secret to a 60-second fix lies in understanding the architecture of the stitch. Today, we are going to master the art of the ‘Invisible Pull-Through.’ This isn’t just a repair; it’s a preservation of craft. We are going to reclaim your wardrobe from the brink of disaster using nothing more than a simple household tool and a bit of tactical finesse. Let’s dive into the anatomy of the snag and the budget-savvy solution that will have your sweater looking brand new before your coffee even gets cold.
The Anatomy of a Snag: Why Scissors are the Enemy
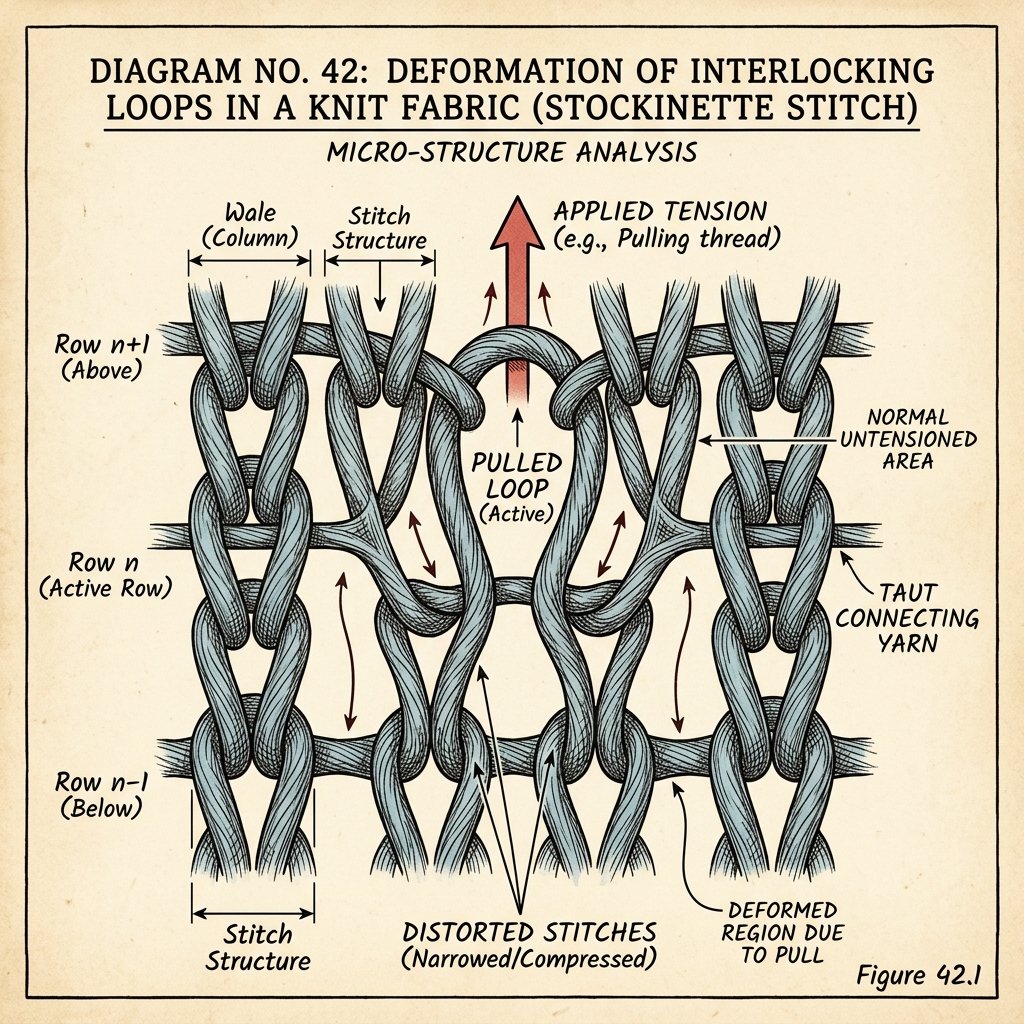
To fix a problem, you must first understand its physics. A sweater is not a flat piece of fabric; it is a complex, continuous series of interlocking loops. When a thread gets caught and pulled out, it isn’t ‘extra’ material—it is simply a loop that has been displaced from its neighbors. If you cut it, you break the chain. Once the chain is broken, the tension of the surrounding stitches will pull that cut end through the next loop, and the next, creating a ‘run’ or a gaping hole that requires much more intensive darning to repair.
The Structural Integrity of Knitwear
When you see a snag, you are looking at a tension imbalance. The yarn that should be tucked neatly into the row has been yanked forward. Our goal is to restore that tension by moving the excess yarn from the ‘public’ side of the garment (the outside) to the ‘private’ side (the inside). This maintains the integrity of the yarn and ensures the sweater remains as strong as the day it was knitted.
| Fabric Type | Snag Risk Level | Recommended Repair Tool |
|---|---|---|
| Chunky Wool/Acrylic | High | Darning Needle or Bobby Pin |
| Fine Merino/Cashmere | Medium | Snag Nab-it or Fine Sewing Needle |
| Cotton Cable Knit | Moderate | Crochet Hook (Small) |
By identifying the fabric type early, you can choose the right ‘weapon’ for the job. A rugged, thick wool requires a sturdier tool, while a delicate cashmere demands a surgeon’s precision. Regardless of the material, the rule remains the same: Zero cutting allowed.
The 60-Second Invisible Pull-Through Technique
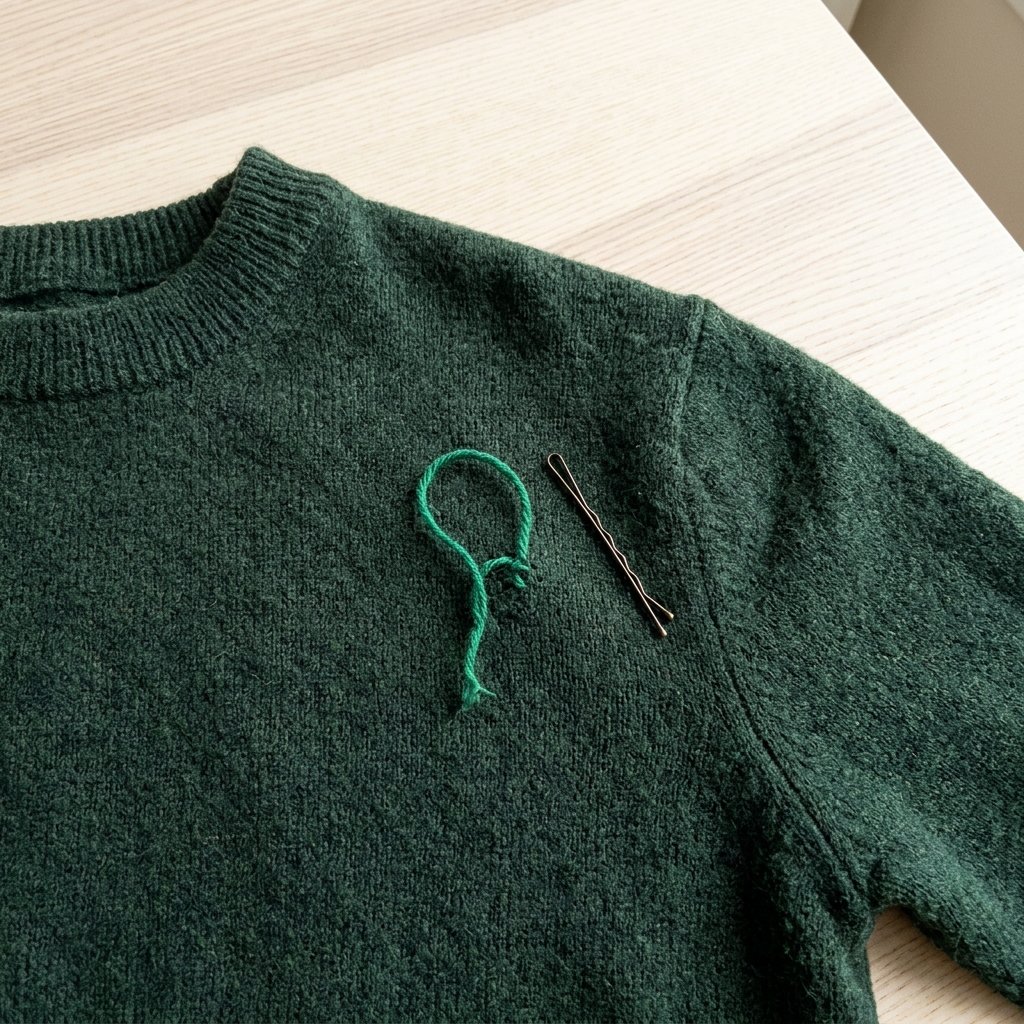
This is the ‘Grandma’s Secret’ of the tailoring world, distilled into a quick, masculine-elegant execution. You don’t need a sewing machine or a degree in textiles—just 60 seconds and a steady hand.
- Isolate the Snag: Lay the garment flat on a hard surface. Do not stretch the fabric, as this will distort the surrounding stitches. Locate the exact loop that is protruding.
- Insert Your Tool: Take a blunt needle, a bobby pin, or a specialized snag-repair tool. From the inside of the sweater, poke the tool through to the outside, emerging exactly at the base of the snagged loop.
- Capture the Loop: Hook the loose thread onto your tool. If using a needle with an eye, thread the loop through the eye. If using a bobby pin, catch the thread in the ‘v’ of the pin.
- The Tactical Retreat: Gently pull the tool back through to the inside of the garment. The snagged loop will follow, disappearing from the face of the fabric.
- Equalize the Tension: Once the loop is on the inside, gently massage the fabric on the outside with your thumb. Stretch it horizontally and vertically to help the neighboring stitches ‘reclaim’ some of the excess yarn.
“The goal isn’t to remove the yarn, but to hide it where it can do no harm. A snag on the inside is a secret; a snag on the outside is a scar.”
This method is 100% free and works on almost every type of knit. It is the ultimate budget-savvy hack for the modern gentleman or the handy parent on the go.
The Rugged Toolkit: Household Items That Save Your Style

You don’t need to spend $20 on a professional mending kit. A resourceful crafter looks at their junk drawer as a goldmine of tailoring tools. If you are caught in a pinch, these everyday items can serve as your primary repair instrument.
The Improvised Mender’s Arsenal
- The Bobby Pin: The ultimate ‘MacGyver’ tool. Its rounded ends ensure you won’t split the yarn fibers while you work.
- The Paperclip: Straighten it out and create a tiny hook at the end using pliers. Perfect for larger, chunkier knits.
- The Sewing Needle: Use the eye-end (the blunt side) to push the thread through if you don’t have a darning needle.
- The Toothpick: In a total emergency, a toothpick can be used to gently nudge a small snag back into the weave, though it lacks the ‘hook’ for a clean pull-through.
| Tool | Cost | Best For |
|---|---|---|
| Bobby Pin | $0.01 | General Snags |
| Darning Needle | $0.50 | Professional Finish |
| Snag Nab-it Tool | $3.00 | Frequent Menders |
| Paperclip | $0.00 | Emergency Field Repair |
Keeping one of these in your wallet or travel bag can save a $100 sweater during a business trip or a wedding. It is about being prepared and practical.
Advanced Tactics: When the Snag Becomes a Hole
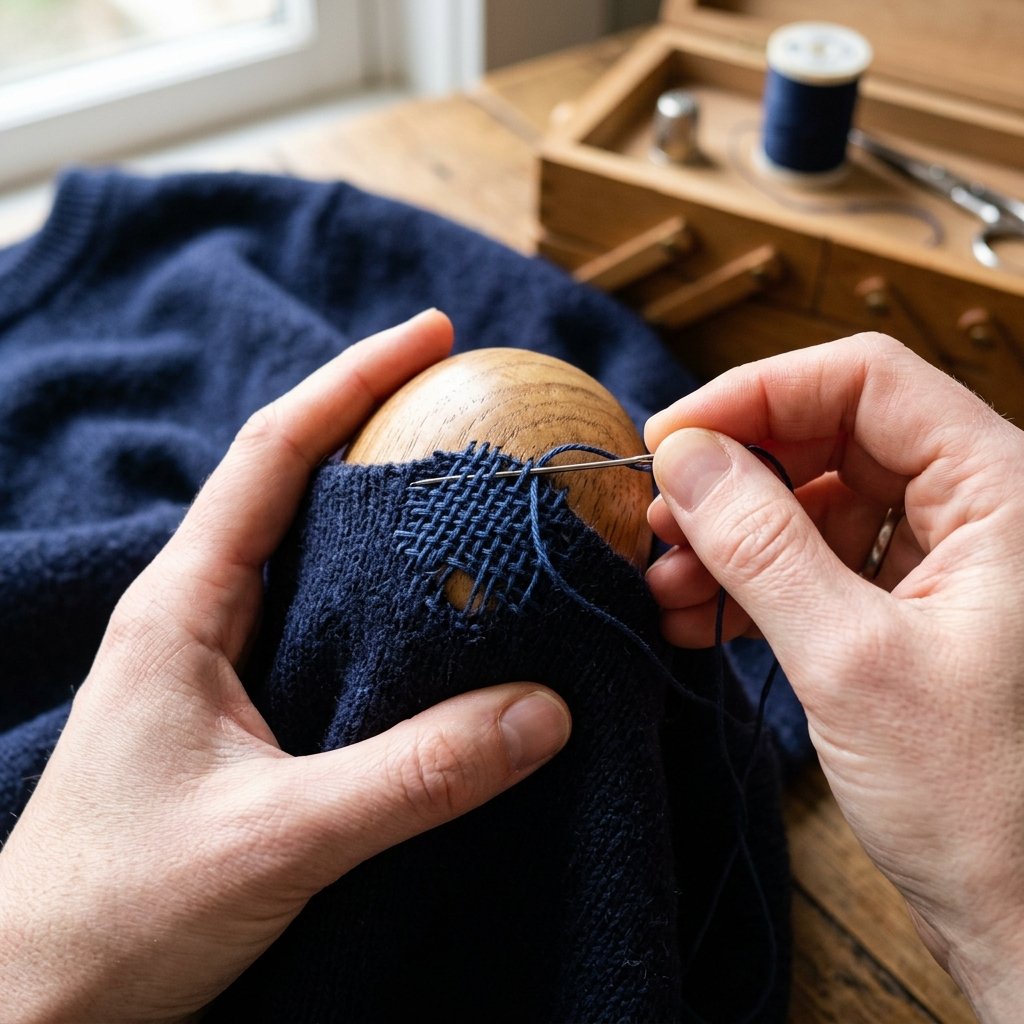
Sometimes, we don’t catch the snag in time, or a moth has decided to have a midnight snack. If you find a small hole (under 1/2 inch), the ‘pull-through’ won’t be enough. You need to move into Darning. Darning is essentially re-weaving a small patch of fabric using a needle and matching yarn.
The Ladder Stitch & Darning Basics
If you see ‘ladders’ (vertical runs where the loops have unraveled), you can use a small crochet hook to ‘knit’ the loops back up to the top before securing them. This is the hallmark of a master upcycler. For a hole, follow the ‘weaving’ pattern: go over and under the existing threads in one direction, then turn 90 degrees and go over and under in the other direction.
Pro Tip: Use a lightbulb or a tennis ball inside the sleeve or body of the sweater to provide a firm, curved surface while you darn. This prevents you from accidentally sewing the two sides of the sweater together!
While darning takes longer than 60 seconds, it is a meditative, rewarding process that adds character and longevity to your garments. It’s the difference between a disposable wardrobe and a curated collection of heirlooms.
Prevention & Maintenance: A Gentleman’s Guide to Knitwear Longevity
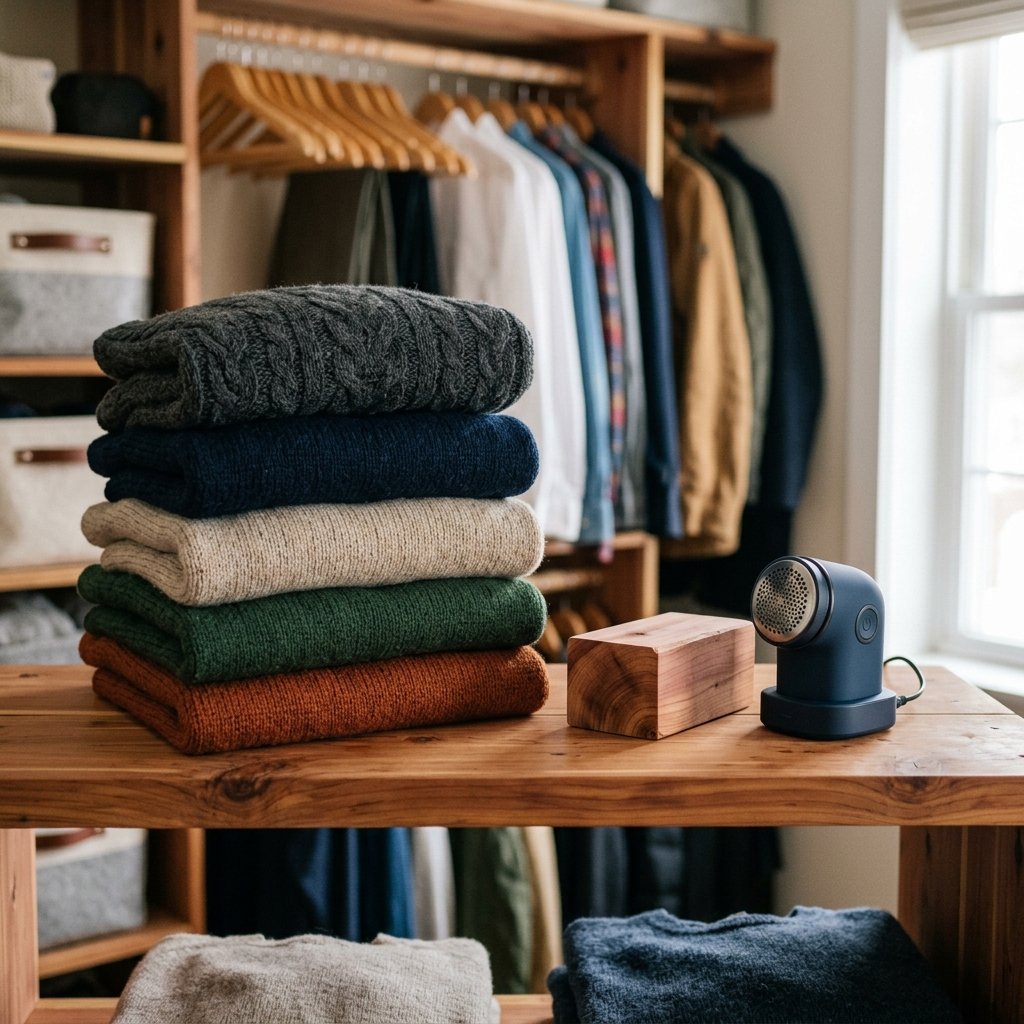
The best repair is the one you never have to make. Proper care is the foundation of a frugal, high-end wardrobe. Most snags happen during washing or due to poor storage. By implementing a few ruggedly simple rules, you can extend the life of your knits by years.
- Turn It Inside Out: Always wash sweaters inside out. If a snag occurs in the wash, it will be on the inside where it is invisible.
- Use a Mesh Bag: For $1.25 at a dollar store, a mesh laundry bag acts as armor against zippers and buttons from other clothes.
- Mind Your Jewelry and Watches: Sharp watch buckles and rings are the primary culprits for sleeve snags. Be mindful when dressing.
- Depill Regularly: Use a fabric shaver or a simple razor to remove ‘pills.’ Pills are loose fibers that are more likely to catch on external objects.
| Maintenance Task | Frequency | Time Investment |
|---|---|---|
| Inside-out Washing | Every Wash | 5 Seconds |
| Depilling | Once a Month | 5 Minutes |
| Cedar Storage | Seasonal | 2 Minutes |
Treating your clothes with respect is not just about vanity; it is about resource management. A well-maintained sweater doesn’t need to be replaced, saving you hundreds of dollars over a decade.
Conclusion
Mastering the Thread: The Ultimate DIY Victory
Fixing a loose thread in 60 seconds is more than just a quick fix; it is a testament to the power of being a resourceful, budget-savvy individual. In a world of fast fashion and disposable goods, choosing to mend rather than discard is a radical act of stewardship. You have saved your garment, saved your money, and gained a skill that separates the amateur from the expert. Next time you see a snag, don’t reach for the scissors—reach for your inner craftsman. Your wardrobe, and your wallet, will thank you. Remember: Stay crafty, stay rugged, and never let a single thread unspool your style.

Makenzie is the founder and lead writer at MoneyHackTips.com — a personal finance blog dedicated to delivering street-smart financial wisdom for real people on real budgets. With 300+ published articles covering everything from debt management to investing fundamentals, Makenzie’s mission is to make every dollar work harder. When not writing about money hacks, Makenzie is testing frugal living strategies, optimizing side hustles, and helping readers build financial freedom from scratch.