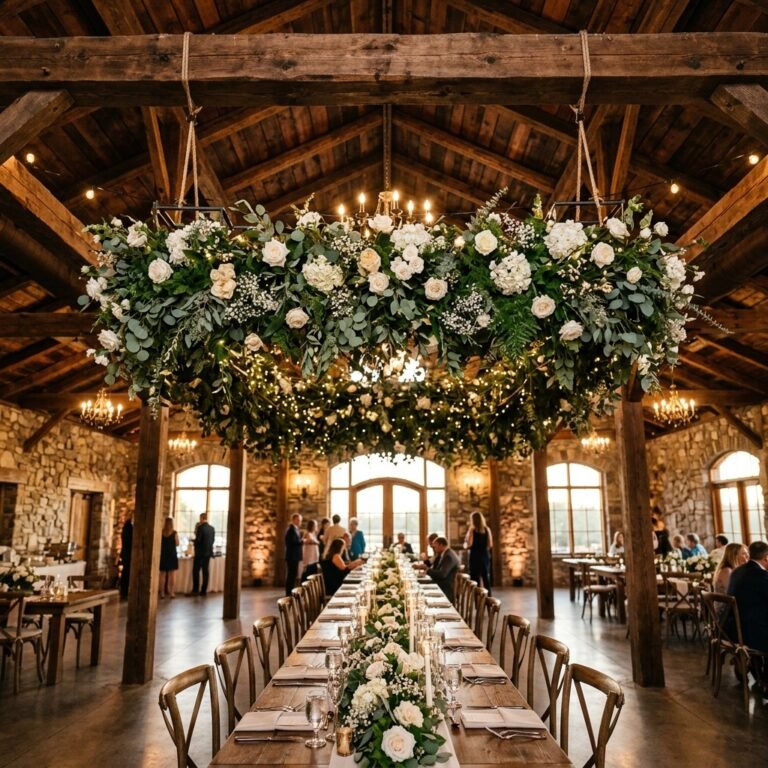
Picture this: a warm summer evening, string lights swaying gently overhead, the clinking of wine glasses, and a long, rustic wooden table stretching out before you. Running down the center of that table is a breathtaking, sun-drenched display of fresh lemons, vibrant oranges, trailing olive branches, and the soft, romantic flicker of candlelight. It looks exactly like a high-end editorial shoot from an exclusive villa in Tuscany or the Amalfi Coast. Now, picture the invoice from a traditional florist for that exact tablescape. If you just gasped, you are not alone. Traditional floral arrangements of this magnitude can easily run $150 to $300 per table. For a wedding with ten tables, you are looking at a down payment on a car just for some greenery and fruit that will be tossed out by Sunday morning.
But what if I told you that you could recreate this exact opulent, Mediterranean aesthetic for under $15 per table? Welcome to the ultimate masterclass in budget-savvy event styling. Whether you are a frugal bride planning your dream wedding, a handy parent hosting a milestone anniversary, or just someone who loves throwing an unforgettable dinner party without emptying your wallet, this guide is your golden ticket.
The Frugal Crafter’s Mantra: Elegance is not defined by how much money you spend; it is defined by how resourcefully you arrange what you have. We do not buy aesthetics; we build them.
In this comprehensive guide, we are going to roll up our sleeves and transform humble grocery store produce and $1.25 Dollar Tree staples into a jaw-dropping, high-end centerpiece. We will cover everything from foraging the right greenery and prepping your citrus so it lasts, to the architectural secrets of layering a table runner that looks thick, expensive, and professionally styled. Grab your floral shears and let us bring Italy to your dining room—on a strict, zero-compromise budget.
The Frugal Forager’s Supply List: Sourcing High-End Looks on a Dime
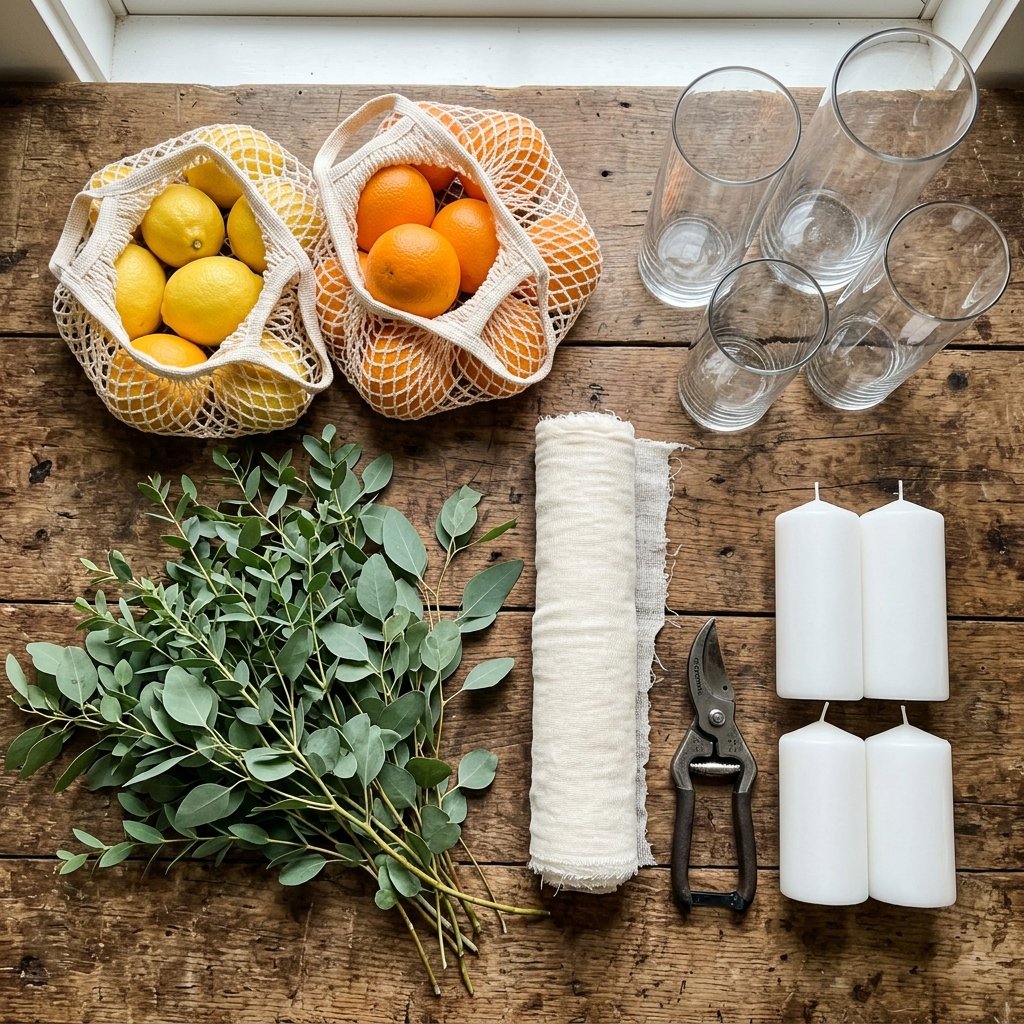
The secret to pulling off a luxury look on a tight budget is knowing exactly where to source your materials. You do not need to step foot inside a premium floral boutique to get premium results. Instead, your hunting grounds will be the local grocery store, wholesale clubs, the beloved Dollar Tree, and quite possibly, your own backyard.
The Core Elements of a Tuscan Centerpiece
- The Citrus: Lemons and oranges are the stars of the show. You will want a mix of whole fruit, halved fruit, and dehydrated slices for texture. Buy these in bulk bags (like the 3 lb or 5 lb mesh bags) from Aldi, Costco, or your local supermarket to drive the cost per lemon down to pennies.
- The Greenery: To achieve that sprawling, romantic look, you need a base. Olive branches are the most authentic choice, but seeded eucalyptus, silver dollar eucalyptus, and Italian ruscus work beautifully. Pro Tip: Check Trader Joe’s for their $3.99 greenery bundles, or better yet, forage from your own yard or a willing neighbor’s property!
- The Textiles: A soft, flowing runner anchors the centerpiece. Cheesecloth is the ultimate budget-friendly fabric. You can buy bulk unbleached cheesecloth online and dye it yourself, or use cheap burlap if you want a more rustic, masculine edge.
- The Lighting: Dollar Tree is your best friend here. Their clear glass cylinder vases and white pillar or floating candles are identical to the ones event rental companies charge $5 to $10 to rent.
Cost Comparison: DIY vs. Professional Florist
Let us look at the cold, hard numbers. This table breaks down the estimated cost for an 8-foot rectangular table centerpiece.
| Material / Element | DIY Cost (Per 8ft Table) | Estimated Florist / Rental Cost |
|---|---|---|
| Greenery Base (Eucalyptus/Olive) | $8.00 (2 Trader Joe’s bundles) | $65.00+ (Sourced & arranged) |
| Fresh Citrus (Lemons/Oranges) | $4.50 (Bulk bag fraction) | $25.00+ (Markup applied) |
| Cheesecloth Runner | $2.00 (Cut from bulk roll) | $15.00+ (Rental fee) |
| Glass Cylinder Vases (Set of 3) | $3.75 (Dollar Tree) | $15.00+ (Rental fee) |
| Candles (Pillar or Floating) | $3.75 (Dollar Tree / Bulk) | $12.00+ (Retail markup) |
| Total Estimated Cost | $22.00 | $132.00+ |
By taking the DIY route, you are saving over 80% per table. Multiply that by 10 or 15 tables for a wedding, and you have just saved thousands of dollars that can be redirected toward a honeymoon, a down payment, or a better open bar.
Prepping the Produce: The Secret to Flawless, Long-Lasting Citrus

When you are working with fresh produce as decor, preparation is everything. You cannot simply dump a bag of dusty lemons on a table and call it a day. To achieve that mouth-watering, vibrant Tuscan look, your citrus needs a little spa treatment. Furthermore, if you are prepping for a wedding, you need to ensure the fruit looks fresh for at least 48 hours.
Step 1: The Olive Oil Shine Trick
Grocery store lemons often come coated in a dull, food-safe wax that mutes their color. To make them pop with a glossy, expensive finish, wash them thoroughly in warm water to remove the dirt. Once completely dry, take a soft microfiber cloth, dab a single drop of olive oil or mineral oil onto it, and gently buff the skin of each lemon and orange. This 10-minute trick instantly elevates the fruit, making it look incredibly fresh and vibrant under venue lighting.
Step 2: Creating Textural Contrast with Dehydrated Slices
A high-end centerpiece relies on varied textures. Mixing whole, plump lemons with dried, translucent citrus slices creates a sophisticated, artisanal look. Plus, dried citrus smells heavenly.
- Preheat your oven to the lowest possible setting, usually around 175°F to 200°F.
- Slice oranges and lemons into even, 1/4-inch thick rounds. Discard the end pieces.
- Pat the slices completely dry with a paper towel. Removing excess moisture is crucial to prevent burning.
- Place the slices on a wire baking rack set over a baking sheet. This allows air to circulate underneath.
- Bake for 3 to 4 hours, flipping the slices every hour. They are done when they are dry to the touch and slightly translucent.
Safety & Prep Disclaimer: If you plan to cut fresh lemons in half to display their juicy centers on the day of the event, do not do this more than 12 hours in advance. Cover the exposed flesh tightly with plastic wrap and keep them refrigerated until the last possible moment to prevent drying and fruit flies.
Building the Base: Structuring Your Greenery Runner Like a Pro
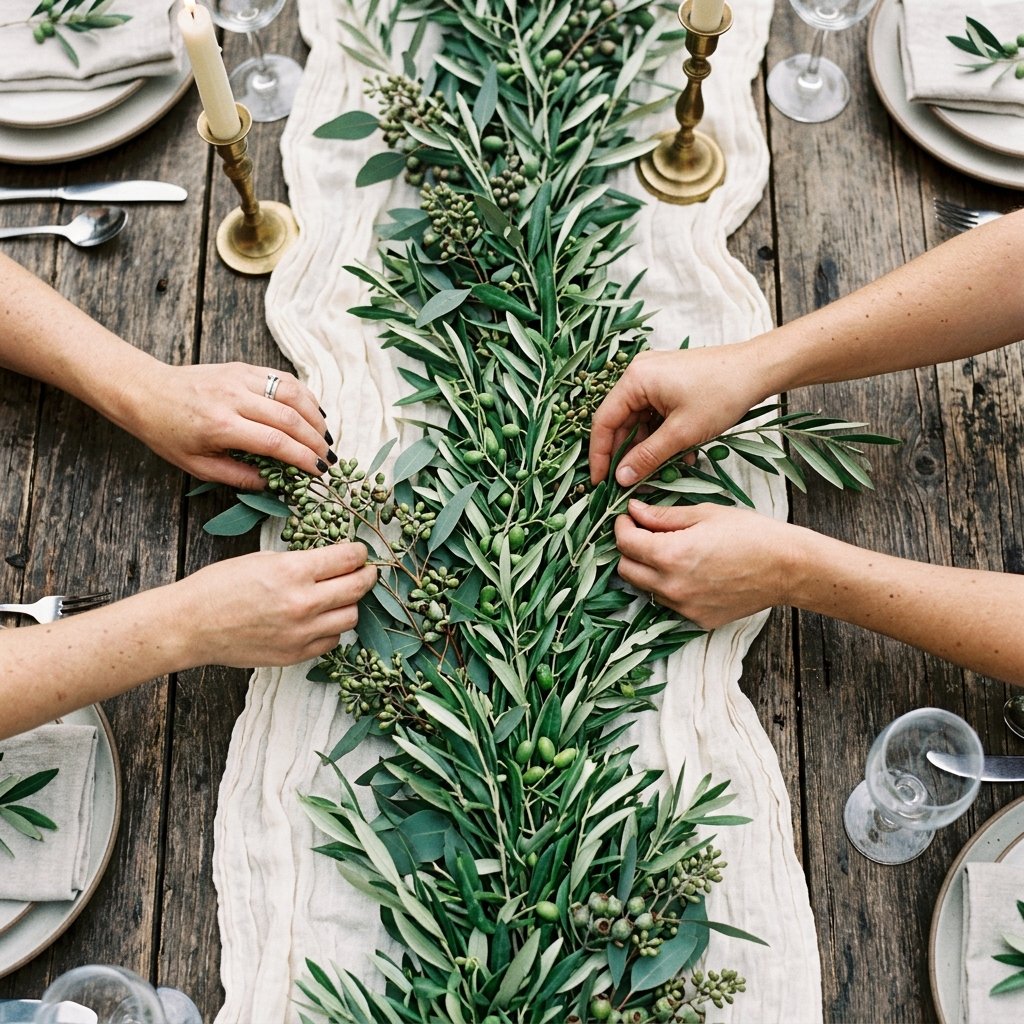
The foundation of your Tuscan centerpiece is the runner. This is what grounds the arrangement and stops it from looking like a scattered pile of fruit. The goal is to create a lush, undulating river of greenery that looks effortlessly organic, but secretly relies on a very strategic, budget-savvy structure.
Laying the Textile Foundation
Start with your cheesecloth or burlap runner. Instead of laying it perfectly flat, you want to create volume. Scrunch, twist, and puddle the fabric down the center of the table. Leave the ends trailing off the edges of the table to kiss the floor—this adds instant drama and a high-end, romantic feel. If you are outdoors and worried about wind, use small, clear thumbtacks on wooden tables, or heavy-duty double-sided tape on rented plastic tables to secure the fabric invisibly.
The “Criss-Cross” Greenery Technique
Florists use a lot of greenery to make runners look thick, but we are frugal crafters. We are going to maximize volume using minimal product.
- Start at the ends: Take your longest, most beautiful sprigs of greenery (like olive branches or Italian ruscus) and point them outward toward the ends of the table.
- Work your way in: Begin laying shorter sprigs of seeded or silver dollar eucalyptus, pointing the stems toward the center of the table. Always overlap the leafy top of one branch over the bare stem of the previous one.
- The Center Meetup: When you reach the middle of the table, the stems will be pointing at each other. This is where you will place your largest cluster of citrus and your main candle grouping to hide the messy stems.
- Wire it up (Optional but recommended): If you are transporting these runners pre-made, use cheap green floral wire to loosely bind the stems together in 2-foot sections. This saves massive amounts of setup time on the big day.
By using the scrunching technique with the cheesecloth, the greenery will sit higher and look twice as full, allowing you to stretch a $4 bundle of greenery across an entire 8-foot table.
The Citrus Placement Masterclass: Achieving Effortless Italian Elegance
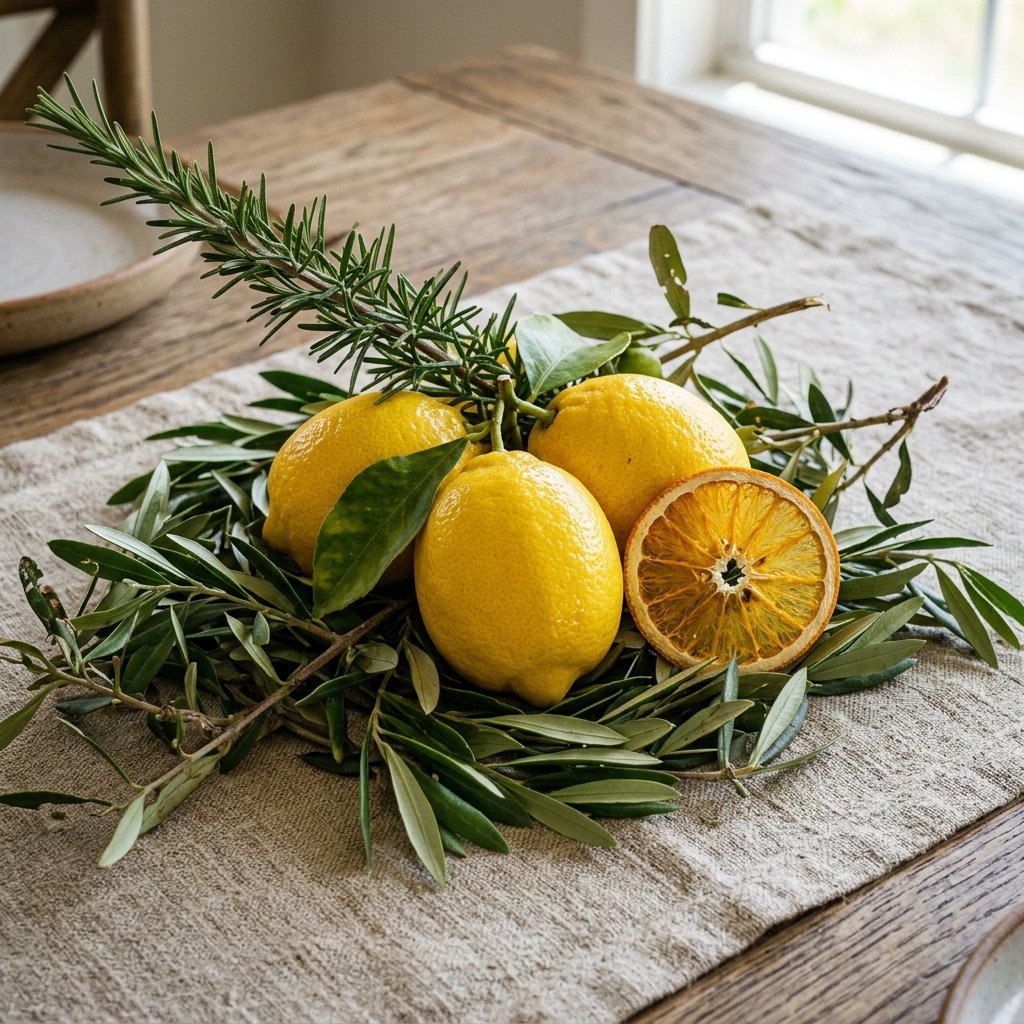
Now comes the fun part: adding the color. Placing the citrus might seem like you just scatter fruit randomly, but there is actually a distinct architectural science to making it look like a professional florist styled it rather than a grocery store produce manager.
The Rule of Three and Asymmetry
In design, odd numbers are more visually appealing than even numbers. When placing your lemons and oranges, always group them in clusters of three or five. Never line them up like soldiers marching down the table. You want an organic, asymmetrical flow.
- The Anchor Clusters: Create three main “anchor” points along an 8-foot table—one in the center, and one on each side midway to the end. In these spots, nestle a large orange, a whole lemon, and a half-cut lemon together.
- The Filler Fruit: Between the anchor clusters, place single lemons or small pairs tucked deeply into the greenery. You want some fruit to be fully visible and others to peek out shyly from under an olive leaf.
- Layering the Dried Slices: Take your dehydrated citrus slices and tuck them into the arrangement. Lean them against the whole lemons, or scatter them near the base of the candles. They add a beautiful, rustic, old-world charm that screams “Tuscan Villa.”
Adding Masculine & Rustic Accents
To keep the centerpiece from looking too sweet or purely bridal, introduce some rugged, earthy elements. This adds depth and a practical, grounded aesthetic. Tuck in sprigs of fresh, woody rosemary (which smells incredible alongside the citrus). If you are hosting a fall or winter event, adding small, natural pinecones or even whole walnuts in their shells provides a stunning, budget-friendly textural contrast that costs absolutely $0 if foraged.
Illuminating the Villa: Budget Candle Hacks for a Romantic Glow

No Tuscan evening is complete without the warm, dancing flicker of candlelight. Lighting is the ultimate cheat code in event design; it hides imperfections, elevates cheap materials, and sets a mood that makes people feel like they are experiencing something truly special. But candles and glassware can eat up a budget fast. Here is how we hack it.
The Dollar Tree Glassware Arsenal
Do not rent glass cylinders. Run, do not walk, to your local Dollar Tree or order a bulk case online. They sell 9-inch, 7.25-inch, and 4-inch clear glass cylinder vases for exactly $1.25 each. To create visual interest, you need varied heights. Group them in trios (remember the Rule of Three!) along the runner.
The Submerged Citrus Floating Candle Trick
Pillar candles can be expensive, but floating candles are incredibly cheap (often bought in bulk for less than $0.50 each). Here is a high-end hack that ties the whole theme together:
- Take your Dollar Tree glass cylinders and drop a few fresh lemon or orange slices into the bottom.
- Add a sprig of rosemary or a small piece of eucalyptus into the vase.
- Fill the vase with water, leaving about two inches at the top. The fruit and greenery will magnify beautifully in the water.
- Gently place a white floating candle on the surface.
Fire Safety Disclaimer: When working with dry greenery (especially eucalyptus) and open flames, safety is paramount. Always ensure that the flame of your candle is safely contained at least an inch below the rim of the glass cylinder. Never place taper candles directly into dry greenery without a sturdy, wide base.
This submerged look is a classic luxury wedding staple. It makes the tablescape look incredibly custom, and the water acts as a magnifying glass, making the cheap Dollar Tree glass look like thick, expensive crystal.
Transport, Setup, and Breakdown: The Practical Guide for Frugal Hosts
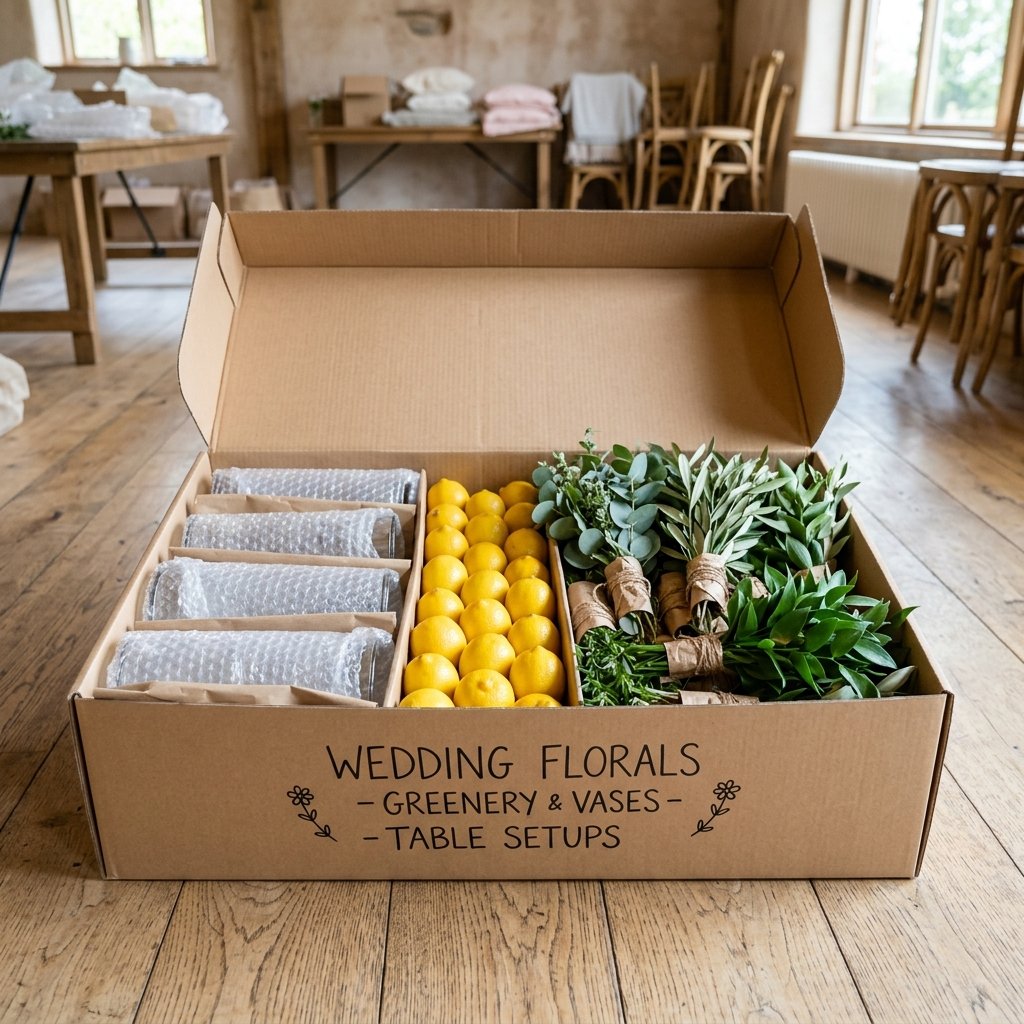
The biggest hurdle for DIY brides, handy parents, and frugal hosts is the logistics. You have built this gorgeous Tuscan masterpiece in your living room, but how do you get it to the venue without it falling apart, and how do you set up 15 tables without having a nervous breakdown on the morning of the event? It is all about the prep-and-pack strategy.
The 48-Hour Prep Timeline
You cannot do everything on the morning of the event. Here is your stress-free timeline:
| Timeline | Action Item | Storage / Care |
|---|---|---|
| 1 Week Out | Dehydrate citrus slices, wash and polish whole citrus, wash glass vases. | Store dried citrus in an airtight container. Store whole fruit in a cool, dry place. |
| 3 Days Out | Purchase or forage fresh greenery. Snip ends and place in buckets of water. | Keep in a cool, dark garage or basement. Avoid direct sunlight. |
| 2 Days Out | Pre-wire greenery bundles into 2-foot sections (The “Criss-Cross” technique). | Mist lightly with water, place in large plastic bins lined with damp paper towels. |
| 1 Day Out | Pack “Table Kits”. One box per table containing the runner, vases, candles, and fruit. | Leave boxes open for air circulation. |
| Day Of | Unroll runners, drop greenery bundles, place fruit clusters, fill vases with water. | Enjoy a mimosa because you just saved thousands of dollars. |
The “Table Kit” Packing Method
Do not pack all the lemons in one box and all the vases in another. That requires you to do math and sort materials while you are trying to set up. Instead, create a dedicated cardboard box for each table. Inside “Box 1”, place exactly one cheesecloth runner, three pre-wired greenery bundles, 7 lemons, 3 oranges, 5 dried slices, 3 glass vases, and 3 candles. When your helpful groomsmen, aunts, or friends arrive to help set up, you simply hand them a box and say, “Make Table 1 look like the reference photo.” It is foolproof, ruggedly efficient, and eliminates setup panic.
Zero-Waste Breakdown: Upcycling the Centerpiece
Frugal DIYers hate waste. At the end of the night, do not throw these beautiful materials in the trash! Encourage guests to take the fresh lemons and oranges home (they are perfectly fine to eat or juice). The eucalyptus can be tied with twine and hung in the shower to create a luxurious, spa-like steam room experience. The Dollar Tree vases can be washed and resold on Facebook Marketplace to another budget-savvy bride, often recouping 100% of your initial investment.
Conclusion
Creating a breathtaking, Tuscan-inspired citrus centerpiece does not require a massive budget, a professional design degree, or a VIP relationship with a wholesale florist. It requires a bit of clever foraging, a strategic trip to the Dollar Tree, and the willingness to roll up your sleeves and get a little crafty. By utilizing the volume-boosting tricks of scrunched cheesecloth, the architectural “Rule of Three” for your polished lemons, and the magical, magnifying glow of submerged floating candles, you have successfully engineered a high-end luxury aesthetic for a fraction of the cost.
Remember, the most memorable events are not the ones where the host simply threw money at a planner. They are the ones infused with personal touch, resourcefulness, and creative love. So, go ahead and forage those olive branches, polish those grocery store lemons, and set a table that will make your guests feel like they have been transported to a sun-drenched villa in Italy. You have got the skills, you have got the budget-savvy blueprint, now go create something beautiful!

Makenzie is the founder and lead writer at MoneyHackTips.com — a personal finance blog dedicated to delivering street-smart financial wisdom for real people on real budgets. With 300+ published articles covering everything from debt management to investing fundamentals, Makenzie’s mission is to make every dollar work harder. When not writing about money hacks, Makenzie is testing frugal living strategies, optimizing side hustles, and helping readers build financial freedom from scratch.