
The Secret to Million-Dollar Tablescapes on a Pocket-Change Budget
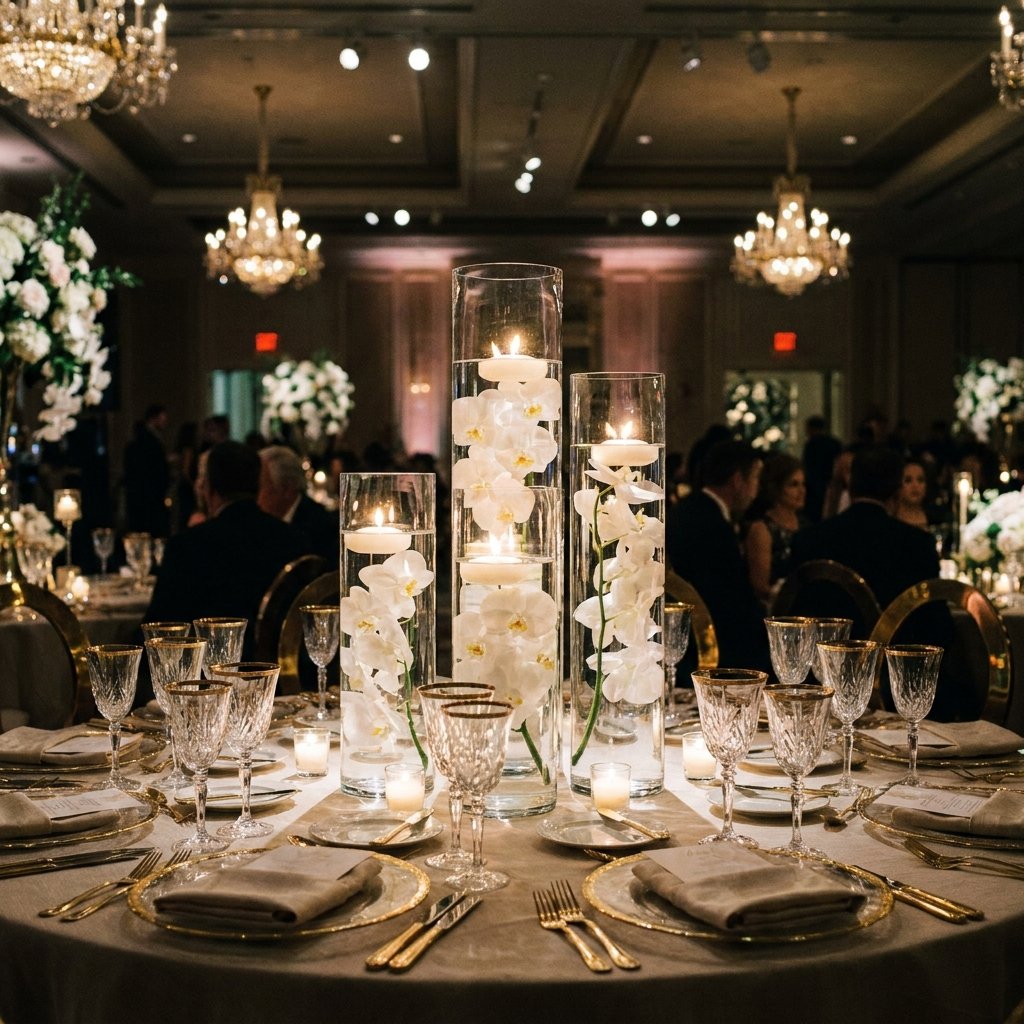
We have all seen them—those ethereal, glowing glass cylinders filled with exotic blooms that seem to defy gravity, gracing the tables of high-end gala dinners and five-star weddings. Usually, a professional florist would charge anywhere from $65 to $150 per arrangement for these submerged masterpieces. But what if I told you that with a bit of resourceful engineering and a quick trip to the local dollar store, you could replicate this exact look for a mere $5? As a self-proclaimed ‘Trash-to-Treasure’ guru, I’ve spent years perfecting the art of the ‘high-low’ design, and today, I’m pulling back the curtain on the most effective, budget-savvy centerpiece hack in the industry. Whether you are a budget bride, a crafty parent hosting a graduation party, or just someone who wants to elevate their dining room, this guide will show you how to achieve rugged elegance without the luxury price tag.
The $5 Blueprint: Sourcing Materials Like a Pro
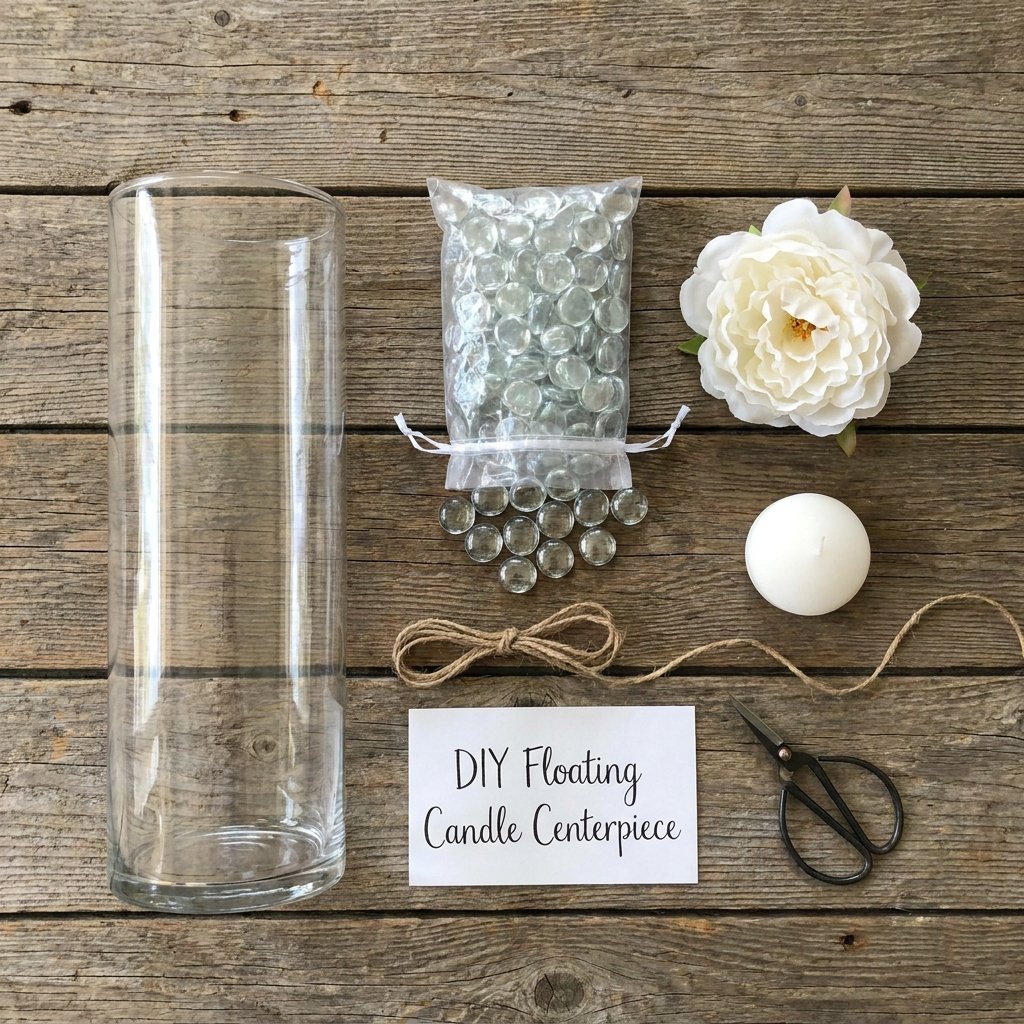
The key to a $5 luxury centerpiece is knowing exactly what to buy and where to find it. You don’t need a wholesale license; you just need a keen eye for ‘blanks’—those simple items that look expensive once styled correctly. To stay under our strict budget, we are going to utilize the ‘Dollar Store Strategy.’ Every item on this list can be found for $1.25 or less, or even sourced for free from your own backyard.
The Essential Material List
| Item | Source | Estimated Cost |
|---|---|---|
| Glass Cylinder Vase (7-9 inch) | Dollar Tree / Thrift Store | $1.25 |
| Single Silk Orchid or Real Stem | Dollar Tree / Garden Scraps | $1.25 |
| Glass Gems or River Rocks | Dollar Tree / Nature | $1.25 |
| Floating Candle (2-pack) | Dollar Store / Bulk Buy | $0.63 |
| Distilled Water | Grocery Store (1 Gallon) | $0.62 |
| Total Cost | – | $5.00 |
By sticking to this list, we ensure that the base of our design is solid. Pro Tip: Look for vases with thick glass bottoms. They have a heavier weight and a more ‘expensive’ feel than thin, lightweight alternatives. If you’re feeling extra crafty, you can even upcycle large pickle jars or glass pasta sauce jars by removing the labels with a bit of rubbing alcohol and elbow grease.
Engineering the Float: The Secret to Submerging Flowers
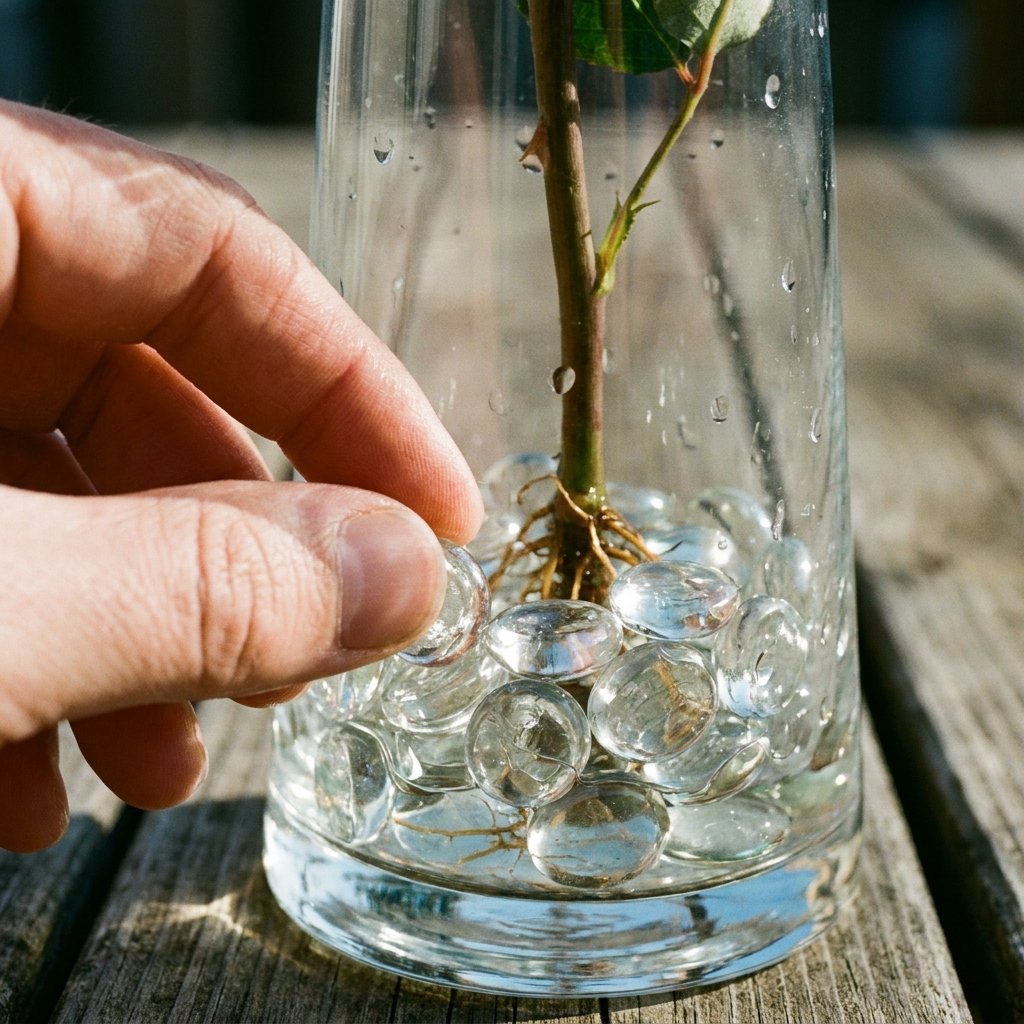
The biggest challenge with submerged centerpieces is buoyancy. Most flowers, whether real or silk, want to float to the top. To achieve that high-end look, the flower must stay perfectly suspended in the middle of the vase. This is where our ‘Crafty-Expert’ engineering comes into play.
Step-by-Step Submerging Technique
- Weight the Stem: Take your flower stem and trim it to fit the vase. Use a small piece of clear fishing line (or a thin floral wire) to tie a heavy glass gem or a stainless steel nut to the bottom of the stem.
- Anchor the Base: Place the weighted stem into the bottom of the dry vase. Pour your remaining glass gems or river rocks over the weight to hide it completely. This creates a natural-looking ‘ground’ for your flower.
- The Water Pour: This is the most critical step. Tilt the vase slightly and pour distilled water slowly down the inside wall. This prevents the force of the water from dislodging your flower and minimizes air bubbles.
“The secret to a professional submerge isn’t the flower itself, but the invisible anchor that holds it in place. Master the weight, and the beauty follows.”
If you are using silk flowers, ensure they are ‘submersible’—meaning they won’t bleed dye into the water. A quick test in a bowl of water for 10 minutes will tell you if the color is stable. For real flowers, hardy varieties like Orchids, Calla Lilies, and Tulips work best as they don’t wilt immediately when fully submerged.
Crystal Clear: Mastering Water Quality and Lighting
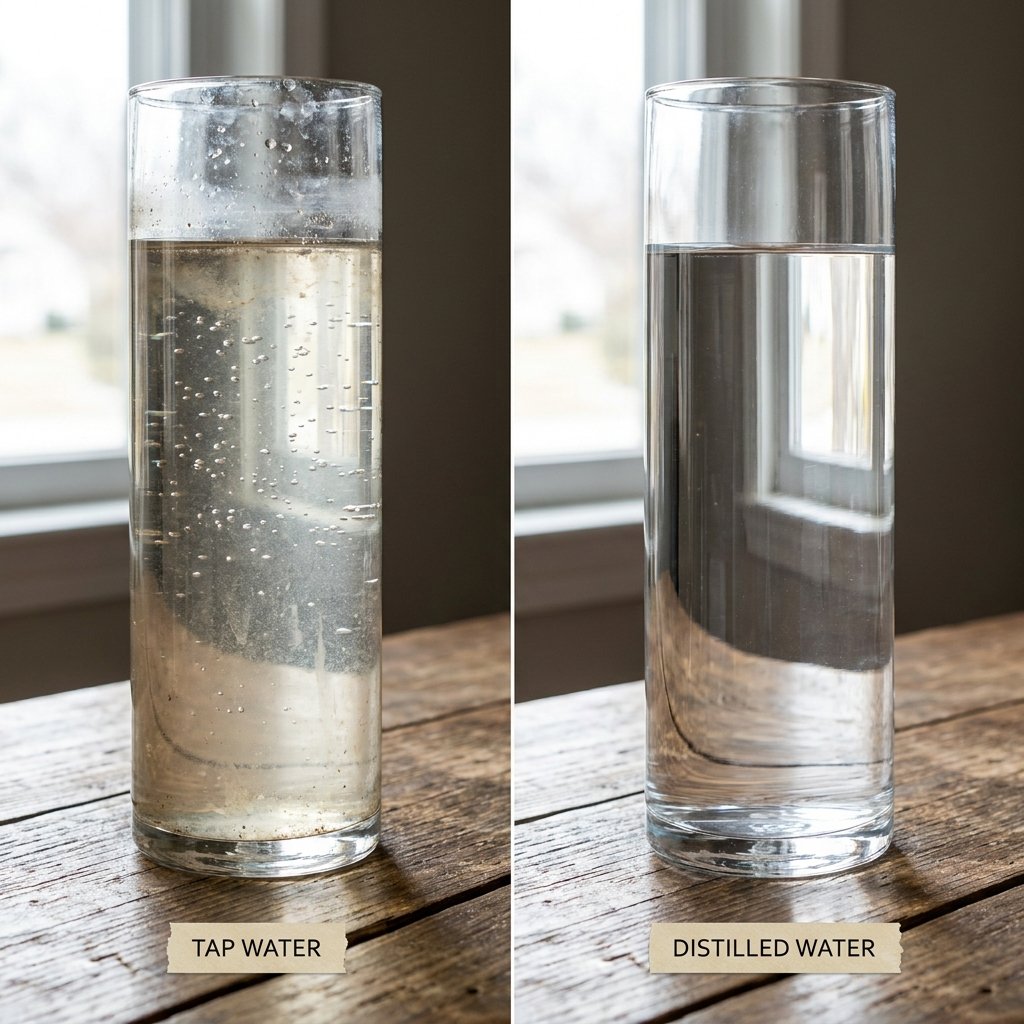
Nothing ruins the illusion of luxury faster than cloudy water or a swarm of tiny air bubbles clinging to your petals. To get that ‘high-end’ crystal-clear look, we need to be savvy about our liquid choice. Tap water often contains minerals and gases that create bubbles over time.
Water Quality Comparison
| Water Type | Visual Result | Cost Impact |
|---|---|---|
| Tap Water | Cloudy, Heavy Bubbles | Free |
| Boiled & Cooled | Clearer, Some Bubbles | Minimal |
| Distilled Water | Crystal Clear, No Bubbles | $1.25/Gallon |
Once your water is perfect, it’s time to add the ‘Elegant’ factor: Lighting. A submerged centerpiece truly comes alive when light passes through the water. You can achieve this by placing a small LED waterproof puck light (often found in 2-packs at the dollar store) at the very bottom of the vase before adding the rocks. Alternatively, place the finished vase on a mirrored candle plate (another $1.25 find) to reflect the light from the floating candle back up through the arrangement.
Budget Mantra: Clarity is the difference between a ‘school project’ and a ‘wedding centerpiece.’ Spend the extra dollar on distilled water.
Luxury Dupe: DIY vs. Professional Florist Costs

Let’s talk numbers. Why are we doing this? Because the savings are astronomical. When you hire a professional for event decor, you aren’t just paying for the materials; you are paying for their labor, transport, and overhead. By taking the ‘Rugged & Practical’ approach, you reclaim that budget for other things—like a better honeymoon or a higher-quality gift.
The Cost Breakdown Comparison
| Expense Item | Professional Florist | DIY Savvy Method |
|---|---|---|
| Vase Rental/Purchase | $15.00 | $1.25 |
| Premium Bloom (Orchid) | $25.00 | $1.25 |
| Submersion Labor | $20.00 | $0.00 |
| Floating Candle & Gems | $10.00 | $1.88 |
| Total Per Unit | $70.00 | $4.38 |
If you are hosting a wedding with 15 tables, the professional route would cost you $1,050. Our DIY method brings that total down to approximately $65.70. That is a 94% savings! This is the essence of being a resourceful crafter—achieving the same visual impact for a fraction of the cost through clever execution and smart sourcing.
Style Variations for Every Occasion
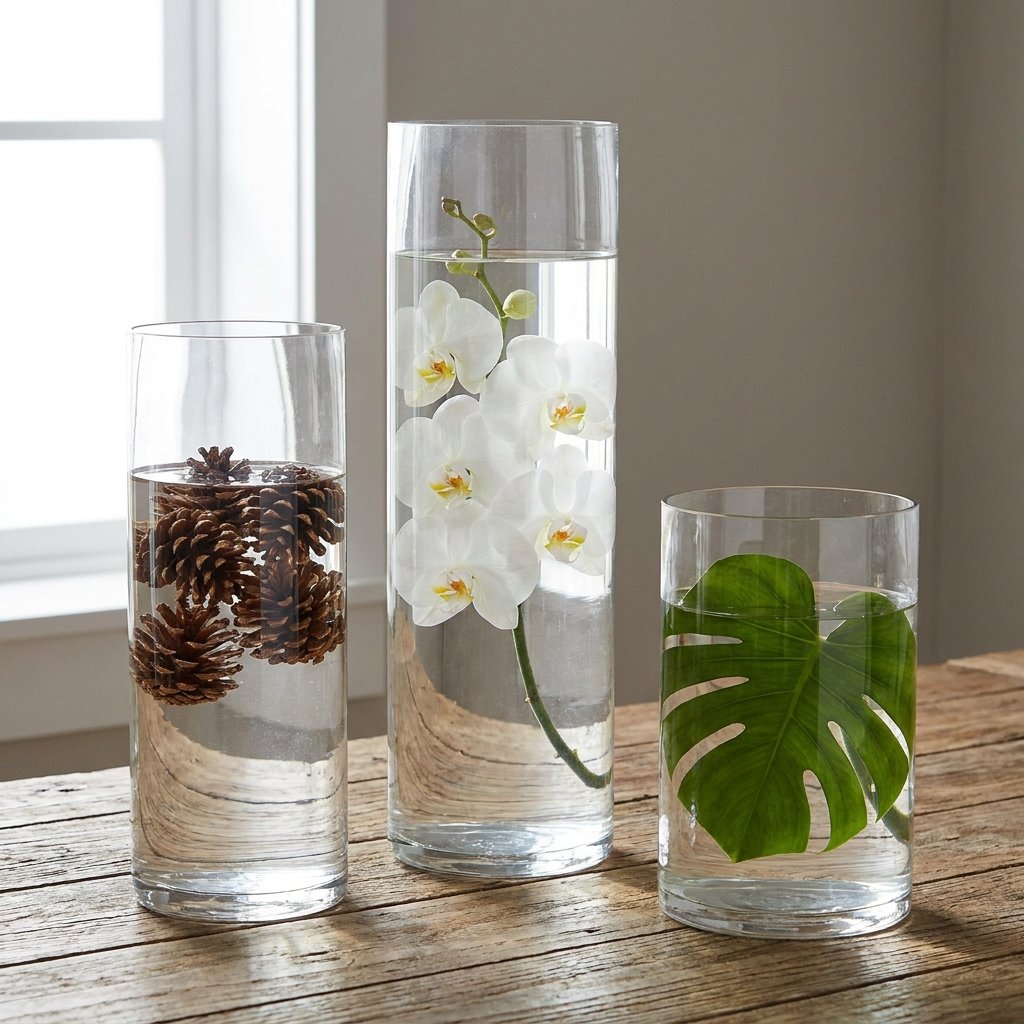
The beauty of the submerged centerpiece is its versatility. Once you master the basic technique, you can adapt it for any season or style. It’s not just for weddings; it’s for life’s celebrations. Here are a few ‘Resourcefully-Creative’ variations:
- The Masculine-Elegant Look: Instead of flowers, submerge river rocks and a few sprigs of evergreen or eucalyptus. This creates a rugged, earthy vibe perfect for a Father’s Day dinner or a woodland-themed event.
- The Holiday Glow: Submerge red berries and small pinecones (weighted down, of course). The water magnifies the textures of the cones, making them look like underwater jewels.
- The Minimalist Zen: Use a single, large Monstera leaf curled inside the vase. The green hue fills the water with a vibrant, modern energy that costs almost nothing if you have a houseplant.
Remember, the scale is important. For a long rectangular table, create a ‘landscape’ by using three vases of varying heights (5-inch, 7-inch, and 9-inch). This adds visual interest and depth without cluttering the space. Pro Tip: If you find your flowers are still trying to escape, a tiny drop of super glue at the base of the stem where it meets the weight will provide a permanent, waterproof bond.
Conclusion
You Are Now a Master of the High-Low Aesthetic
Creating a high-end look doesn’t require a high-end bank account. It requires a resourceful spirit and the willingness to look at everyday items—like a $1.25 vase and some fishing line—as the building blocks of something beautiful. By following these steps, you’ve learned how to anchor your decor in both style and savings. Whether you’re planning a grand event or just want to spruce up your home for a dinner party, these submerged centerpieces prove that luxury is a matter of creativity, not cost. Now, go forth and craft something spectacular—your guests (and your wallet) will thank you!

Makenzie is the founder and lead writer at MoneyHackTips.com — a personal finance blog dedicated to delivering street-smart financial wisdom for real people on real budgets. With 300+ published articles covering everything from debt management to investing fundamentals, Makenzie’s mission is to make every dollar work harder. When not writing about money hacks, Makenzie is testing frugal living strategies, optimizing side hustles, and helping readers build financial freedom from scratch.