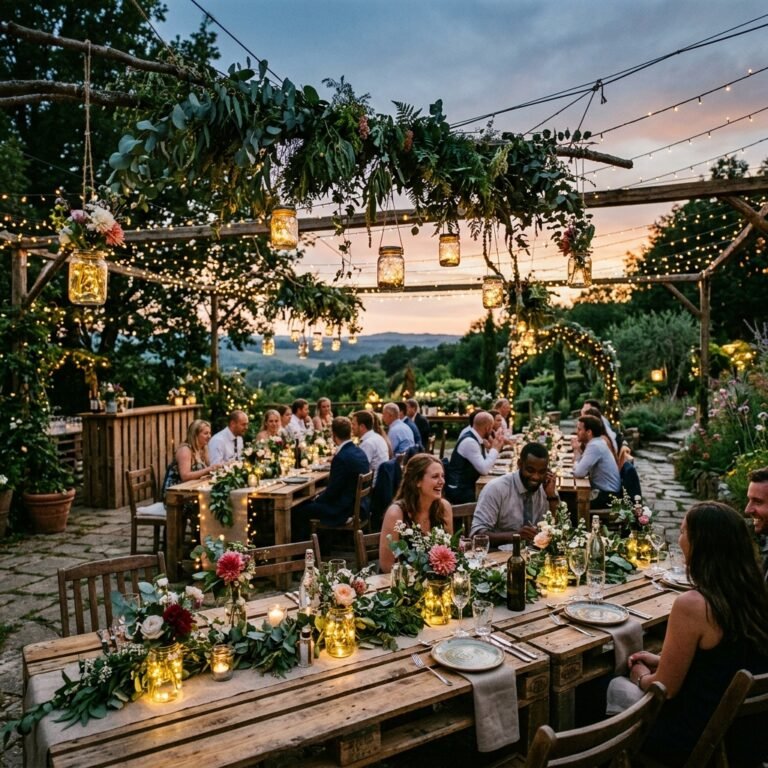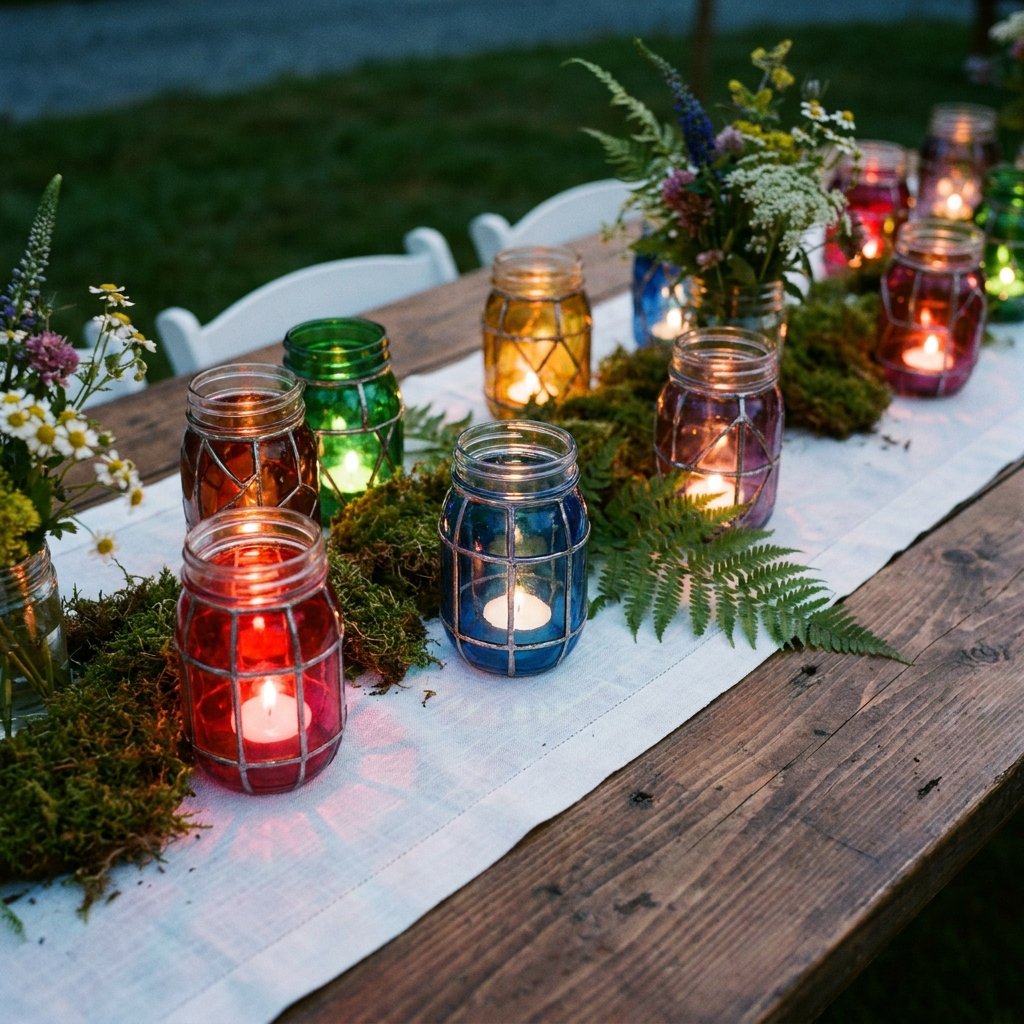

The Art of the High-End Hustle
Let’s be honest: weddings are notoriously expensive, but your decor doesn’t have to be. If you have a refined eye and a resourceful spirit, you can create an atmosphere of rugged elegance without the premium price tag. Today, we are diving into the world of ‘Trash to Treasure,’ where we take humble, everyday glass waste—think pickle jars, wine bottles, and pasta sauce containers—and transform them into jaw-dropping faux stained glass centerpieces. This isn’t just about saving money; it’s about the crafty-expert satisfaction of knowing your $0.50 creation looks like a $150 boutique find. Whether you’re a budget bride, a handy dad helping with the reception, or a frugal DIYer looking to spruce up an event, this guide will show you how to manipulate light and color to achieve a sophisticated, stained-glass aesthetic for mere pennies per piece.
Budget Mantra: Your creativity is the most valuable currency at your disposal. Don’t buy what you can build better for less.
In this masterclass, we will cover the scavenging process, the chemistry of budget-friendly pigments, and the precise techniques needed to mimic leaded glass. By the time we’re done, you’ll have a fleet of centerpieces that command attention and spark conversation, all while keeping your wedding budget firmly in the black.
The Scavenger Hunt: Sourcing Your Glass Canvas

Finding Treasure in the Recycling Bin
The first step in this resourceful journey is sourcing your glass. You don’t need to spend a dime at a craft store for ‘blanks.’ Your kitchen and the local recycling center are gold mines. Look for glass with interesting textures or unique shapes. A tall, slender olive jar can be just as elegant as a wide, stout honey jar when treated with the right technique.
- Pickle Jars: Great for large, bold patterns.
- Wine Bottles: Perfect for creating height on a table.
- Baby Food Jars: Ideal for small tea light accents around the main centerpiece.
- Thrift Store Vases: If you must buy, never pay more than $1.00.
Before you begin, you must properly prep your glass. Remove labels by soaking the jars in hot, soapy water. For stubborn adhesive, a mixture of equal parts baking soda and olive oil works like a charm. Ensure the glass is 100% dry and free of oils before you start your ‘leading’ process.
| Glass Type | Best Use | Estimated Cost |
|---|---|---|
| Recycled Sauce Jar | Main Centerpiece | $0.00 |
| Thrifted Wine Bottle | Taper Candle Holder | $0.50 – $1.00 |
| Mason Jar (Used) | Rustic Accent | $0.00 |
The Alchemist’s Kit: Budget Materials for High-End Results

Mixing Your Own Faux Glass Paint
The secret to the ‘stained glass’ look isn’t expensive specialty paint; it’s a clever mix of household staples. To achieve that translucent, jewel-toned glow, we use a base of clear school glue. This is where the budget-savvy magic happens.
- Clear School Glue: The medium that provides the ‘glass’ finish.
- Food Coloring: Just a few drops go a long way in creating vibrant tints.
- Black Dimensional Puff Paint: This mimics the heavy, leaded lines of real stained glass.
- Liquid Dish Soap: A single drop in your glue mix helps the paint spread evenly without bubbling.
By using these materials, you are cutting your costs by nearly 90% compared to buying professional glass paints. A single bottle of glue and a pack of food coloring can cover dozens of jars.
The Recipe: Mix 2 tablespoons of clear glue with 1 drop of dish soap and 2-3 drops of food coloring. Stir slowly to avoid air bubbles.
| Material | Purpose | DIY Cost | Store-Bought Equivalent |
|---|---|---|---|
| Clear Glue + Food Color | Translucent Tint | $0.15 per jar | $8.00 per bottle |
| Black Puff Paint | Faux Leading | $1.25 per tube | $12.00 leading kit |
| Recycled Glass | The Base | $0.00 | $5.00 – $15.00 |
Mastering the Faux Lead: Precision Outlining
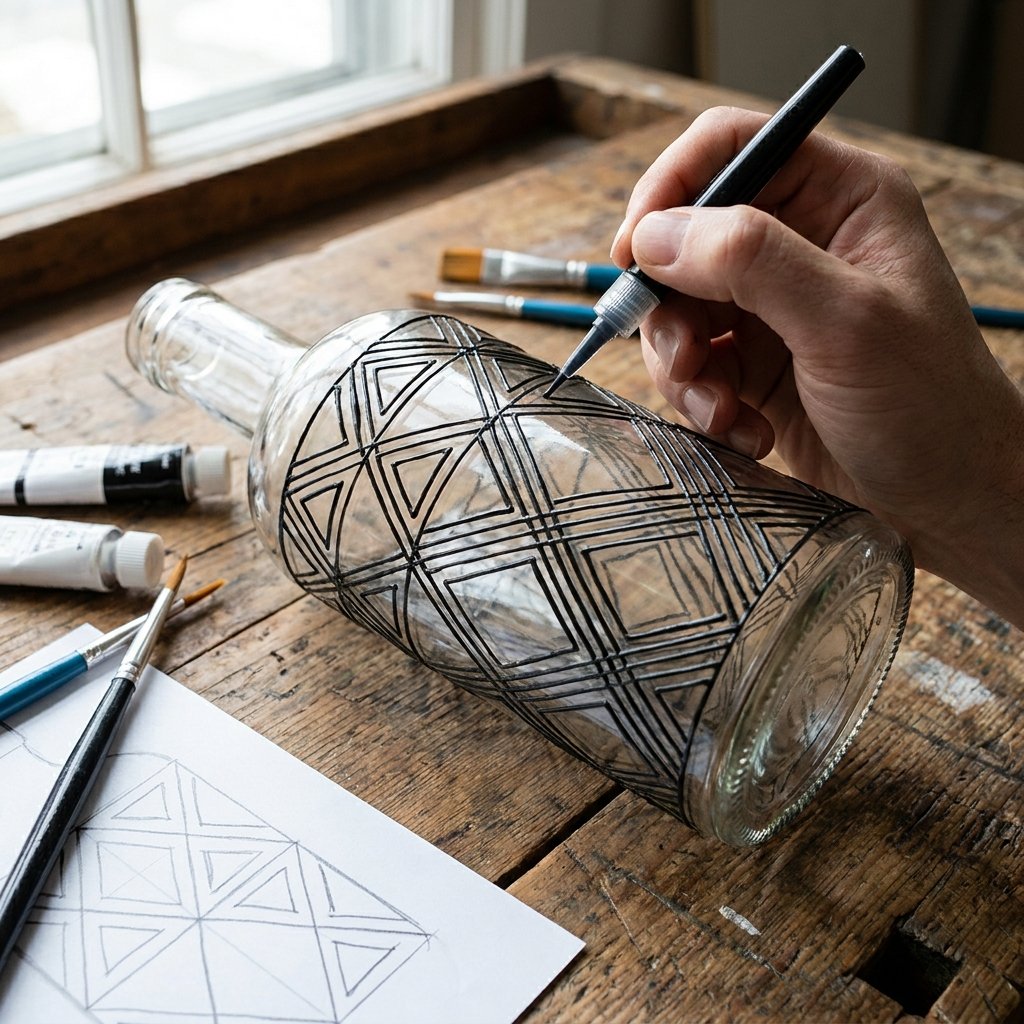
The Secret to Professional Lines
The ‘leading’ is what separates a craft project from a piece of art. Real stained glass uses lead cames or copper foil to hold the pieces together. We will mimic this using black puff paint. The goal is to create a rugged, masculine-elegant structure that defines the shapes.
- Sketch Your Design: If you aren’t confident freehanding, place a template inside the jar and trace it from the outside.
- The Steady Hand: Hold the puff paint bottle like a pen. Apply consistent pressure to create a raised, even line.
- Connect the Lines: Ensure every line connects to another. This creates ‘cells’ that will hold your color.
- Dry Time: Allow the ‘lead’ to dry for at least 2 to 4 hours. It must be completely firm before you add the color.
Pro Tip: If you make a mistake, let it dry completely, then peel it off with a craft knife. It’s much cleaner than trying to wipe wet paint.
Don’t be afraid of imperfections. Real leaded glass has character and slight variations in thickness. Embrace the crafty-expert look of a handmade piece.
The Coloring Technique: Filling the Cells
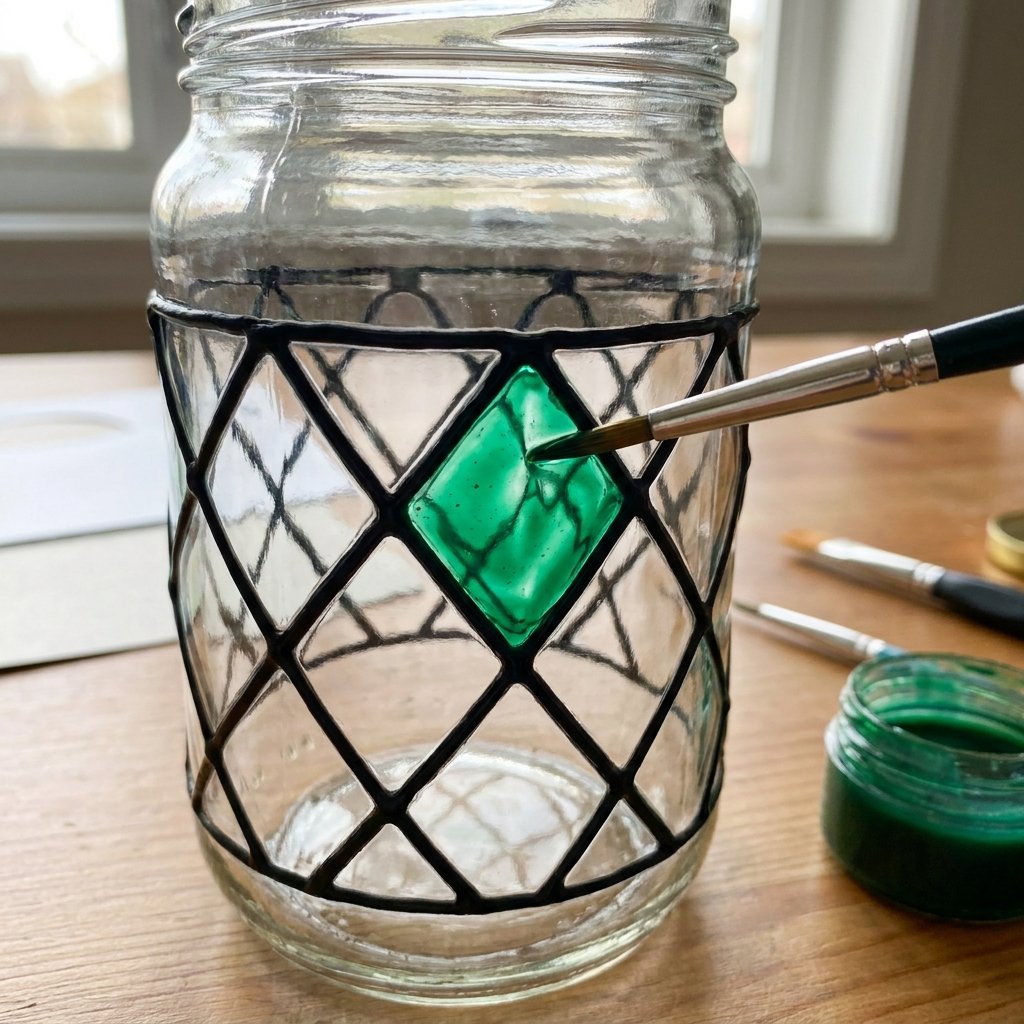
Bringing the Jewel Tones to Life
Once your ‘lead’ lines are dry, it’s time to add the color. This is the most satisfying part of the process. You want to fill each cell with your custom-mixed glue-paint. Use a small paintbrush or even a toothpick for tight corners.
- Flood the Cell: Drop a generous amount of color into the center of a cell and push it toward the edges.
- Avoid Overworking: The more you brush, the more bubbles you create. Let the glue self-level.
- Layering: For deeper colors, let the first coat dry and add a second. This adds sophisticated depth to the piece.
As the glue dries, it will transform from an opaque, milky substance into a crystal-clear, vibrant film. This process usually takes 12 to 24 hours depending on humidity. Be patient—the reveal is worth the wait!
Safety Note: Work in a well-ventilated area. While these materials are generally non-toxic, some puff paints can have a strong odor as they cure. Keep your workspace clean and away from dust to ensure a smooth finish.
The Final Reveal: Styling Your Masterpieces
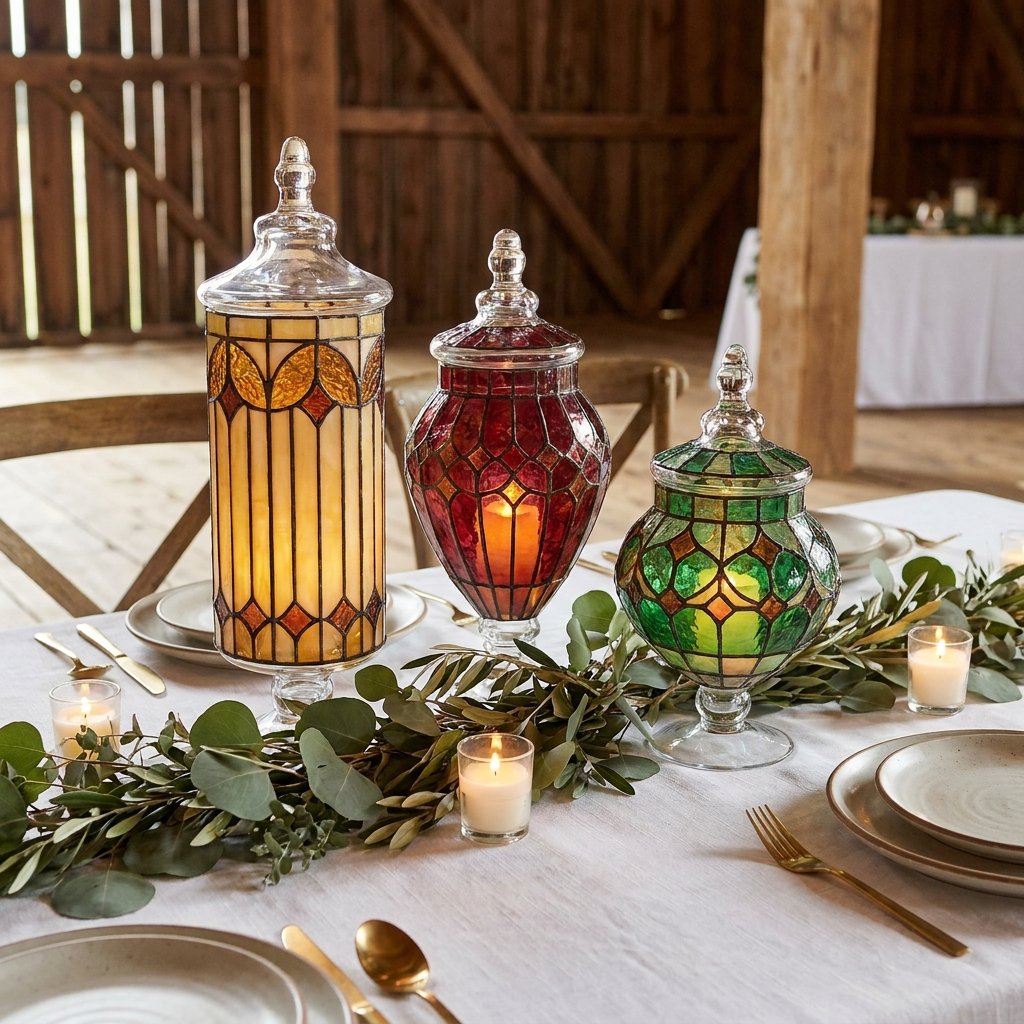
Creating a High-End Tablescape
Your centerpieces are finished, but the way you present them is what truly sells the ‘treasure’ aspect. To maximize the jaw-dropping impact, you need the right lighting. Stained glass lives and breathes through light.
- LED Tea Lights: Safe, long-lasting, and they don’t produce heat that might soften the glue.
- Fairy Lights: Stuffing a string of warm-white fairy lights into a wine bottle creates a magical, glowing column.
- Mirror Bases: Place your jars on small mirrors or polished wood rounds to reflect the colors onto the tablecloth.
For a wedding, group these in clusters of three at varying heights. This creates visual interest and makes the arrangement look more expensive. Pair them with simple greenery or white tea roses to keep the focus on the vibrant colors of your faux stained glass.
| Styling Element | Visual Impact | Cost Factor |
|---|---|---|
| LED Tea Light | Internal Glow | $0.25 each |
| Mirror Base | Reflective Depth | $1.00 (Dollar Tree) |
| Eucalyptus Sprig | Organic Texture | $0.50 per stem |
Conclusion
The Triumph of the Frugal Maker
By turning ‘trash’ into these stunning stained glass centerpieces, you’ve proven that elegance isn’t something you buy—it’s something you create. For a total investment of roughly $1.50 to $3.00 per table, you’ve achieved a look that rivals professional event styling. This resourceful and clever approach not only saves you hundreds (or thousands) of dollars on your wedding decor but also leaves you with unique, handmade keepsakes that your guests will be clamoring to take home. Remember, the next time you see an empty jar, don’t see waste; see a canvas. Keep crafting, keep saving, and keep turning the everyday into the extraordinary. You’ve got the skills, the tools, and the budget-savvy mindset to make your big day absolutely unforgettable.

Makenzie is the founder and lead writer at MoneyHackTips.com — a personal finance blog dedicated to delivering street-smart financial wisdom for real people on real budgets. With 300+ published articles covering everything from debt management to investing fundamentals, Makenzie’s mission is to make every dollar work harder. When not writing about money hacks, Makenzie is testing frugal living strategies, optimizing side hustles, and helping readers build financial freedom from scratch.