
Store-bought ornaments, especially those featuring trendy, chunky boho textiles or rustic macrame designs, can easily cost upwards of $10 to $15 per piece. When you are trying to decorate an entire tree, those numbers add up faster than a toddler unwrapping presents. But as resourceful creators, we do not buy the hype—we build it. By learning the simple, crafty-expert technique of cutting a continuous strip of t-shirt yarn (affectionately known in the upcycling community as ‘tarn’), you unlock a versatile, durable material that is perfect for crafting high-end holiday decor.
“The most thoughtful, beautiful homes are not furnished by the depth of a wallet, but by the resourcefulness of the hands that live there. Never underestimate the aesthetic power of upcycled cotton.”
Whether you are a budget bride looking for rustic winter wedding favors, a handy parent wanting a safe, shatter-proof craft to do with the kids, or simply a creative gift-giver wanting to add a personalized touch to your holiday wrapping, this guide is your blueprint. Grab your sharpest scissors, raid your donation bin, and let us dive into this genius upcycling trick!
The Magic of ‘Tarn’: Why T-Shirt Yarn is the Ultimate Frugal Material
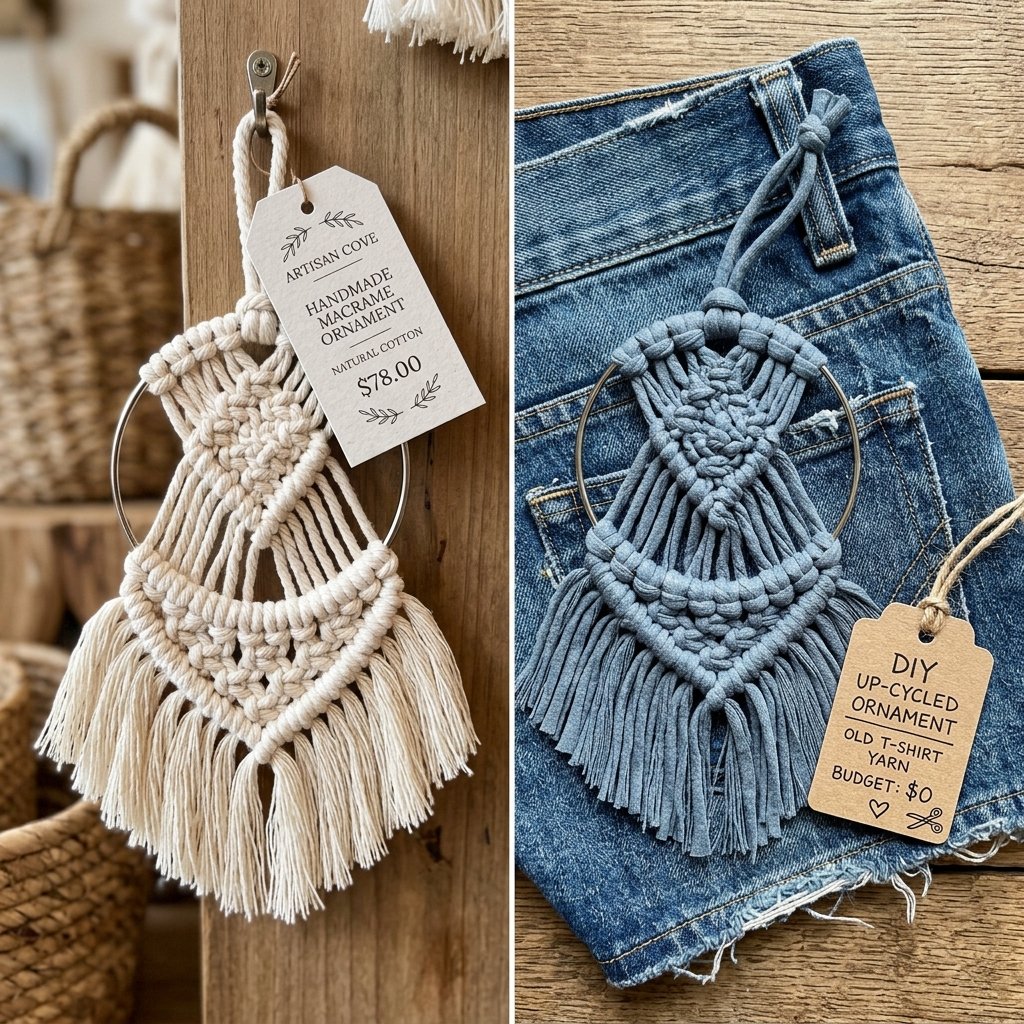
Furthermore, utilizing t-shirt yarn is an environmentally conscious masterstroke. Millions of tons of textile waste end up in landfills every year. By intercepting those worn-out cotton shirts, you are practicing highly practical sustainability. You are saving money, saving the planet, and elevating your home’s aesthetic all at once. Let us take a hard look at the economics of this project. When you compare the cost of curating a trendy, boho-chic Christmas tree from a high-end retailer versus utilizing our zero-budget DIY method, the savings are staggering.
| Ornament Style / Material | High-End Retailer Cost (Per 6-Pack) | Our Zero-Budget DIY Cost |
|---|---|---|
| Chunky Macrame Mini Trees | $45.00 | $0.00 (Old green/white tees + yard twigs) |
| Rustic Cotton Tassels | $30.00 | $0.00 (Scrap yarn + cardboard template) |
| Woven Yarn Baubles | $35.00 | $0.00 (Old plastic ornaments + tarn wrapping) |
| Total Tree Makeover | $110.00+ | $0.00 (100% Free!) |
As you can see, the math heavily favors the resourceful crafter. By simply investing 30 to 45 minutes of your time, you can generate an entire collection of bespoke ornaments that rival anything found in a boutique catalog.
The Master Tailor’s Secret: How to Cut Continuous T-Shirt Yarn
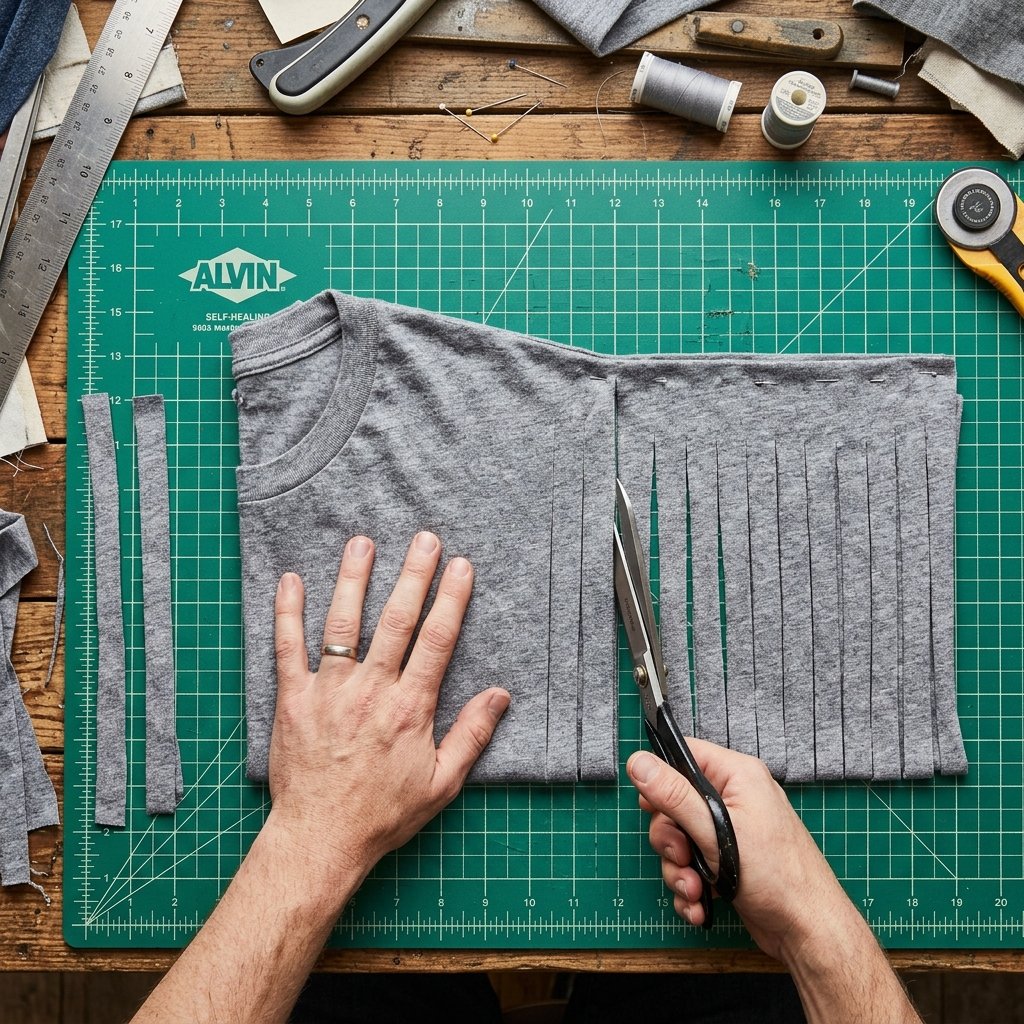
Safety & Tool Note: To avoid jagged edges and hand fatigue, you must use a pair of dedicated, heavy-duty fabric shears or a sharp rotary cutter on a self-healing mat. Never use paper scissors on fabric; it will chew the cotton and leave a frayed, messy edge.
Follow these highly practical, step-by-step instructions to manufacture your own yarn:
- Prep the Canvas: Lay your t-shirt flat on a large table or the floor. Smooth out all wrinkles. Using your fabric scissors, cut straight across the shirt just below the armpits. Discard the top half (or save it for cleaning rags). You are now left with a tube of fabric. Cut off the bottom hem as well.
- The Strategic Fold: Take your fabric tube and fold one side over to the other, but do not let the edges meet perfectly. Leave about a 1.5-inch gap at the top edge. This offset gap is the critical secret to making continuous yarn.
- Cutting the Strips: Starting from the folded bottom edge, cut strips upward toward the top gap. Make each strip about 1-inch wide. Cut all the way past the bottom layer, but stop when you reach the 1.5-inch gap at the top. Do not cut all the way through! You should end up with what looks like a Hawaiian hula skirt attached at a top waistband.
- The Diagonal Snip: Open up the uncut “waistband” section and lay it flat over your arm or a rolling pin. You will see the slits you made. To create a continuous string, do not cut straight across. Instead, cut diagonally from the first slit on the left to the second slit on the right. Continue this diagonal cutting pattern all the way down the line.
- The Magic Stretch: Once you have a massive pile of flat, 1-inch fabric strips, the magic happens. Take sections of the strip in both hands and pull firmly. The raw edges of the jersey knit cotton will naturally curl inward upon themselves, instantly transforming the flat strip into a rugged, rounded, professional-looking cord. Roll it into a tight ball, and you are ready to craft!
Project 1: The Rugged Macrame Twig Tree
Materials Needed:
- Green, white, or grey t-shirt yarn
- Sturdy twigs (cut to 4-inch lengths) or cinnamon sticks
- A piece of twine or thin ribbon for the hanging loop
- A fine-tooth comb (optional, for fraying ends)
Step-by-Step Construction:
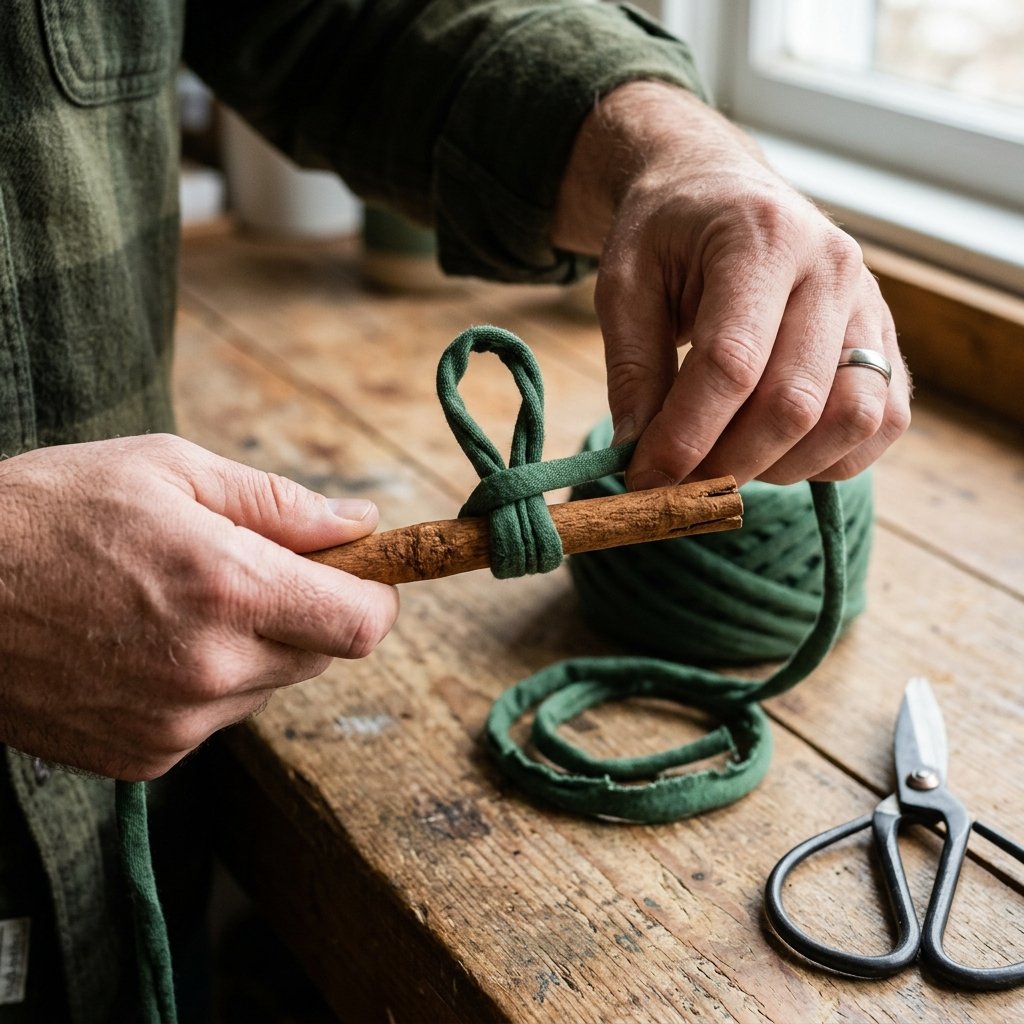
- Prepare the Base: Take your 4-inch twig or cinnamon stick. Tie a loop of twine securely to the top—this will serve as the hanger for your tree branch.
- Cut the Tarn: Cut your t-shirt yarn into strips. You will need about 10 to 14 strips. Start with strips that are 8 inches long.
- The Larks Head Knot: Take your first 8-inch strip, fold it in half to create a loop. Place the loop under the twig. Take the two tail ends, pull them over the twig, and thread them through the loop. Pull tight. This is a basic Lark’s Head knot.
- Build the Branches: Continue tying these knots tightly down the length of the twig, pushing them close together so the wood does not show through.
- The Barber’s Trim: Once your twig is full of yarn knots, it will look like a messy rectangle. Lay the ornament flat on a table. Take your fabric scissors and cut the yarn tails on an angle, starting narrow at the top and widening at the bottom, mimicking the triangular silhouette of a pine tree.
This creates a highly textured, minimalist, and masculine-elegant ornament that looks phenomenal against the dark green needles of a Christmas tree.
Project 2: Upcycled Boho Tassels with Wooden Beads
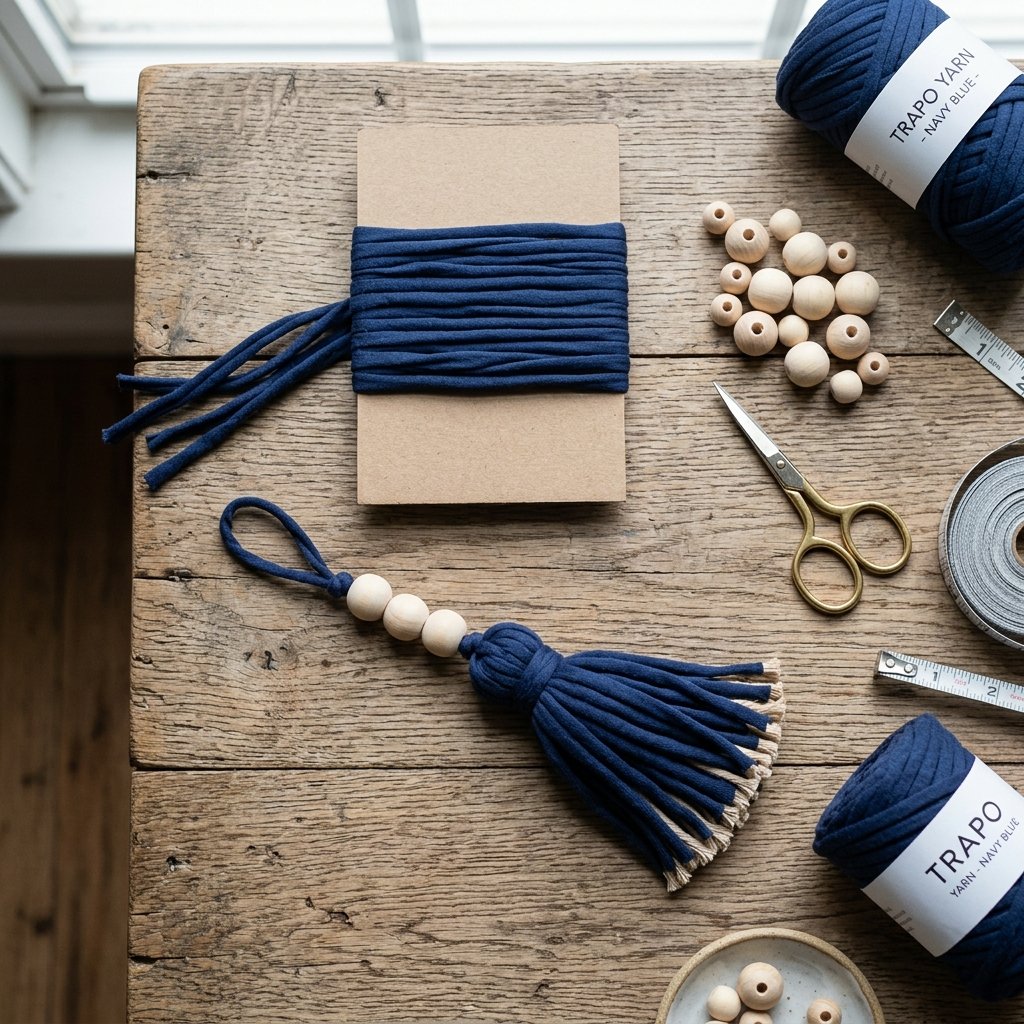
The Simple Tassel Formula:
- The Template: Cut a piece of sturdy cardboard to be 5 inches wide. This will determine the length of your tassel.
- The Wrap: Take your ball of t-shirt yarn and wrap it around the cardboard template 15 to 20 times. The more wraps, the plumper the tassel.
- The Top Tie: Cut a separate 10-inch piece of yarn. Slip it under the wrapped yarn at the top edge of the cardboard and tie a tight double knot. Leave the tails long to serve as your hanging loop.
- The Release: Carefully slide the wrapped yarn off the cardboard template. Take your fabric scissors and cut straight through the loops at the very bottom edge.
- The Gathering Knot: Cut one more piece of yarn, about 12 inches long. Wrap it tightly around the entire bundle of yarn, about 1 inch down from the top tie. Wrap it around three times and tie a secure, hidden knot. This creates the ‘head’ of the tassel.
- The Final Trim: Comb through the bottom of the tassel with your fingers and trim the ends straight across for a clean, tailored finish.
Crafty-Expert Tip: To elevate this from a simple craft to a high-end looking ornament, string one or two large, raw wooden beads onto the top hanging loop before tying it off. The combination of the raw wood and the thick cotton yarn screams upscale boutique decor!
Project 3: The Woven Bauble Revamp & Rustic Stars
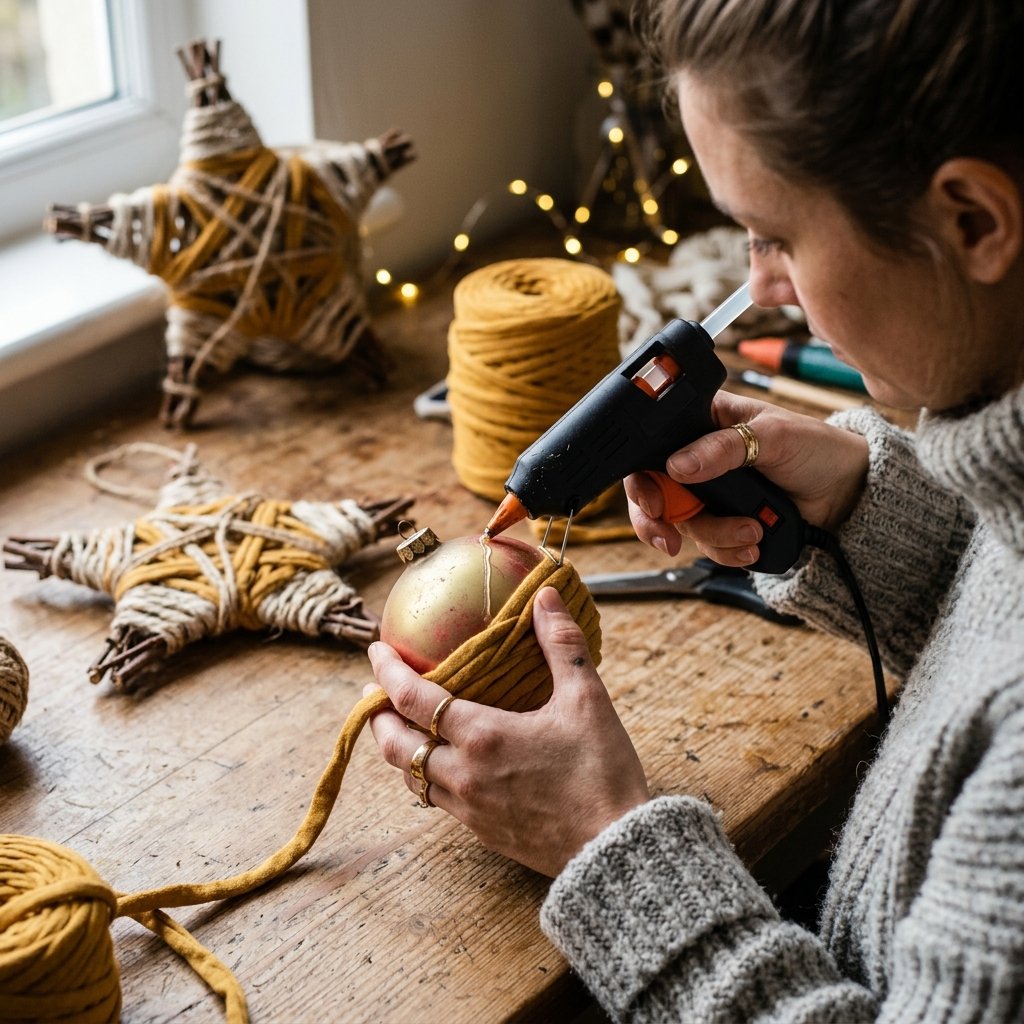
How to Wrap a Bauble:
- Heat Up the Glue Gun: Apply a small dot of hot glue to the very bottom center of the old plastic ornament.
- The Spiral: Press the end of your t-shirt yarn into the glue. Carefully begin coiling the yarn in a tight spiral, applying thin lines of hot glue as you go.
- Tension is Key: Pull the yarn slightly taut as you wrap. Because t-shirt yarn stretches, pulling it tight ensures a smooth, seamless finish without any gaps showing the ugly plastic underneath.
- Finish at the Top: Continue spiraling until you reach the metal cap of the ornament. Cut the yarn and glue the final tail down securely.
The Rustic Woven Star:
If you prefer a more rugged, woodland aesthetic, you can create woven stars. Collect five small, straight twigs of equal length (about 5 inches). Hot glue the ends together to form a traditional five-point star shape. Once the glue is dry, take a long, continuous strand of your t-shirt yarn and begin wrapping it randomly and tightly around the twig frame. The thick yarn will easily catch on the rough bark of the twigs, creating a stunning, primitive-style woven star that looks brilliant nestled in the branches of your tree.
Pro Tips for Styling Your Upcycled Holiday Tree
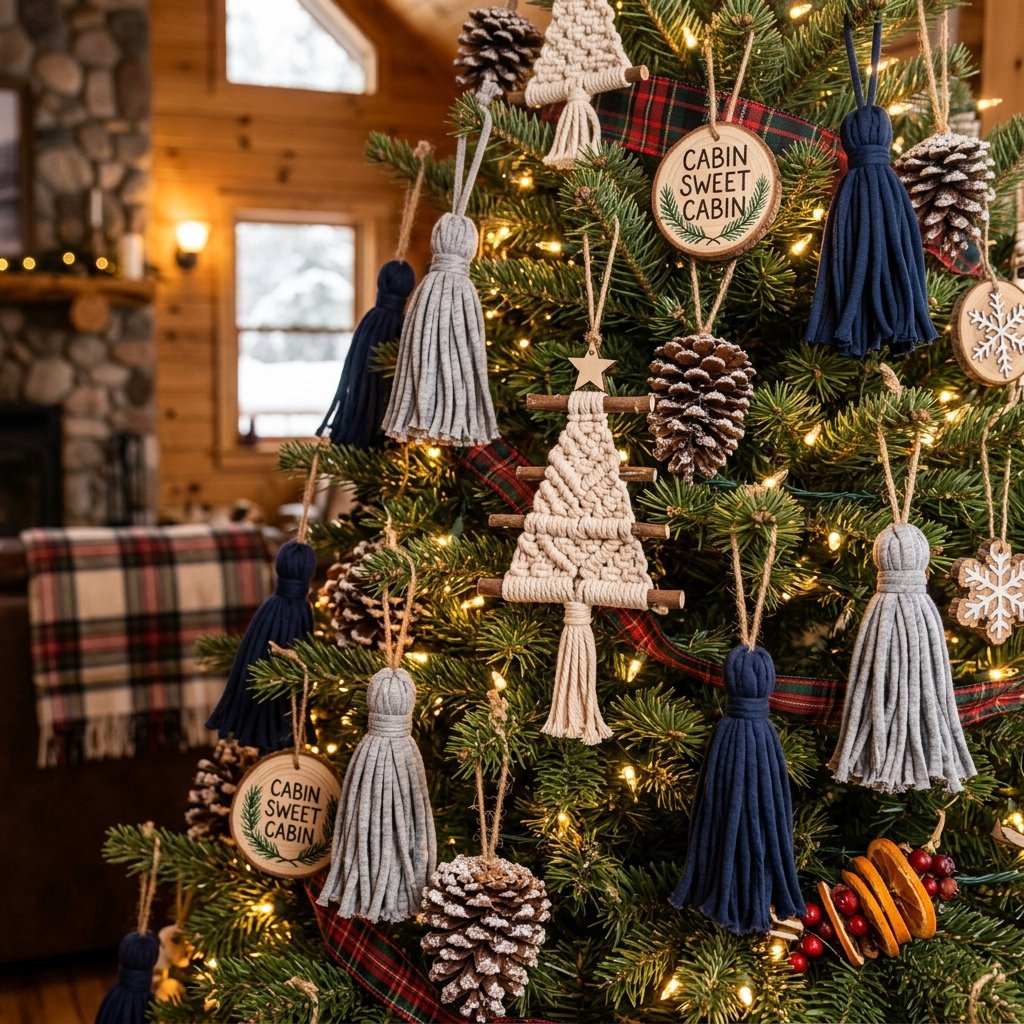
Because you are sourcing your yarn from old t-shirts, you have total control over the color scheme. Keep an eye out at thrift store clearance bins (or your own closet) for shirts that fit a specific, sophisticated palette. Here is a handy guide for combining t-shirt yarn colors to achieve different high-end aesthetics:
| Design Aesthetic | Ideal T-Shirt Yarn Color Palette | Complementary Tree Accents |
|---|---|---|
| Masculine & Cabin Rustic | Heather Grey, Navy Blue, Forest Green, Charcoal | Leather ribbons, pinecones, warm white Edison lights |
| Modern Farmhouse / Minimalist | Crisp White, Cream, Oatmeal, Soft Black | Raw wooden beads, galvanized metal bells, flocked branches |
| Boho Chic & Earthy | Mustard Yellow, Terracotta, Olive, Blush Pink | Dried orange slices, cinnamon sticks, pampas grass |
When hanging your t-shirt yarn ornaments, push the larger wrapped baubles deeper into the tree near the trunk. This creates depth and reflects the tree lights beautifully off the matte cotton texture. Hang your macrame twig trees and tassels closer to the tips of the branches so they can dangle freely. By mixing these heavy, chunky cotton textures with the delicate twinkle of string lights and the organic shapes of pinecones or dried citrus, you create a beautifully balanced, magazine-worthy holiday display that costs absolutely nothing.
Conclusion
So, before you toss out that pile of old tees, grab your fabric shears and start snipping. Whether you are decking out your own family tree, crafting thoughtful, handmade gifts for teachers and friends, or looking for a budget-savvy way to decorate a winter event, this genius trick will serve you well. Stay crafty, stay frugal, and have a wonderfully creative holiday season!

Makenzie is the founder and lead writer at MoneyHackTips.com — a personal finance blog dedicated to delivering street-smart financial wisdom for real people on real budgets. With 300+ published articles covering everything from debt management to investing fundamentals, Makenzie’s mission is to make every dollar work harder. When not writing about money hacks, Makenzie is testing frugal living strategies, optimizing side hustles, and helping readers build financial freedom from scratch.