
The Magic of the Thrift Store Aisle
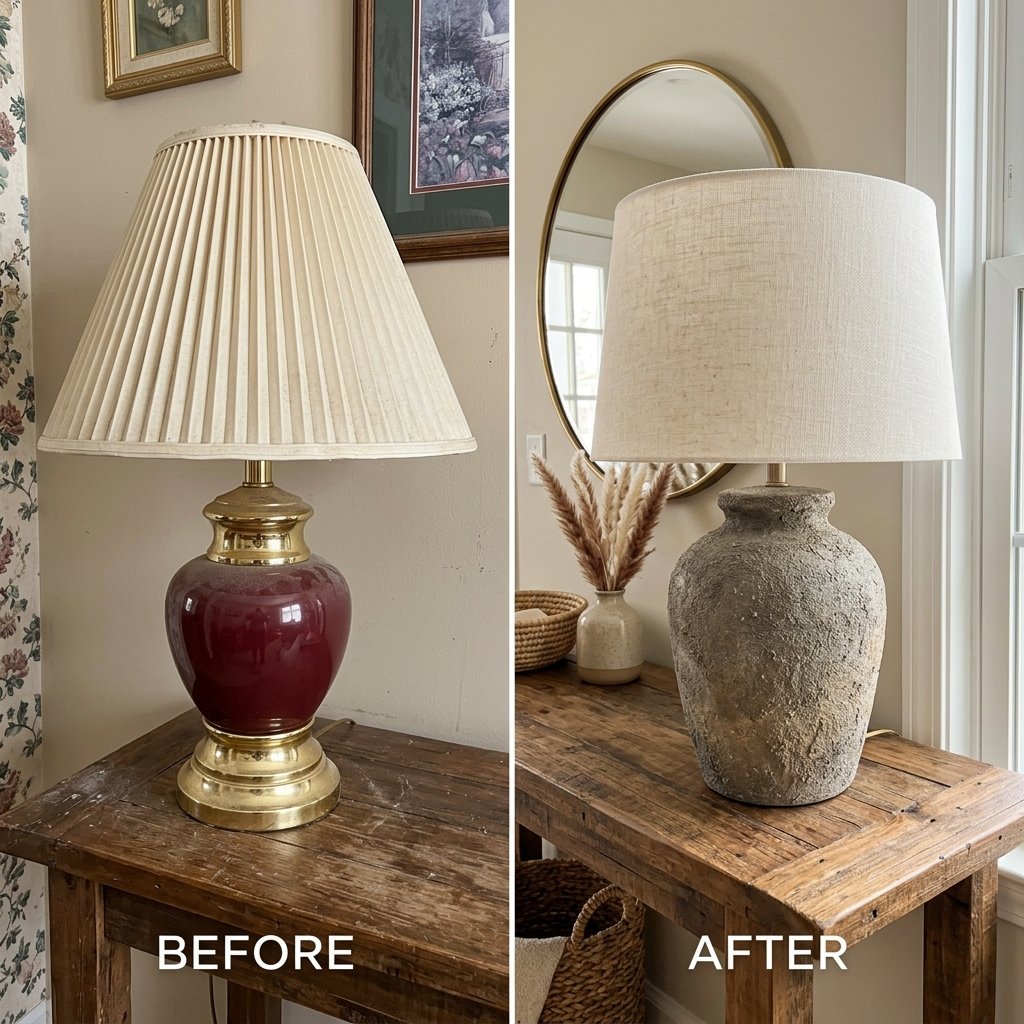
Let us talk about the absolute thrill of the hunt. If you are a frugal DIYer, a handy upcycler, or a budget-savvy decorator, you already know that the local thrift store is a goldmine disguised as a junk drawer. But there is one specific aisle that separates the amateurs from the visionary crafters: the lighting section. Row upon row of shiny, outdated 1990s brass, glossy maroon ceramics, and aggressively floral glass lamps sit gathering dust. To the untrained eye, it is an aisle of cast-offs. But to the resourceful creative, it is an aisle of raw, untapped potential.
High-end retailers like Pottery Barn, West Elm, and Anthropologie charge a small fortune for lighting. We are talking $150 to $350 for a single lamp that features a beautiful, matte, earthy, artisan-crafted texture. But what if I told you that you could achieve that exact same organic, faux-stone, or aged-terracotta look for under $10 using something you already have sitting in your kitchen pantry?
“Never judge a thrift store find by its ugly, glossy finish. Look at the bones, look at the curves, and look at the geometry. Paint can fix the rest.”
Enter the legendary baking soda paint trick. This clever, budget-savvy technique is the ultimate equalizer in home decor. By mixing standard water-based paint with household baking soda, you create a thick, chalky, highly textured medium that grips to almost any surface and dries to a stunning, plaster-like finish. In this comprehensive masterclass, we are going to walk step-by-step through the process of selecting the perfect ugly lamp, mixing the ultimate textured paint, and styling your new designer dupe so flawlessly that your guests will swear you bought it at a high-end boutique.
The Anatomy of a Thrift Store Diamond in the Rough

The first step in our trash-to-treasure journey begins at the thrift store, yard sale, or even your own basement. When you are hunting for a lamp to upcycle, you have to train your eyes to ignore the superficial. Look past the dusty, yellowed pleated lampshade. Ignore the chipped, high-gloss navy blue glaze. Disregard the cheap, fake brass base. You are looking for one thing and one thing only: shape.
What to Look For:
- Bold Geometry: Globes, cylinders, urns, and stacked gourds make incredible candidates for the baking soda paint trick. The simpler and more pronounced the shape, the more it will look like a modern, expensive piece of pottery once textured.
- Substantial Weight: A heavy lamp base (like solid ceramic, glass, or heavy resin) feels more expensive. Even if you paint a cheap plastic lamp to look like stone, a heavier base will sell the illusion when you turn the switch.
- Good Bones: Ensure the socket is secure and the harp (the metal wire part that holds the shade) is intact. If the harp is missing, do not panic; you can buy a replacement harp at any hardware store for about $4.
The Safety Check:
Safety First: Always inspect the electrical cord before purchasing a second-hand lamp. If the cord is frayed, cracked, or has exposed wires, it is a fire hazard. However, do not let a bad cord ruin a great shape! A basic lamp rewiring kit costs around $6 at the hardware store, and rewiring a standard table lamp takes less than 15 minutes with a screwdriver.
Once you have secured your perfect, ugly canvas, it is time to bring it home and prepare it for its massive glow-up.
The Alchemist’s Formula: Mixing the Perfect Baking Soda Paint
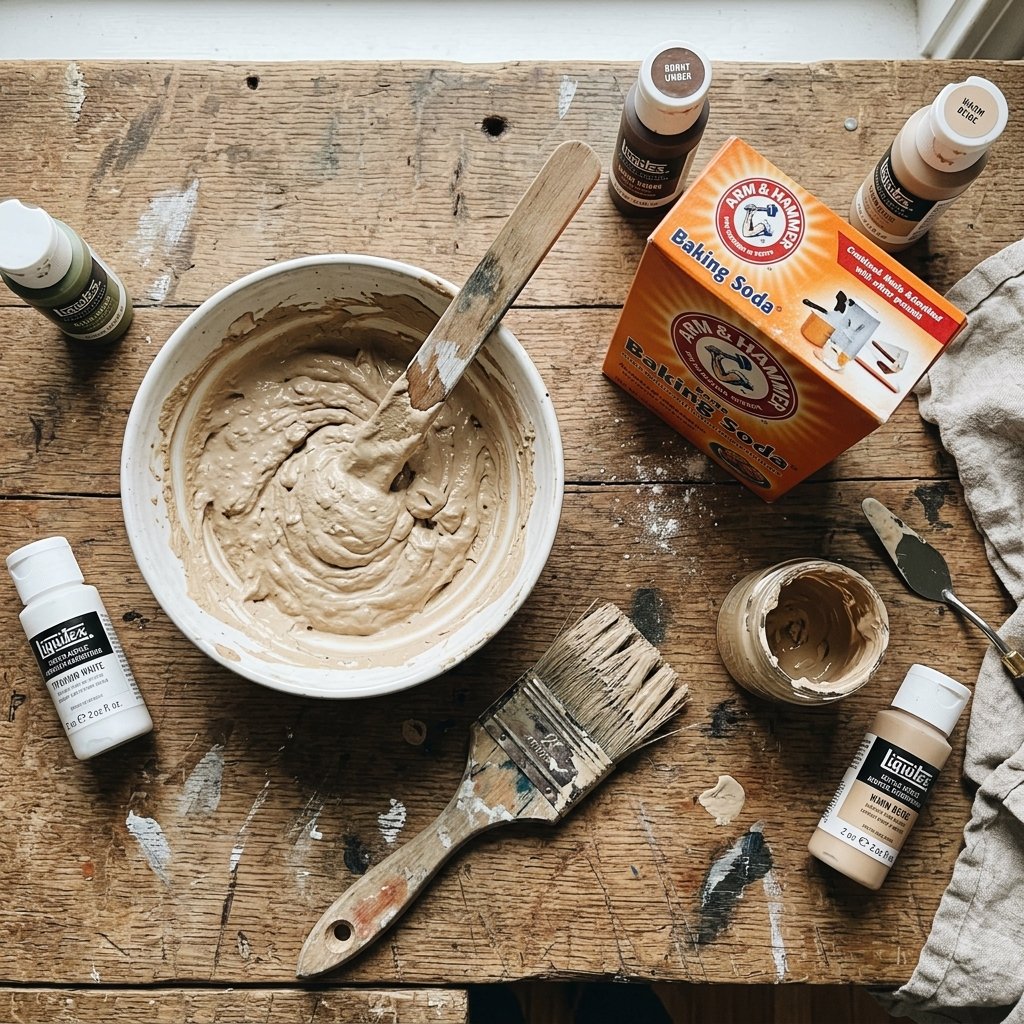
Now we reach the secret sauce of this entire crafty operation. The baking soda paint trick works because the sodium bicarbonate acts as a bulking agent. When added to standard acrylic or latex paint, it fluffs up the consistency, turning a thin liquid into a thick, frosting-like paste. This paste not only adheres beautifully to slick surfaces without the need for heavy priming, but it also holds brush strokes, creating that coveted, hand-thrown ceramic texture.
Choosing Your Paint
You do not need expensive specialty paints for this. The most budget-savvy approach is to raid your garage for leftover interior latex wall paint. Flat or eggshell finishes work best, but honestly, the baking soda will mattify even a semi-gloss paint. If you do not have leftover wall paint, a cheap $2 bottle of matte acrylic craft paint from the hobby store works perfectly. Sample pots from the hardware store (usually around $5) are also an incredible, frugal option that gives you access to designer color palettes.
The Golden Ratio
There is no exact, rigid science to the ratio, as different paints have different viscosities, but here is the foolproof starting point for the perfect artisan texture.
| Ingredient | Measurement | Purpose |
|---|---|---|
| Water-Based Paint (Latex or Acrylic) | 1 Cup | Provides the color and the adhesive binder. |
| Baking Soda (Sodium Bicarbonate) | 1/4 Cup to 1/2 Cup | Creates the chalky, matte, faux-stone texture. |
| Water (Optional) | 1-2 Teaspoons | Thins the mixture if it becomes too clumpy to spread. |
The Mixing Process: Pour your paint into a disposable plastic cup or an old yogurt container. Slowly add the baking soda a little bit at a time, stirring continuously with a wooden craft stick or a plastic spoon. You will feel the paint start to thicken. You are aiming for the consistency of thick pancake batter or whipped frosting. As you stir, the mixture might puff up slightly—this is a normal reaction. If it gets too thick and dry, add a tiny splash of water. If it is too thin, add another spoonful of baking soda.
Crafty Pro-Tip: Do not mix a massive batch all at once. Baking soda paint can dry out and thicken up quickly once mixed. Mix enough for one coat at a time to ensure the best workability.
Prepping Your Canvas: Sanding, Taping, and Priming
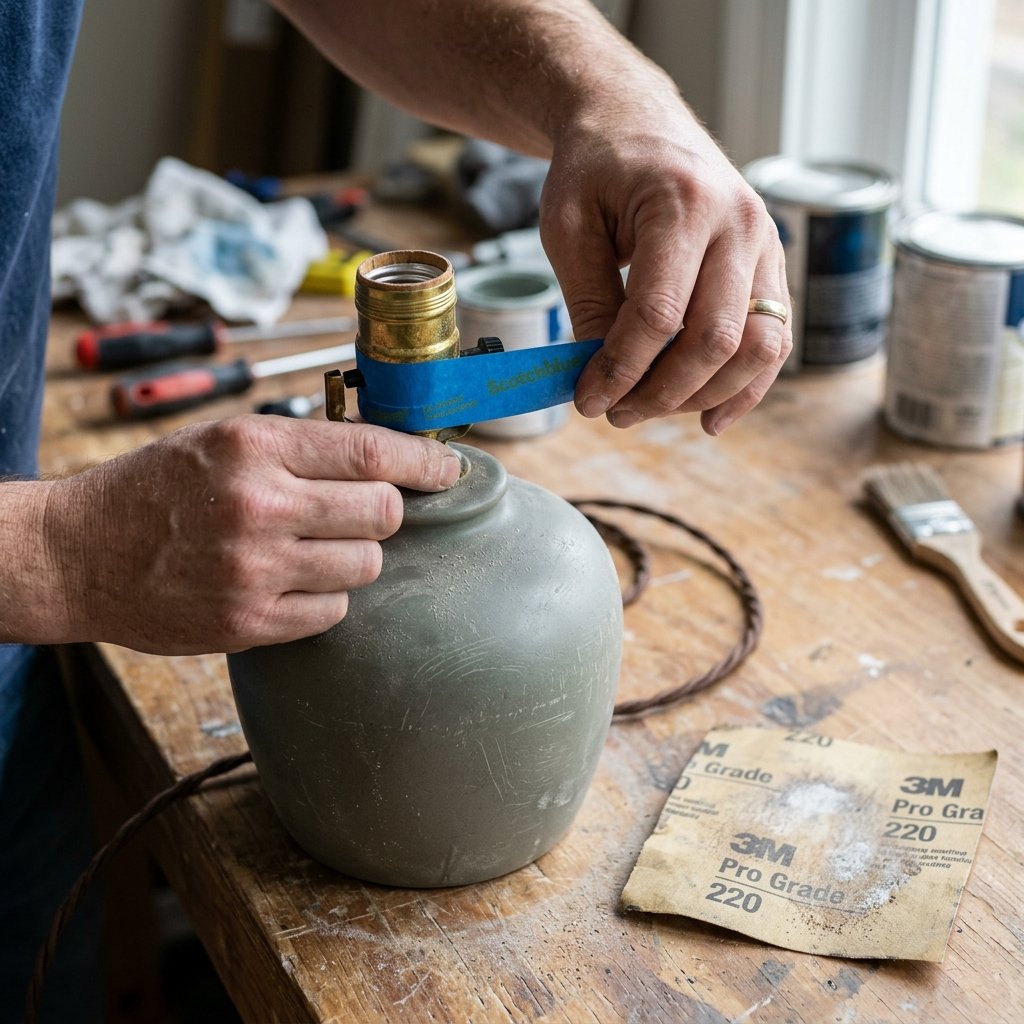
Even the most rugged, heavy-duty paint needs a clean surface to grab onto. Skipping the prep work is the number one reason DIY projects fail. Fortunately, prepping a lamp for baking soda paint is incredibly fast and requires very little elbow grease.
Step 1: The Deep Clean
Thrift store lamps are notoriously grimy. They have been sitting in living rooms absorbing dust, cooking oils, and furniture polish for decades. Take a damp rag and a heavy-duty degreaser (like TSP substitute, or simply warm water mixed with grease-cutting dish soap) and scrub the entire base. Dry it thoroughly with a lint-free cloth or paper towel.
Step 2: The Scuff Sand
While baking soda paint is famous for sticking to almost anything, a quick scuff sand guarantees durability. Take a medium-grit sanding block (around 120 to 150 grit) and lightly run it over the glossy surface of the lamp. You are not trying to remove the old finish; you just want to knock down the shine and give the surface some microscopic “teeth” for the new paint to grip. Wipe away the sanding dust with a damp cloth.
Step 3: Taping Off the Hardware
You want your lamp to look like a high-end designer piece, not a sloppy DIY project. That means keeping paint off the electrical components. Use high-quality painter’s tape to meticulously mask off the metal socket where the lightbulb screws in. Tape off the cord where it exits the base of the lamp. If your lamp has a metal neck or base that you want to keep exposed for a two-toned look, tape that off as well.
Frugal Hack: If you do not have painter’s tape, wrap the socket tightly in a small piece of aluminum foil. It molds perfectly to the shape and protects the metal from stray brush strokes!
The Artisan’s Touch: Applying the Faux-Ceramic Finish
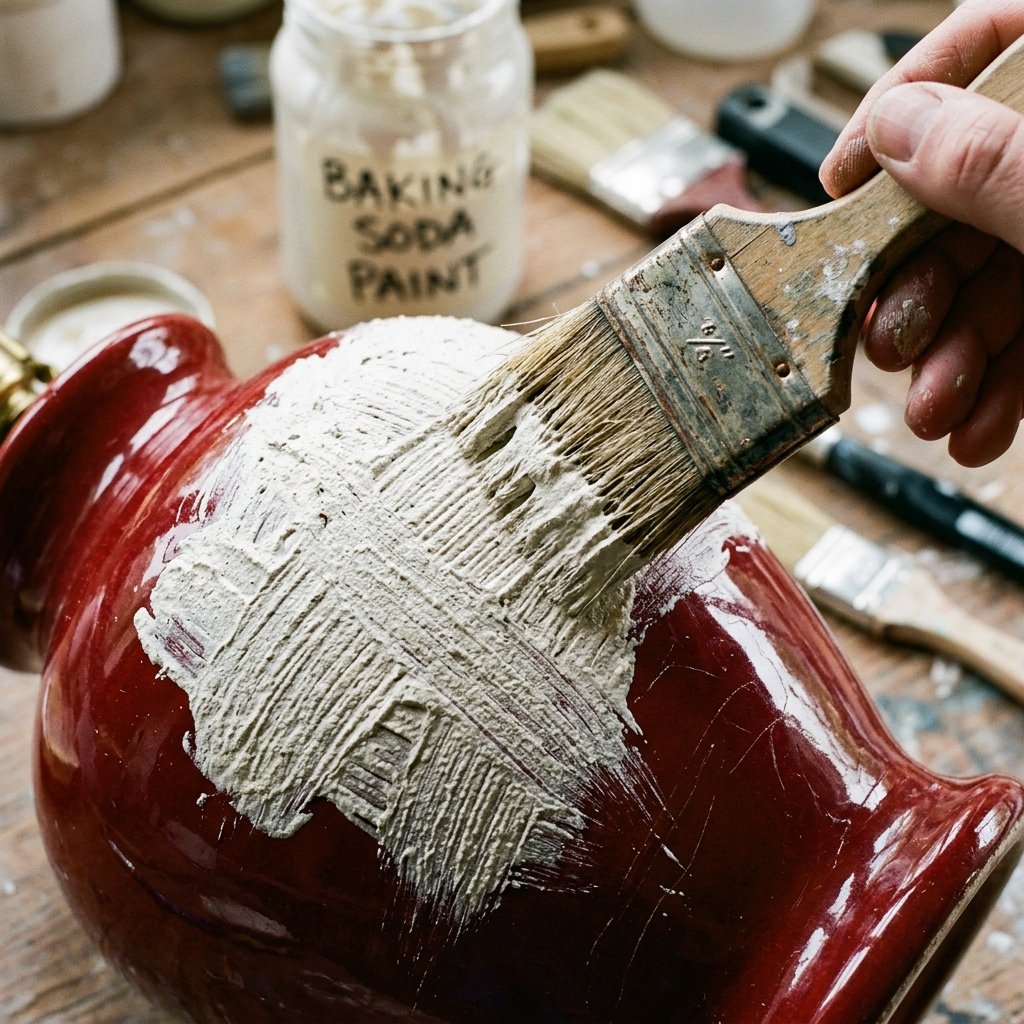
This is where the transformation happens. Applying baking soda paint is not like painting a wall; it is more like frosting a cake or applying plaster. The goal is not a perfectly smooth finish—the goal is texture, movement, and organic imperfection.
Choosing the Right Brush
Put away your expensive, ultra-smooth synthetic paintbrushes. For this project, cheaper is actually better. A $1 natural bristle “chip brush” from the hardware store is your best friend. The stiff, uneven bristles help create beautiful, stippled textures and heavy brush strokes that mimic hand-thrown clay.
Applying the First Coat
Dip your brush into the thick baking soda paint mixture and apply it to the lamp. Do not worry about long, even strokes. Instead, use a criss-cross motion (painting in “X” patterns) to build up an organic texture. If you want a rougher, stone-like finish, use a stippling technique: hold the brush perpendicular to the lamp and dab the paint on in quick, bouncing motions.
The first coat will likely look terrible. It might be streaky, and the original ugly color might peek through. Do not panic. This is just the base layer establishing the grip and the initial texture. Let the first coat dry completely. Because of the baking soda, it will dry much faster than normal paint—usually within 30 to 45 minutes.
Applying the Second Coat
Once the first coat is dry to the touch and completely matte, apply your second coat. This is where the magic solidifies. The second coat will provide full, opaque coverage. You can play with the texture here. If you want a smoother (but still matte) ceramic look, use longer, softer brush strokes. If you want a heavy, rustic, ancient-pottery vibe, lay the paint on thick and dab heavily. Allow the second coat to dry fully for at least 2 to 3 hours.
Distressing and Sealing: Giving Your Masterpiece That Aged Pottery Barn Vibe
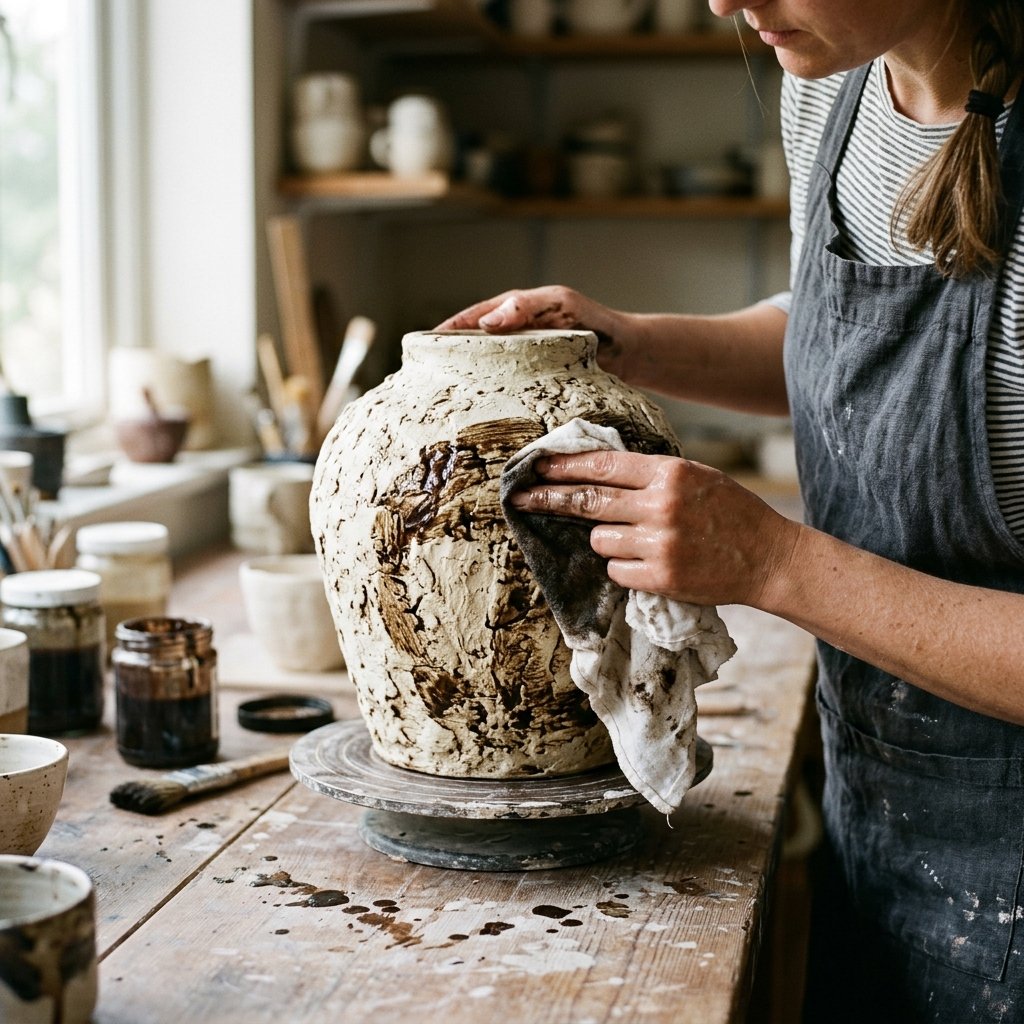
At this point, you have a beautiful, matte, solid-colored lamp. For some, this minimalist, modern look is exactly what they want. But if you want to push this project into the realm of high-end, rustic, Anthropologie-style home decor, you need to add a little age and depth.
The Aging Wash Technique
Real aged stone and vintage pottery are rarely one flat color. They have depth, shadows, and variations. To achieve this, we are going to create a simple “dirt wash.”
- Take a small amount of dark brown or charcoal gray acrylic craft paint.
- Mix it with water until it is very thin, like the consistency of dirty water (about 1 part paint to 4 parts water).
- Dip a clean brush into the wash and apply it loosely over a section of the textured lamp.
- Immediately take a slightly damp rag or paper towel and wipe the wash away.
The dark, watery paint will settle into the deep grooves and textures created by your brush strokes, while wiping it away keeps the raised areas light. This instantly highlights the faux-stone texture and gives the lamp a beautiful, aged patina.
Sealing the Deal
Baking soda paint is highly porous. If you leave it unsealed, it will attract dust and be difficult to wipe clean. Furthermore, the chalky finish can sometimes scuff easily. To protect your hard work while maintaining that gorgeous matte finish, you must seal it.
Use a high-quality, ultra-matte clear spray sealer (like Rust-Oleum Dead Flat or Krylon Matte Finish). Take the lamp outside or to a well-ventilated area. Hold the can about 10-12 inches away and apply two light, even coats, allowing 15 minutes of dry time between coats. This seals the porous surface, locks in the texture, and makes your lamp durable enough for everyday use.
The Grand Reveal: Cost Breakdown and Styling Your New Lamp
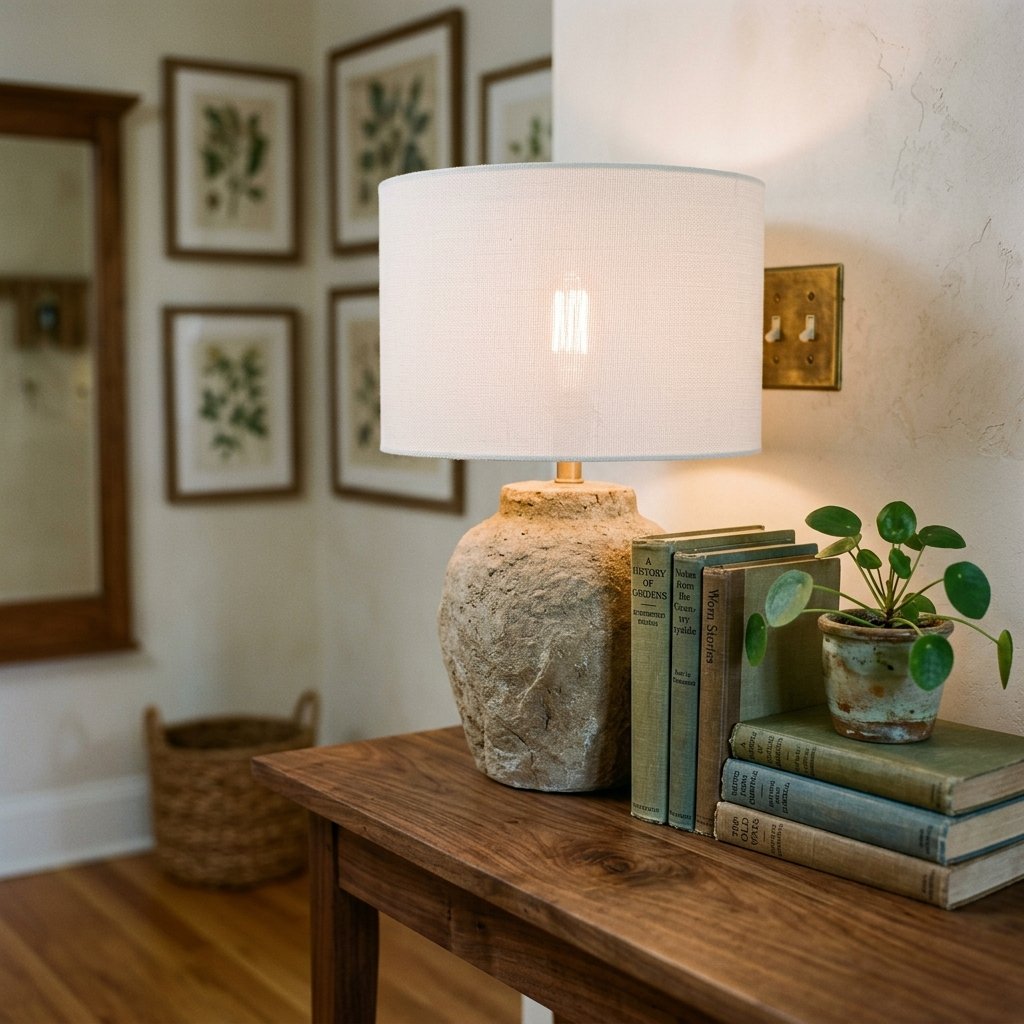
You have sanded, mixed, painted, aged, and sealed. Now it is time to remove the painter’s tape, screw in a fresh LED bulb, and top your masterpiece with a beautiful shade. The transformation from thrift store trash to high-end treasure is complete. But the real victory lies in the budget.
The Ultimate Frugal Decor Comparison
Let us look at exactly how much money this resourceful, crafty weekend project saved you compared to buying a brand new, textured ceramic lamp from a high-end catalog retailer.
| Item / Material | High-End Retailer Cost | Your Zero-Budget DIY Cost |
|---|---|---|
| Lamp Base | $150.00 – $250.00 | $4.00 (Thrift Store Find) |
| Textured Finish (Paint & Soda) | Included | $1.50 (Leftover paint + Pantry Baking Soda) |
| Lampshade | $40.00 – $80.00 | $12.00 (Target or Walmart basic linen shade) |
| Total Estimated Cost | $190.00 – $330.00 | $17.50 |
You just saved over $200 by utilizing a little bit of elbow grease and some clever upcycling!
Styling Tips for Maximum Impact
- The Lampshade Matters: Do not put the ugly, dusty thrift store shade back on your beautiful new base. Invest in a crisp, clean, drum-style lampshade. Linen, burlap, or woven jute shades pair incredibly well with the earthy, textured finish of baking soda paint.
- Location is Key: Place your newly upcycled lamp on an entryway console table, a rustic wooden nightstand, or a masculine leather-topped desk. The matte texture of the lamp contrasts beautifully against smooth surfaces like polished wood, glass, or metal.
- Warm Lighting: To highlight the organic texture of the faux-stone finish, use a warm white LED bulb (around 2700K). The warm light will cast soft shadows across the brush strokes, emphasizing the artisan, hand-crafted look you worked so hard to achieve.
Conclusion
Never Look at Trash the Same Way Again
The baking soda paint trick is more than just a viral DIY hack; it is a testament to the power of resourceful creativity. It proves that you do not need a massive decorating budget to have a home that feels curated, stylish, and high-end. All you need is a willingness to see the potential in forgotten items, a little bit of crafty ingenuity, and a box of baking soda from your kitchen pantry.
So, the next time you are wandering down the lighting aisle of your local Goodwill, do not quickly walk past the ugly, glossy, outdated lamps. Stop. Look at the shapes. Run your hands over the curves. Visualize the texture. Grab that $4 diamond in the rough, take it home, and create your very own designer masterpiece. Happy upcycling, and stay budget-savvy!

Makenzie is the founder and lead writer at MoneyHackTips.com — a personal finance blog dedicated to delivering street-smart financial wisdom for real people on real budgets. With 300+ published articles covering everything from debt management to investing fundamentals, Makenzie’s mission is to make every dollar work harder. When not writing about money hacks, Makenzie is testing frugal living strategies, optimizing side hustles, and helping readers build financial freedom from scratch.