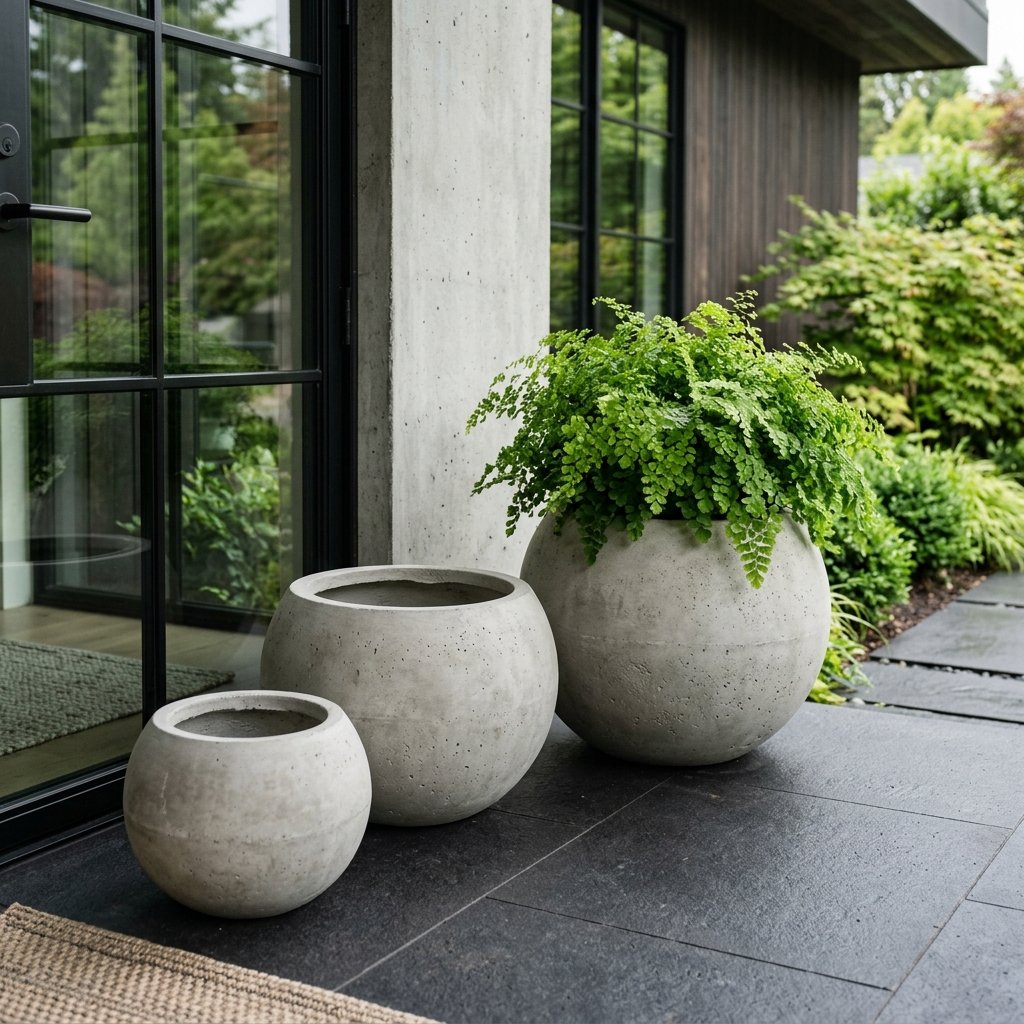

We have all been there—flipping through a high-end home catalog like Pottery Barn or West Elm, spotting a set of architectural stone spheres, and feeling that immediate ‘must-have’ urge. Then, you see the price tag: $150, $250, or even $400 for a single large planter. It is enough to make any budget-conscious decorator weep. But here is the secret the big-box retailers do not want you to know: you do not need a massive bank account to achieve that rugged, masculine-elegant aesthetic. You just need a bit of grit, a bag of concrete, and a trip to the toy aisle at the dollar store. In this guide, I am going to show you how to use $1.25 inflatable beach balls and play balls as the secret molds for stunning, heavy-duty faux concrete planters that look identical to their $200 counterparts. This is the ultimate trash-to-treasure hack for the frugal DIYer who refuses to compromise on style.
The High-End Aesthetic on a Thrift Store Budget
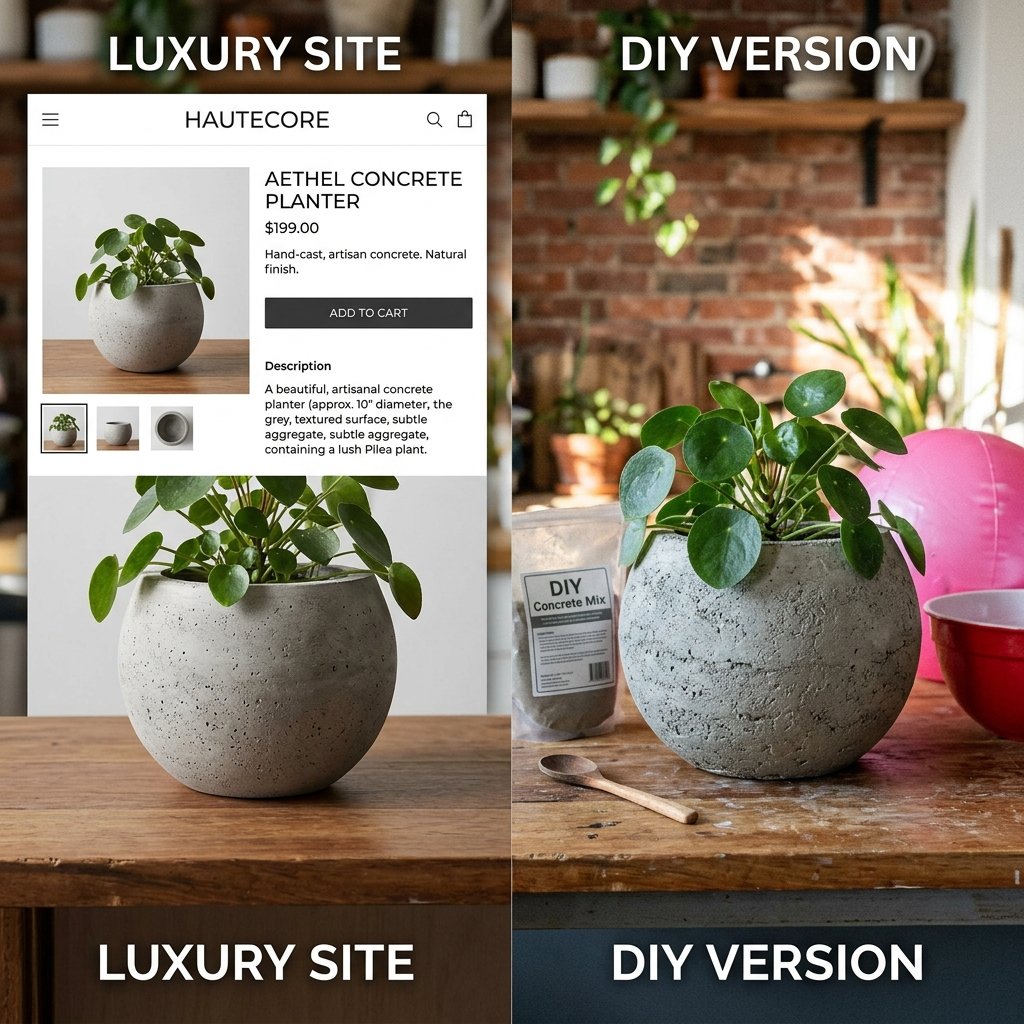
The beauty of the concrete sphere lies in its simplicity. It is a geometric form that feels both ancient and ultra-modern. However, buying pre-cast stone is expensive because of the shipping weight and the manufacturing markup. By making these ourselves, we are cutting out the middleman and the massive shipping fees. We are going to use a technique that mimics the look of solid stone while keeping the planters manageable in weight. Before we dive into the ‘how,’ let us look at the ‘why’—specifically, the massive savings you are about to pocket.
| Item | Pottery Barn Retail Price | DIY Dupe Cost |
|---|---|---|
| Small Sphere (8 inch) | $79.00 | $4.50 |
| Medium Sphere (12 inch) | $129.00 | $7.00 |
| Large Sphere (16 inch) | $199.00 | $12.00 |
| Total for Set | $407.00 | $23.50 |
That is a total savings of over $380. With that extra cash, you could buy the actual plants, a new outdoor rug, and still have enough for a celebratory steak dinner. The rugged texture we will create today is not just about saving money; it is about custom-built quality that lasts through every season.
Gathering Your Gear: The $10 Material Breakdown
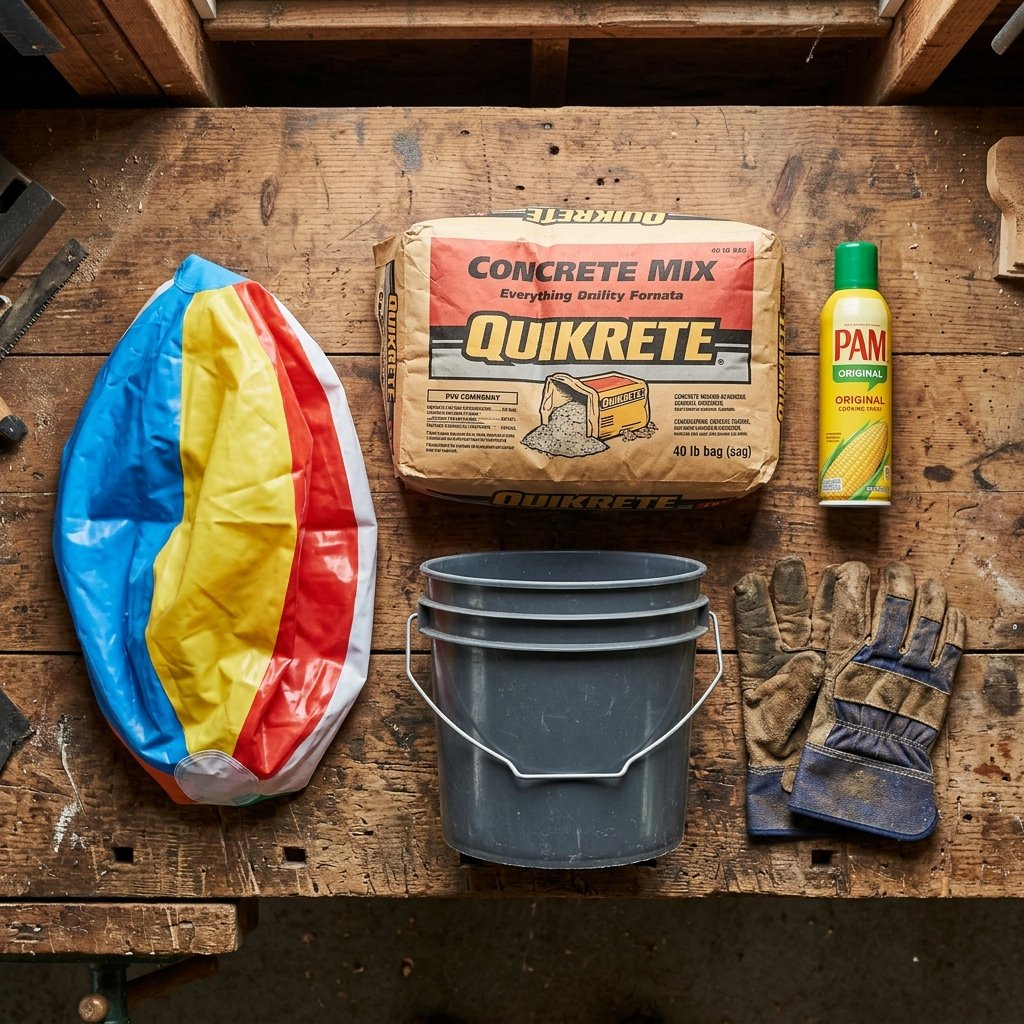
To pull off this heist of the century, you need the right supplies. Most of these can be found in your garage or at the local hardware store for pennies. The ‘mold’ is the most clever part of this build. Instead of expensive silicone or plastic molds, we are using inflatable balls. They are perfectly spherical, come in various sizes, and are incredibly easy to remove once the concrete sets.
Essential Materials List:
- Inflatable Balls: Grab beach balls for large planters and playground kick-balls for smaller ones (Cost: $1.25 each).
- Quikrete Sand Topping Mix: This provides a smoother finish than standard gravel-filled concrete (Cost: $6.00 per bag).
- Portland Cement: For a smoother, more ‘artistic’ slurry (Optional).
- Cooking Spray or Vegetable Oil: This acts as our mold release agent (Cost: $1.00).
- Fiber Mesh or Chicken Wire: To reinforce the larger spheres (Cost: $5.00 for a roll).
- Plastic Bowls: To act as a ‘base’ so your balls do not roll away during the curing process.
Budget Guru Mantra: Never buy what you can scavenge. Check your local ‘Buy Nothing’ groups for leftover bags of concrete or old inflatable toys before heading to the store!
Mastering the Mix: The Perfect Stone Slurry

The secret to that ‘expensive’ look is the texture of the concrete. You do not want chunky, gravel-heavy sidewalk concrete. You want a mixture that is creamy enough to spread but thick enough to hold its shape on a curved surface. We call this the ‘peanut butter’ consistency. If it is too runny, it will slide off the ball; too dry, and it will crumble.
The Golden Ratio Recipe:
| Ingredient | Ratio Part | Purpose |
|---|---|---|
| Sand Topping Mix | 3 Parts | The structural body and grit. |
| Portland Cement | 1 Part | Smoothness and binding power. |
| Water | 0.5 to 1 Part | Hydration (Add slowly!). |
| Liquid Concrete Colorant | Dash | For that deep charcoal or slate look. |
Safety First: Concrete is a caustic material. Always wear a dust mask when mixing dry powder and heavy-duty rubber gloves to protect your hands from ‘concrete burns’ and drying.
Mix your dry ingredients first in a 5-gallon bucket. Slowly add water while stirring with a sturdy stick or a drill mixer. You are looking for a texture that stays on your trowel even when turned sideways. If you want a more aged, ‘European Estate’ look, you can add a handful of peat moss to the mix to create ‘Hypertufa,’ which allows moss to grow on the sphere over time.
Step-by-Step: Turning Toys into Architectural Art
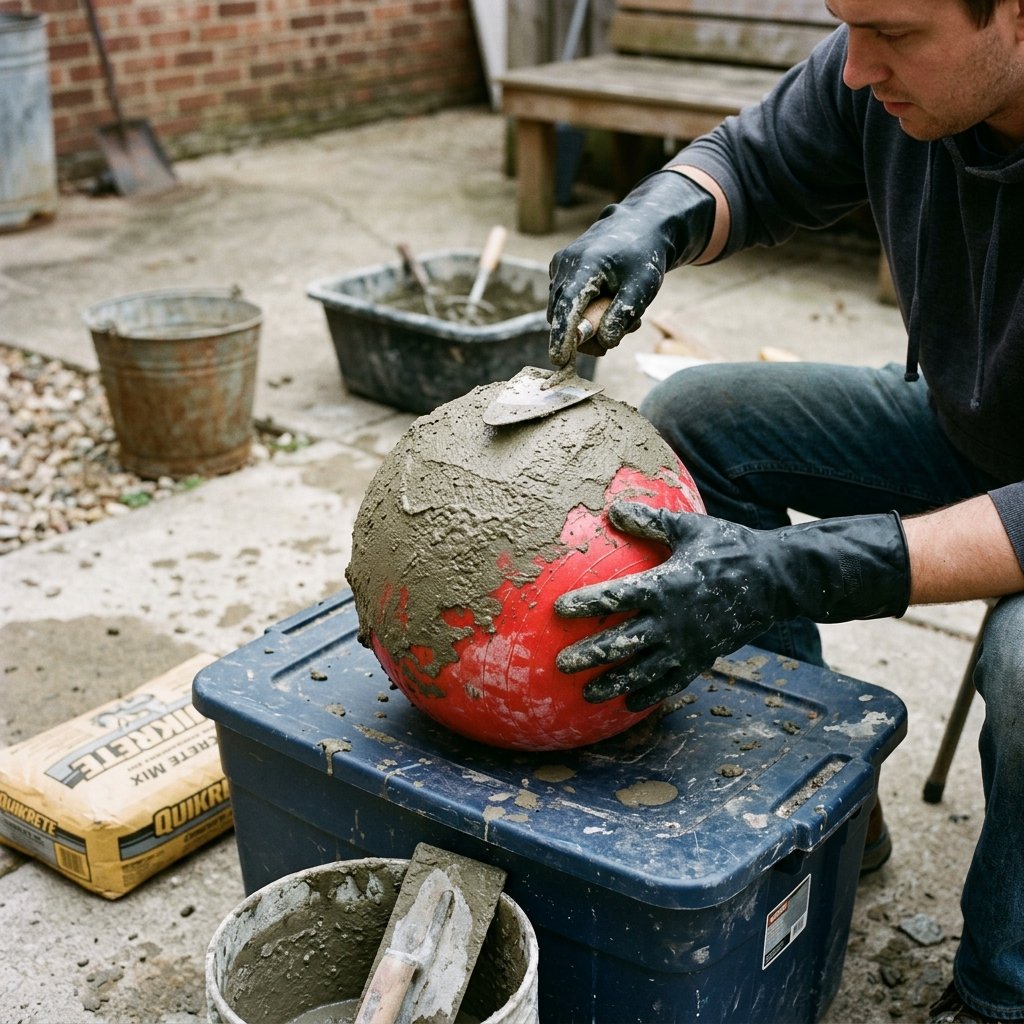
Now for the fun part. This process requires a bit of patience, but the results are incredibly rewarding. We will be building the planter in layers to ensure it is strong enough to hold soil and a plant.
The Application Process:
- Prep the Mold: Inflate your ball to its full size. Coat the entire exterior liberally with cooking spray. This ensures the concrete doesn’t bond to the plastic.
- Set the Base: Place the ball on a plastic bowl or a roll of duct tape so it stays stationary.
- Apply the First Layer: Start at the top (which will eventually be the bottom of your planter) and spread a 1/2 inch layer of concrete over the ball, covering about 75% of the surface. Leave a circular opening at the bottom (which is currently the top) for the plant to go in later.
- Reinforce (For Large Spheres): While the first layer is wet, press pieces of fiber mesh or chicken wire into the concrete. This prevents cracking.
- The Final Coat: Apply a second 1/2 inch layer over the mesh. Use your hands (in gloves!) to smooth the surface or leave it slightly rugged for a hand-carved stone look.
- Create Drainage: Poke a small hole through the concrete at the very top (the base) using a 1/2 inch PVC pipe or a thick dowel. Drainage is key for plant health!
Let the sphere cure in a shady spot for at least 24 to 48 hours. Do not rush this! Concrete gains its strength through a slow chemical reaction with water.
The Art of the Finish: Achieving the Aged Patina
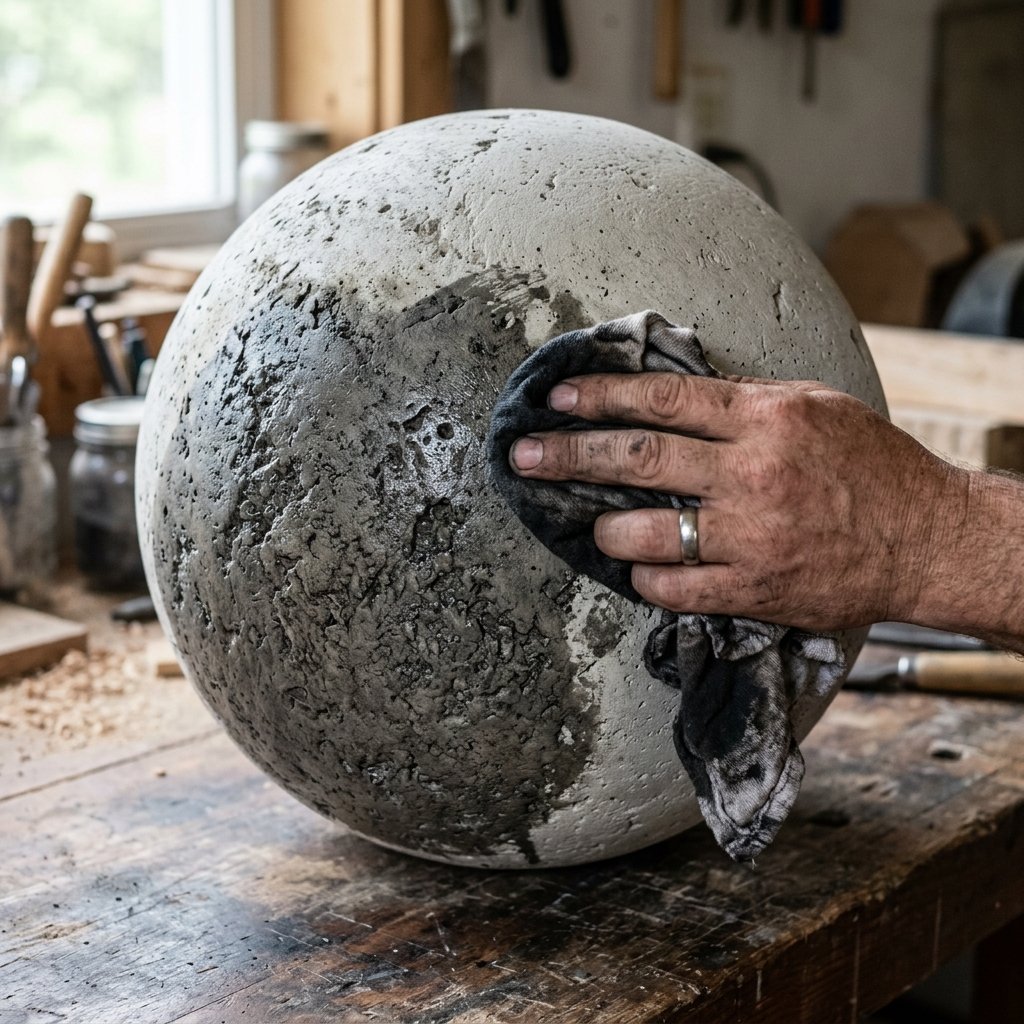
Once the concrete is hard to the touch, it is time for the big reveal. Deflate the ball by poking a hole in the valve or cutting it. The ball should peel away easily, leaving a hollow stone sphere. But we are not done yet! To get that true Pottery Barn look, we need to address the finish. Raw concrete can look a bit ‘flat’ and DIY-ish if left alone.
Refining the Surface:
- Sanding: Use a 60-grit sanding block to knock down any sharp edges or drips. This gives it a honed, professional finish.
- The ‘Wash’ Technique: Mix a tiny bit of black or dark brown acrylic paint with 90% water. Brush this over the sphere and immediately wipe it off with a rag. The pigment will settle into the crevices, highlighting the texture and giving it an aged, weathered look.
- Sealing: If you live in a climate with harsh winters, apply a coat of matte concrete sealer. This prevents water from seeping into the pores, freezing, and cracking your masterpiece.
By using these finishing techniques, you transition the piece from a ‘craft project’ to a ‘designer element.’ The goal is to make people ask, ‘Where did you buy that?’ rather than ‘How did you make that?’
Maintenance and Styling: Keeping Your Spheres Weather-Ready
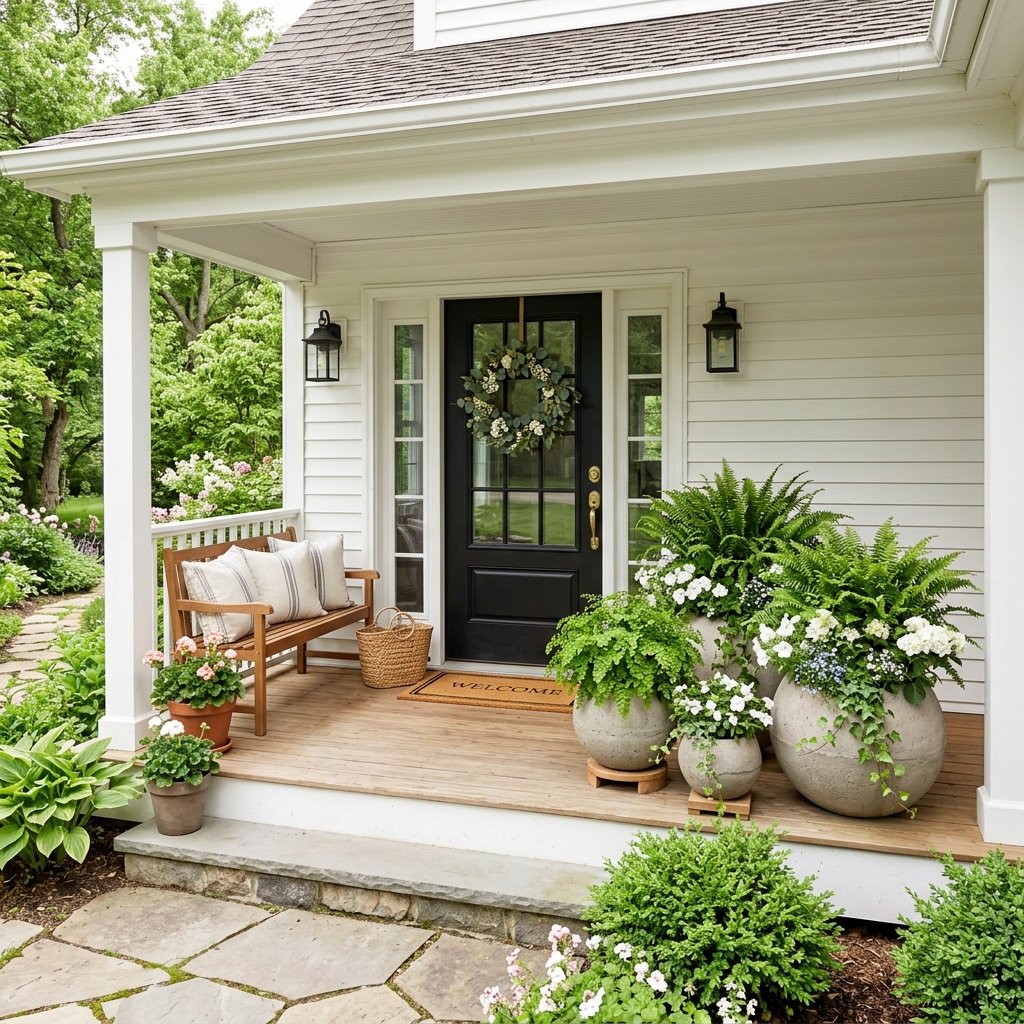
Your new planters are heavy-duty, but a little care goes a long way. Because these are ‘faux’ stone made with a thin-shell technique, they are much lighter than solid concrete, making them easier to move. However, they can still weigh 15 to 30 pounds depending on size, so be careful when lifting.
Styling Tips for Maximum Impact:
- The Rule of Three: Group your spheres in odd numbers (a small, medium, and large) to create a professional-looking vignette.
- Plant Selection: These look best with ‘spiller’ plants like Ivy or Creeping Jenny, or structural plants like Snake Plants or Agave for a modern look.
- Elevate: Place one of the spheres on a small wooden pedestal or a stack of bricks to create varying heights on your porch.
Total time investment? About 2 hours of active work and 2 days of drying time. Total savings? Nearly $400. That is the power of a resourceful mind and a few cheap inflatable balls. You have successfully upgraded your home’s curb appeal with a project that is as rugged and practical as it is elegant.
Conclusion
Creating high-end home decor does not require a high-end budget; it requires a bit of creative engineering. By looking at a $1.25 toy and seeing a professional mold, you have mastered the art of the ‘Trash-to-Treasure’ lifestyle. These faux concrete sphere planters are more than just a Pottery Barn dupe—they are a testament to your DIY prowess. They are durable, stylish, and uniquely yours. So, the next time you find yourself drooling over a luxury catalog, remember: you have the tools, the grit, and the cleverness to build it yourself for a fraction of the cost. Now, get out there, grab some concrete, and start molding your dream home, one sphere at a time!

Makenzie is the founder and lead writer at MoneyHackTips.com — a personal finance blog dedicated to delivering street-smart financial wisdom for real people on real budgets. With 300+ published articles covering everything from debt management to investing fundamentals, Makenzie’s mission is to make every dollar work harder. When not writing about money hacks, Makenzie is testing frugal living strategies, optimizing side hustles, and helping readers build financial freedom from scratch.