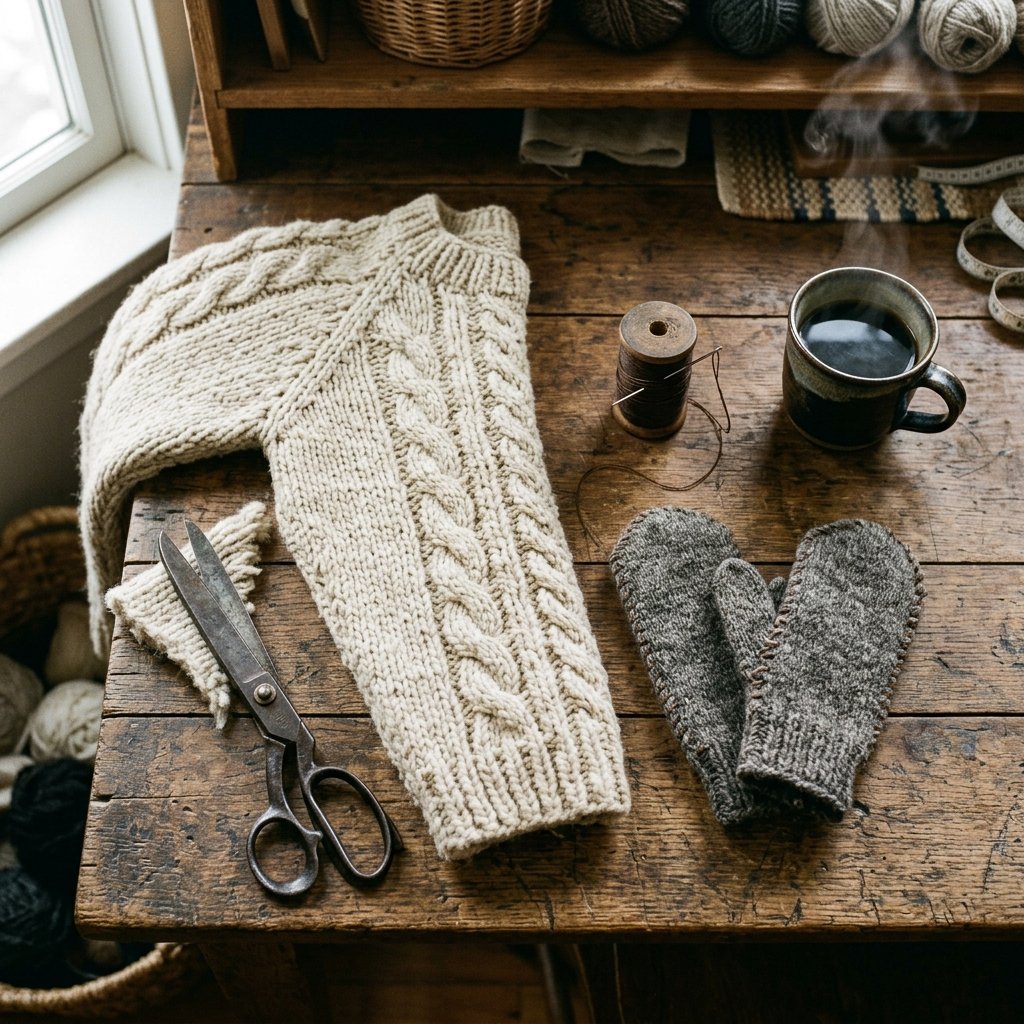

We have all been there. You are doing the laundry, rushing through the chores, and a beautiful, expensive wool sweater accidentally makes its way into a hot water wash and a high-heat tumble dry. When you pull it out, it has shrunk to a size that would barely fit a toddler. The fibers are dense, matted, and stiff. Before you resign yourself to throwing it in the trash or donating it in shame, stop! You have just accidentally performed one of the greatest textile magic tricks known to frugal crafters: you have felted wool.
Welcome to the ultimate trash-to-treasure masterclass. In the world of resourceful DIY and budget-savvy upcycling, a ruined sweater is not a tragedy; it is an opportunity. That dense, wind-proof, ultra-warm felted wool is the exact material high-end outdoor brands use to make winter gear that retails for upwards of $60 to $100. But today, we are going to harness our inner craftsman, pick up our shears, and transform that unwearable garment into the absolute coziest, most rugged winter mittens you will ever own—for exactly $0.00.
“The essence of frugal upcycling is seeing not what an object is, but what it has the potential to become. A ruined sweater is just a pair of premium mittens waiting to be cut free.”
Whether you are a handy parent looking to outfit your kids for a snowball fight without breaking the bank, a crafty gift-giver preparing for the holidays, or an outdoor enthusiast who appreciates the masculine-elegant utility of custom-made gear, this project is for you. This comprehensive guide will walk you through every step of the process, from selecting the perfect donor sweater to drafting a custom blueprint for your hands, executing the perfect stitch, and even adding rugged leather palm grips for chopping firewood or scraping icy windshields. Let us dive into the craft and turn your laundry mishap into your favorite winter accessory.
Selecting the Right Knit: The Thrift Store Hunter’s Guide to Wool and Felting
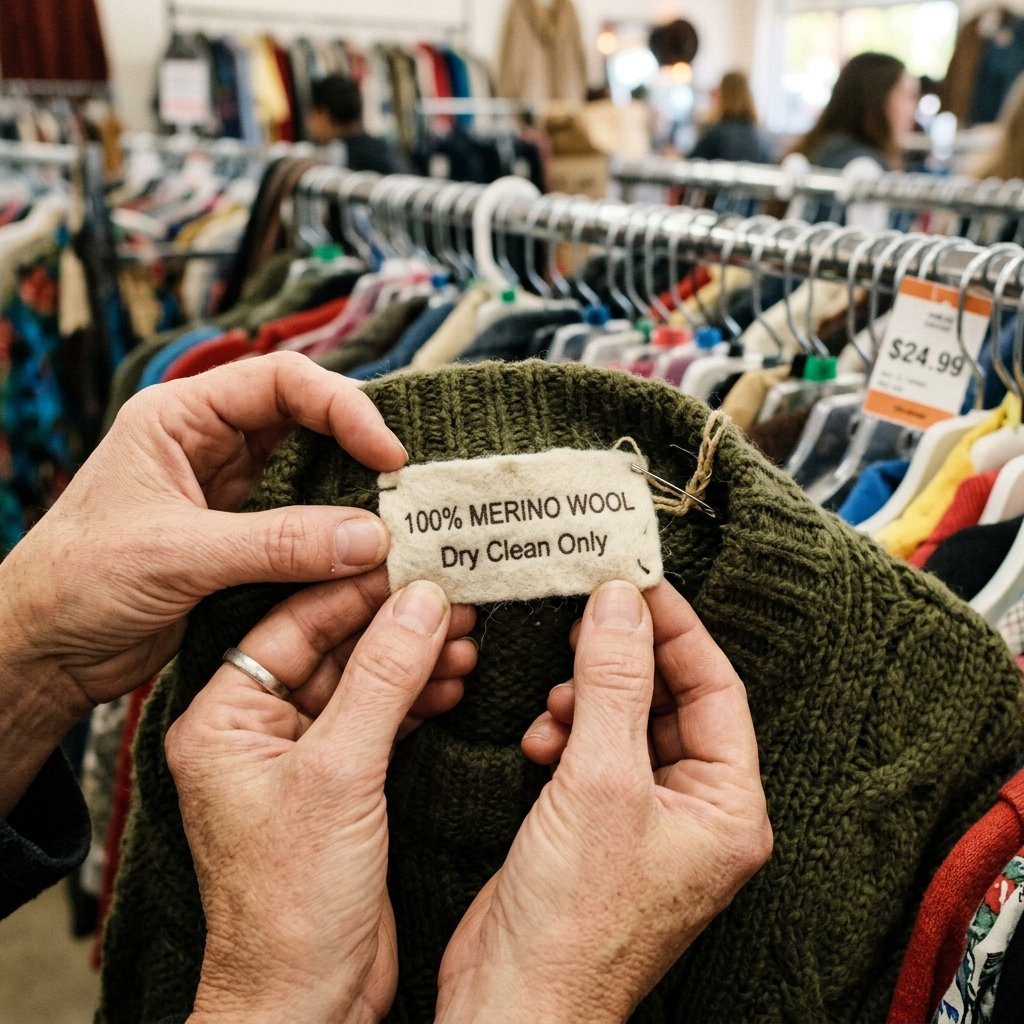
Not all sweaters are created equal when it comes to crafting premium winter mittens. If you do not have a shrunken sweater in your own closet, your local thrift store is an absolute goldmine for this project. You can often find high-quality wool garments in the clearance bins for as little as $1.00 to $3.00. But to make mittens that actually block the biting winter wind and trap your body heat, you need to understand the science of the fabric.
The Magic of 100% Wool
When hunting for your donor sweater, always check the tag. You are looking for garments that are at least 80% animal fiber. This includes sheep’s wool, merino, cashmere, alpaca, or angora. Avoid acrylic, polyester, or heavy cotton blends. Synthetic fibers do not have the microscopic scales that animal hairs possess, which means they cannot ‘felt’ or lock together.
The Felting Process Explained
If you find a wool sweater that hasn’t already been shrunken, you will need to felt it yourself. Felting is the process of applying heat, moisture, and agitation to wool fibers, causing them to interlock tightly. This creates a dense fabric that will not unravel when you cut it with scissors—a crucial feature for our mitten project.
- Step 1: Place your 100% wool sweater into your washing machine.
- Step 2: Add a small amount of heavy-duty laundry detergent to help strip the fibers.
- Step 3: Wash on the hottest water setting possible, with the highest level of agitation.
- Step 4: Transfer the wet sweater to the dryer and dry it on high heat.
- Step 5: Repeat if necessary until the stitches are no longer visible and the fabric feels thick, dense, and slightly stiff.
“Safety Note: When working with thrifted garments, always launder them thoroughly before cutting. If you are felting a sweater, ensure your washing machine lint trap is clear, as wool can shed heavily during the agitation process.”
The Frugal Crafter’s Arsenal: Tools, Materials, and the Economics of Upcycling
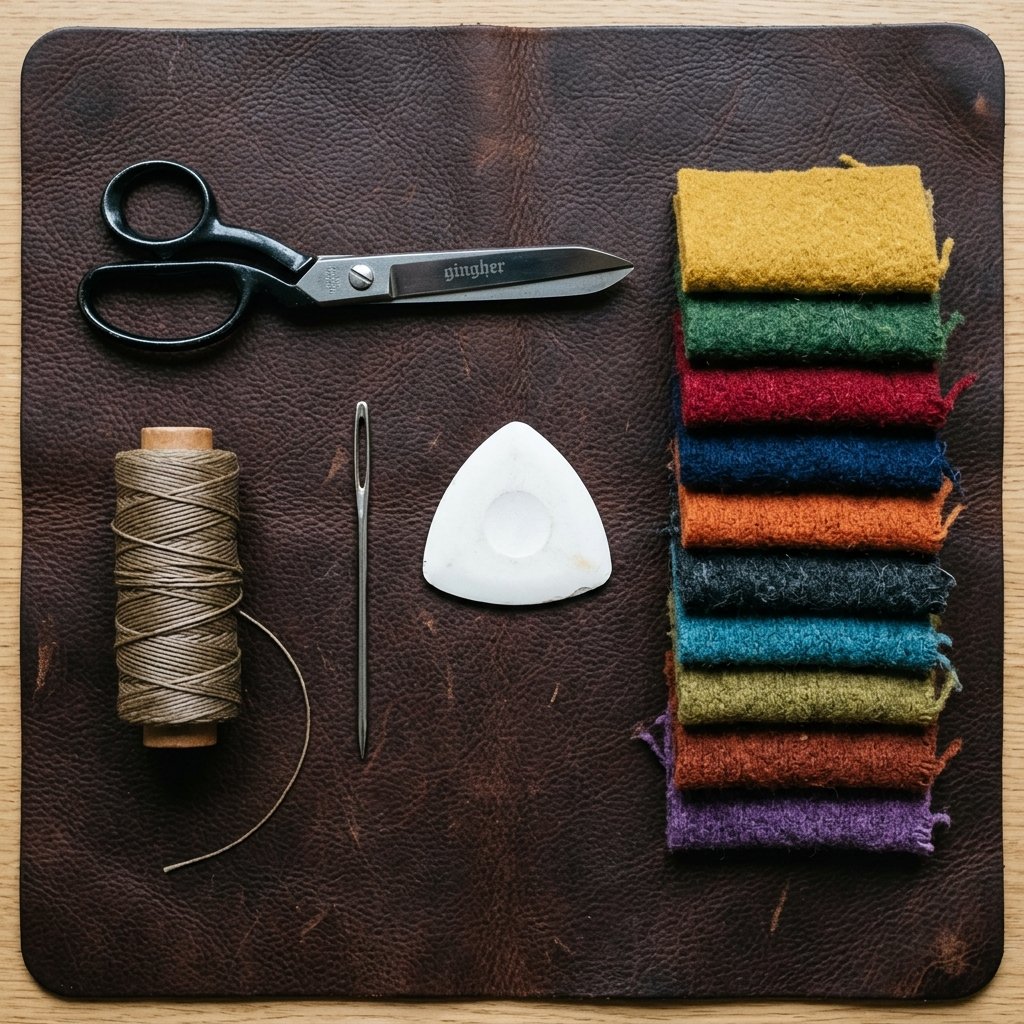
One of the most satisfying aspects of this project is the incredibly low barrier to entry. You do not need a multi-thousand-dollar sewing machine or a dedicated crafting studio to produce a high-end result. In fact, the tools required for this project are likely already sitting in your junk drawer or basic household sewing kit. Let us break down the materials needed and look at the undeniable economics of DIY upcycling.
Your Tool Kit
- A Felted Wool Sweater: The star of the show. One large adult sweater can yield up to three pairs of mittens!
- Fabric Shears: Sharp scissors are essential for cutting through thick felted wool without fraying the edges.
- Heavy-Duty Thread or Embroidery Floss: For a rugged, durable seam that can withstand snowball fights and winter chores.
- A Large Darning Needle: Thick enough to pierce the wool and carry your heavy thread.
- Chalk or a Washable Marker: For tracing your hand blueprint directly onto the fabric.
- Straight Pins: To hold the fabric layers together while you sew.
The Economics of Upcycling: DIY vs. Store-Bought
Let us look at the hard numbers. High-quality, 100% wool mittens are a premium item in retail stores. By utilizing your resourceful skills, you are not just saving pennies; you are keeping significant cash in your wallet while producing a superior, custom-fitted product.
| Item / Expense | Retail (Store-Bought) | Frugal DIY (Upcycled) |
|---|---|---|
| 100% Wool Outer Shell | $45.00 | $0.00 (from old sweater) |
| Heavy-Duty Thread | N/A (Included in retail) | $1.50 (lasts for 10+ pairs) |
| Custom Tailored Fit | $15.00 (Alteration fee) | 100% Free |
| Labor / Time Investment | $0.00 (0 minutes) | 30 minutes of fun crafting |
| Total Estimated Cost | $60.00+ | $1.50 or less! |
By investing just 30 minutes of your time, you are creating a bespoke winter accessory that rivals anything found in a high-end outdoor catalog. This is the essence of budget-savvy living.
Drafting the Master Blueprint: How to Create a Custom Mitten Pattern
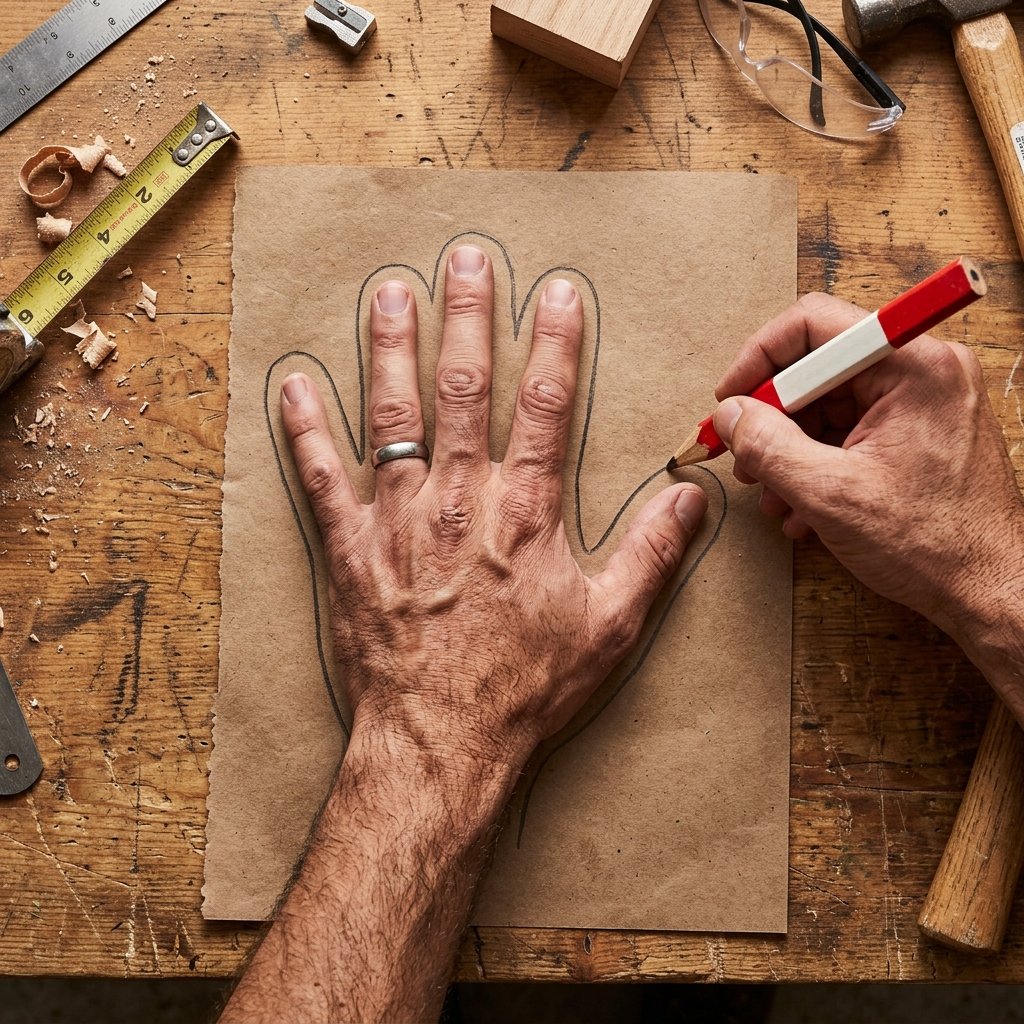
The secret to a mitten that feels like a warm hug for your hands lies in the custom pattern. Because we are making these from scratch, we have the luxury of tailoring them exactly to the wearer’s hand size—whether it is a tiny toddler or a lumberjack with massive paws. Drafting your blueprint is incredibly simple and requires nothing more than a piece of scrap paper or cardboard.
Step-by-Step Pattern Drafting
- Position the Hand: Place your non-dominant hand flat onto a piece of sturdy paper or a flattened cereal box. Keep your four fingers together and extend your thumb out naturally at a comfortable 45-degree angle.
- Trace the Outline: Take a pen and trace around your hand. Do not trace tight against your skin; you want to leave a little breathing room for the thick wool.
- Add the Seam Allowance: This is the most critical step! Once you have your basic outline, draw a second line exactly 1/2 inch outside of your first line all the way around. This extra space ensures that when you sew the seams together, the mitten will still fit your hand perfectly.
- Shape the Cuff: Extend the bottom lines straight down past your wrist to your desired cuff length. A longer cuff tucked into a winter coat is excellent for keeping out drafts.
- Cut the Blueprint: Use paper scissors (never your good fabric shears!) to cut out your cardboard template. You now have a reusable, custom-sized mitten blueprint.
“Pro-Tip: When tracing the thumb crotch (the ‘V’ shape between your thumb and index finger), round it out slightly rather than making a sharp, deep ‘V’. A rounded seam is much stronger and less likely to tear when you grip a snow shovel or a steering wheel.”
The Cutting Room Floor: Slicing and Prepping Your Sweater Pieces
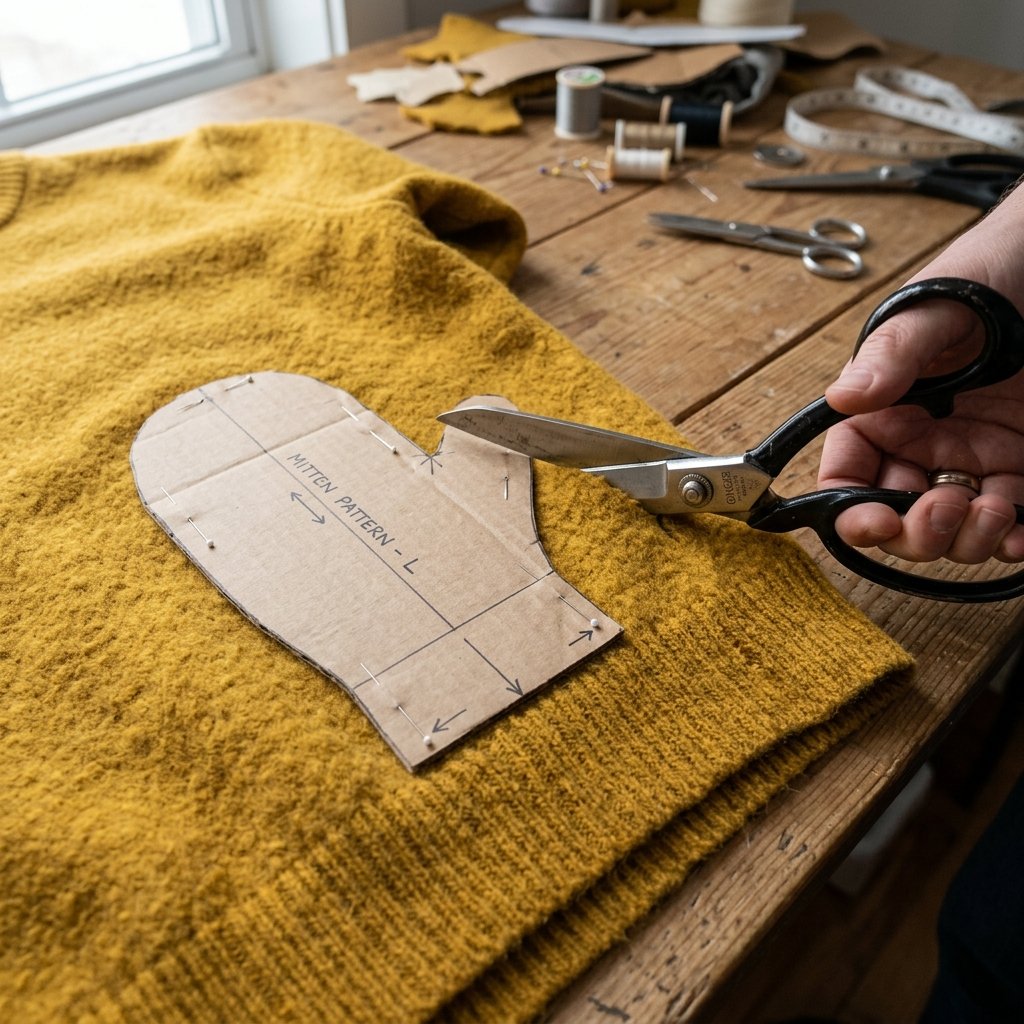
With your custom blueprint in hand, it is time to face the sweater. This is where your resourceful eye comes into play. A sweater is not just a flat piece of fabric; it has built-in features that we can exploit to make our mittens even better. The ribbed bottom hem of the sweater, for example, makes a perfect, pre-finished wrist cuff that hugs the arm tightly.
Strategic Pattern Placement
Lay your felted sweater flat on your dining table or workbench. Smooth out any wrinkles. Take your cardboard blueprint and lay it over the sweater. The smartest move here is to align the bottom edge of your pattern (the wrist opening) directly with the ribbed bottom hem of the sweater. By doing this, you instantly save yourself from having to sew or hem the bottom of the mitten!
Executing the Cut
- Pin it Down: Once you have aligned the pattern with the hem, use straight pins to secure the cardboard to both the front and back layers of the sweater.
- Trace the Chalk Line: Use your tailor’s chalk to trace the outline of the cardboard directly onto the wool.
- Cut Both Layers: Using your sharp fabric shears, cut slowly and deliberately through both the front and back layers of the sweater at the same time. This ensures that the front and back of your mitten will match perfectly.
- Repeat for the Second Hand: Flip your cardboard pattern over (this is crucial so you don’t end up with two left mittens!) and repeat the process on the other side of the sweater’s hem.
You should now have four pieces of wool: two for the left hand and two for the right hand. Save the leftover sweater scraps! They are excellent for patching clothes, making dog toys, or crafting tiny ornaments.
Stitch by Stitch: The Assembly and Sewing Masterclass
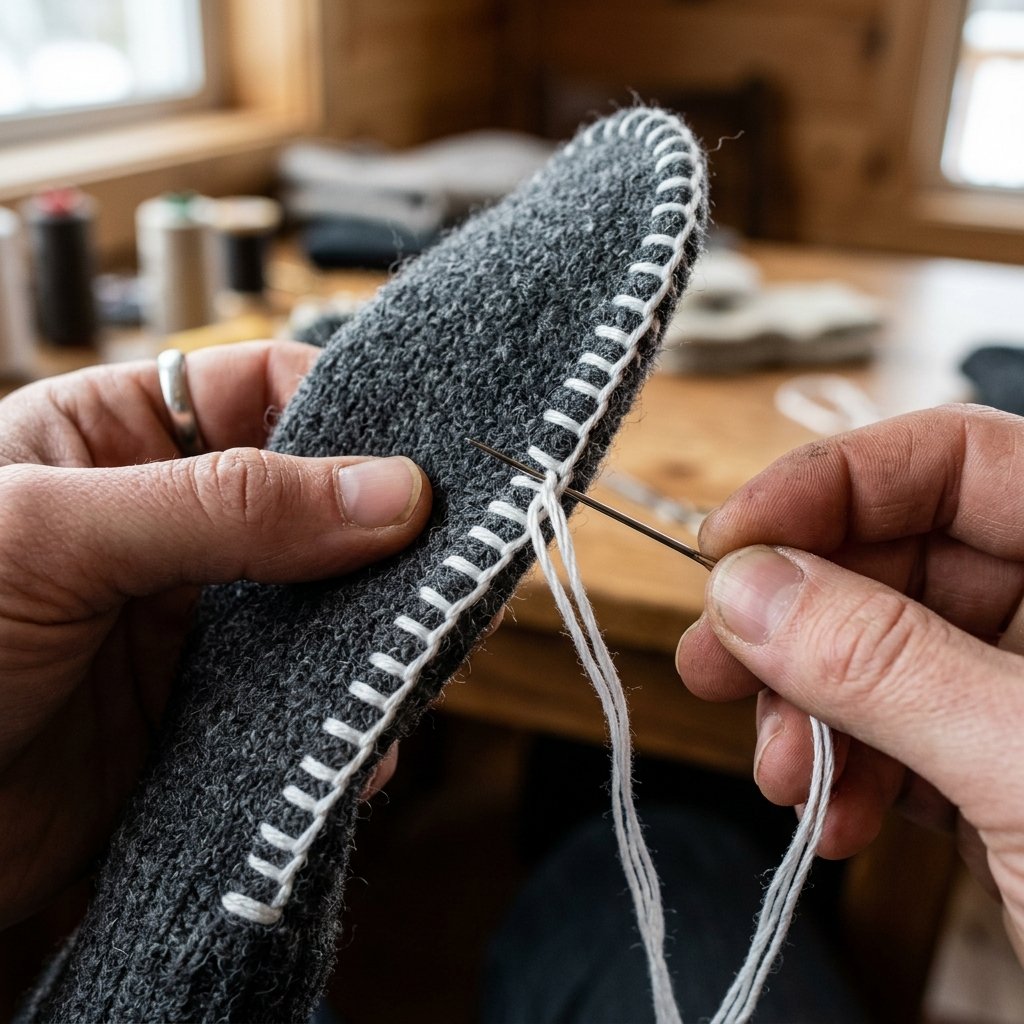
Now we enter the heart of the craft: the assembly. While you can absolutely run these through a sewing machine equipped with a heavy-duty needle, hand-sewing them adds a rugged, artisanal quality that looks incredibly high-end. Plus, hand-sewing allows you to sit by the fire with a cup of coffee and craft in peace. We are going to use the classic blanket stitch—a functional and decorative stitch that binds the edges securely.
Preparing for the Stitch
Take the two pieces for your right mitten. Place them together so the inside of the sweater (the less pretty side) is facing outward. This is called sewing ‘right sides together’. If you plan to leave your stitches exposed on the outside for a rustic, mountain-man look, you can place them ‘wrong sides together’. Pin the edges securely every inch or so to prevent the thick wool from shifting.
The Hand-Sewing Technique
- Thread the Needle: Cut a piece of heavy-duty thread or embroidery floss about the length of your arm. Thread your darning needle and tie a sturdy knot at the end.
- Start at the Cuff: Begin sewing at one side of the wrist opening. Push the needle through both layers of wool from back to front.
- The Blanket Stitch: To create a blanket stitch, push the needle through both layers again, about a quarter-inch up from your first stitch. Before pulling the thread completely tight, pass your needle through the loop of thread that forms. Pull tight. This creates a binding thread that sits right on the raw edge of the wool.
- Navigate the Curves: Continue this stitch all the way around the perimeter of the mitten. Take your time around the curve of the fingertips and the thumb. Keep your stitches tight and uniform—about a quarter-inch apart and a quarter-inch deep.
- Reinforce the Thumb Crotch: When you reach the ‘V’ between the thumb and the hand, double up your stitches. This area takes the most stress when you open your hand, so extra reinforcement here is a highly practical move.
- Tie Off: Once you have sewn all the way around to the other side of the wrist cuff, tie a strong double knot and snip the excess thread.
If you sewed your mittens ‘right sides together’, simply reach inside and turn the mitten right-side out. Use the blunt end of a pencil to gently push out the thumb and the rounded top. Slip it onto your hand and marvel at your craftsmanship!
Rugged Refinements: Adding Leather Palms and Fleece Linings
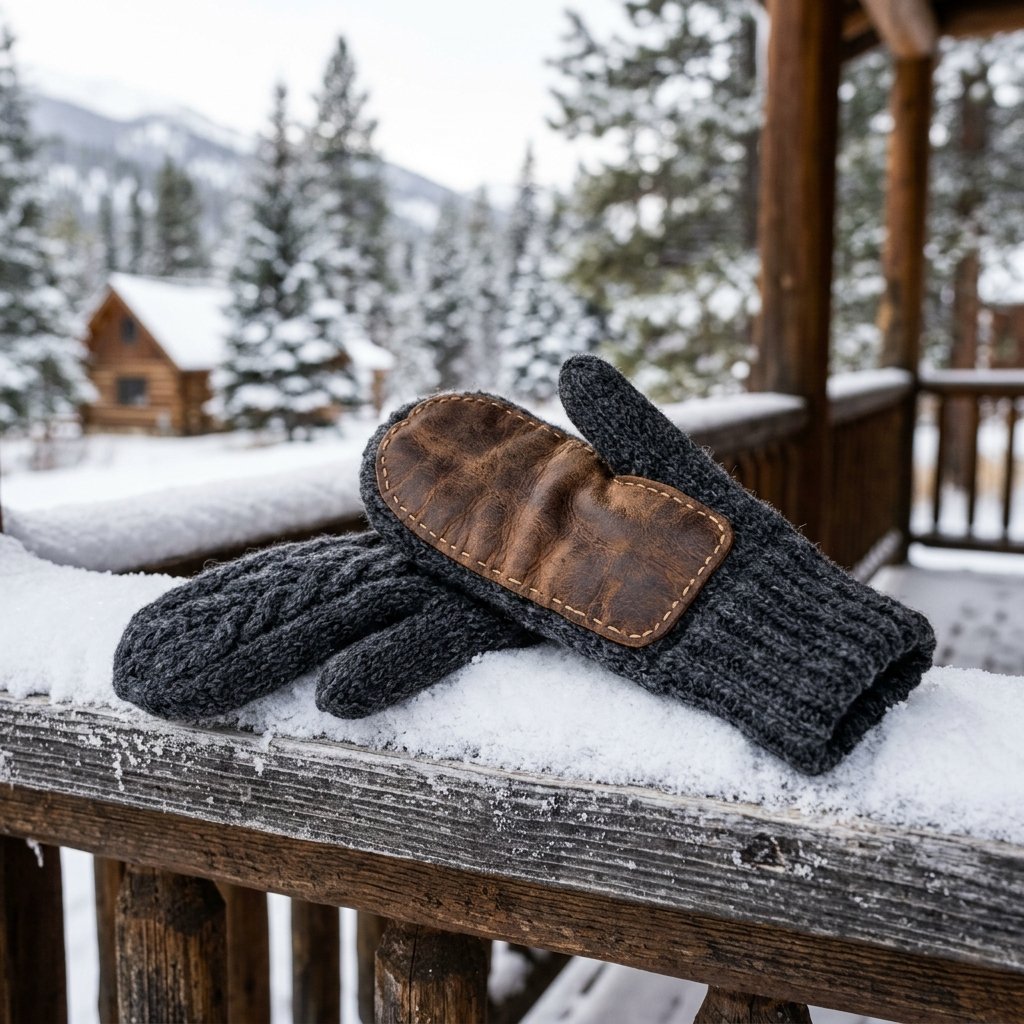
Your basic upcycled sweater mittens are already warmer and more durable than 90% of the gloves sold in big-box stores. But if you want to elevate this project from a simple craft to a piece of heirloom-quality, rugged winter gear, it is time to add some masculine-elegant refinements. Adding a leather palm provides immense grip and durability for outdoor work, while a fleece lining adds an impenetrable layer of coziness.
The Leather Palm Upgrade
Wool is incredibly warm, but it can be slippery on a steering wheel or a snow shovel. Adding a leather grip solves this problem. You do not need to buy expensive leather hides; resourcefully harvest scrap leather from an old thrifted purse, a damaged leather jacket, or an old couch cushion.
- Cut the Grip: Before sewing the front and back of your mitten together, cut a piece of scrap leather into an oval or a shape that covers the palm and the inside of the thumb.
- Punch the Holes: Leather is tough to sew through. Use a leather punch, an awl, or even a small nail to pre-punch a perimeter of holes around the edge of your leather patch.
- Stitch it Down: Use waxed heavy-duty thread to stitch the leather patch onto the palm piece of your wool mitten. A simple running stitch or a saddle stitch looks incredibly rugged and professional. Once the leather is attached, proceed to sew the front and back of the mitten together as normal.
The Double-Layer Fleece Lining
If you live in a climate with sub-zero temperatures, consider adding a micro-fleece lining. To do this, simply use your cardboard blueprint to cut out a second set of mitten pieces from an old fleece blanket or pullover. Sew the fleece pieces together exactly as you did the wool, but leave the seams on the outside. Slip the sewn fleece mitten inside the sewn wool mitten, and tack them together with a few invisible stitches at the wrist cuff. The result is a dual-layer, wind-proof, ultra-insulated fortress for your hands.
“Frugal Upcycler’s Mantra: Never buy what you can build, and never throw away what you can transform. A scrap of leather and an old sweater are the raw materials of winter survival.”
Conclusion
And there you have it—a masterclass in resourceful, budget-savvy upcycling. By looking at a ruined, shrunken sweater not as a piece of trash, but as a premium textile waiting to be repurposed, you have created a stunning, highly functional pair of winter mittens. You have bypassed the retail markups, saved perfectly good materials from the landfill, and honed your hand-sewing skills in the process.
These upcycled sweater mittens make incredibly thoughtful, zero-waste gifts for teachers, friends, and family members during the holiday season. Wrap them in some brown kraft paper, tie them with a piece of twine, and you have a beautifully rustic, handcrafted present that costs absolutely nothing but carries immense sentimental value. So, the next time the laundry machine shrinks a favorite knit, do not despair. Grab your fabric shears, draft your blueprint, and get to stitching. Stay warm, stay crafty, and keep upcycling!

Makenzie is the founder and lead writer at MoneyHackTips.com — a personal finance blog dedicated to delivering street-smart financial wisdom for real people on real budgets. With 300+ published articles covering everything from debt management to investing fundamentals, Makenzie’s mission is to make every dollar work harder. When not writing about money hacks, Makenzie is testing frugal living strategies, optimizing side hustles, and helping readers build financial freedom from scratch.