Taking Control of Your Wardrobe, One Stitch at a Time
There is a quiet, rugged dignity in maintaining your own gear. Whether it is oiling a leather work boot, sharpening a pocket knife, or mending your favorite garments, true resourcefulness knows no bounds. But when it comes to delicate fabrics like silk, even the most confident DIYers and handy parents tend to freeze up. Silk is notoriously slippery, fragile, and unforgiving. Because of this, professional tailors charge a premium—often upwards of $25 to $50—just to adjust the hem of silk trousers or pajama pants. They want you to believe it requires industrial machinery and years of apprenticeship.
We are here to bust that myth wide open. You do not need a heavy-duty sewing machine or an expensive tailor to get a flawless, invisible finish. In fact, a sewing machine is often the worst tool for silk, causing unsightly puckering and tension issues. The ultimate, budget-savvy secret to tailoring silk lies in the hands—specifically, a centuries-old hand-sewing technique known as the blind catch-stitch. With a minimal investment of about $3 for a spool of quality thread and exactly 10 minutes of your time, you can achieve a high-end, bespoke finish right at your kitchen table. Welcome to the masterclass in frugal, crafty tailoring.
The Anatomy of a Flawless Hand-Stitched Hem
Why Hand-Sewing Beats the Machine for Delicate Fabrics
Before we thread the needle, it is crucial to understand why this crafty trick works so well. Silk fibers are strong but incredibly smooth, meaning machine feed dogs often chew them up or create micro-tears. Furthermore, a machine straight-stitch locks the fabric in place, eliminating the natural drape and flow that makes silk so elegant in the first place.
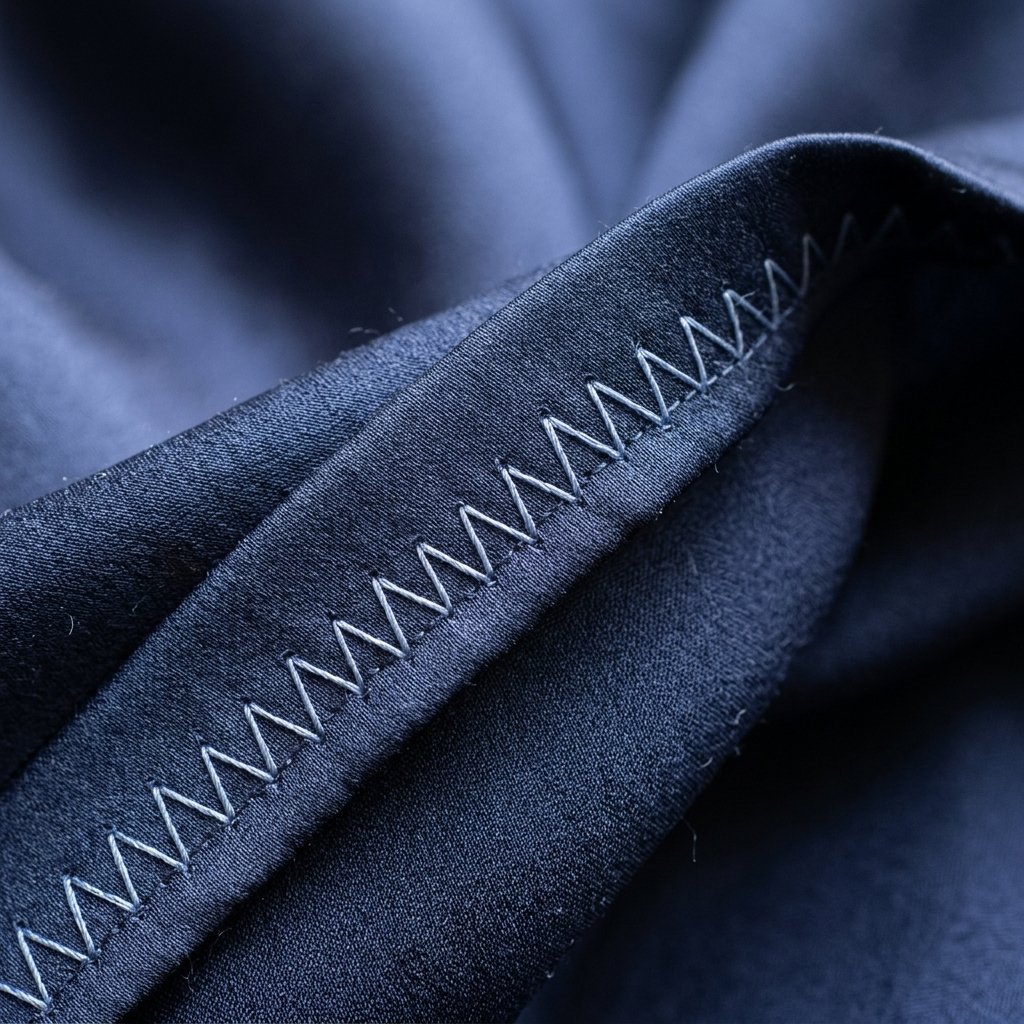
The secret weapon of the frugal master tailor is the blind catch-stitch (sometimes called a herringbone stitch). This specific technique builds a tiny bit of slack into the hem. It allows the silk to move, stretch slightly, and hang perfectly straight without any visible thread lines on the outside of the pants. It is an invisible mending marvel that respects the integrity of the fabric while keeping your hard-earned cash in your wallet.
“True craftsmanship isn’t about having the most expensive tools; it’s about knowing exactly how to use the simplest ones. A single needle and thread, guided by patience, will out-perform a rushed machine every single time.”
The Frugal Master Tailor’s Toolkit: Gathering Your Arsenal
Equipping Yourself for Success on a Dime
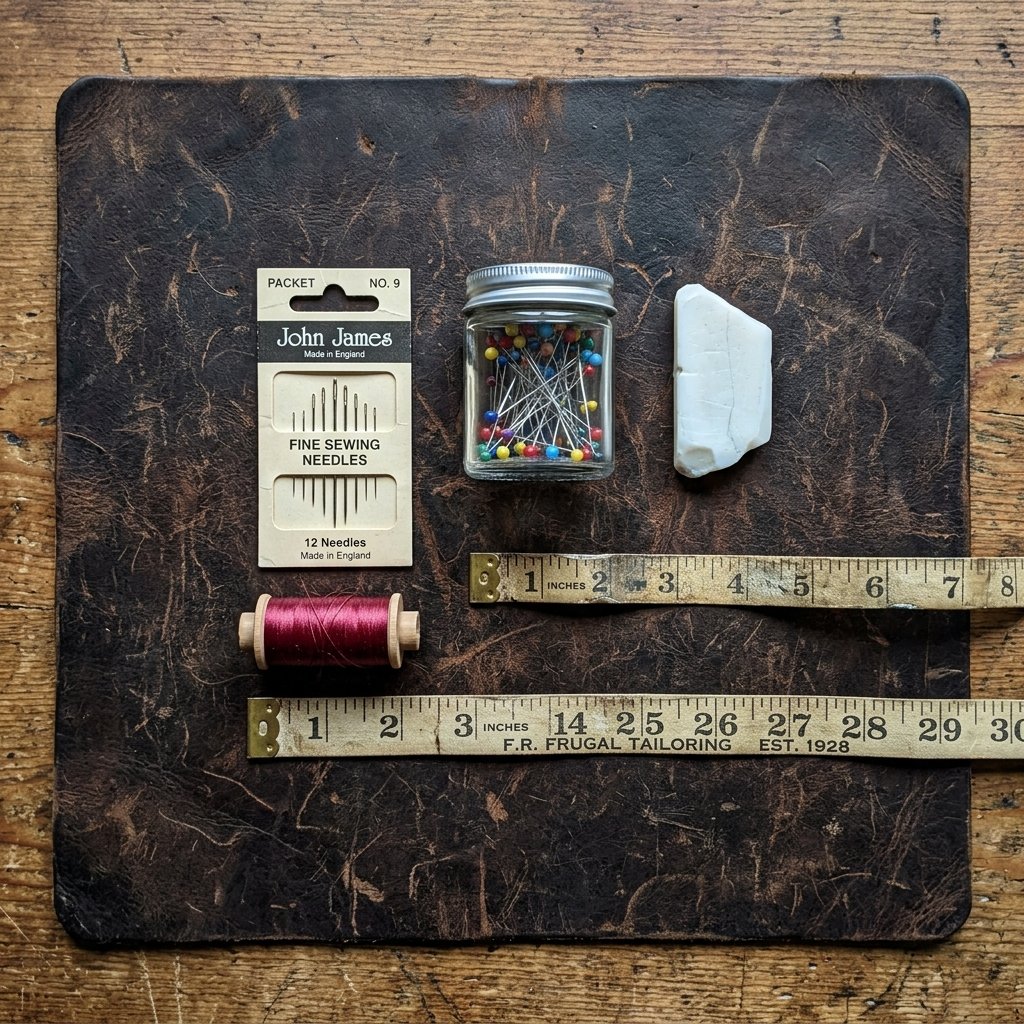
You cannot do a craftsman’s job without the right gear, but thankfully, the gear for this project costs less than a cup of coffee. The key to conquering silk is minimizing friction and puncture size. Here is exactly what you need to assemble from your crafting stash or pick up for pennies at the local craft store.
- Sharps Needle (Size 9 or 10): The finer the needle, the smaller the hole. Do not use heavy denim needles here.
- 100% Silk Thread or Fine Polyester: Silk thread glides through silk fabric like butter. Cotton thread creates too much friction and can snap or pull.
- Glass-Head Silk Pins: Standard thick pins will leave permanent holes in silk. You need ultra-thin silk pins.
- A Steam Iron & Pressing Cloth: A scrap piece of white cotton (like an old T-shirt) works perfectly to protect the silk from the iron’s heat.
- Tailor’s Chalk or a Slivers of Bar Soap: A brilliant frugal hack! The thin edge of a dried sliver of bar soap marks dark fabric perfectly and washes out instantly without leaving a greasy residue.
Cost and Time Comparison
| Hemming Method | Estimated Cost | Time Required | Silk Compatibility & Finish |
|---|---|---|---|
| Professional Tailor | $25 – $50 | 3 – 7 Days | Excellent (but highly expensive) |
| Sewing Machine (Home) | $0 (if owned) | 15 Minutes | Poor (High risk of puckering & visible lines) |
| Hemming Tape / Glue | $5 – $8 | 5 Minutes | Terrible (Stiffens the silk, ruins the drape) |
| The 10-Minute Blind Hem | $2.50 (Thread) | 10 Minutes | Flawless, Invisible & Professional |
Measure Twice, Cut Once: Prepping Your Silk Canvas
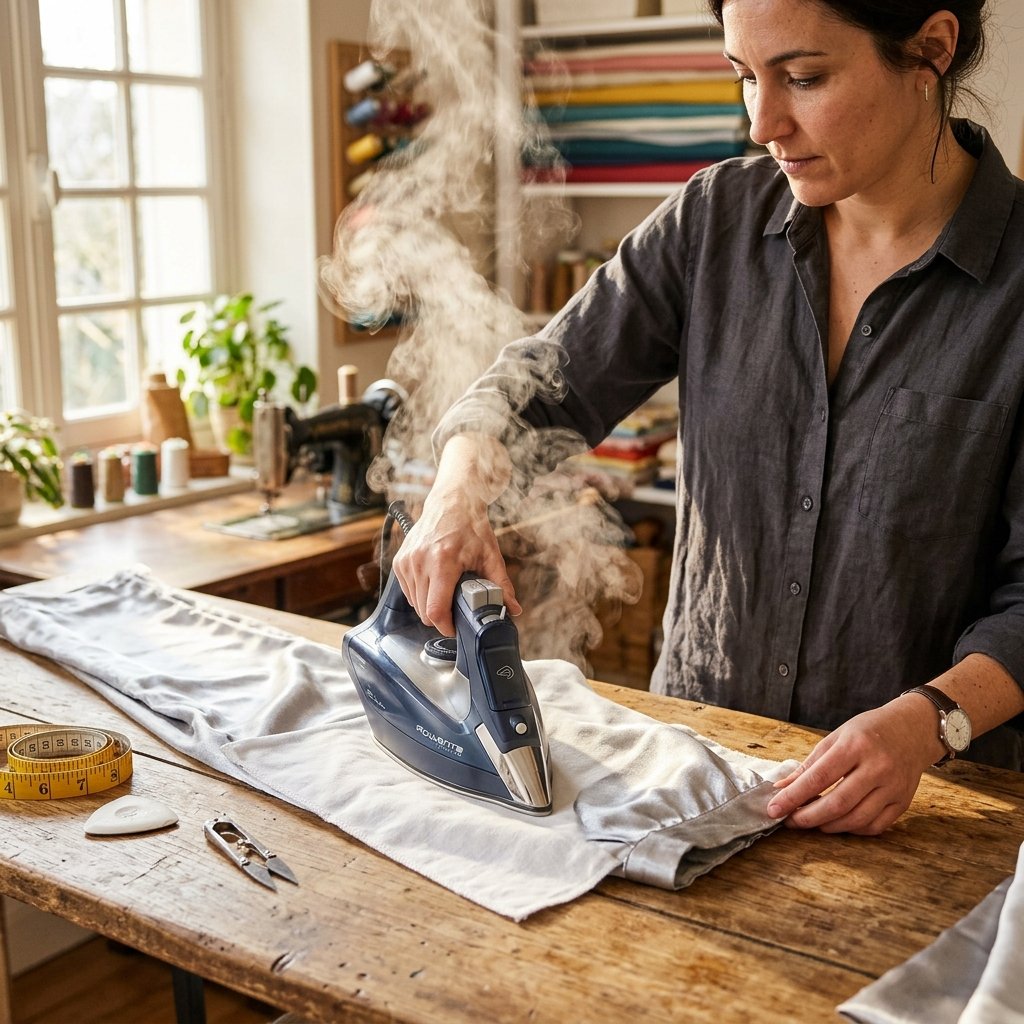
Setting the Stage for a 10-Minute Victory
Any carpenter, machinist, or crafty DIYer will tell you that the magic is in the preparation. If you skip the prep work, your 10-minute project will turn into an hour of frustrating seam-ripping. Silk shifts, so we must tame it before we stitch.
Step 1: The Try-On and Mark
Put the pants on with the exact shoes you intend to wear with them. Fold the excess fabric up inside the pant leg until it hits the perfect break (usually right at the top of the shoe heel). Secure it with exactly three ultra-thin silk pins: one at the front crease, one at the back, and one on the side seam. Take the pants off carefully.
Step 2: The Measure and Trim
Turn the pants inside out. Using your measuring tape, measure from the folded edge to the raw edge. You want exactly 1.5 inches of hem allowance. If you have more than that, use your tailor’s chalk (or frugal soap sliver) to mark a line, and confidently trim away the excess with sharp scissors.
Step 3: The Double Fold and Press
To prevent the raw edge of the silk from fraying into a messy bird’s nest, we do a double fold. Fold the raw edge down by 1/2 inch, and press it firmly with your iron (always use your pressing cloth!). Then, fold it again by 1 inch so the raw edge is completely hidden inside. Pin horizontally every few inches. Your canvas is now locked, loaded, and ready for the master stitch.
The 10-Minute Blind Catch-Stitch: Step-by-Step Execution
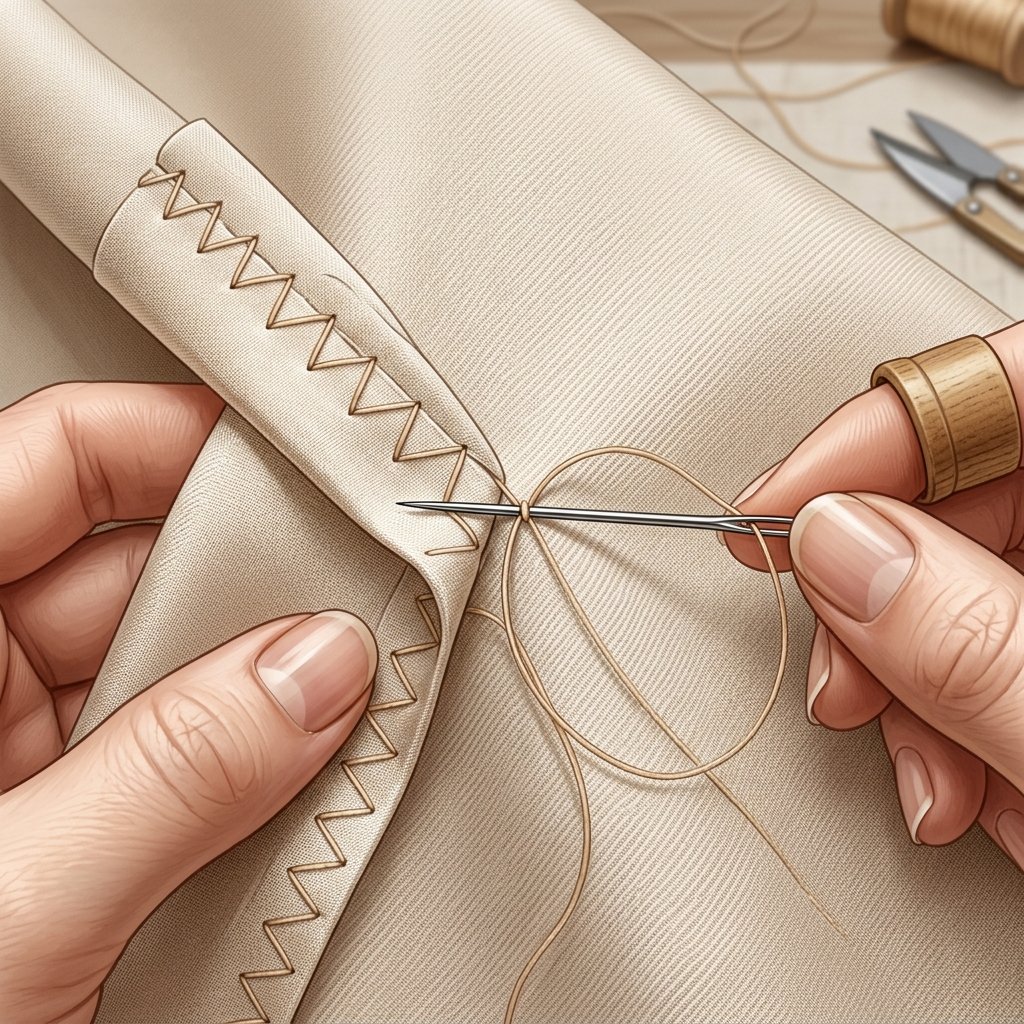
Executing the Tailor’s Secret Stitch
This is where the magic happens. The blind catch-stitch works from left to right, but your needle will point right to left. It sounds counterintuitive, but once you get the rhythm, you will feel like a true craftsman. Follow these steps meticulously.
- Thread and Knot: Cut a piece of silk thread no longer than your forearm (about 18 inches). Any longer, and it will tangle. Thread your fine needle and tie a small, secure knot at the end.
- Anchor the Thread: Hide your starting knot by pushing the needle up from inside the folded hem allowance. Pull it through so the knot is trapped inside the fold.
- The Micro-Bite: Move about 1/4 inch to the right. Here is the secret: pick up exactly ONE or TWO threads of the main pant leg fabric with the tip of your needle. Do not push the needle all the way through to the outside. This tiny “bite” is what makes the hem invisible on the outside.
- The Cross-Over: Pull the thread gently. Now, move another 1/4 inch to the right, and take a bite of the folded hem allowance edge (you can grab a bigger bite here because this part won’t show on the outside).
- Establish the Rhythm: Continue alternating: a micro-bite on the main fabric, then a bite on the folded edge, always moving left to right, with the needle pointing left. The thread will form a series of small “X” shapes or zig-zags.
- The Loose Finish: Crucial Step! Do not pull the thread tight like you are lacing a combat boot. Leave the stitches slightly relaxed. This slack allows the silk to drape beautifully. Once you circumnavigate the pant leg, tie off with a double knot hidden inside the fold.
“The blind catch-stitch is a dance of precision. One thread of the main fabric, a generous bite of the fold. Keep it loose, keep it relaxed, and let the silk do the talking.”
Troubleshooting Slippery Silk: Crafty Fixes for Common Snags
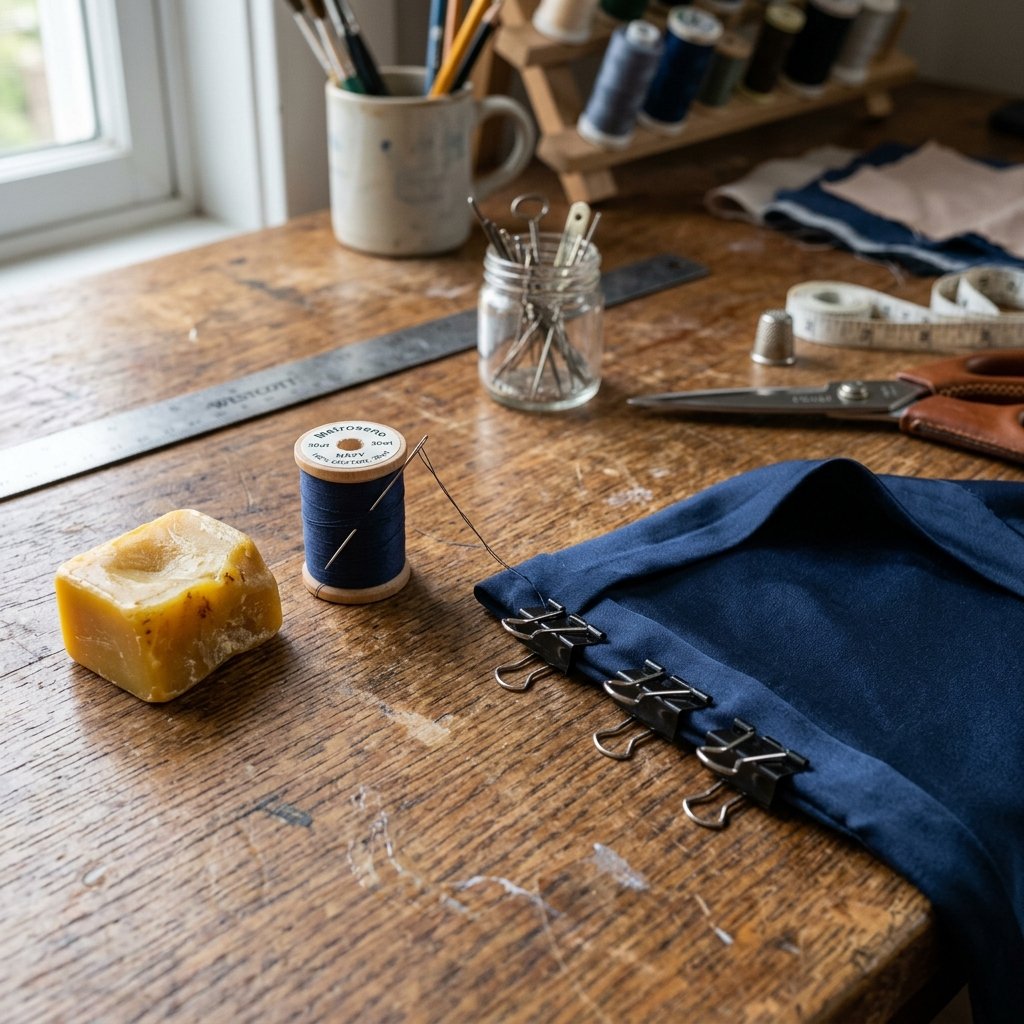
Overcoming the Quirks of Delicate Textiles
Even the most rugged and resourceful upcyclers run into hiccups when dealing with high-maintenance materials. If your 10-minute project hits a snag, don’t panic. Here are the frugal, crafty fixes to ensure flawless execution.
Problem 1: The Fabric Keeps Shifting and Sliding
Silk has a mind of its own. If pins aren’t holding it securely, use a frugal tailor’s trick: hair clips or mini binder clips. If you raid your home office, you can find small binder clips that hold the folded hem securely without puncturing the fabric at all. Just be sure they are clean so they don’t leave oil marks on the silk.
Problem 2: The Thread Keeps Tangling
Silk thread is bouncy. To tame it, run the length of your cut thread over a block of natural beeswax before you start sewing. This is a classic leatherworker and tailor trick. The wax coats the thread, adding a tiny bit of weight and friction that completely prevents annoying knots and tangles while you stitch.
Problem 3: Visible Dimples on the Outside
If you turn the pants right-side out and see tiny dimples or puckers where you stitched, you committed one of two sins: you either pulled the thread too tight, or you grabbed too many fibers in your “micro-bite.” Remember, you only want to catch a single fiber of the outer silk. Take a deep breath, use a seam ripper to undo the tight section, and try again with a lighter touch. Practice makes perfect, and the savings are well worth the patience!
Conclusion
Wear Your Craftsmanship with Pride
Congratulations! In less time than it takes to drive to the tailor—and for a fraction of the cost—you have successfully mastered one of the most guarded secrets in garment alterations. By taking a resourceful, hands-on approach, you saved yourself at least $30 and added a highly valuable, practical skill to your DIY arsenal.
Hemming silk pants by hand isn’t about having a magic touch; it is about respecting the material, using the right frugal tools, and trusting the centuries-old blind catch-stitch. Whether you are prepping for a budget-friendly wedding, upgrading your thrift store finds, or just maintaining your favorite lounging gear, you can now alter delicate fabrics with the confidence of a master craftsman. Keep your needle sharp, keep your stitches relaxed, and never pay a premium for something you can conquer with your own two hands!

Makenzie is the founder and lead writer at MoneyHackTips.com — a personal finance blog dedicated to delivering street-smart financial wisdom for real people on real budgets. With 300+ published articles covering everything from debt management to investing fundamentals, Makenzie’s mission is to make every dollar work harder. When not writing about money hacks, Makenzie is testing frugal living strategies, optimizing side hustles, and helping readers build financial freedom from scratch.