
The Workshop Philosophy: Engineering Play from Waste
Welcome to the ultimate masterclass in trash-to-treasure engineering. In a world where plastic electronic toys with flashing lights dominate the aisles, there is a rugged, quiet power in the simplicity of cardboard. As a frugal DIYer, you know that the best tools for development aren’t bought; they are built. Today, we are taking the humble shipping box—that ubiquitous byproduct of modern life—and transforming it into a precision-engineered Lock and Key Matching Game. This isn’t just a craft; it’s a developmental powerhouse designed to sharpen the pincer grasp, enhance bilateral coordination, and foster problem-solving skills in young learners. Whether you are a handy parent looking to entertain a toddler or a crafty gift-giver aiming for a thoughtful, handmade present, this project delivers high-end educational value for literally pennies. We aren’t just cutting paper; we are building a foundation for future mechanics and artists alike.
The Blueprint: Why Cardboard Engineering Wins
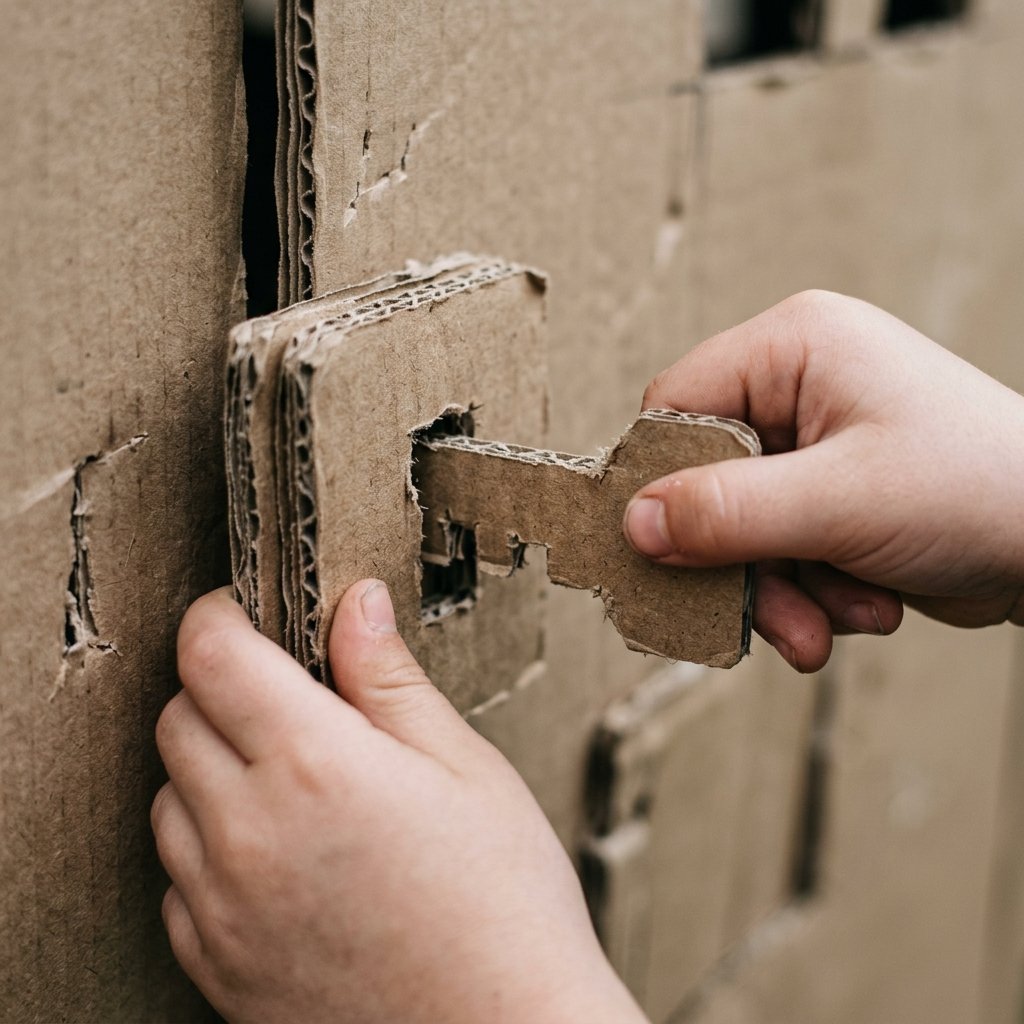
Before we pick up the blade, let’s talk about the ‘why.’ Fine motor skills are the small muscle movements in the hands and wrists that allow us to write, button shirts, and manipulate tools. A lock-and-key mechanism is one of the most effective ways to challenge these muscles because it requires precision rotation and controlled pressure. By using recycled cardboard, we are teaching our children the value of resourcefulness. We are showing them that with a little grit and a sharp eye, the world around them is full of raw materials waiting to be mastered.
The Developmental ROI
- Pincer Grasp Strength: Manipulating the ‘keys’ strengthens the index finger and thumb.
- Visual Discrimination: Matching the specific notches of a key to its corresponding lock hole trains the eye to see minute differences in shape.
- Hand-Eye Coordination: Aligning the cardboard key into the slot requires a sophisticated feedback loop between the brain and the hand.
Budget Mantra: A child’s imagination is the most expensive toy you’ll never have to buy; provide the raw materials, and they will build the world.
Scavenging the Workshop: Materials & Cost Analysis
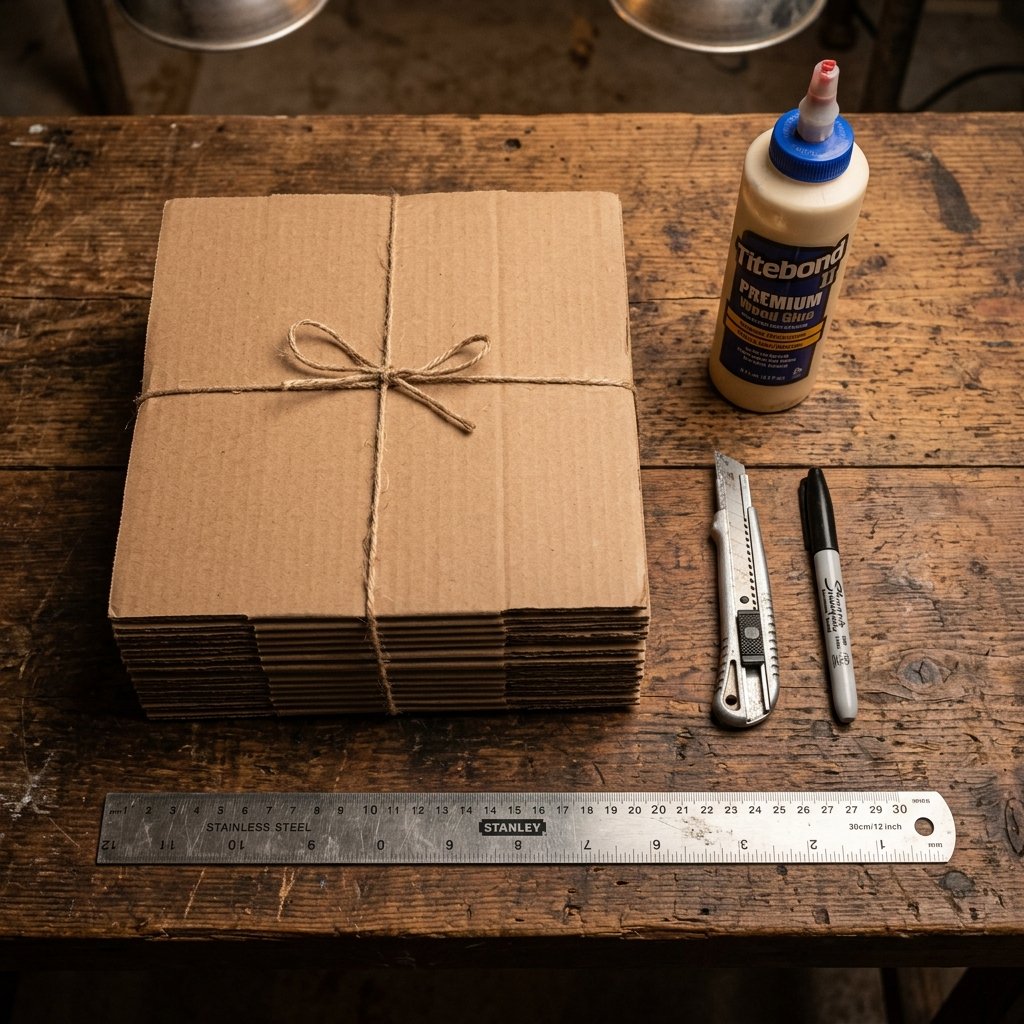
One of the hallmarks of a master upcycler is the ability to see potential in the ‘scrap’ pile. For this project, we are looking for double-wall corrugated cardboard for the locks (for durability) and single-wall or cereal box cardstock for the keys (for ease of insertion). This project is a financial victory, costing $0.00 if you already have basic household tools.
| Material/Tool | Sourcing Strategy | Estimated Cost |
|---|---|---|
| Corrugated Cardboard | Amazon boxes / Grocery store scraps | $0.00 |
| Precision Craft Knife | Workshop staple (X-Acto or similar) | $0.00 (Owned) |
| Metal Ruler | For straight, crisp cuts | $0.00 (Owned) |
| Hot Glue or Wood Glue | To reinforce the lock bases | $0.05 |
| Markers/Paint | For color-coding and numbering | $0.10 |
| Total Project Cost | The frugal champion’s choice | $0.15 |
Store-Bought vs. DIY Comparison
A high-end wooden Montessori lock box can retail for anywhere between $35 and $65. While beautiful, those sets often feature metal locks that can be heavy or difficult for very small hands. Our DIY version allows you to customize the difficulty and replace parts instantly if they get stepped on or lost. You are saving over 95% by opting for the cardboard route.
The Master Build: Step-by-Step Construction
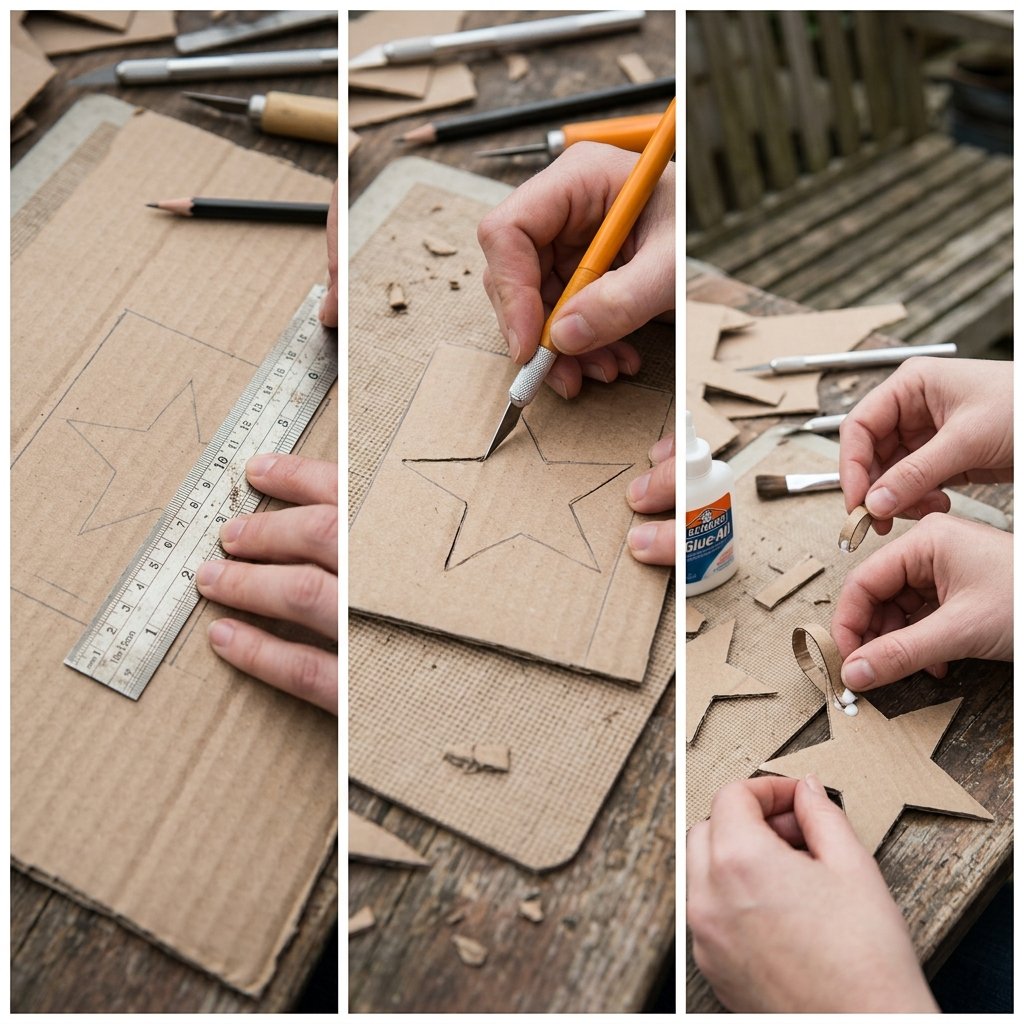
Follow these steps with the precision of a master tailor. We aren’t just hacking away; we are creating a flush, satisfying fit that provides tactile feedback to the user.
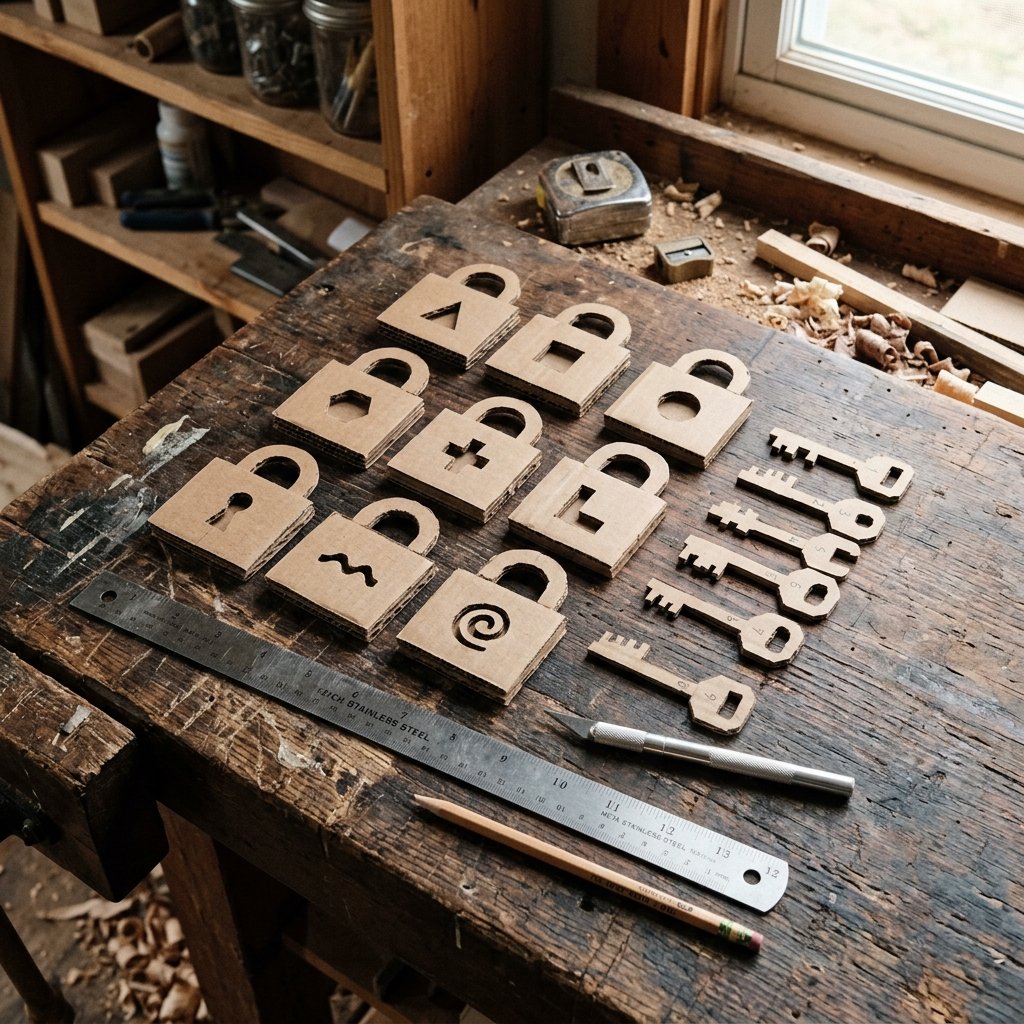
- Dimensioning the Locks: Cut 10 rectangles of heavy cardboard, each measuring 4 inches by 6 inches. These will serve as your ‘lock’ bases.
- Designing the Keyholes: In the center of each base, draw a unique geometric shape. Start simple: a 1-inch square, a 1-inch circle, and a triangle. For advanced levels, create ‘T’ shapes or ‘L’ shapes.
- The Surgical Cut: Using your craft knife, carefully cut out the shapes. Pro Tip: Place a self-healing mat or a thicker piece of scrap wood underneath to ensure a clean exit cut.
- Fabricating the Keys: Use the shapes you just cut out as templates, but cut new keys from a slightly thinner cardboard (like a cereal box). Cut them 1/16th of an inch smaller than the hole to allow for smooth movement.
- Adding Handles: Cut small strips of cardboard (1 inch by 3 inches), fold them into a ‘U’ shape, and hot glue them to the back of your keys. This creates a rugged ‘handle’ for the child to grasp.
Safety Note: Always cut away from your body. When working with cardboard, a sharp blade is safer than a dull one, as it requires less force to penetrate the material. Supervise children at all times during play if small parts are involved.
The ‘Master Locksmith’ Progression: 3 Levels of Play

To keep the engagement high, you must evolve the game as the child’s skills sharpen. A static toy is a boring toy. We want a dynamic challenge.
Level 1: The Visual Match (Beginner)
Color-code the edge of the lock and the handle of the key with a matching marker. If the lock has a blue border, the key has a blue handle. This uses color as a secondary cue for success.
Level 2: The Shape Specialist (Intermediate)
Remove the color cues. All cardboard remains its natural brown. The child must now rely entirely on spatial reasoning and shape recognition to find the correct match.
Level 3: The Cryptographer (Advanced)
Incorporate numbers or simple math. Write ‘2+2’ on the lock and ‘4’ on the key. This forces the brain to solve a cognitive puzzle before engaging the motor skill. It’s a double-duty workout for the mind and hands.
| Level | Primary Skill Focus | Success Indicator |
|---|---|---|
| Level 1 | Color Association | Matching blue to blue |
| Level 2 | Spatial Awareness | Matching complex notches |
| Level 3 | Cognitive Integration | Solving math to unlock |
Rugged Durability: Making Paper Last a Lifetime

Cardboard is surprisingly resilient, but in the hands of a determined toddler, it can take a beating. Use these workshop hacks to reinforce your build for long-term use.
- The Edge-Seal Technique: Run a thin bead of super glue or clear nail polish along the cut edges of the keyholes. This hardens the fibers and prevents fraying over time.
- Lamination on a Dime: Cover the faces of the locks and keys with clear packing tape before cutting. This creates a wipeable surface that resists sticky fingers and spills.
- The Double-Wall Foundation: If your cardboard is flimsy, glue two pieces together with the grain running in opposite directions (cross-graining). This creates a composite material that is nearly impossible to bend.
By applying these simple industrial techniques, you transform a temporary craft into a heirloom-quality developmental tool that can be passed down to younger siblings or cousins.
Conclusion
The Final Turn of the Key
There is a profound satisfaction in finishing a project that costs next to nothing but provides unlimited value. By building this DIY Cardboard Lock and Key Game, you’ve proven that you don’t need a massive budget to provide high-quality educational experiences. You’ve salvaged waste, applied precision engineering, and created a tool that will supercharge a child’s fine motor skills for hours on end. This is the essence of the frugal DIYer: being resourceful, clever, and practical. Now, clear your workbench, grab that shipping box from the recycling bin, and start cutting. Your ‘Master Locksmith’ is waiting for their first challenge. Happy crafting!

Makenzie is the founder and lead writer at MoneyHackTips.com — a personal finance blog dedicated to delivering street-smart financial wisdom for real people on real budgets. With 300+ published articles covering everything from debt management to investing fundamentals, Makenzie’s mission is to make every dollar work harder. When not writing about money hacks, Makenzie is testing frugal living strategies, optimizing side hustles, and helping readers build financial freedom from scratch.