
The Heartbreak of the Moth Hole
We have all been there. You pull your favorite, ultra-cozy, masculine-elegant wool sweater out of winter storage, ready to brave the crisp autumn air, only to discover a devastating reality: a moth has feasted on the sleeve. Or perhaps you snagged your luxurious cashmere cardigan on a rogue nail while tackling a weekend DIY project. Suddenly, your $150 investment feels like it is destined for the rag bin. But hold on to your hand-hemming needles, frugal DIYers and handy parents! Before you toss that premium garment or pay an exorbitant fee to a professional tailor, there is a crafty-expert secret you need to know. It requires no sewing machine, no complicated darning looms, and absolutely no advanced tailoring degree.
Welcome to the mind-blowing world of needle felting. This resourcefully-creative technique is the ultimate grandma’s secret for invisible mending. By utilizing the natural properties of animal fibers, a specialized barbed needle, and a tiny pinch of wool roving, you can seamlessly fill in holes, reinforce thinning elbows, and breathe new life into your cherished knits. Not only is this hack incredibly budget-savvy, costing mere pennies per repair, but it is also deeply satisfying. It is a rugged, practical, and incredibly tactile process that empowers you to take control of your wardrobe’s longevity. Get ready to transform your clothing casualties into triumphant testaments of your upcycling prowess!
Mending is not just about saving money; it is a rebellious act of caring for what we own. A well-mended garment carries a story, a rugged charm, and the undeniable mark of a resourceful owner.
The Science and Magic of Needle Felting
To truly master this frugal DIY hack, you need to understand the clever mechanics behind it. Needle felting might look like magic, but it is actually a fascinating display of microscopic friction and fiber locking. Unlike traditional sewing or darning, where you weave new threads over and under existing ones, needle felting relies on the unique structure of animal hair.
How the Barbed Needle Works
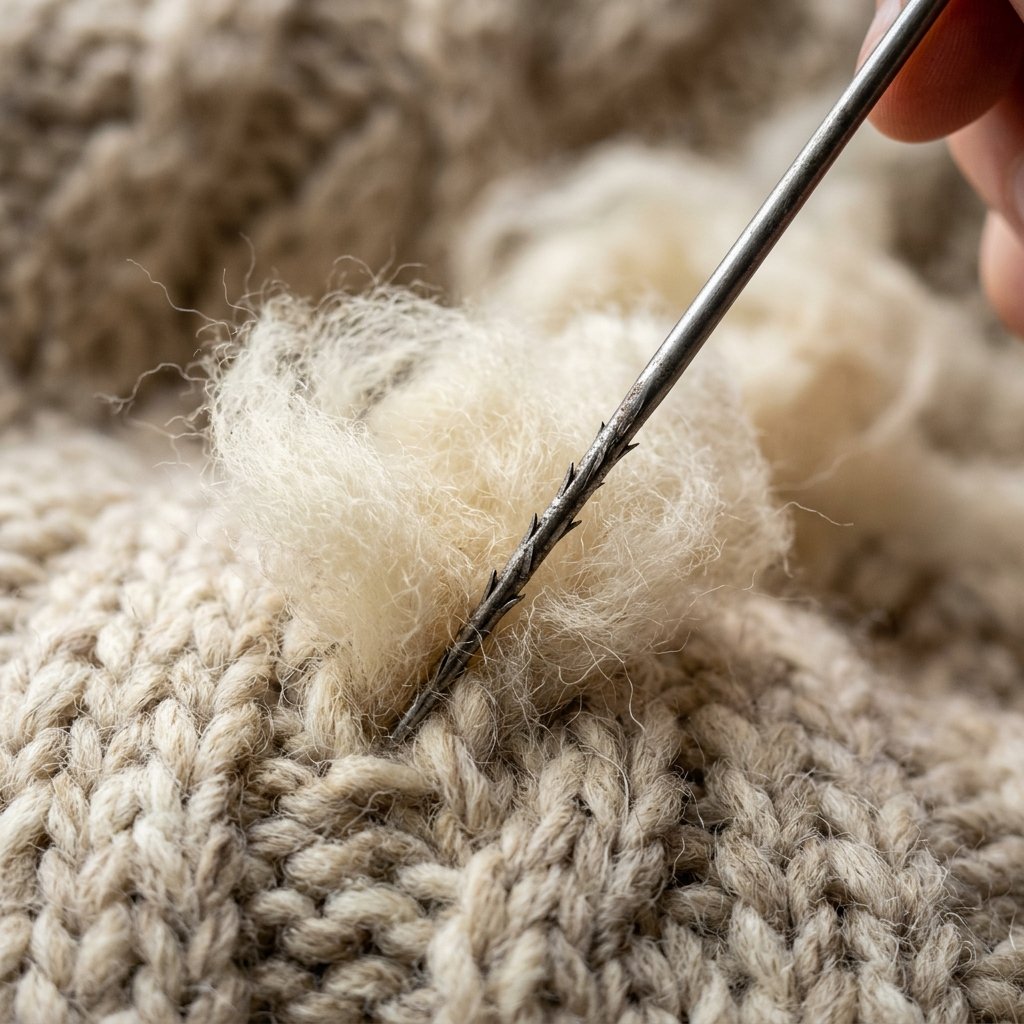
If you were to look at a strand of sheep’s wool under a microscope, you would see that it is not smooth. It is covered in tiny, overlapping scales, much like the shingles on a roof. A felting needle is a specialized, industrial-looking tool that is completely different from your standard sewing needle. It does not have an eye for thread. Instead, the lower shaft is scored with tiny, sharp barbs facing in one direction. When you repeatedly stab this needle through a tuft of unspun wool (called roving) and into your sweater, the barbs catch those microscopic scales on the fibers, dragging them down and tangling them together.
As you continue this rhythmic stabbing motion, the fibers become so densely interlocked that they form a solid, cohesive piece of fabric right inside the hole of your sweater. It essentially creates a custom-fit, perfectly integrated patch that bonds directly with the surrounding knit. The result? An invisible mend that is often stronger than the original fabric. This technique is a game-changer for handy moms, dads, and crafty gift-givers who want to restore heirloom garments or rescue high-quality thrift store finds.
The Budget-Savvy Mender’s Toolkit
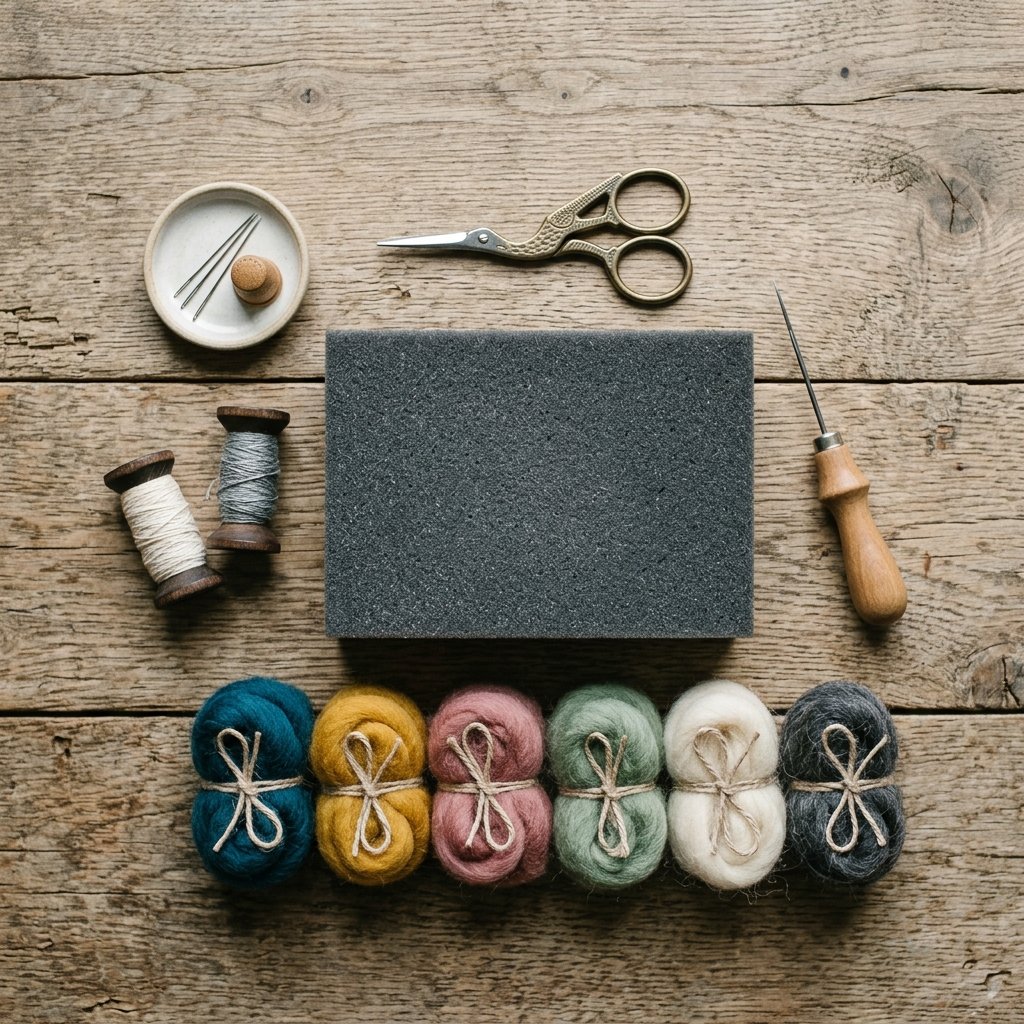
One of the most encouraging aspects of this clothing hack is the incredibly low barrier to entry. You do not need a massive craft room or expensive machinery. The entire toolkit can fit inside a small cigar box or a tactical grooming caddy, making it a highly practical, space-saving skill. Let us break down exactly what you need and how much it costs compared to the alternatives.
Essential Tools for the Job
- Felting Needles: You will want a variety of gauges. A 36-gauge needle is great for initial shaping, while a 38-gauge or 40-gauge needle is perfect for fine detailing and invisible finishing.
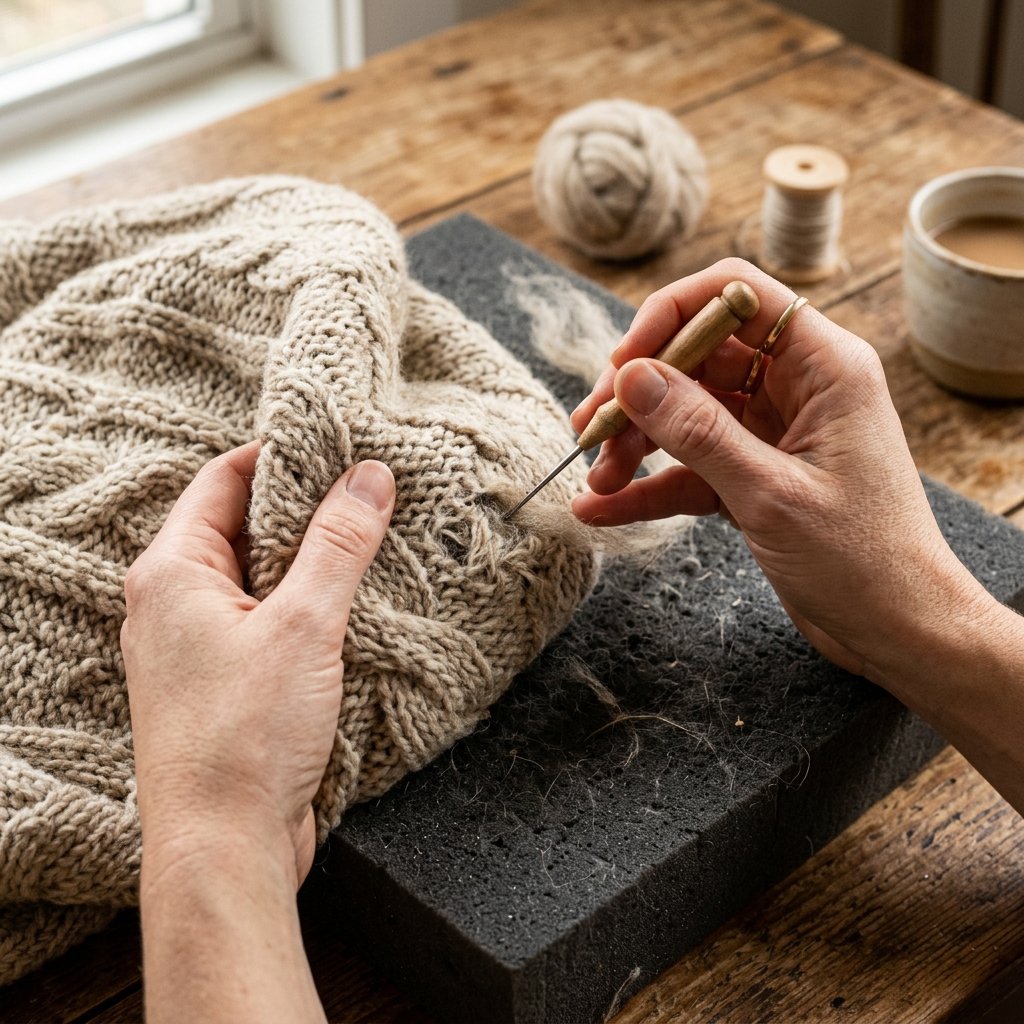
- Felting Foam Block: This is non-negotiable. You must have a dense foam pad or a specialized felting brush mat to place behind the hole. This gives the needle a safe place to go after it passes through the fabric, protecting your table and your lap.
- Wool Roving: This is raw, unspun wool. You only need a tiny pinch per hole. You can buy multi-color sampler packs online for incredibly cheap, ensuring you always have a color match on hand.
- Scissors: A small, sharp pair of embroidery or grooming scissors to trim any fuzzy excess.
Safety First!
Safety Warning: Felting needles are ridiculously sharp and brittle. They are designed to puncture dense fibers, which means they will easily puncture skin. Always keep your fingers clear of the needle’s path, work in a well-lit area, and never bend the needle while stabbing, as it can snap off inside your garment.
Let us look at the hard numbers. As a frugal DIYer, you know that saving money is all about the long game. Here is a breakdown of why this technique is the ultimate budget-savvy move.
| Repair Method | Initial Investment | Cost Per Hole Repair | Time Required | Skill Level |
|---|---|---|---|---|
| Professional Tailor / Reweaving | $0 | $35 – $75+ | 1 to 3 weeks | None (Outsourced) |
| Replacing the Garment | $0 | $50 – $200+ | Hours of shopping | None |
| DIY Needle Felting | $10 – $15 (Reusable Kit) | Less than $0.10 | 5 to 10 minutes | Beginner / Crafty |
As you can see, the DIY route pays for itself after a single repair. It is a highly practical, masculine-elegant skill that ensures your favorite rugged outdoor gear and sophisticated office knits stay in rotation for years to come.
Fabric Type Compatibility Guide
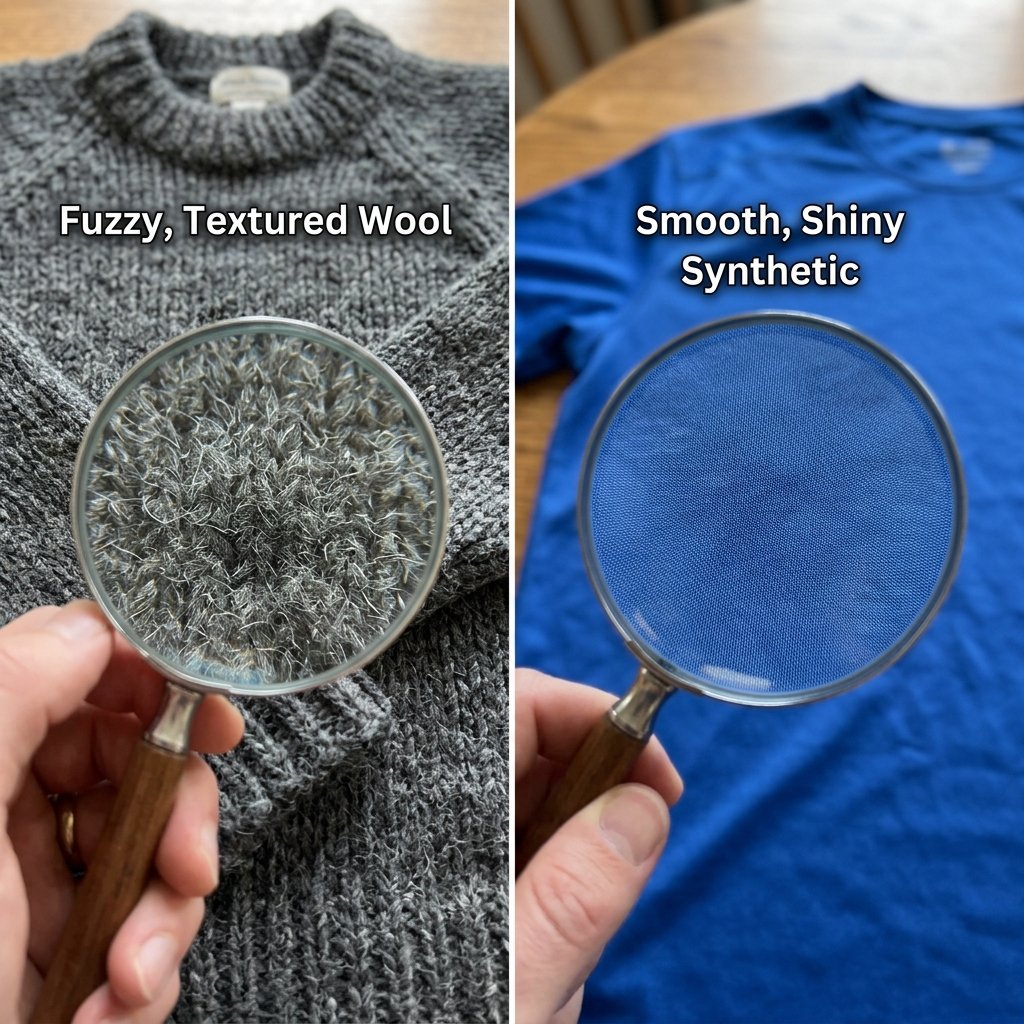
Before you start stabbing away at your wardrobe, it is crucial to understand that needle felting is not a universal solution for every fabric in existence. Because the magic relies on the microscopic scales of animal hair interlocking, this technique works beautifully on certain materials and completely fails on others. As a resourceful upcycler, knowing your materials is half the battle.
The Golden Rule of Felting
The general rule of thumb is: Like felts to like. You are using wool roving to fill the hole, so the sweater itself needs to have enough natural animal fiber for the roving to grab onto. If you try to needle felt a hole in a 100% synthetic nylon windbreaker, the wool will just fall right out because the synthetic fibers are completely smooth and offer no grip.
Here is a comprehensive guide to help you determine if your garment is a candidate for this crafty-expert repair method.
| Fabric Material | Compatibility for Needle Felting | Mending Notes & Best Practices |
|---|---|---|
| 100% Wool (Merino, Lambswool) | Excellent (100% Match) | The absolute best candidate. The roving will blend seamlessly and create a permanent, incredibly strong bond. |
| Cashmere & Alpaca | Great (Highly Compatible) | Works beautifully. Use a very fine needle (40-gauge) and a gentle touch to maintain the luxurious, soft drape of the fabric. |
| Wool Blends (e.g., 70% Wool, 30% Nylon) | Good (Workable) | As long as the animal fiber content is above 50%, the felting should hold securely. It may take a bit more stabbing to lock in. |
| 100% Cotton or Linen | Poor (Not Recommended) | Plant fibers lack the necessary scales. The wool will not bond chemically/structurally. Use traditional darning or sashiko stitching instead. |
| 100% Acrylic or Polyester | Fail (Do Not Attempt) | Smooth, plastic-based fibers will not hold the wool. The patch will simply fall out in the wash. Stick to sewing for these. |
If you are working with a high-end Dollar Tree replica craft or upcycling a thrifted sweater into mittens, always check the care tag first. This budget-savvy habit will save you time and frustration, ensuring your mending efforts are permanently successful.
Step-by-Step Guide to Invisible Mending
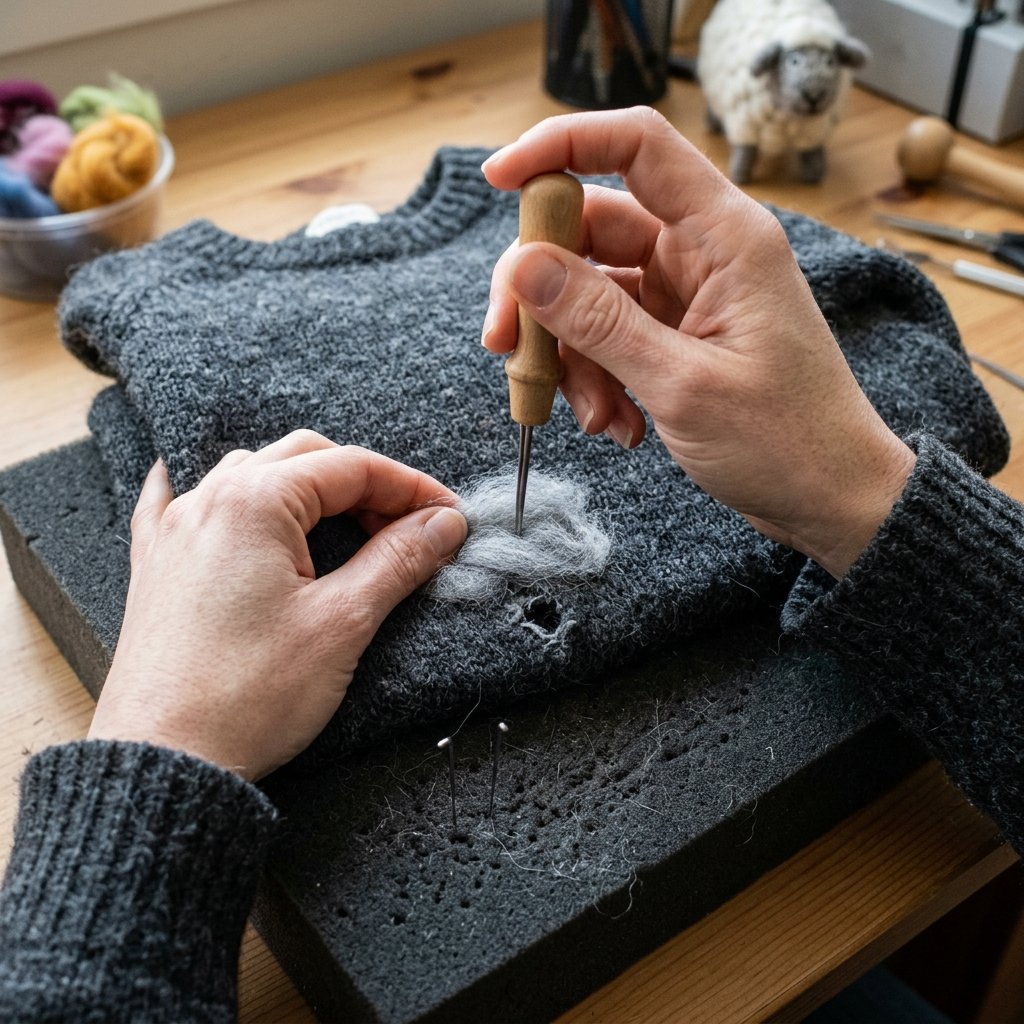
Now that you have your materials and you have verified your sweater is compatible, it is time to execute the perfect invisible mend. This process is incredibly therapeutic and rewarding. Find a comfortable spot, ensure you have good lighting, and let us get to work. Follow these steps meticulously for a flawless, professional-grade finish.
Step 1: Preparation and Placement
- Isolate the Damage: Lay your sweater flat. Identify all the moth holes or snags. Sometimes, holding the garment up to a light source will reveal thinning areas that are about to become holes.
- Insert the Foam Block: Slide your felting foam block inside the sweater, directly directly beneath the hole. Make sure the fabric is resting flat against the foam without being overly stretched. If you stretch it too much, the patch will pucker when you take the foam out.
- Clean up the Edges (Optional): If the hole has long, unraveling, frayed threads, you can gently snip them with your scissors to create a cleaner working area, but do not make the hole bigger than necessary.
Step 2: The Art of Color Matching
The secret to an invisible mend is a perfect color match. If you cannot find a single roving color that matches perfectly, you can become a fiber artist! Take a tiny pinch of two or three different colored rovings (e.g., a bit of navy, a tiny wisp of black, and a speck of gray). Layer them in your hands and gently pull them apart and put them back together repeatedly. This process, called hand-blending, will create a custom heathered shade that perfectly mimics complex sweater yarns.
Step 3: The Stabbing Process
The Golden Technique: Always push the needle straight down and pull it straight back up. Never angle, twist, or bend the needle while it is in the fabric, or it will snap instantly. Think of it like a tiny, precise sewing machine needle moving on a vertical axis.
- Place the Roving: Take a pinch of your perfectly matched roving. You want an amount that is slightly larger and fluffier than the hole itself. Roll it lightly between your fingers to form a loose, flat cloud, and place it directly over the hole.
- Tack it Down: Using your 36-gauge or 38-gauge needle, start stabbing gently around the very edges of the hole. This tacks the roving to the existing sweater fabric, anchoring your patch in place.
- Fill the Center: Once the edges are secure, begin stabbing the center of the roving cloud, pushing the fibers down into the void of the hole. Work your way around in a spiral or grid pattern.
- Build Density: Continue stabbing. You will notice the fluffy roving shrinking, flattening, and becoming dense. Your goal is to make the patch the exact same thickness as the surrounding sweater. If it feels too thin, add another tiny wisp of roving and keep stabbing.
Step 4: Flipping and Finishing
- Peel and Flip: Carefully peel the sweater off the foam block. You will notice a fuzzy chunk of fibers sticking out of the back. Turn the sweater inside out and place the foam block back under the mended area.
- Felt the Backside: Take your needle and stab those fuzzy backside fibers back into the patch. This locks the fibers from both directions, making the mend incredibly secure and smooth against your skin.
- The Final Polish: Turn the sweater right-side out again. Switch to your finest needle (40-gauge) and do a few shallow, rapid stabs over the surface of the patch. This smooths out any remaining fuzziness and blends the texture seamlessly into the knit.
Step 5: Steam Blocking (The Tailor’s Secret)
To make the mend truly invisible, you must block it. Set your iron to the “wool” or “steam” setting. Place a damp pressing cloth (a thin cotton towel works perfectly) over the mended area. Press the iron down firmly for 5 to 10 seconds, shooting a burst of steam into the fabric. Do not rub the iron back and forth. Lift the iron and let the fabric cool completely. The heat and steam relax the fibers, flattening the patch and perfectly integrating it into the surrounding weave. Your sweater is now saved!
Visible Mending: The Rugged & Creative Alternative
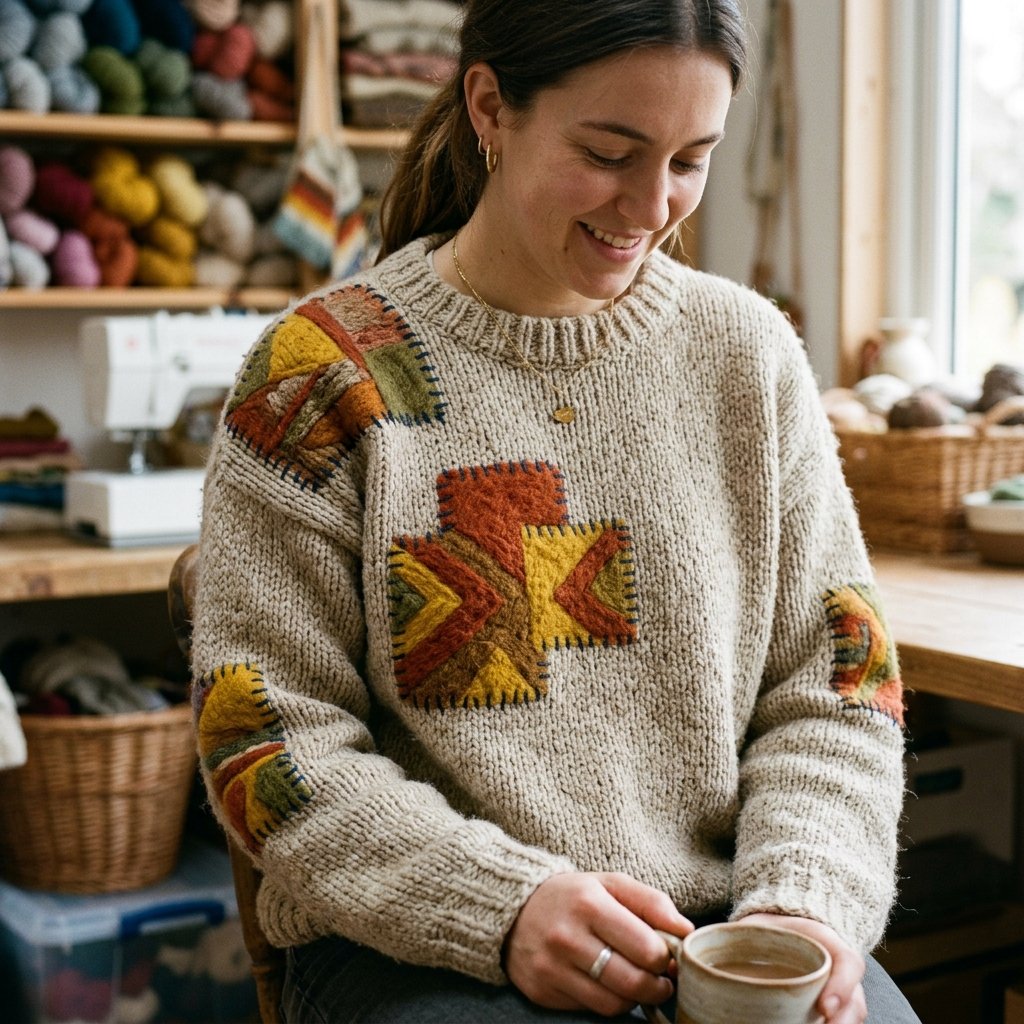
While invisible mending is a fantastic skill for preserving the original, masculine-elegant look of a classic crewneck, sometimes a hole is an opportunity for creative expression. If you cannot find a perfect color match, or if you simply want to add a bit of crafty, personalized flair to your wardrobe, welcome to the world of Visible Mending.
Turn Blemishes into Badges of Honor
Visible mending embraces the Japanese philosophy of Wabi-Sabi—finding beauty in imperfection. Instead of hiding the repair, you highlight it. This is a brilliant, resourcefully-creative approach for kids’ clothes, rugged outdoor flannels, or casual weekend cardigans.
- Contrasting Colors: Have a moth hole in a navy blue sweater? Patch it with a vibrant mustard yellow or a striking cherry red roving. It instantly turns a flaw into a bespoke polka dot.
- Geometric Shapes: By using a small cookie cutter or a stencil placed over the hole, you can needle felt the roving into perfect shapes. Fix a torn elbow by felting a rugged, contrasting wool elbow patch directly onto the sleeve. Felt tiny hearts, stars, or lightning bolts over small snags.
- The Sashiko Hybrid: For a truly master-tailor look, you can combine needle felting with hand-sewing. Felt a contrasting patch into the hole to stabilize the fabric, and then use a thick embroidery thread to stitch geometric Sashiko patterns over the felted area. This provides ultimate durability and a high-end, artisanal aesthetic that looks like it belongs in a premium boutique.
By embracing visible mending, you are not just repairing clothes; you are upcycling them into one-of-a-kind wearable art. It is a fantastic way for handy parents to make their children’s hand-me-downs feel fresh, unique, and totally customized without spending a dime on new clothes.
Troubleshooting & Long-Term Garment Care

Even the most budget-savvy, crafty-expert DIYers run into minor hiccups. If your first attempt at needle felting does not look like it came straight from a professional tailor, do not panic! Wool is an incredibly forgiving medium. Here are some common issues and how to fix them, along with vital tips for maintaining your newly mended garments.
Common Felting Issues and Fixes
- The Patch is Too Thick and Bulky: You used too much roving. To fix this, you can try stabbing it more intensely to compress it further. If it is still a hard lump, carefully use your embroidery scissors to shave off the top layer of the felted bump, then use your fine needle to smooth it out again.
- The Patch is Too Thin or Has a Dip: You didn’t use enough roving. This is the easiest fix! Simply grab another tiny wisp of wool, lay it over the dip, and felt it right into the existing patch until it is flush with the sweater surface.
- The Patch Keeps Falling Out: This usually means one of three things: (1) You didn’t stab it enough times to lock the fibers. (2) You didn’t felt it from both the front and the back. (3) The sweater contains too much synthetic fiber (acrylic/polyester) and cannot hold the wool. If it’s the latter, you will need to switch to traditional thread darning.
Washing and Caring for Felted Sweaters
Now that you have invested 5 to 10 minutes of your time to save your garment, you want to ensure the repair lasts a lifetime. The good news is that a properly needle-felted patch is incredibly durable. However, wool requires specific care to prevent further damage or shrinking.
The Frugal Mender’s Wash Routine: Never put a wool sweater in the washing machine on a warm cycle, and absolutely never put it in the dryer. The agitation and heat will cause the entire sweater to felt, shrinking it down to fit a toddler!
Always hand-wash your wool and cashmere garments in cool water with a gentle, no-rinse wool wash (or a tiny drop of budget-friendly baby shampoo). Gently squeeze the suds through the fabric—do not wring or twist it. Rinse in cool water, press the excess water out by rolling the sweater in a dry towel, and always lay it flat to dry on a mesh rack. Proper care is the ultimate frugal living hack, preventing the need for repairs in the first place and keeping your masculine-elegant wardrobe looking sharp year after year.
Conclusion
Wear Your Mends with Pride
Congratulations! You have just unlocked one of the most powerful, budget-savvy tailoring secrets in the frugal DIYer’s arsenal. By mastering the simple, satisfying art of needle felting, you have freed yourself from the tyranny of moth holes and the high costs of professional repairs. You have learned how to look at a damaged garment not as trash, but as a blank canvas for resourcefully-creative restoration.
Whether you choose to flawlessly blend your repairs for an invisible, masculine-elegant finish, or you embrace the rugged charm of brightly colored visible mending, you are taking a stand against fast fashion. You are proving that with a $10 toolkit, a bit of wool roving, and a few minutes of rhythmic stabbing, you can extend the life of your favorite clothes indefinitely. So, dig into the back of your closet, rescue those discarded sweaters, and start stabbing! Wear your mended garments with the ultimate pride, knowing you saved money, learned a crafty-expert skill, and breathed new life into something beautiful. Happy felting!

Makenzie is the founder and lead writer at MoneyHackTips.com — a personal finance blog dedicated to delivering street-smart financial wisdom for real people on real budgets. With 300+ published articles covering everything from debt management to investing fundamentals, Makenzie’s mission is to make every dollar work harder. When not writing about money hacks, Makenzie is testing frugal living strategies, optimizing side hustles, and helping readers build financial freedom from scratch.