
The Art of the Financial Gesture
Let’s be honest: sliding a twenty-dollar bill into a generic grocery store card feels a bit… uninspired. It’s practical, sure, but it lacks the rugged character and thoughtful effort that defines a truly great gift. As frugal DIYers, we know that the best gifts aren’t necessarily the most expensive ones, but the ones that show a mastery of craft and a respect for the recipient. Enter the Money Origami Wreath. This isn’t just a gift; it’s a geometric feat of engineering that turns cold hard cash into a festive work of art. Whether you are looking to impress a hard-to-buy-for teenager, a budget-conscious newlywed couple, or a family member who appreciates the finer details, this wreath delivers a masculine-elegant aesthetic that commands attention. In this guide, we will break down the precise mechanics of the fold, the best denominations to use for maximum visual impact, and how to assemble a structural masterpiece without a single drop of glue. Get ready to turn your holiday budget into a holiday highlight.
Strategic Currency Selection: The Visual Impact Matrix

Choosing Your Canvas
Before you make your first crease, you need to consider the tactical selection of your bills. Not all currency is created equal when it comes to origami. For a wreath, you want bills that are crisp, uncirculated, and stiff. If the bills are limp or wrinkled, the wreath will lose its structural integrity and look more like a pile of laundry than a professional gift. If you only have access to older bills, a clever trick is to lightly mist them with water and iron them flat (on low heat) to restore some of the original starchiness. The denomination you choose sets the tone for the entire project. While a wreath made of $1 bills is a budget-savvy way to give a $10 or $12 gift that looks massive, using $20 bills creates a high-stakes luxury item that will be the talk of the Christmas morning coffee session.
| Bill Denomination | Visual Impact Level | Total Wreath Value (10 Units) | Best Recipient |
|---|---|---|---|
| $1 Bills | High (Green/White Contrast) | $10 | Kids, Paperboys, Neighbors |
| $20 Bills | Elite (Deep Green Tones) | $200 | Graduates, Newlyweds, Spouses |
| $50 Bills | Premium (Subtle Pink/Blue) | $500 | The ‘Big’ Family Gift |
| International Notes | Exotic & Colorful | Varies | Travel Lovers |
Pro-Tip: Always visit your bank teller and specifically request ‘crisp, new bills.’ It makes the folding process 50% faster and the final result look 100% more professional.
The Master Fold: A Step-by-Step Tactical Guide
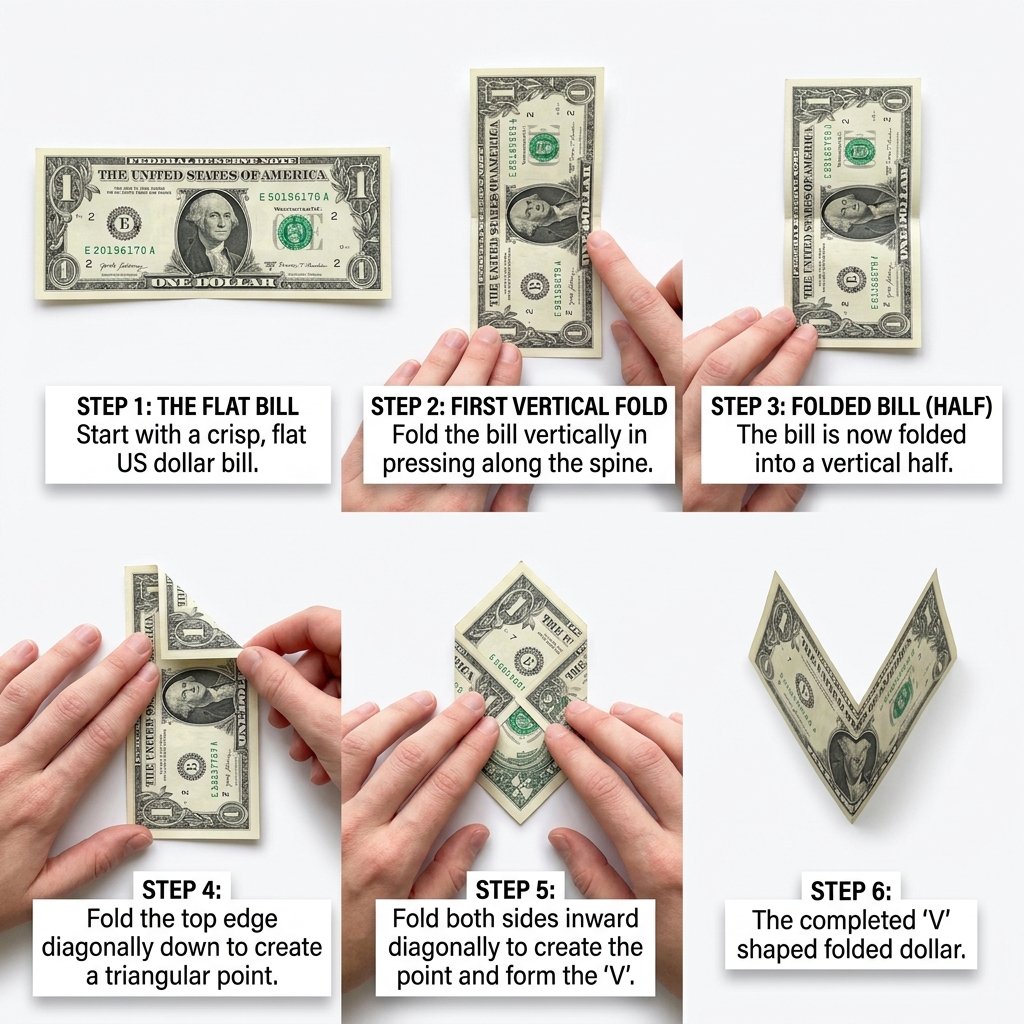
Precision Engineering in Paper
The money origami wreath is a modular design, meaning you will fold several identical units and then interlock them. To create a standard-sized wreath, you will need 10 to 12 bills. Follow these instructions with mathematical precision to ensure each piece fits perfectly into the next. Consistency is the key to a symmetrical finished product.
- The Long Fold: Lay the bill flat on a hard surface. Fold the bill in half lengthwise (hot dog style), making a sharp crease with your fingernail. Unfold it.
- The Center Point: Fold the bill in half widthwise (hamburger style) just to mark the center, then unfold.
- The Corner Flaps: Fold all four corners inward so that the edges meet the horizontal center crease you made in step 1. This should create two pointed ends, making the bill look like a long hexagon.
- The Edge Tuck: Fold the long top and bottom edges inward to meet at the center horizontal line. The bill will now be a thin, sturdy strip with pointed ends.
- The Final Bend: Fold the entire strip in half widthwise. You should now have a ‘V’ or ‘U’ shaped module with two open pockets on the ends.
Mantra: Crease twice, fold once. A sharp crease is the difference between a wreath that holds its shape and one that unravels.
Structural Assembly: The Friction-Lock Technique

Building Without Adhesives
One of the hallmarks of high-end money origami is the absence of tape or glue. Not only does adhesive damage the currency, but it also lacks the sophisticated engineering of a true friction-lock. To assemble your wreath, you will take the ‘arms’ of one folded unit and slide them into the ‘pockets’ of the next. This creates a circular chain that is surprisingly strong. As you add more units, the tension will increase, naturally forming a beautiful, serrated circle. If the wreath feels loose, ensure your folds are tight and that the ends of each bill are pushed as far as they can go into the receiving pockets of the next bill. This process usually takes about 15 minutes once all your units are folded.
| Metric | DIY Wreath | Store-Bought Gift Card |
|---|---|---|
| Setup Time | 30-45 Minutes | 5 Minutes |
| Presentation Value | Exceptional | Low |
| Cost of Materials | $0 (Plus Cash) | $5 (Card & Envelope) |
| Wow Factor | 10/10 | 2/10 |
The Finishing Touches: Styling for the Holidays
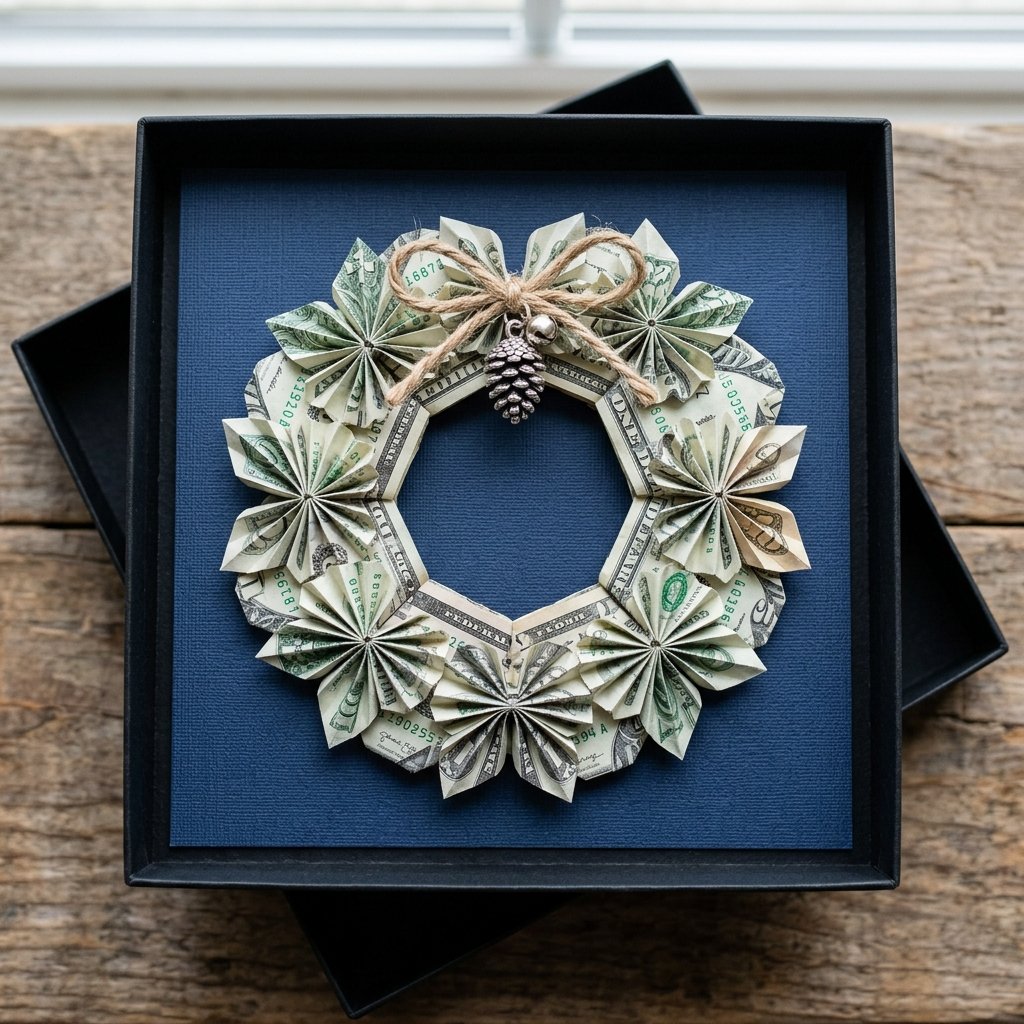
Presentation is Everything
Now that you have your structural wreath, it’s time to add the masculine-elegant flair. You can leave the wreath as is for a minimalist look, or you can mount it to a piece of high-quality cardstock. For a Christmas theme, a deep burgundy or forest green cardstock provides a stunning backdrop that makes the green of the money pop. Use a small piece of removable glue dot (only on the back of the wreath) to secure it to the card. Add a small, handmade twine bow or a single metallic bell to the center of the wreath to complete the look. If you are giving this as a standalone gift, place it in a shallow, square box with a clear lid. This protects the folds and allows the recipient to appreciate the geometry before they ever open the package.
Crafty Expert Tip: Don’t just give the wreath! Include a small ‘How to Unfold’ note to ensure the recipient doesn’t accidentally rip the bills in their excitement.
Troubleshooting and Advanced Customization
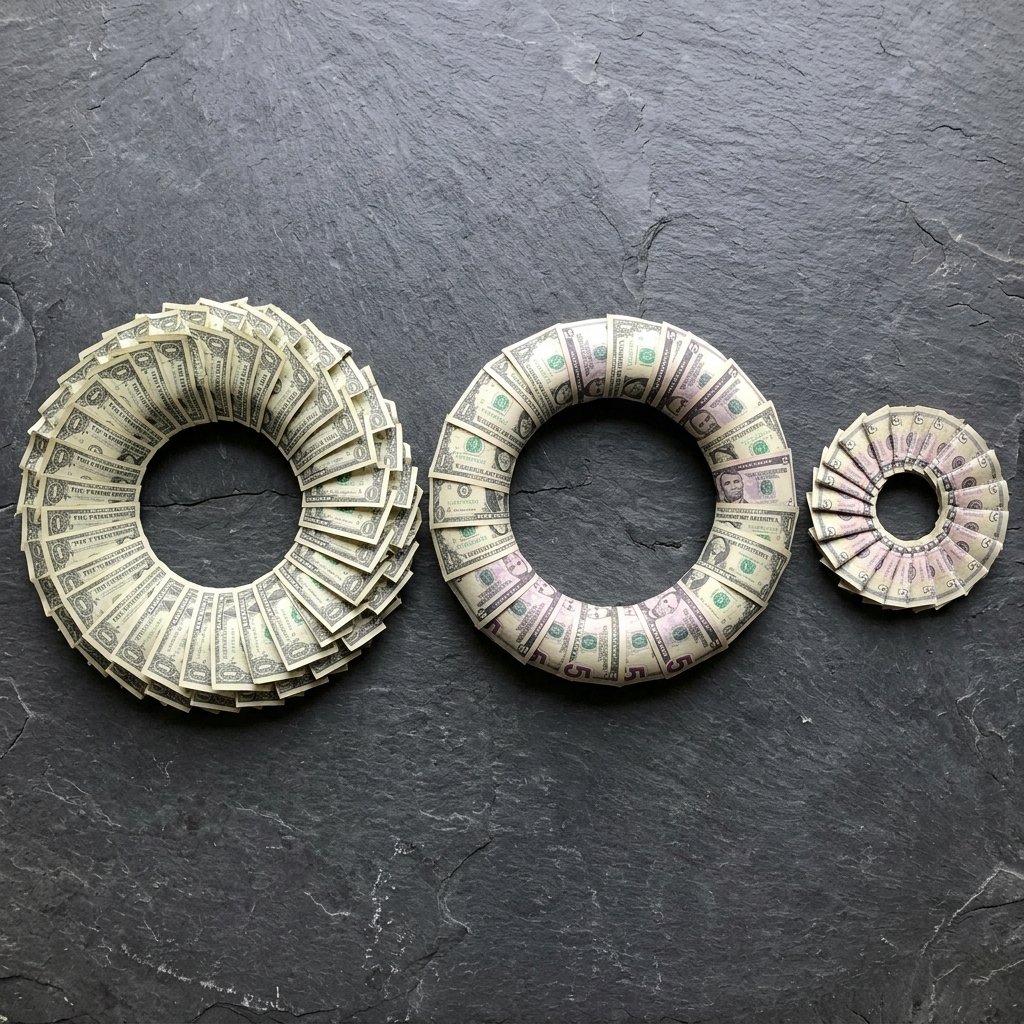
Mastering the Curve
Sometimes, your wreath might want to ‘buckle’ or refuse to lay flat. This usually happens if the bills aren’t folded to the exact same width. If your wreath is too tight, try adding an 11th or 12th bill to increase the circumference. If it’s too loose, go back and sharpen the creases on the ‘V’ fold of each unit. For those who want to take it to the next level, you can alternate denominations—using $1s and $5s to create a striped color pattern. This adds a level of complexity and visual interest that shows you really know your way around a folding table. Remember, this is a skill; your first wreath might take a bit of patience, but by the third one, you’ll be a master of the currency craft.
Safety First: Currency Integrity
Note: While folding is perfectly legal, avoid cutting or permanently altering the bills. The goal is a gift that is both beautiful and spendable. Never use staples or permanent glues.
Conclusion
The Gift That Keeps on Giving
By choosing to fold a Money Origami Wreath, you’ve moved beyond the realm of the ‘easy way out’ and into the territory of the thoughtful creator. You’ve taken a simple commodity and transformed it into a memorable experience. This Christmas, don’t just hand over an envelope; hand over a masterpiece. It’s budget-savvy, resourcefully creative, and carries a rugged elegance that no store-bought card can match. Whether they spend it the next day or keep it as a memento of your skill, your gift will be the one they remember. Now, grab those bills, find a flat surface, and start folding your way to the best Christmas gift ever.

Makenzie is the founder and lead writer at MoneyHackTips.com — a personal finance blog dedicated to delivering street-smart financial wisdom for real people on real budgets. With 300+ published articles covering everything from debt management to investing fundamentals, Makenzie’s mission is to make every dollar work harder. When not writing about money hacks, Makenzie is testing frugal living strategies, optimizing side hustles, and helping readers build financial freedom from scratch.