
The Tailor Tax: Why Your Activewear Deserves a Better Solution
We have all been there: you find the perfect pair of high-performance yoga pants or compression leggings, only to realize they were designed for someone with the legs of a professional basketball player. For the frugal DIYer, the prospect of spending $15 to $25 at a professional tailor just to shorten a hem is a bitter pill to swallow, especially when that cost represents nearly half the price of the garment itself. But there is a clever, rugged, and entirely practical alternative that requires zero needle-and-thread expertise. Welcome to the world of the No-Sew Secret. This isn’t just a quick fix; it is a tactical approach to garment customization that uses heat-activated bonding to create a sleek, factory-finish edge that maintains the integrity of your favorite activewear. Whether you are a handy parent looking to save on the kids’ sports gear or a budget-savvy athlete, mastering this craft will save you hundreds of dollars over the lifetime of your wardrobe. In this guide, we will break down the science of fabric bonding and provide a step-by-step blueprint for achieving professional results on your kitchen table.
“Frugality isn’t about doing without; it’s about doing it better for less. A master of their own wardrobe doesn’t wait for a tailor; they command the tools at hand to create the perfect fit.”
The Science of Stretch: Why Traditional Sewing Fails

Understanding Synthetic Fibers
Yoga pants are a marvel of modern textile engineering, typically composed of a blend of polyester, nylon, and a high percentage of spandex (or Lycra). These fabrics are designed for four-way stretch, meaning they expand and contract in every direction. Traditional straight-stitch sewing on a standard machine often fails because the thread does not stretch with the fabric. When you pull your leggings on, those rigid threads snap, leading to the dreaded ‘popped hem.’
The No-Sew Advantage
The secret to a successful home hem lies in polyamide heat-bond tape. Unlike rigid thread, this adhesive creates a flexible, cohesive bond between the two layers of fabric. When applied with the correct heat and pressure, the adhesive melts into the fibers, creating a permanent union that moves with you. This method is not only faster than hand-stitching but also results in a much lower profile, mimicking the high-end ‘bonded hems’ found in premium athletic brands like Lululemon or Alo Yoga.
| Fabric Type | Stretch Factor | Best Hemming Method |
|---|---|---|
| Cotton Jersey | Medium | Hand-Stitch or Tape |
| Polyester/Spandex Blend | High | Flexible Heat-Bond Tape |
| Compression Nylon | Very High | Heavy-Duty No-Sew Adhesive |
The No-Sew Arsenal: Essential Tools for the Resourceful Crafter
Gathering Your Supplies
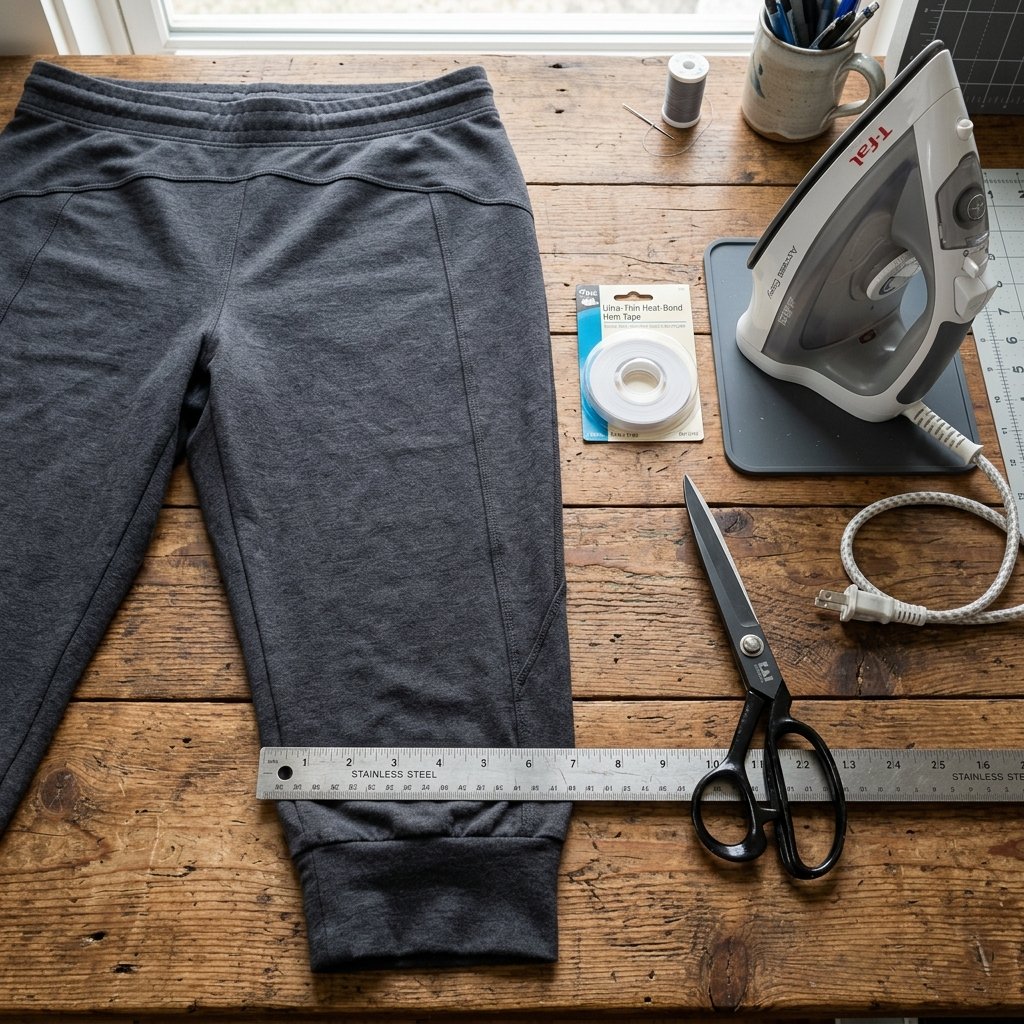
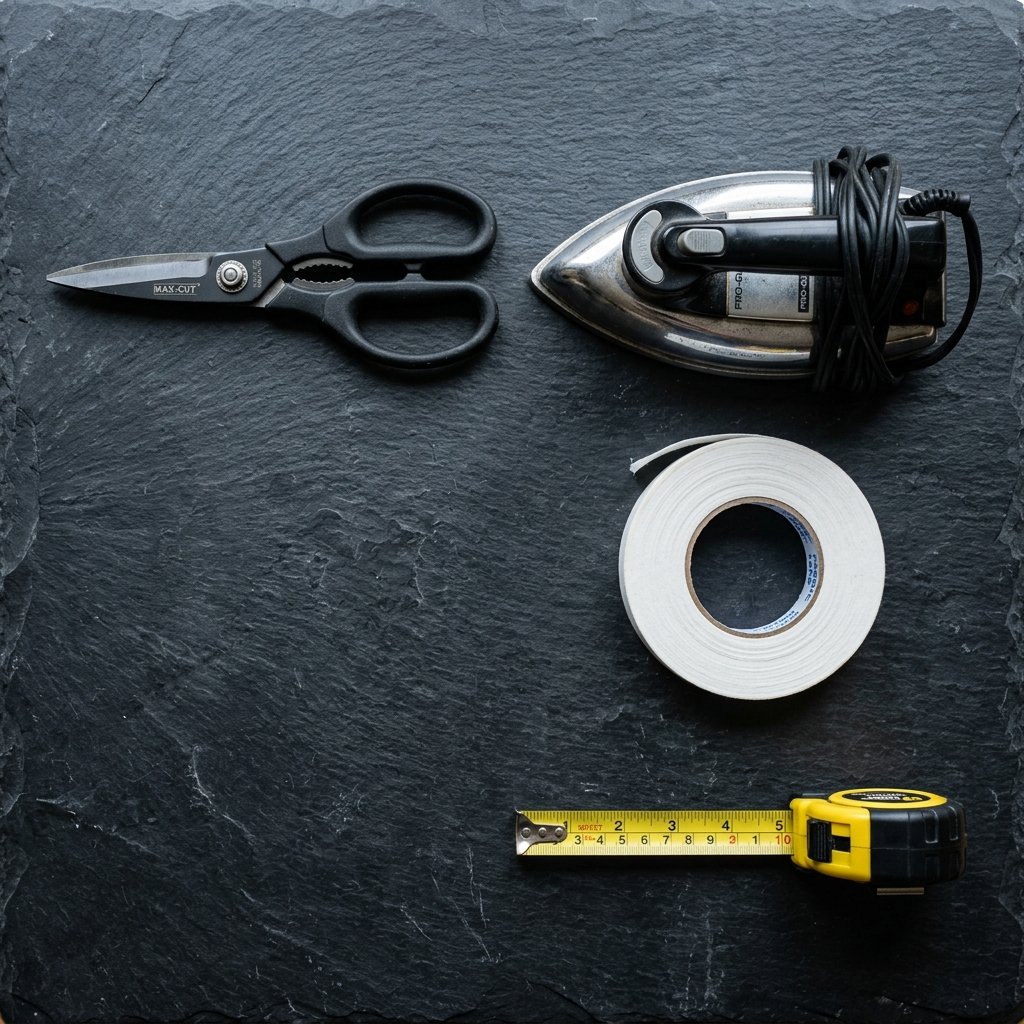
To execute a professional-grade hem, you need the right tools. We are looking for high-quality results on a Dollar Tree budget. You likely already own most of these items, but the key is in the specific type of bonding agent you select. You want a ‘Stretch’ version of hem tape if possible, though standard ‘Ultra-Hold’ works for most leggings that don’t require extreme ankle expansion.
- Fabric Shears: Do not use kitchen scissors. You need a sharp, clean cut to prevent fraying.
- Heat-Activated Hem Tape: Look for brands like Stitch Witchery or HeatnBond. One roll ($3-$5) can hem up to 10 pairs of pants.
- Steam Iron: The engine of this operation.
- Measuring Tape and Chalk: For tactical precision.
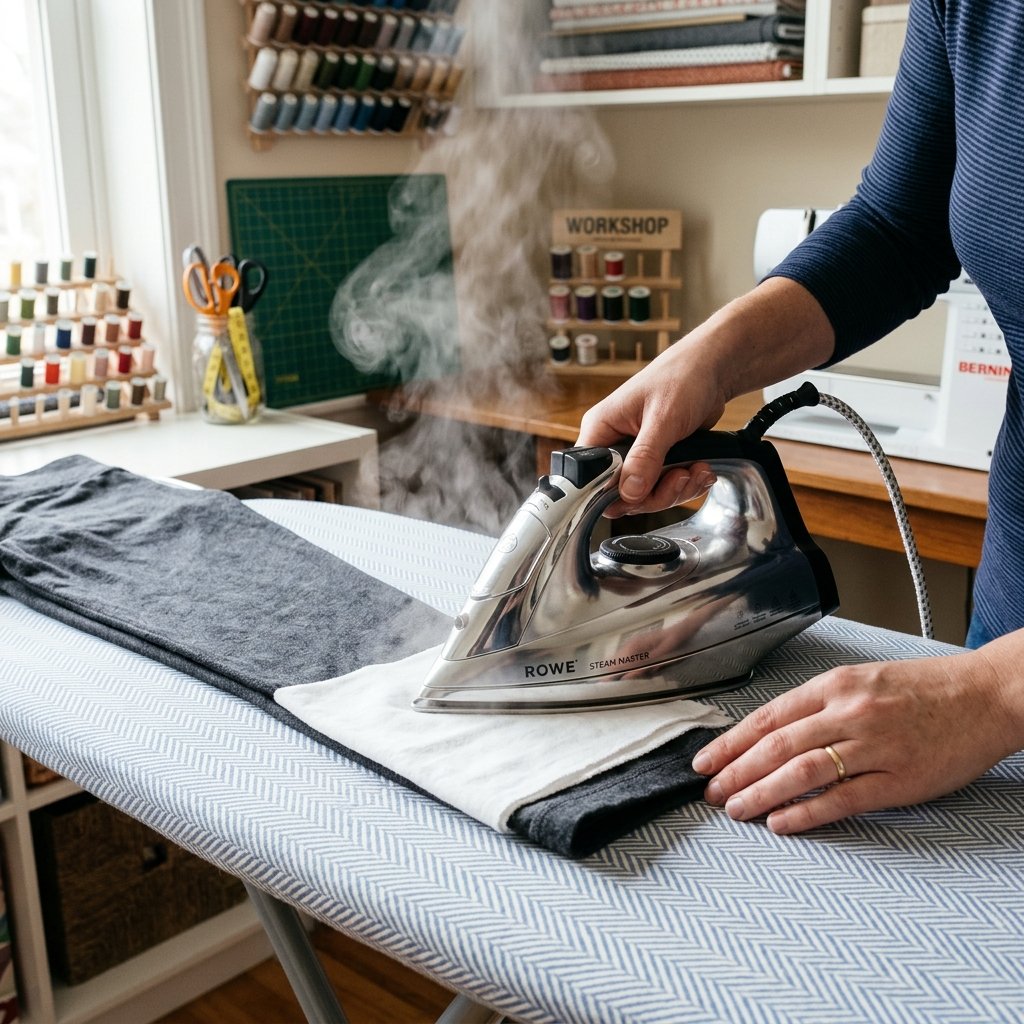
- Pressing Cloth: A thin cotton towel or old t-shirt to protect your synthetic fabrics from melting.
| Item | Estimated Cost | Source |
|---|---|---|
| Hem Tape (Roll) | $3.49 | Craft Store / Online |
| Fabric Shears | $0.00 (Owned) | Household Tool Kit |
| Tailor’s Chalk | $1.25 | Dollar Store |
| Total Project Cost | $4.74 | Savings of ~$20 vs Tailor |
Safety Note: Synthetic fabrics like nylon and polyester have a low melting point. Always use a pressing cloth and start with a lower iron setting to avoid scorching your favorite gear.
The Step-by-Step Blueprint: Precision Hemming
Step 1: The Measurement Ritual
Put on your yoga pants and stand in front of a mirror. Fold the excess fabric inward to your desired length. Use pins or a chalk mark to indicate the new hemline. Pro Tip: Measure twice, cut once. Ensure both legs are symmetrical by measuring from the crotch seam (the inseam) down to the mark.
Step 2: The Tactical Cut
Lay the pants flat on a hard surface. Measure 1 inch below your mark—this extra inch will be folded up to create the hem. Use your fabric shears to cut a straight line across the bottom of each leg. Remove the excess fabric scrap.
Step 3: Setting the Fold
Turn the pants inside out. Fold the bottom edge up by 1 inch (to your original mark) and press it with a warm iron to create a crisp crease. This makes the tape application much easier.
Step 4: The Bonding Phase
Cut a piece of hem tape long enough to go around the circumference of the leg opening. Unfold the crease you just made, lay the tape inside the fold, and refold the fabric over it. The tape should be sandwiched between the two layers of fabric.
Step 5: The Heat Strike
Place your pressing cloth over the hem. Press the iron down firmly on the fabric for 10 to 15 seconds. Do not slide the iron; use vertical pressure. Let the fabric cool completely before moving it—this ‘setting’ time is crucial for a permanent bond.
- Mark the length while wearing.
- Add 1 inch for the seam allowance and cut.
- Crease the fold with an iron.
- Insert the heat-bond tape.
- Press firmly with a cloth for 15 seconds.
- Allow to cool for 5 minutes.
Troubleshooting and Advanced Maneuvers
Dealing with Flared Legs
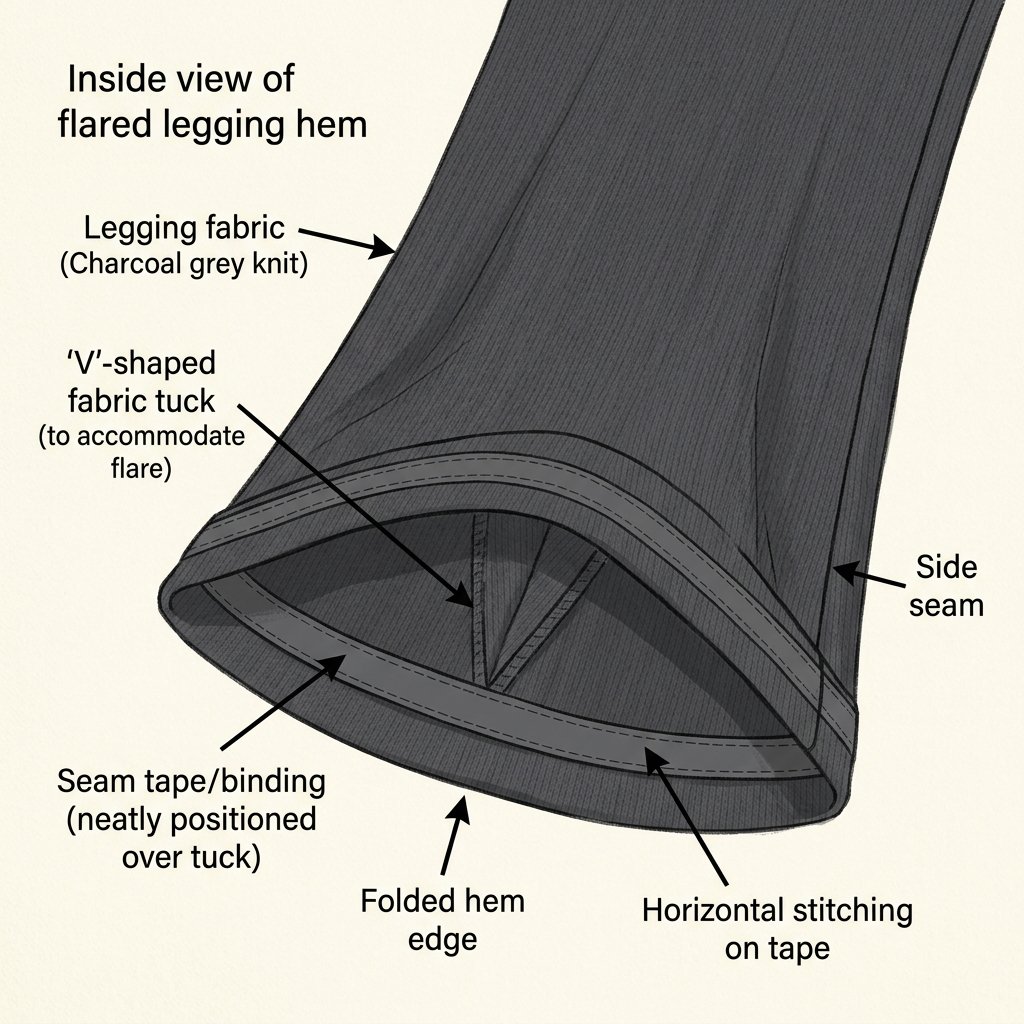
If you are hemming ‘bootcut’ yoga pants, you will notice that the leg gets wider at the bottom. When you fold the hem up, there will be ‘excess’ fabric. The clever solution is to create a tiny, invisible ‘V’ tuck in the inner seam before applying the tape. This allows the wider fabric to sit flush against the narrower part of the leg.
What if the Bond Peels?
If after a few washes you notice a corner lifting, do not panic. This is usually due to insufficient heat during the initial application. Simply re-insert a small piece of tape and re-apply the iron with more pressure. For high-stress areas, you can use two parallel rows of tape for a ‘double-bonded’ reinforced hem.
| Problem | Cause | Solution |
|---|---|---|
| Tape not sticking | Iron not hot enough | Increase heat & press longer |
| Fabric puckering | Tape was stretched | Lay tape flat without tension |
| Adhesive seeping through | Iron too hot / No cloth | Use pressing cloth; lower heat |
The Economics of DIY: Tailor vs. Home Mastery

The Long-Term Savings
Let’s talk numbers. If you buy three pairs of activewear a year and require hemming for all of them, you are spending roughly $60 to $75 annually at the tailor. By investing $5 in a roll of hem tape and 20 minutes of your time, you are essentially paying yourself $150 an hour. For the frugal family, these savings can be redirected toward higher-quality gear or other household essentials.
Environmental Impact
Beyond the wallet, hemming your own clothes is an act of sustainable stewardship. Instead of discarding pants that are ‘too long’ or letting them drag and fray at the heels (destroying the fabric), you are extending the life of the garment. A well-maintained hem prevents the fibers from unravelling and keeps your activewear looking brand new for years.
“True wealth is built through small, consistent acts of resourcefulness. Every hem you do yourself is a victory against the disposable culture of modern fashion.”
Conclusion
Mastering Your Wardrobe, One Hem at a Time
You have now successfully bypassed the tailor and mastered the no-sew secret to perfect activewear. Hemming your own yoga pants is more than just a craft project; it’s a declaration of independence from unnecessary service costs. By using the heat-bonding method, you’ve achieved a finish that is rugged, flexible, and aesthetically superior to a clunky home-sewn stitch. This same technique can be applied to dress slacks, curtains, and even children’s school uniforms. As you grow more confident in your crafty-expert skills, you’ll find that there is very little in your wardrobe that you cannot fix, improve, or customize. Wear your perfectly-fitted leggings with pride, knowing you saved both your money and your favorite gear with nothing more than a little heat and a lot of cleverness. Happy crafting!

Makenzie is the founder and lead writer at MoneyHackTips.com — a personal finance blog dedicated to delivering street-smart financial wisdom for real people on real budgets. With 300+ published articles covering everything from debt management to investing fundamentals, Makenzie’s mission is to make every dollar work harder. When not writing about money hacks, Makenzie is testing frugal living strategies, optimizing side hustles, and helping readers build financial freedom from scratch.