The $100 Problem with a 2-Cent Solution
It happens to the best of us: you’re heading out the door, you tug on your favorite rugged winter coat or that reliable work jacket, and—snap—the zipper slider jumps the track. One side is flapping in the wind, and the other is stuck fast. Most people see this as a death sentence for the garment. They think of the $50 to $80 tailor fee for a full zipper replacement and decide it’s easier to just buy a new one. But as a resourceful DIYer, you know better. A derailed zipper isn’t a broken jacket; it’s just a minor mechanical misalignment. In the next two minutes, we are going to walk through the ‘Grandma’s Secret’ of tailoring—a method so simple and effective it feels like a magic trick. We’re talking about saving your gear, keeping your hard-earned cash in your pocket, and mastering a skill that makes you the hero of the household. Let’s get that slider back where it belongs.
The Anatomy of the Derailed Slider: Why Good Gear Goes Bad
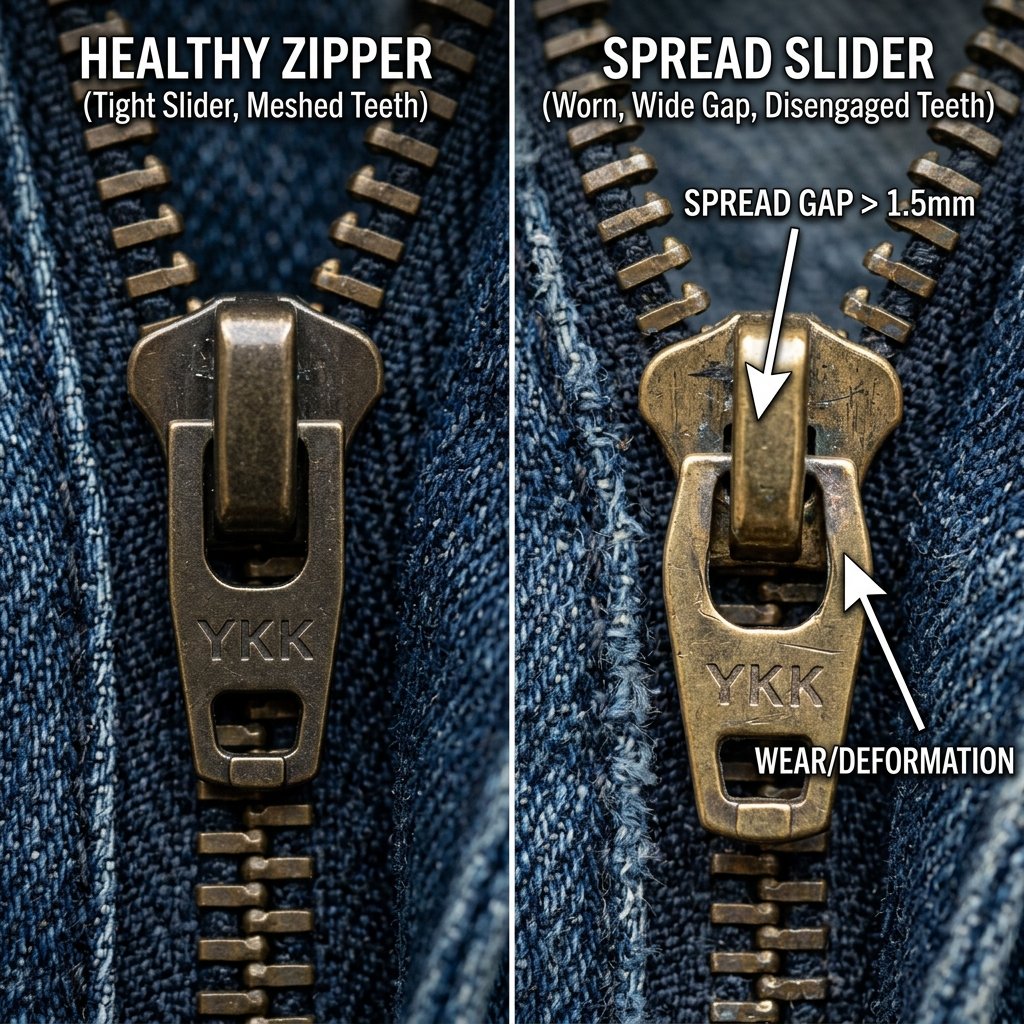
Before we jump into the fix, we need to understand why zippers fail. Most modern zippers are either coil (nylon) or tooth (plastic or metal) style. Over time, the slider—the metal piece you pull—begins to stretch open ever so slightly. When that gap widens by even a fraction of a millimeter, the teeth no longer lock together, or worse, one side of the slider slips off the track entirely.
Common Zipper Failure Points
- Slider Spread: The ‘mouth’ of the slider has widened due to heavy use.
- Missing Bottom Stop: The small metal or plastic piece at the base has fallen off, allowing the slider to slide right off the end.
- Misaligned Teeth: One tooth is slightly bent, causing the slider to jump ship.
| Zipper Problem | The Tailoring/Stitch Solution |
|---|---|
| Slider off one side | The ‘Bottom-Snip’ Re-entry Method |
| Slider won’t stay closed | The Plier Compression Hack |
| Missing bottom stop | Heavy-Duty Thread ‘Stop’ Stitch |
| Bent metal tooth | Needle-Nose Plier Realignment |
The secret to a long-lasting jacket isn’t how much you paid for it; it’s how well you know how to maintain the hardware. A little bit of tension and the right angle can fix 90% of zipper issues.
The ‘Two-Minute Rescue’: A Step-by-Step Guide to Re-Tracking
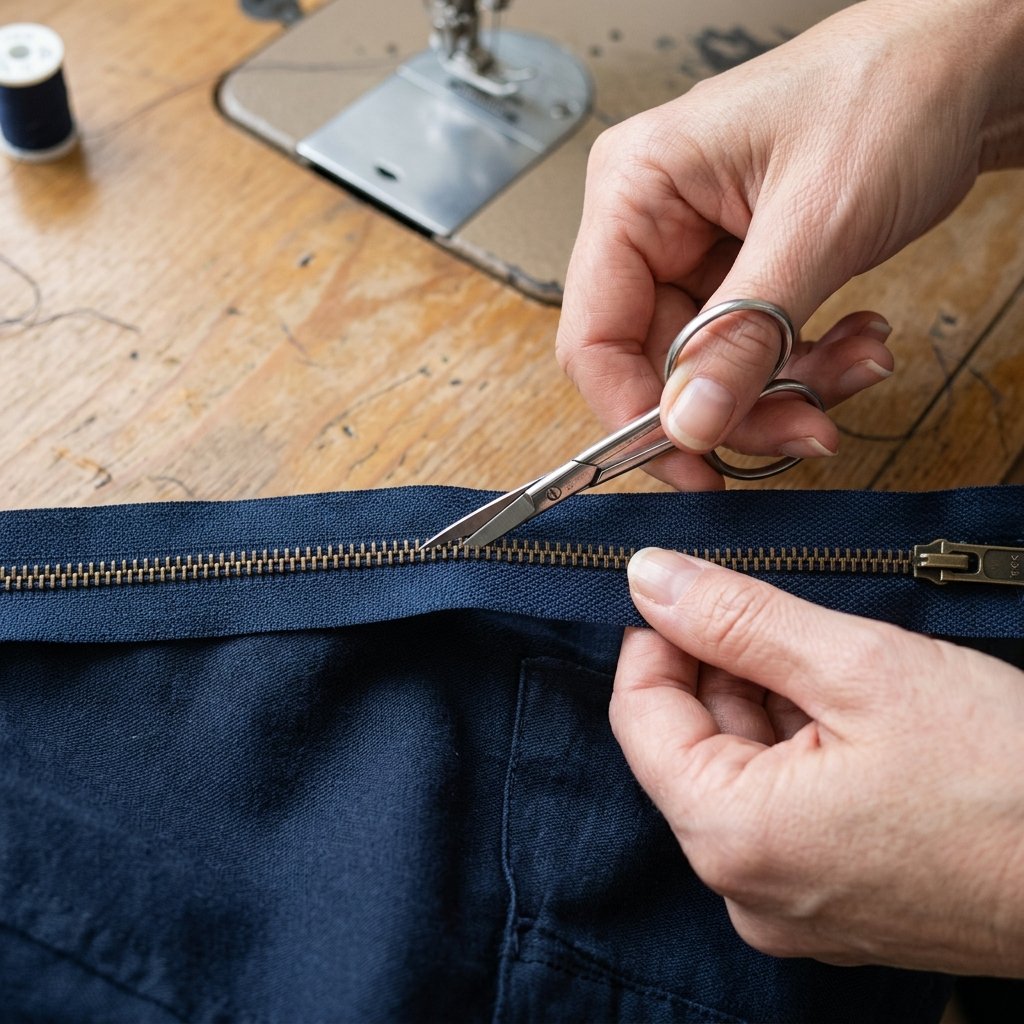
This is the primary method used by professional menders to get a slider back on track without deconstructing the entire jacket. We call this the ‘Bottom-Cut Technique’. It is ideal for jackets where the slider has completely detached from one side of the zipper tape.
Step-by-Step Instructions
- Move the Slider: Slide the detached slider all the way down to the bottom of the side it is still attached to.
- Identify the ‘Entry Point’: Look at the bottom of the opposite (detached) track. If there is a plastic ‘starter box,’ we will work just above it.
- The Tiny Snip: Use sharp fabric scissors to make a tiny horizontal snip (about 1/8 inch) between two teeth on the detached side, near the very bottom. Note: Only cut the fabric tape, not the teeth themselves.
- Feed the Slider: Angle the slider and slide the ‘sniped’ section of the track into the empty side of the slider.
- The Pull: Once the teeth are engaged inside the slider, pull it up firmly. The zipper should now be zipping both sides together.
- The Permanent Fix: Because you made a small snip, you must now create a ‘New Stop.’ Take a needle and heavy-duty thread and sew 10-15 loops over the track at the site of the snip to prevent the slider from ever coming off there again.
| Fabric Type | Repair Difficulty | Best Tool for the Job |
|---|---|---|
| Heavy Canvas/Denim | Easy | Needle-nose pliers & Heavy Thread |
| Lightweight Nylon/Puffer | Moderate | Fine-point tweezers |
| Leather Jackets | Difficult | Thimble and Waxed Cord |
The Fork Method and Other Clever Workshop Hacks
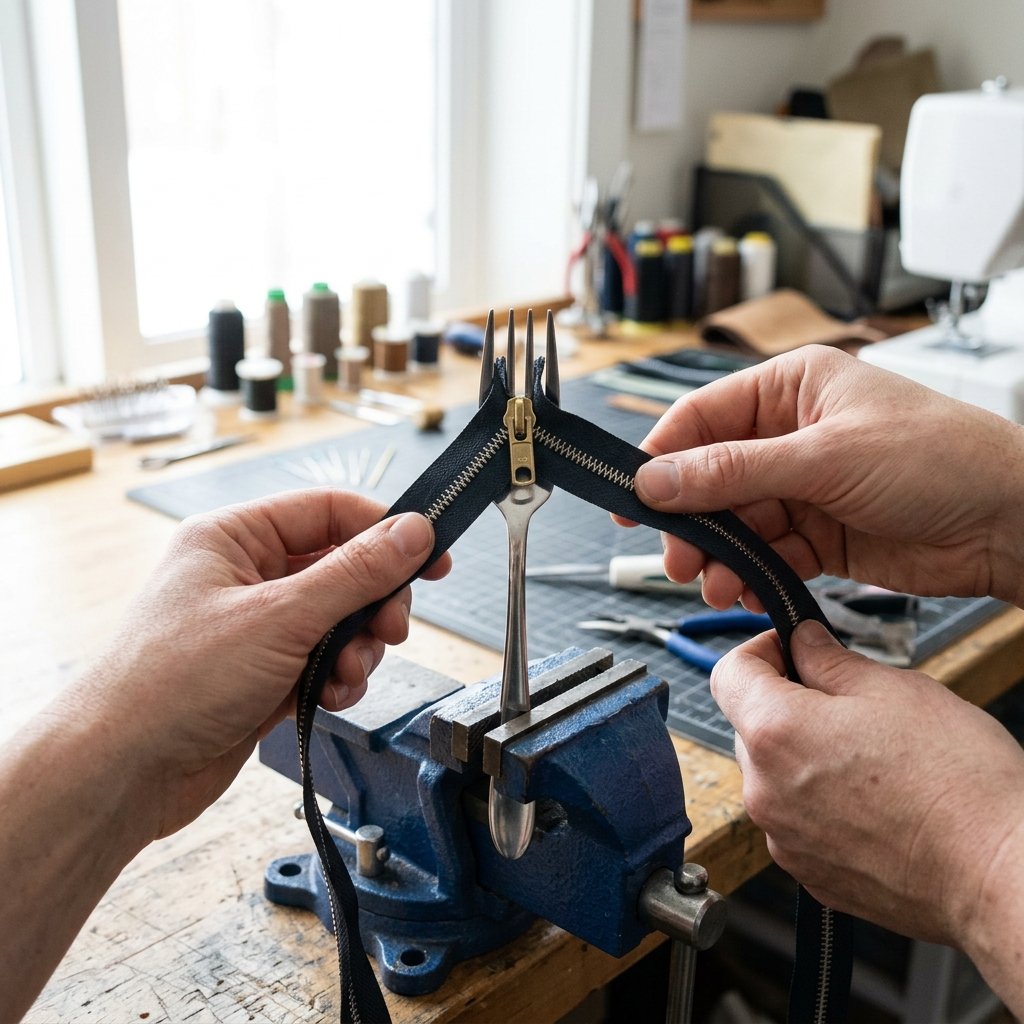
If you don’t want to cut the fabric of your jacket, there is a legendary ‘Fork Hack’ that works wonders for zippers that have come off completely (like on a pillowcase or a jacket with a removable slider). This is the ultimate budget-savvy trick for the crafty parent.
How to Use a Kitchen Fork as a Third Hand
- Secure the Fork: Place a standard kitchen fork flat on a table, or better yet, secure it in a small hobby vise.
- Mount the Slider: Slide the zipper slider onto the center tines of the fork so it is held steady with the ‘mouth’ facing you.
- Feed the Tracks: Take both sides of the zipper track and feed them into the slider simultaneously. Because the fork holds the slider perfectly still, you can apply even pressure to both sides.
- Slide and Go: Once the teeth engage, pull the fabric toward you, and the slider will glide onto the tracks perfectly aligned.
Budget Mantra: A fork is not just for dinner; it’s a precision jig for a master mender. Never throw away what you can fix with a kitchen utensil.
Pro-Level Maintenance: Lubrication and Tooth Alignment
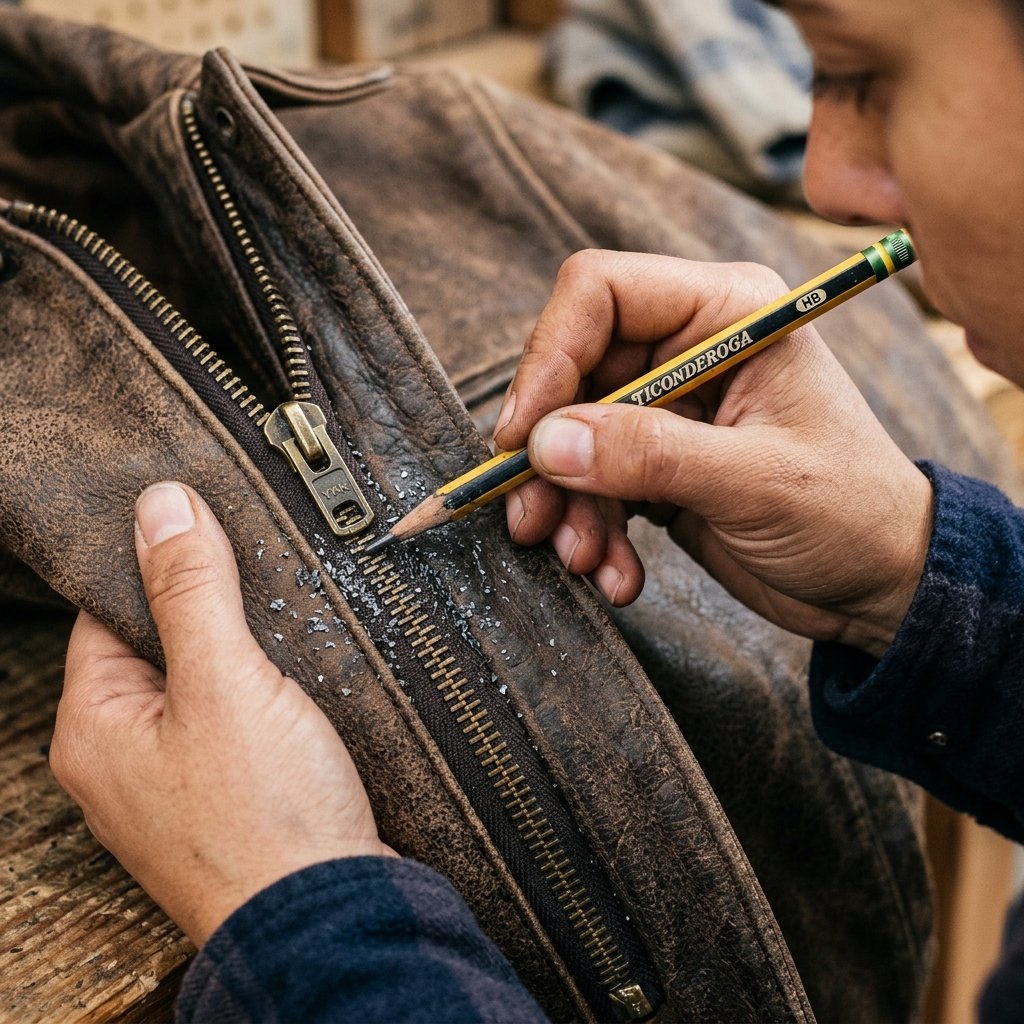
Once you’ve got the zipper back on track, you need to ensure it stays there. A ‘sticky’ zipper is the number one cause of derailment because it forces the user to pull too hard, which stretches the slider. Maintenance is 100% free if you use items already in your junk drawer.
Top 3 DIY Zipper Lubricants
- The Graphite Pencil: Rub a soft lead pencil (No. 2) over the teeth. The graphite acts as a dry lubricant that won’t attract dirt or grit.
- Bar Soap: A dry bar of soap rubbed along the track provides a slick surface for the slider to glide over.
- Beeswax or Candle Wax: Perfect for rugged work jackets and leather gear. It provides a long-lasting, water-resistant coating.
Straightening Bent Teeth
If your zipper is metal, use a pair of needle-nose pliers to gently squeeze any ‘wavy’ teeth back into a straight line. If the teeth are plastic and twisted, you can sometimes use a hair dryer to gently soften the plastic and press it flat with a heavy book.
Essential Mending Kit: Tools Every Frugal Fixer Needs
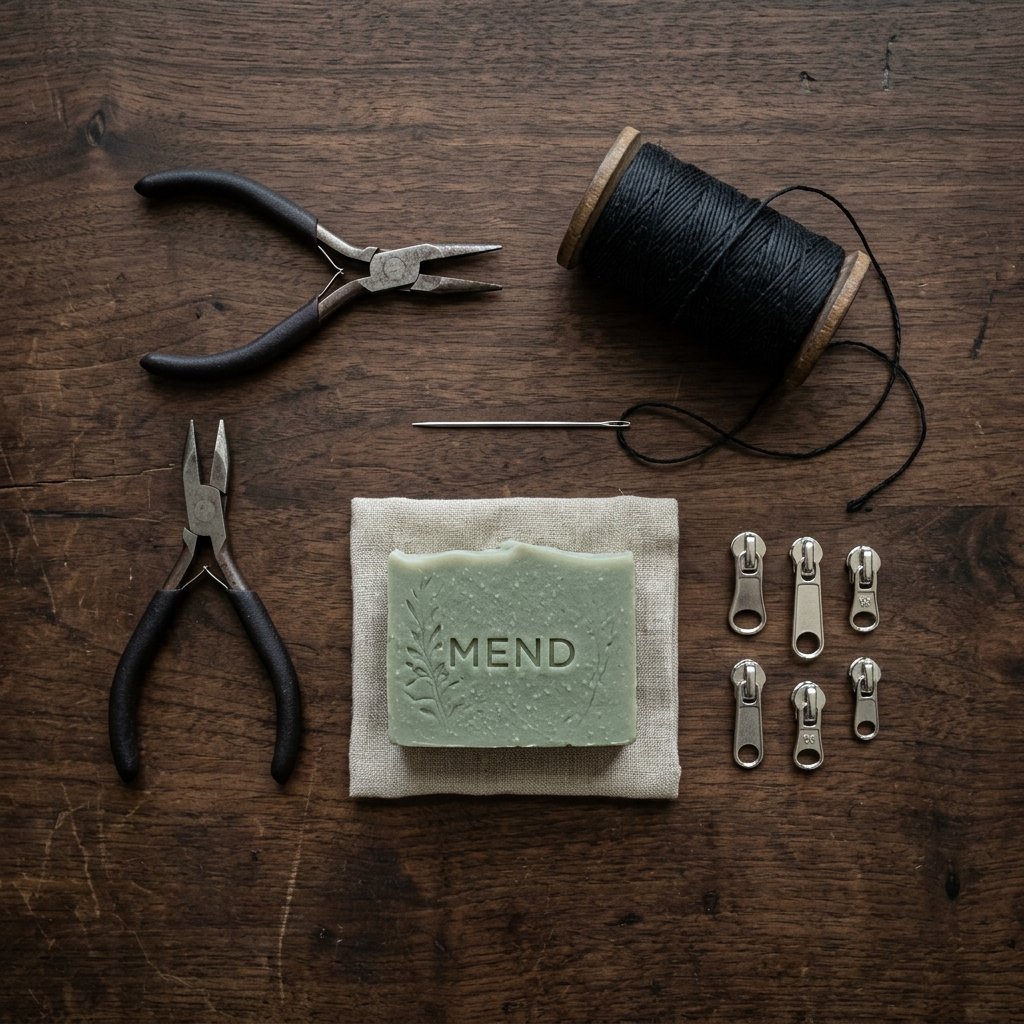
To stop throwing away clothes, you need a basic ‘Mending Station’ in your home. You don’t need an expensive sewing machine; you just need these five rugged essentials. This kit will pay for itself the very first time you save a $150 North Face or Carhartt jacket.
| Tool | Purpose | Estimated Cost |
|---|---|---|
| Needle-Nose Pliers | Crimp sliders and straighten teeth | $5.00 |
| Heavy-Duty Upholstery Thread | Creating new ‘stops’ and patching | $3.00 |
| Seam Ripper | Removing old threads carefully | $2.00 |
| Graphite or Wax | Lubrication for smooth operation | Free (Household) |
| Assorted Replacement Sliders | Bulk pack for various sizes (#3, #5, #10) | $7.00 |
Safety Note: When using pliers to crimp a slider, apply pressure in tiny increments. If you squeeze too hard, you can crack the cast metal, turning a 2-minute fix into a total replacement job. Always wear eye protection when working with tensioned metal.
Conclusion
Wear It with Pride
There is a unique satisfaction that comes from fixing something with your own two hands. By spending just 2 minutes and using zero dollars in new materials, you’ve successfully rescued a jacket from the bin. This isn’t just about frugality; it’s about a rugged, self-reliant lifestyle. You’ve mastered the ‘Bottom-Cut’ technique, learned the ‘Fork Hack,’ and understood the importance of graphite lubrication. Next time a friend complains about a broken zipper, don’t let them buy a new coat—show them the power of a quick fix. Remember: Repair is a radical act of sustainability. Now, zip up that jacket and get back out there!

Makenzie is the founder and lead writer at MoneyHackTips.com — a personal finance blog dedicated to delivering street-smart financial wisdom for real people on real budgets. With 300+ published articles covering everything from debt management to investing fundamentals, Makenzie’s mission is to make every dollar work harder. When not writing about money hacks, Makenzie is testing frugal living strategies, optimizing side hustles, and helping readers build financial freedom from scratch.