
The Magic of Upcycling: Fueling Imaginations on a Dime
There is an undeniable magic in watching a child’s imagination take flight. One moment they are standing in the living room, and the next, they are intrepid explorers charting the rings of Saturn or pirate captains scanning the horizon for a rugged coastline. As handy parents and frugal DIYers, we know a secret that the big toy companies don’t want us to realize: the best toys aren’t the expensive, battery-operated plastic gadgets that break after a week. The best toys are the ones built with our own two hands, infused with love, and engineered from the very materials most people toss in the recycling bin.
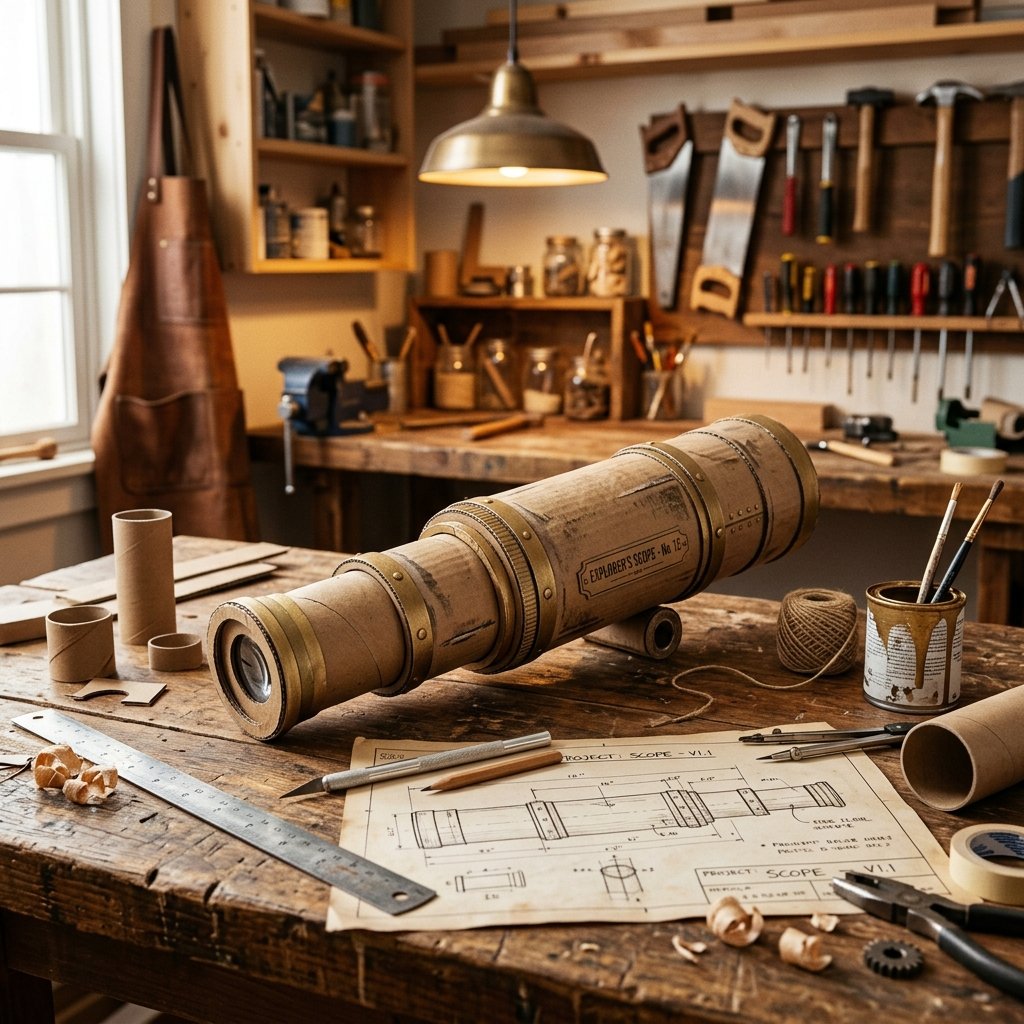
Welcome to the ultimate trash-to-treasure masterclass. Today, we are turning empty wrapping paper tubes, shipping boxes, and a little bit of workshop ingenuity into a highly durable, sliding DIY cardboard telescope. This isn’t your average flimsy paper craft; we are applying practical, rugged construction techniques to ensure this space-exploration tool survives the heavy-duty play of active kids. By utilizing clever reinforcement methods and a touch of masculine-elegant design, you will craft a high-end-looking prop that costs absolutely nothing but your time.
“The most powerful tool in a parent’s workshop isn’t the table saw; it’s the ability to look at a pile of cardboard and see a galaxy of possibilities. Save your money, build their dreams.” – The Frugal Maker’s Mantra
Whether you are a budget-savvy mom looking for a rainy-day activity, or a crafty dad wanting to spend some quality workshop time building a legacy toy, this guide will walk you through every cut, glue, and faux-metal finish. Prepare for liftoff, because we are about to build a sturdy DIY cardboard telescope toy your kids will absolutely love!
The Blueprint: Gathering Your Upcycled Space Gear
Scavenging the Workshop and Recycling Bin
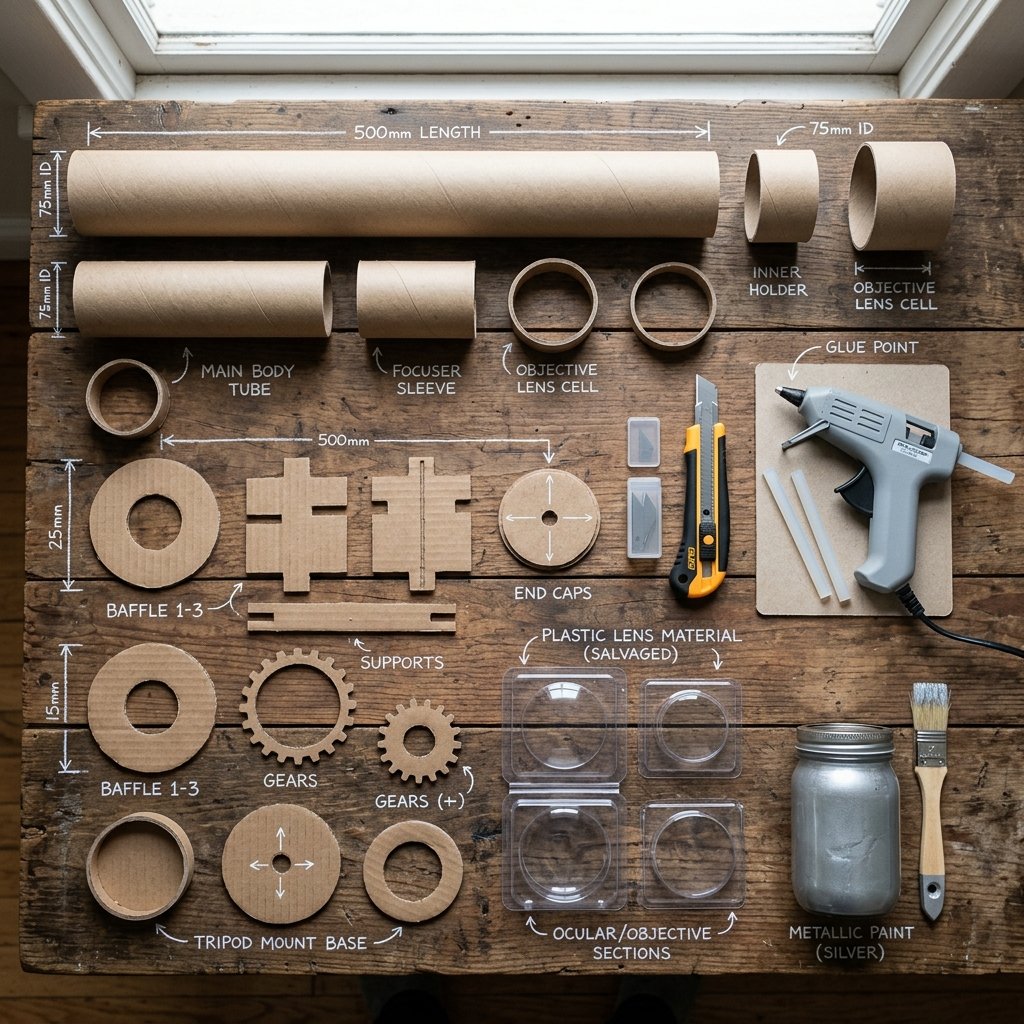
Before we begin engineering our telescope, we need to gather our materials. The beauty of this project lies in its extreme budget-friendliness. We are looking for structural integrity disguised as household waste. You will need a variety of tube sizes to create the sliding focal mechanism, as well as flat corrugated cardboard for the structural mounts and tripod.
Core Materials Checklist
- Heavy-Duty Cardboard Tubes: You will need at least two tubes of slightly different diameters. A thick mailing tube or wrapping paper tube works perfectly for the main body, while a paper towel roll often serves well as the sliding eyepiece.
- Flat Corrugated Cardboard: Save those Amazon shipping boxes. We need thick, double-walled cardboard if possible to build the rugged tripod and mounting brackets.
- Clear Plastic Packaging: Clamshell containers from berries or baked goods will be upcycled into our “lenses.”
- Adhesives: Wood glue or heavy-duty craft glue for structural bonds, and hot glue for quick, rigid assembly.
- Hardware (Optional but Recommended): A single brass nut, bolt, and a few washers (or a sturdy split pin/brad) for the swivel mount.
- Finishing Supplies: Masking tape, black or metallic spray paint, and acrylic craft paints for weathering.
| Telescope Component | Store-Bought Plastic Equivalent | Our Rugged DIY Zero-Budget Alternative |
|---|---|---|
| Main Optical Tube | $15.00 | $0.00 (Upcycled mailing tube or wrapping paper roll) |
| Sliding Focuser | $10.00 | $0.00 (Paper towel tube + masking tape shims) |
| Glass Lenses | $12.00 | $0.00 (Clear plastic from berry clamshells) |
| Adjustable Tripod | $25.00 | $0.00 (Scrap corrugated shipping boxes) |
| Total Estimated Cost | $62.00+ | $0.00 – $2.00 (Just pennies for glue and paint) |
Safety Note: When using craft knives to cut thick corrugated cardboard, always use a fresh, sharp blade. A dull blade requires more force and is more likely to slip. Always cut away from your body and use a metal straight-edge ruler to guide your cuts. Keep hot glue guns out of reach of unsupervised little hands.
Engineering the Main Tube: Structural Integrity is Key
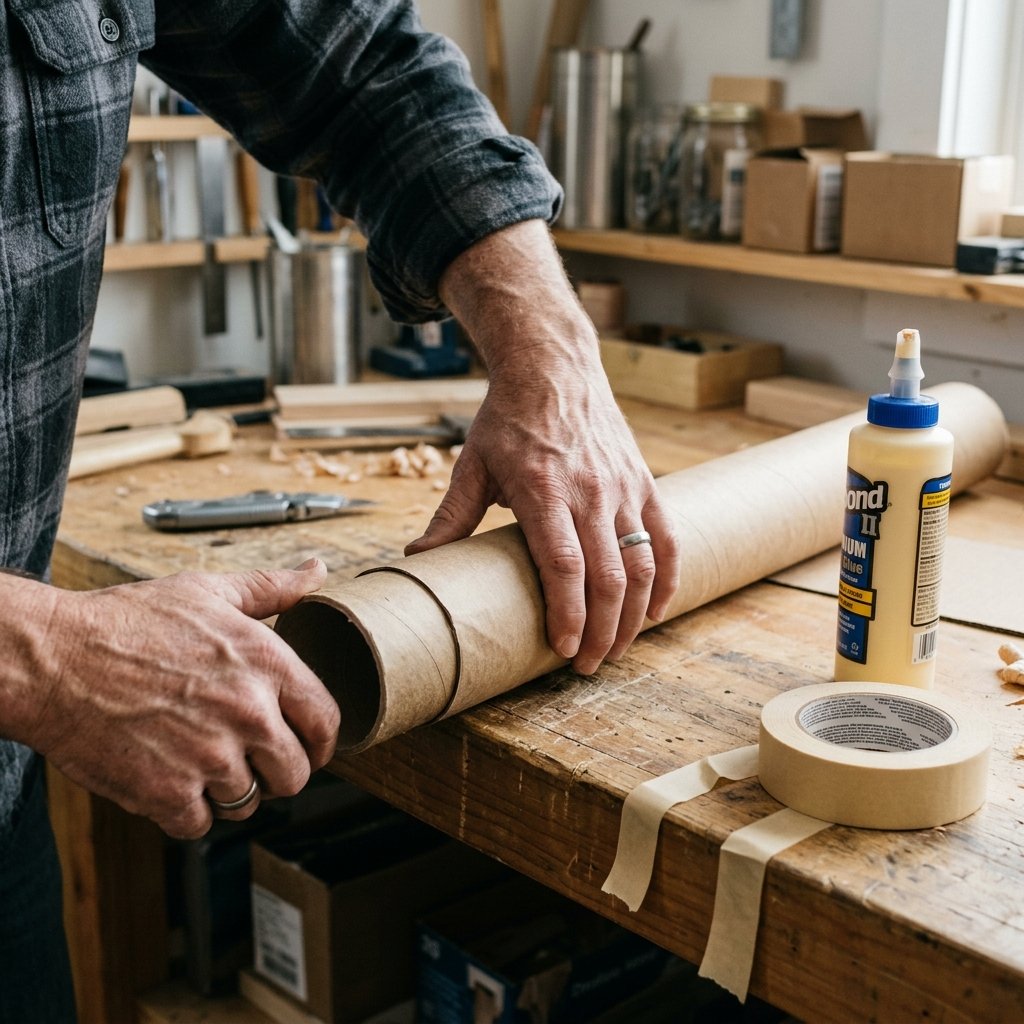
Building a Crush-Proof Body
Kids are tough on toys. A simple paper towel tube will inevitably get crushed during an intense space battle or pirate raid. To prevent this, we are going to reinforce our main optical tube, giving it a solid, rugged feel in the hands.
Step-by-Step Tube Reinforcement
- Step 1: Size the Main Body. Take your thickest tube (the mailing tube or wrapping paper tube) and cut it down to a manageable length. A length of 18 to 24 inches is ideal for the main body. Use a craft knife to score around the circumference before cutting completely through to ensure a clean, straight edge.
- Step 2: The Double-Walled Technique. If your tube feels flimsy, we will laminate it. Cut a piece of flat cardboard (cereal box thickness works best here) to the exact length of your tube. Apply a thin, even layer of wood glue to one side, and wrap it tightly around the main tube. Secure it tightly with rubber bands or masking tape until the glue cures. This simple lamination step increases the crush resistance by over 200%.
- Step 3: Seal the Edges. Cardboard edges can fray over time. Take strips of masking tape and carefully bind the raw cut edges of the tube. Fold the tape half over the outside and half into the inside of the tube. This not only protects the edge but gives the telescope a finished, manufactured look once painted.
By taking the extra 15 minutes to reinforce the main body, you are upgrading this project from a temporary craft to a durable, heritage-style toy. The tactile feel of a solid, heavy tube makes the imaginative play much more immersive.
The Focuser: Crafting a Smooth Sliding Mechanism
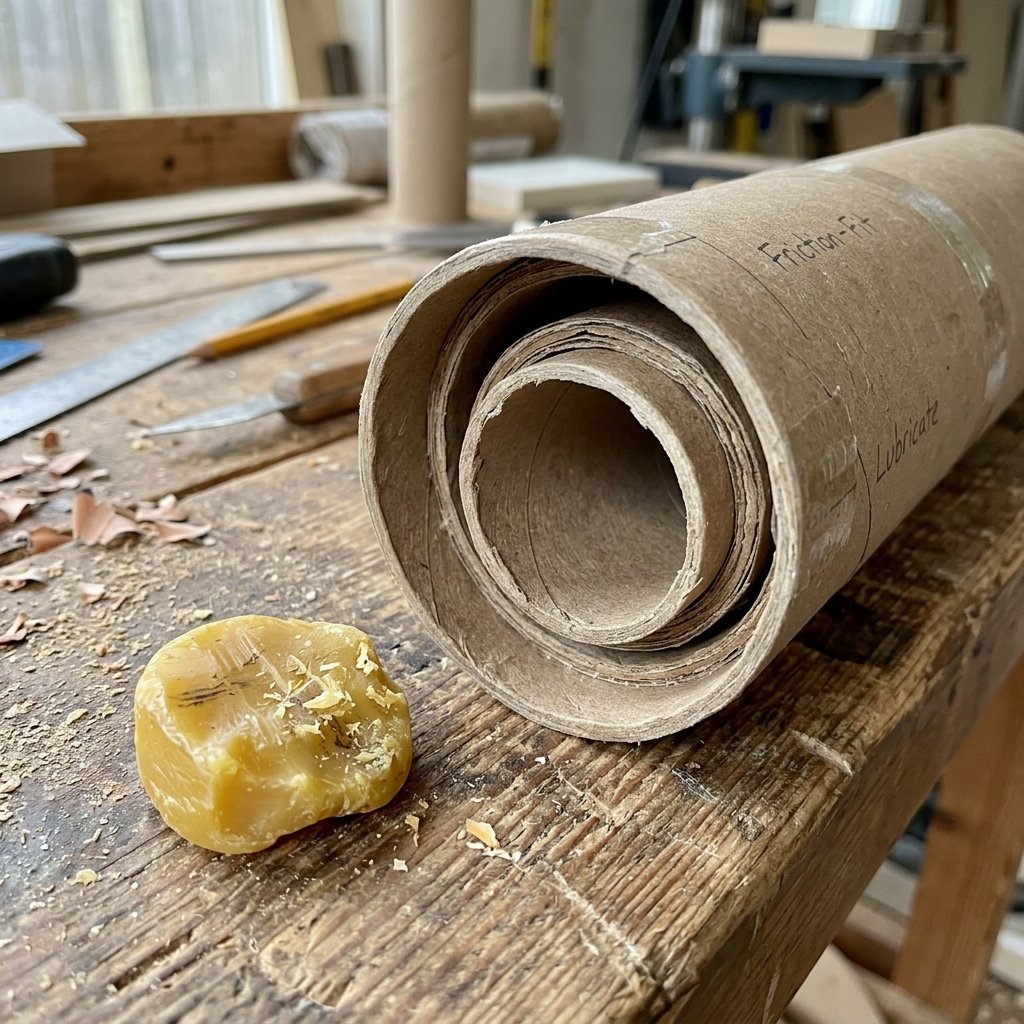
The Magic of the Slide
A telescope isn’t a telescope unless it can focus! Creating a sliding eyepiece is the most interactive part of this build. The goal is to have the smaller inner tube slide smoothly inside the main body without being so loose that it falls out.
Mastering the Friction Fit
Finding two tubes that fit perfectly together is rare. Usually, the inner tube is too small. Here is the crafty expert’s secret to creating a custom friction fit using shims.
- Step 1: Prepare the Eyepiece Tube. Cut your smaller tube (like a paper towel roll) to about 10 inches in length. This will be the sliding focuser.
- Step 2: Create Spacer Rings. Cut two strips of thick cardboard or craft craft foam, about 1 inch wide. Wrap one strip around the bottom end of your inner tube (the end that goes inside the main body). Keep wrapping until the outer diameter of this foam/cardboard ring perfectly matches the inner diameter of your main tube. Glue it securely in place.
- Step 3: The Outer Guide Ring. Now, we need a guide ring on the main tube. Cut a strip of thick cardboard and glue it inside the opening of the main tube. This restricts the opening so the inner tube stays centered and doesn’t wobble.
- Step 4: Lubricate for Smooth Action. For an ultra-smooth, premium feel, rub a plain wax candle or a bit of beeswax along the spacer rings you just created. This dry lubrication allows the cardboard to glide effortlessly without catching, mimicking the feel of a real brass spyglass.
Test the sliding action. It should feel snug but slide with a gentle pull. This clever engineering trick teaches kids basic mechanics and makes the toy infinitely more satisfying to use.
Lenses and Magic: Adding Safe Glass and Constellation Discs
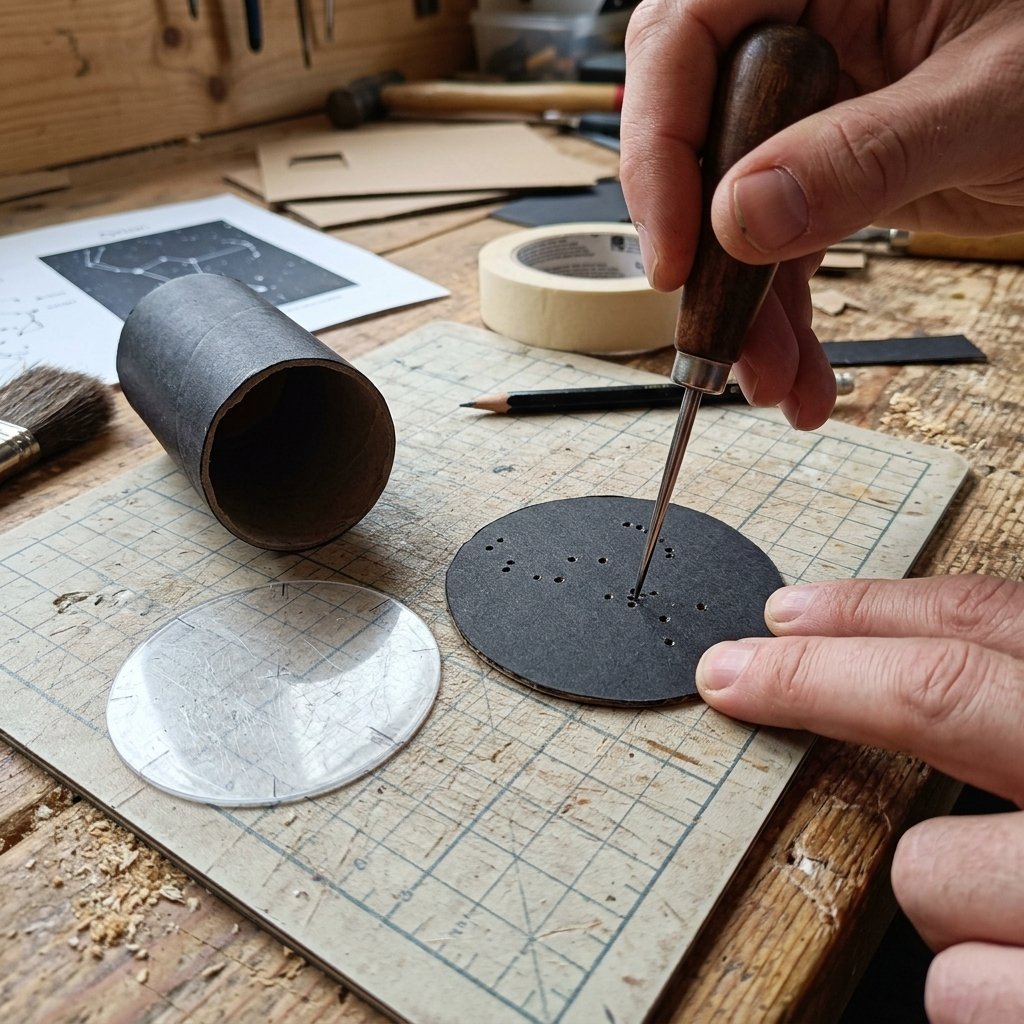
Seeing the Stars in Broad Daylight
While our telescope won’t actually magnify distant galaxies, we can create the illusion of lenses and even add a magical interactive element: interchangeable constellation discs. This turns the toy into an educational tool.
Upcycling Clear Plastic for Lenses
- Step 1: Harvesting the Glass. Take your clean, clear plastic clamshell packaging (berry boxes are excellent). Using the end of your telescope tube as a template, trace two circles onto the flat sections of the plastic with a permanent marker.
- Step 2: Cutting and Fitting. Cut out the plastic circles, cutting just slightly inside the line so they fit snugly inside the tubes.
- Step 3: Mounting the Lenses. Run a very thin bead of hot glue inside the objective end (the front) of the main tube, about 1/2 inch deep. Carefully press the plastic circle into the glue. Repeat for the eyepiece end. The reflection of light off this plastic gives the unmistakable look of real glass lenses.
Crafting Constellation Discs
To take this project over the top, let’s make drop-in constellation filters.
- Cut several circles out of opaque black cardstock or thin cardboard that fit exactly over the front opening of your telescope.
- Look up simple constellations like the Big Dipper, Orion, or Cassiopeia.
- Using a thick needle or an awl, poke holes through the black cardstock in the shape of the stars. (Make sure to do this on top of a piece of scrap wood or a cutting mat!)
- Create a simple slip-on cap out of cardboard for the front of the telescope that can hold these discs. When your child looks through the telescope towards a light source, they will see glowing stars perfectly framed in their view!
Crafty Tip: Use different sized needles to represent the different brightness levels of the stars. A larger hole for Sirius, smaller holes for the surrounding stars. It adds a wonderful layer of educational realism!
Mounting the Scope: Building a Rugged Cardboard Tripod
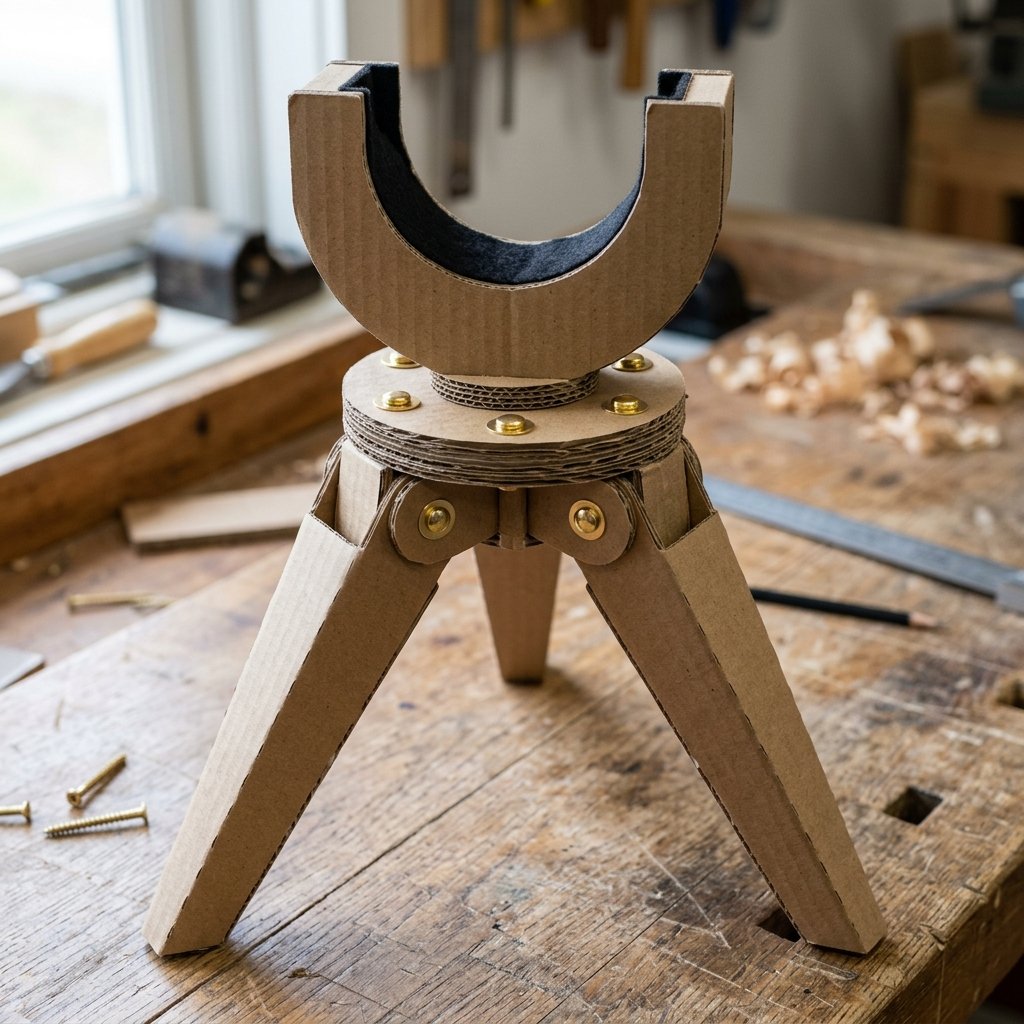
Stability for Deep Space Observation
A handheld spyglass is great for pirates, but astronomers need stability. Building a tripod out of flat cardboard requires an understanding of geometry and triangulation. We want a rugged, masculine-elegant mount that looks like a piece of vintage surveying equipment.
Constructing the Tri-Fold Legs
- Step 1: Cut the Leg Profiles. From your heavy-duty double-walled shipping boxes, cut three identical leg pieces. They should be about 24 to 30 inches long, tapering from 3 inches wide at the top to 1 inch wide at the bottom.
- Step 2: The Central Hub. Cut two identical circles from thick cardboard, about 4 inches in diameter. These will sandwich the tops of the legs.
- Step 3: Articulating the Legs. To allow the legs to fold, do not glue them solidly to the hub. Instead, use brass brads (split pins) or small nuts and bolts. Punch a hole through the top of each leg and through the edge of the circular hubs. Sandwich the legs between the two hubs and secure them with the hardware. You now have a working, folding tripod base!
The Swivel Mount (Altazimuth Mount)
The telescope needs to pan up, down, left, and right.
- The Yoke: Cut a U-shaped piece of thick cardboard that is wide enough to cradle your main telescope tube. Glue the bottom of this U-shape to the top center of your tripod hub.
- The Pivot: Punch a hole through the sides of the U-shape and through the center of gravity on your telescope’s main tube. Run a wooden dowel, a thick paper straw, or a long bolt through the whole assembly. Secure the ends so it doesn’t slip out.
Your telescope can now tilt towards the heavens and rotate on its tripod base. The structural rigidity provided by the double-walled cardboard ensures it won’t collapse under its own weight.
The Paint Job: Weathering and Masculine-Elegant Aesthetics
Turning Trash into Treasure with Paint
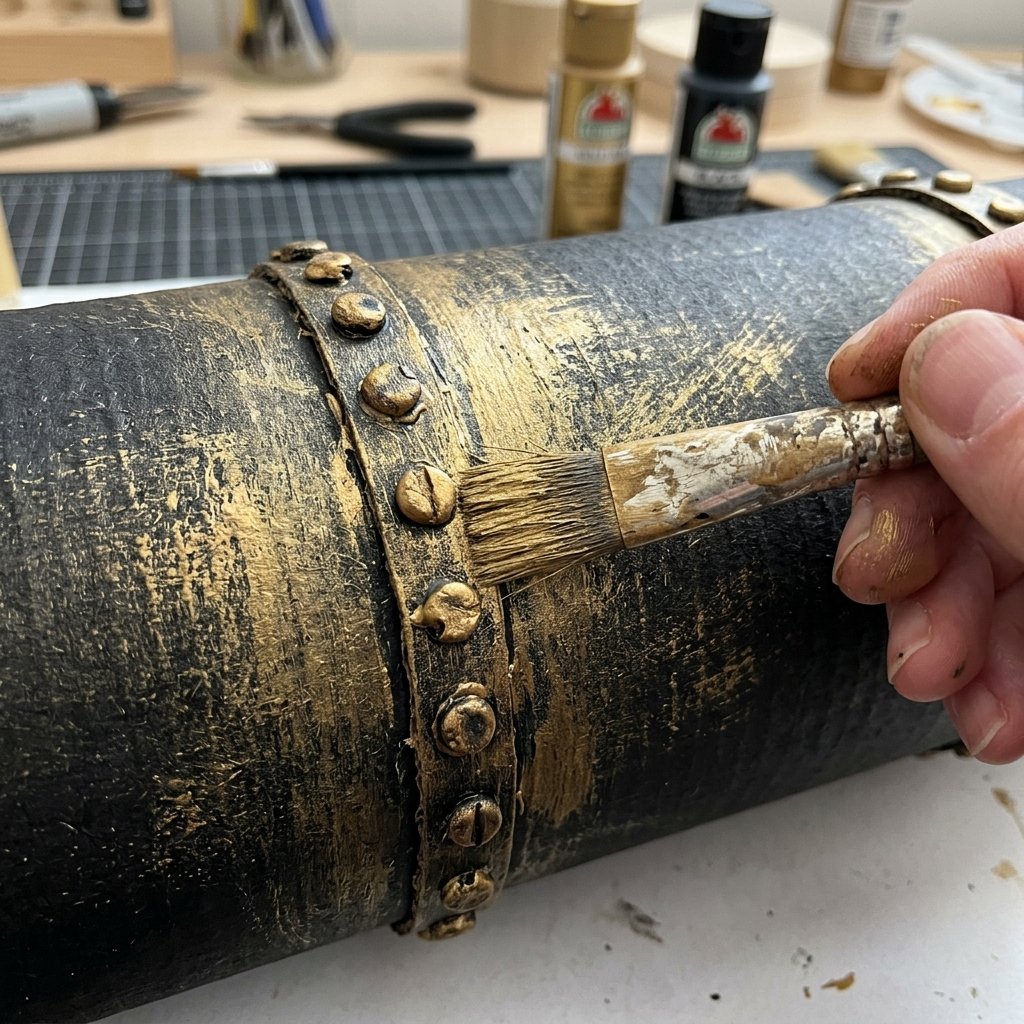
Construction is complete, but right now, it still looks like a pile of Amazon boxes and paper towel tubes. The final step is where the true upcycling magic happens. We are going to apply a faux-metal, weathered finish that gives the telescope a rugged, steampunk, or vintage nautical vibe. This masculine-elegant aesthetic makes it look like a high-end prop rather than a cheap craft.
The Faux-Brass and Iron Finish
- Step 1: The Base Coat. Take the entire assembly outside to a well-ventilated area. Spray paint the telescope body and tripod with a matte black or dark oil-rubbed bronze spray paint. The dark base coat hides the cardboard texture and unifies all the different upcycled materials. Let it dry completely.
- Step 2: Dry Brushing the Metal. Squeeze a small amount of metallic gold, bronze, or silver acrylic craft paint onto a paper plate. Take a stiff-bristled paintbrush, dip it in the metallic paint, and then wipe almost all of it off onto a paper towel. The brush should be almost dry.
- Step 3: Highlighting the Details. Lightly whisk the dry brush over the raised edges, the masking tape seams, and the hardware of the telescope. The metallic paint will catch on the textures, instantly making the black cardboard look like heavy, aged cast iron or tarnished brass.
- Step 4: Adding Rivets. For extra rugged detail, take a silver or gold metallic sharpie and draw small dots along the seams to simulate metal rivets. Alternatively, before painting, you can glue small googly eyes or split peas in rows along the tube; once painted over, they look exactly like heavy-duty industrial rivets!
This painting technique costs mere pennies in acrylic paint but elevates the project to a masterpiece. When your kids take this out to the backyard, it won’t look like a toy; it will look like a genuine instrument of exploration.
Conclusion
Final Thoughts: Building Memories, Not Just Toys
By following this guide, you have successfully transformed everyday recycling bin fodder into a magnificent, sturdy DIY cardboard telescope. You’ve utilized clever engineering for the sliding focuser, applied rugged construction techniques for the tripod, and finished it off with a budget-savvy, masculine-elegant paint job that rivals high-end store-bought props. But more importantly, you’ve engaged in the purest form of frugal, resourceful crafting.
When we build toys alongside our children, we teach them invaluable lessons. We teach them that they have the power to create their own worlds, that materials have value far beyond their first use, and that imagination doesn’t require a battery or a Wi-Fi connection. The $60+ you saved by not buying a plastic alternative can go towards a family camping trip where they can use their new telescope to gaze up at the real stars.
So clear off the workbench, grab those empty tubes, and start building. The universe is waiting to be explored, and you’ve just provided the perfect, budget-friendly vessel for the journey. Blast off, and happy crafting!

Makenzie is the founder and lead writer at MoneyHackTips.com — a personal finance blog dedicated to delivering street-smart financial wisdom for real people on real budgets. With 300+ published articles covering everything from debt management to investing fundamentals, Makenzie’s mission is to make every dollar work harder. When not writing about money hacks, Makenzie is testing frugal living strategies, optimizing side hustles, and helping readers build financial freedom from scratch.