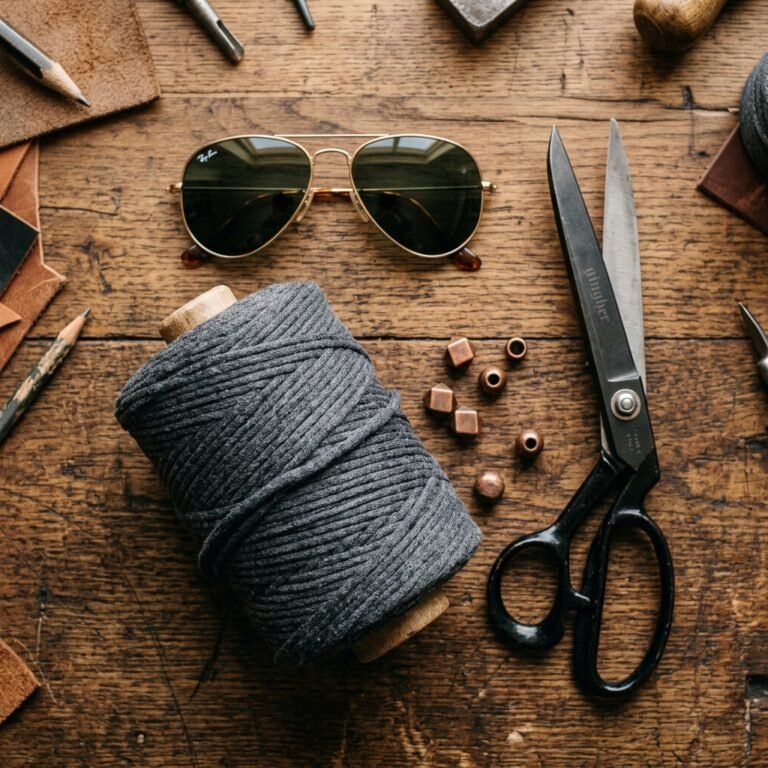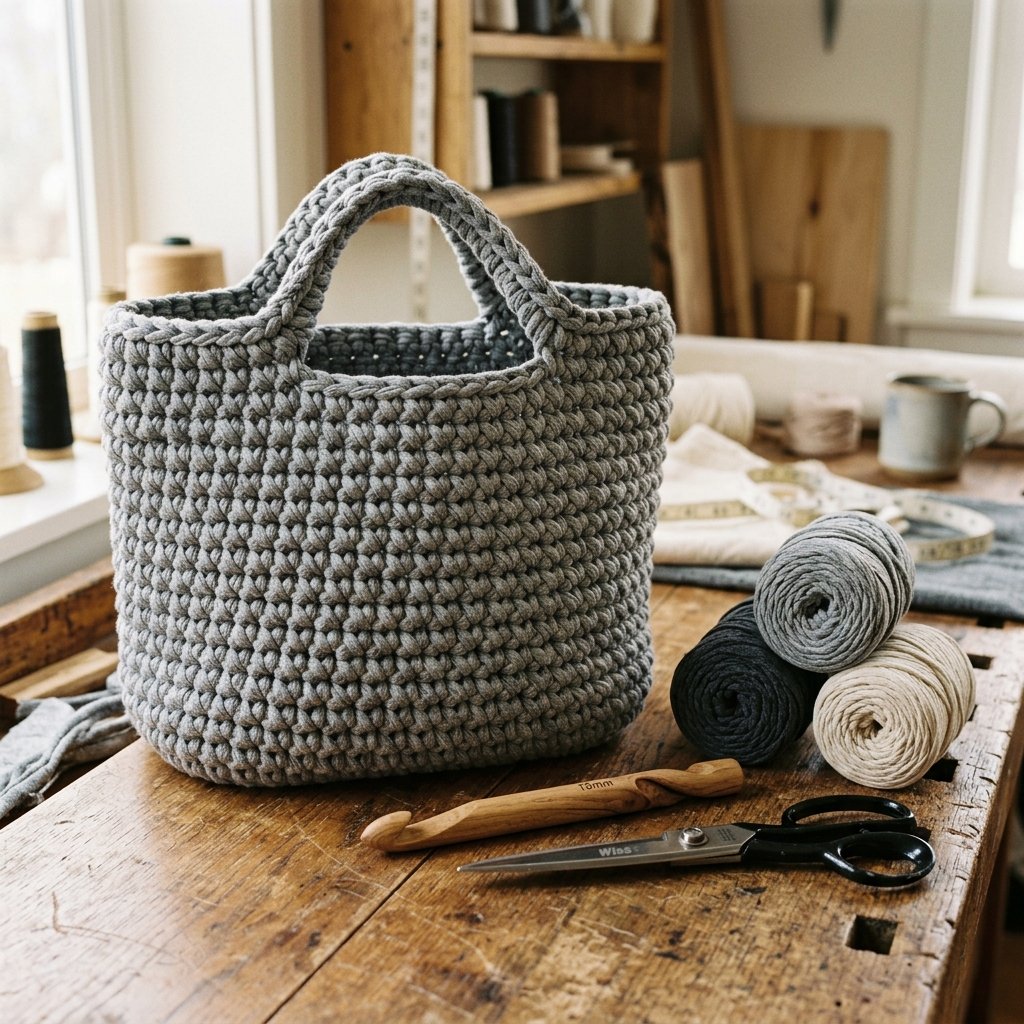

There is an undeniable thrill that comes from taking something destined for the donation bin—or worse, the landfill—and transforming it into a high-end, designer-looking masterpiece. Welcome to the ultimate guide for frugal DIYers, crafty upcyclers, and anyone who loves a brilliant trash-to-treasure project. Today, we are diving deep into the world of sustainable fashion with a project that perfectly marries rugged practicality with sophisticated style: the chunky crochet t-shirt yarn bag.
If you have been eyeing those thick, woven, luxury boutique bags that retail for hundreds of dollars, put your wallet away. You can achieve that exact heavy-duty, structured, and incredibly chic aesthetic using nothing but old t-shirts and a large crochet hook. This is not just a craft; it is a clever, budget-savvy hack that empowers you to create custom, durable accessories for practically $0. T-shirt yarn, affectionately known in the crafting community as tarn, is a powerhouse material. It is thick, slightly stretchy, incredibly forgiving, and works up so fast that you can finish a whole bag in a single weekend afternoon.
Whether you are a handy parent looking to repurpose outgrown clothes, a frugal bride crafting custom bridesmaid gift totes, or a practical maker wanting a rugged, washable market bag, this tutorial is your blueprint. We will cover everything from foraging the right shirts and cutting continuous yarn to mastering the dense, knit-like crochet stitch that gives this bag its expensive, structured silhouette. Grab your fabric scissors and let us turn those forgotten cotton tees into your new favorite accessory.
The Anatomy of a Designer-Inspired T-Shirt Yarn Bag

What separates a homemade-looking craft from a DIY project that elicits the coveted question, Where did you buy that? The secret lies in the structure, the material thickness, and the hardware. High-end designers frequently utilize oversized, chunky woven materials to create statement pieces. By making our own t-shirt yarn, we are replicating that massive, luxurious texture without the exorbitant price tag.
T-shirt yarn creates a dense, sturdy fabric when crocheted. Unlike standard acrylic yarn that might slouch or stretch out of shape under the weight of your wallet and keys, a tightly stitched tarn bag stands up on its own. It possesses a rugged, practical elegance. Furthermore, by utilizing upcycled cotton, your finished bag is completely machine washable, making it just as functional as it is fashionable.
Store-Bought vs. Zero-Budget DIY
Let us break down exactly why this project is a massive win for your wallet. When you compare the cost of purchasing a trendy chunky knit bag, or even buying pre-made t-shirt yarn from a craft store, the savings of making it yourself from upcycled materials are staggering.
| Feature / Item | High-End Boutique Bag | Craft Store Tarn (DIY) | Zero-Budget Upcycled DIY |
|---|---|---|---|
| Material Cost | $150 – $400+ | $30 – $50 (3-4 rolls) | $0.00 (Old shirts from home) |
| Customization | Limited to seasonal colors | Limited to stock colors | Infinite (Mix, match, or dye) |
| Durability | Moderate (Often delicate) | High | Extreme (Heavy-duty cotton) |
| Eco-Impact | Mass production waste | New manufacturing footprint | 100% Eco-Friendly (Saves textiles) |
The true beauty of frugal crafting is not just the money saved; it is the absolute creative freedom that comes from knowing you can build luxury from the ground up, using what you already have.
Foraging for Fabric: Selecting the Perfect T-Shirts
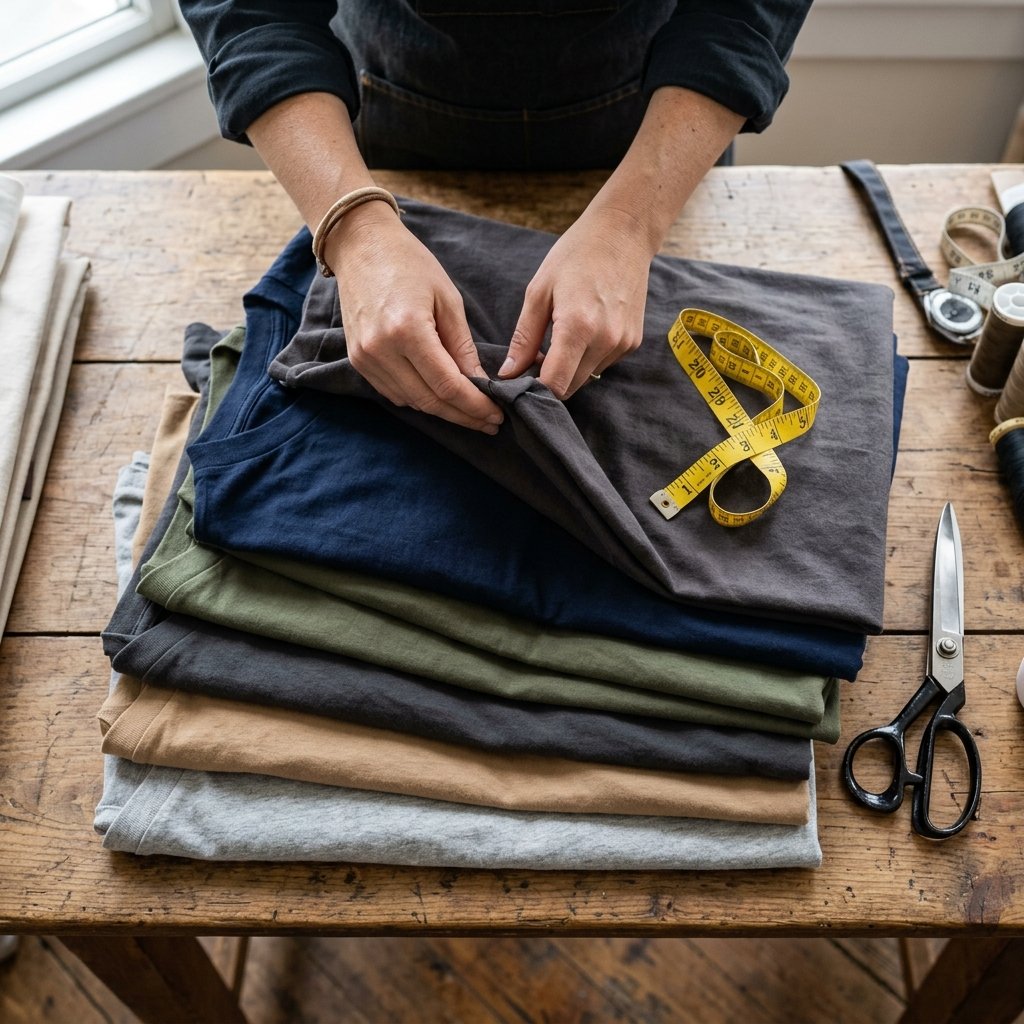
Not all t-shirts are created equal when it comes to making yarn. To achieve that smooth, professional, tubular yarn look, you need the right raw materials. Your first stop should be the back of your own closet, your spouse’s drawer of unworn promotional tees, or the local thrift store’s clearance bins.
The Golden Rules of T-Shirt Foraging
- Look for Seamless Sides: This is the holy grail of t-shirt yarn. Shirts that are woven as a continuous tube (without side seams) will yield the smoothest yarn. If you use a shirt with side seams, you will have small bumps in your yarn every few feet. While this is fine and adds a rugged, rustic charm, seamless is best for a sleek designer look.
- Check the Fabric Blend: Aim for 100% cotton or a high cotton/polyester blend. You want the fabric to curl in on itself when stretched. Highly elastic fabrics (like spandex workout shirts) will stretch too thin and lose their structural integrity.
- Size Matters: The larger the shirt, the more continuous yardage you will get. Men’s XL, XXL, or XXXL shirts are the absolute best for this. A single XXL shirt can yield up to 20 to 25 yards of yarn.
- Avoid Heavy Graphics: Large, rubbery screen prints do not stretch and will not curl. If your shirt has a small logo on the chest, you can easily cut around it, but avoid shirts with massive, stiff graphics across the entire torso.
For a standard-sized, structured tote bag, you will generally need about 4 to 6 large t-shirts. Do not be afraid to mix and match colors! Color-blocking or creating a rugged, multi-tonal heathered look adds immense character to the final piece.
The Masterclass: Creating Continuous T-Shirt Yarn (Tarn)
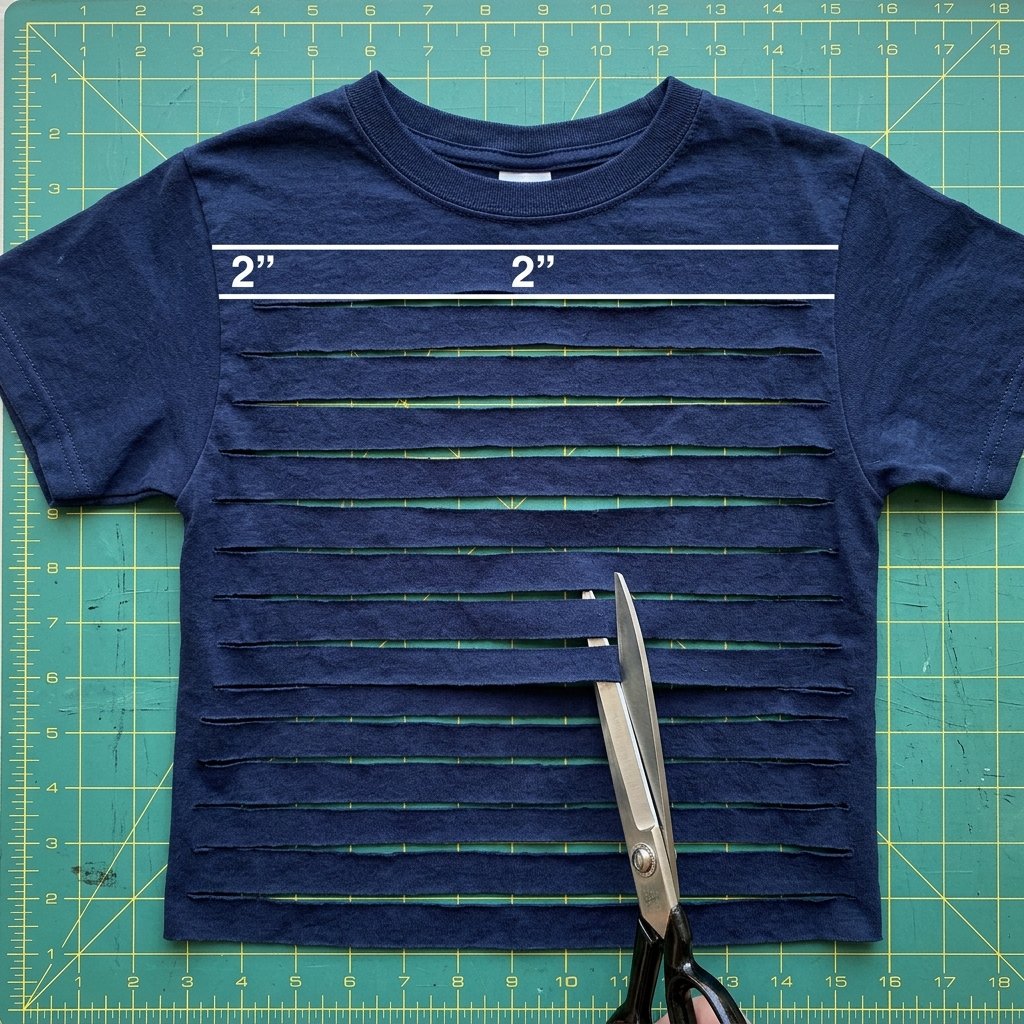
This is where the magic happens. We are going to take a standard t-shirt and cut it into one massively long, continuous strip of yarn. This method ensures you have very few ends to weave in later, which is crucial for a clean, professional finish.
Safety Note: You will be doing a lot of cutting through double-layered fabric. Ensure your fabric shears are sharp to prevent hand fatigue, and always cut away from your body on a flat, stable surface like a large cutting mat or a clean floor.
Step-by-Step Continuous Cutting Method
- Prep the Canvas: Lay your t-shirt completely flat on your cutting surface. Smooth out all wrinkles so the front and back hems align perfectly.
- Remove the Excess: Using your sharp fabric scissors or a rotary cutter, cut straight across the shirt just below the armpits. Discard the top section (sleeves and neckline) into your scrap bin for future stuffing or cleaning rags. Next, cut off the thick bottom hem and discard it. You are now left with a fabric tube.
- Fold with a Gap: Fold the right side of the fabric tube over to the left side, but do not fold it all the way flush. Leave about a 1.5-inch to 2-inch gap of the bottom layer exposed on the left side.
- Cut the Strips: Starting from the folded edge on the right, cut horizontal strips about 1 to 1.5 inches wide. Cut through the folded layers, but stop when you reach that 1.5-inch gap you left on the bottom layer. Do not cut all the way through the tube! You want a fringe-like piece where all the strips are still connected by that uncut margin on the left.
- Open the Tube: Once you have fringed the entire piece, open up the uncut margin. You will see the uncut section in the center, with the strips falling away to the sides like a ribcage.
- The Diagonal Cut: This is the clever trick for continuous yarn. Start at the bottom. Cut diagonally from the outside edge of the margin to the first slit. Then, cut from the first slit across the margin to the second slit on the opposite side. Continue this diagonal cutting pattern all the way up the margin. When you reach the top, you will have one massive, continuous strip of fabric!
- The Stretch: This is the most satisfying part. Take your long strip of fabric and pull it firmly between your hands, working your way down the entire length. The raw edges will magically roll inward, hiding the cuts and creating a smooth, tubular yarn. Roll it into a tight ball, and you are ready to crochet!
Essential Tools and Materials Breakdown
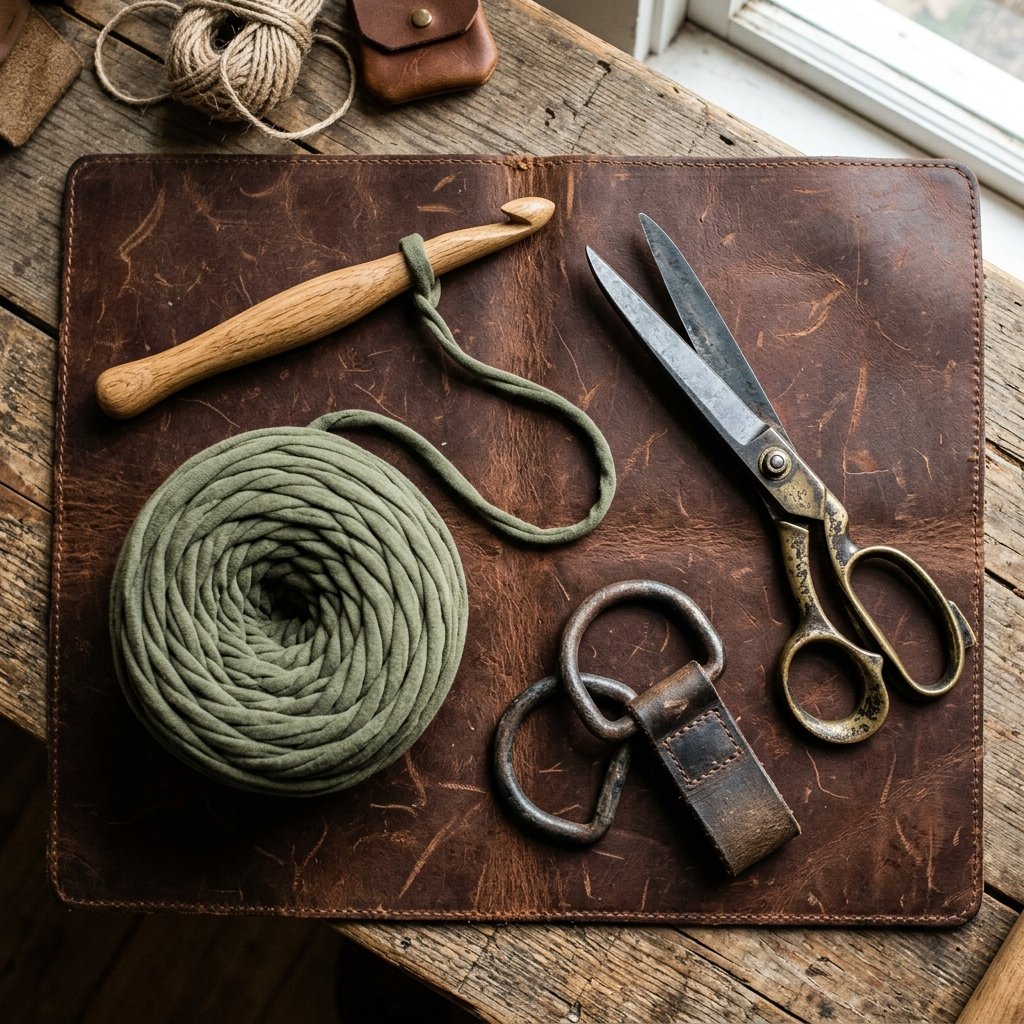
Because t-shirt yarn is so thick, standard crochet hooks simply will not work. You need heavy-duty tools for a heavy-duty project. The beauty of this is that the stitches are massive, meaning you can easily see your work and the bag builds up incredibly fast.
Your Frugal Toolkit
- Large Crochet Hook: You will need a hook ranging from 10mm (Size N/P) to 15mm (Size P/Q). The exact size depends on how wide you cut your strips. If your yarn is very thick, go for a 12mm or 15mm to save your wrists from strain.
- Stitch Markers: Essential for working in the round so you do not lose your place. Frugal tip: If you do not have stitch markers, use a safety pin or a contrasting scrap of t-shirt yarn!
- Large Eye Tapestry Needle: Needed for weaving in the thick ends. If you do not have one large enough, you can use a smaller crochet hook to pull the ends through the stitches.
- Upcycled Hardware (Optional but Recommended): To give your bag that true masculine-elegant or high-end designer finish, harvest hardware from old, broken thrift store purses. D-rings, magnetic snaps, and leather handles instantly elevate the look of upcycled cotton.
| Material | Purpose | Estimated Cost |
|---|---|---|
| 4-6 Large T-Shirts | The main body of the bag | $0.00 (Upcycled) |
| 10mm – 15mm Crochet Hook | To stitch the chunky yarn | $4.00 – $8.00 |
| Fabric Scissors / Rotary Cutter | For processing the shirts | $0.00 (Already owned) |
| Thrifted Leather Belt or Bag Straps | For rugged, high-end handles | $2.00 – $4.00 |
Step-by-Step Crochet Bag Pattern: The Base and Body
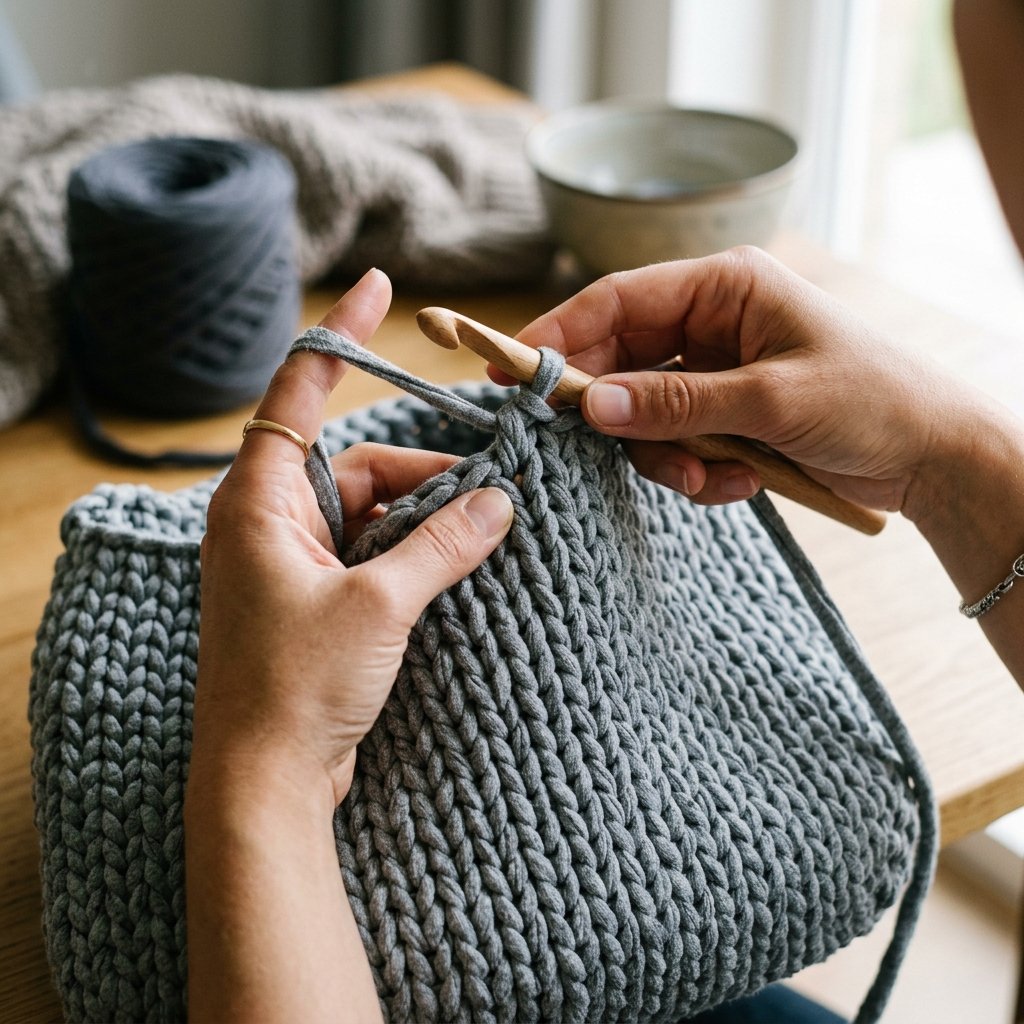
To achieve that structured, high-end boutique look, we are going to use the Waistcoat Stitch (also known as the Center Single Crochet or Knit Stitch). This stitch is incredibly dense and sturdy, preventing the bag from stretching out and giving it a gorgeous, woven-knit appearance. It requires a bit more hand strength, so take your time and keep your tension slightly loose.
Phase 1: The Sturdy Base
- The Foundation: Start by chaining 16 stitches. This will determine the width of your bag. If you want a wider tote, chain more; for a smaller clutch, chain fewer.
- Round 1: Place 2 Single Crochets (SC) in the second chain from the hook. SC in each of the next 13 chains. In the last chain, place 3 SC (this helps turn the corner). Now, working down the opposite side of the foundation chain, SC in the next 13 chains. Place 1 SC in the very first chain (where you put the first 2 SC). You now have an oval base. Place a stitch marker in the last stitch.
- Round 2: To keep the base flat, we need to increase at the curves. Place 2 SC in each of the first 3 stitches. SC in the next 13 stitches. Place 2 SC in each of the next 3 stitches at the curve. SC in the last 13 stitches. Move your stitch marker up.
- Round 3: You can continue increasing the curves if you want a deeper base, or stop here for a sleek, slim tote profile.
Phase 2: Building the Body with the Waistcoat Stitch
Now we stop increasing and build the walls of the bag. This is where the designer magic happens.
- Round 4 (Transition Round): To create a sharp, defined bottom edge, SC in the Back Loop Only (BLO) all the way around without any increases. This creates a ridge that allows the walls to stand straight up.
- Round 5 and Beyond (The Waistcoat Stitch): Instead of inserting your hook under the top two loops of the stitch like a normal SC, you are going to insert your hook directly into the center of the V of the single crochet stitch from the previous row. Pull up a loop, yarn over, and pull through both loops on the hook.
- Continuing the Body: Continue working the Waistcoat Stitch in continuous rounds (do not slip stitch to join at the end of the round, just keep going in a spiral). Keep moving your stitch marker up at the end of each round. You will quickly see the dense, knit-like texture forming! Continue until the bag reaches your desired height (usually about 10 to 12 inches tall for a standard tote).
Pro Frugal Tip: If you run out of one color of tarn, do not tie a bulky knot! Instead, cut a small slit in the end of your working yarn and a small slit in the end of the new yarn. Thread the new yarn through the slit of the working yarn, then thread the tail of the new yarn through its own slit and pull tight. This creates a seamless, knot-free join!
Crafting the Perfect Handles and Finishing Touches
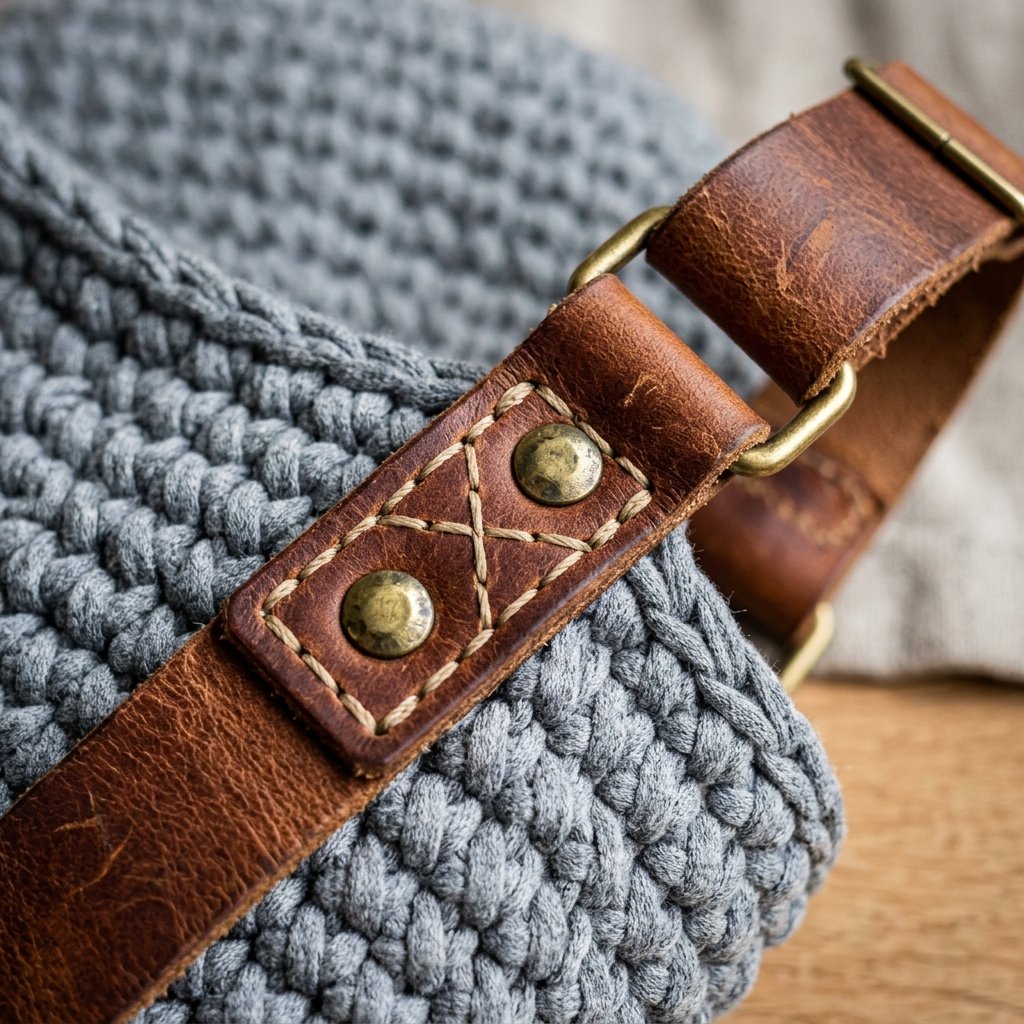
The body of your bag is complete, and it is already looking like a rugged, stylish masterpiece. But the handles and finishing touches are what elevate this from a simple craft project to a functional piece of daily wear. You have two fantastic, budget-savvy options here: integrated tarn handles or upcycled leather straps.
Option A: Integrated T-Shirt Yarn Handles
If you want a monochromatic, minimalist look, you can crochet the handles directly into the bag. This costs absolutely nothing extra and is incredibly sturdy.
- On your final round of the bag, determine where you want your handles to be. Place stitch markers to indicate the start and end of the handle opening on both the front and back of the bag.
- Crochet up to the first marker. Chain 15 to 20 stitches (depending on how long you want the handle), skip the stitches between the markers, and attach the chain to the bag at the second marker with a waistcoat stitch.
- Continue crocheting around the side of the bag until you reach the markers on the opposite side, and repeat the process to create the second handle.
- For the final round, waistcoat stitch around the bag, and when you reach the chains, place standard single crochets around the entire chain to thicken the handles. Slip stitch to finish, cut the yarn, and weave in the massive tail securely.
Option B: The Rugged Leather Upgrade
For a truly masculine-elegant, high-end designer dupe, upcycled leather handles are the ultimate hack. Head to your local thrift store and look for old, sturdy leather belts or damaged purses with salvageable leather straps and hardware.
- Harvesting: Cut the leather straps off the old bag. If using a belt, cut it into two equal lengths.
- Punching: Use a leather punch or a heavy-duty awl to punch holes in the ends of the leather straps.
- Attaching: Using a smaller crochet hook or a heavy tapestry needle, use a thinner piece of twine, heavy-duty thread, or even a thin strip of t-shirt yarn to sew the leather handles directly onto the dense crochet fabric of your bag. The contrast between the soft, chunky cotton and the rugged, worn leather is visually stunning.
Final Care and Maintenance
Because your bag is made from 100% upcycled cotton t-shirts, it is incredibly easy to care for. If it gets dirty, simply toss it in the washing machine on a cold, gentle cycle. Do not put it in the dryer, as the heat can cause the cotton to shrink and warp the dense stitches. Instead, reshape the bag with your hands while it is damp and let it air dry completely. Your frugal, designer-inspired creation will last for years of market runs, beach trips, and daily commutes.
Conclusion
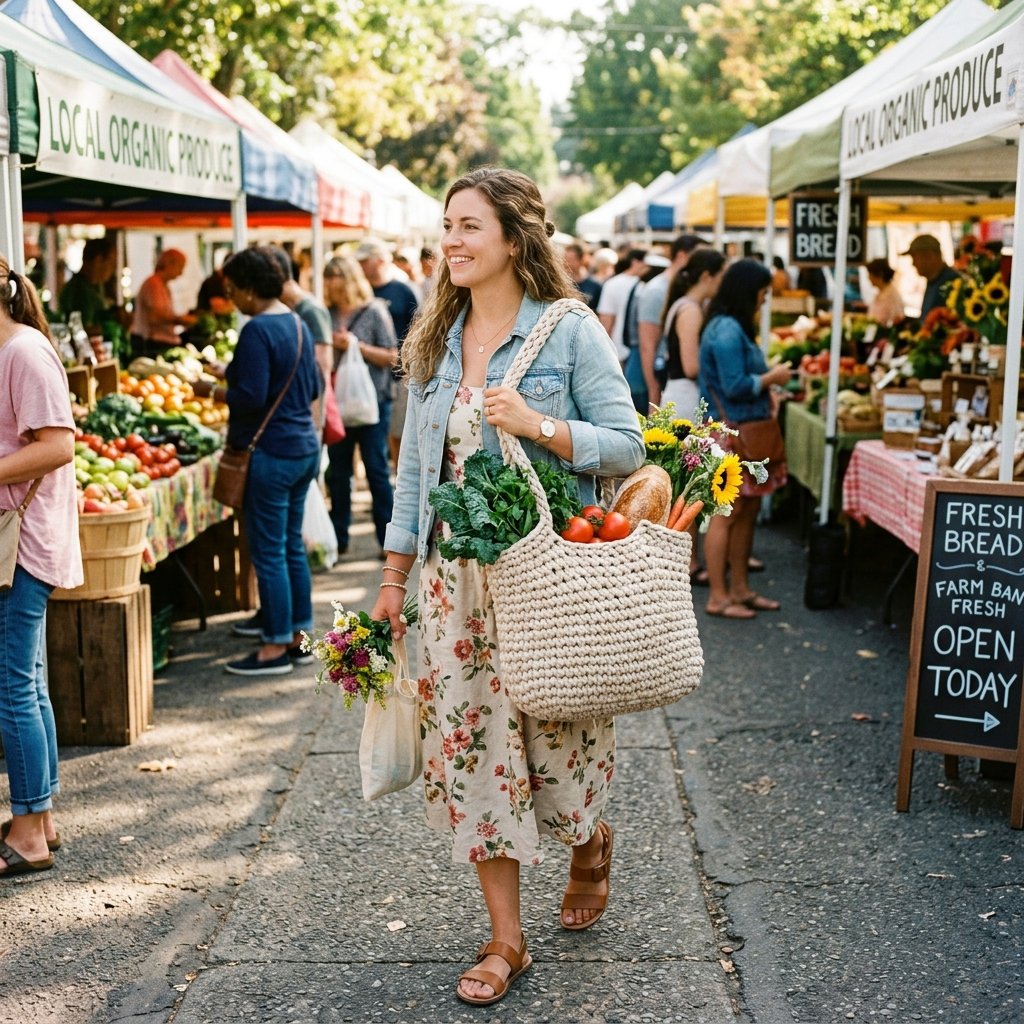
Congratulations, upcycling warrior! You have successfully transformed a pile of forgotten, discarded clothing into a highly functional, stunningly structured tote bag. By mastering the art of making your own continuous t-shirt yarn and utilizing the dense waistcoat stitch, you have bypassed the massive markups of boutique fashion and created something entirely custom with your own two hands.
This project proves that you do not need a massive budget to craft beautiful, durable, and practical items. Frugal crafting is about resourcefulness, looking at ‘trash’ through a lens of potential, and executing with clever techniques. Whether you keep this rugged tote for your own grocery runs or gift it to a friend who appreciates sustainable fashion, it is a testament to the power of zero-budget DIY.
Keep experimenting with different shirt colors, hardware combinations, and bag sizes. The skills you have learned today—from continuous fabric cutting to heavy-duty crocheting—are tools you will carry into countless future projects. Keep crafting, keep saving, and keep turning the ordinary into the extraordinary!
Conclusion
Congratulations, upcycling warrior! You have successfully transformed a pile of forgotten, discarded clothing into a highly functional, stunningly structured tote bag. By mastering the art of making your own continuous t-shirt yarn and utilizing the dense waistcoat stitch, you have bypassed the massive markups of boutique fashion and created something entirely custom with your own two hands.
This project proves that you do not need a massive budget to craft beautiful, durable, and practical items. Frugal crafting is about resourcefulness, looking at ‘trash’ through a lens of potential, and executing with clever techniques. Whether you keep this rugged tote for your own grocery runs or gift it to a friend who appreciates sustainable fashion, it is a testament to the power of zero-budget DIY.
Keep experimenting with different shirt colors, hardware combinations, and bag sizes. The skills you have learned today—from continuous fabric cutting to heavy-duty crocheting—are tools you will carry into countless future projects. Keep crafting, keep saving, and keep turning the ordinary into the extraordinary!

Makenzie is the founder and lead writer at MoneyHackTips.com — a personal finance blog dedicated to delivering street-smart financial wisdom for real people on real budgets. With 300+ published articles covering everything from debt management to investing fundamentals, Makenzie’s mission is to make every dollar work harder. When not writing about money hacks, Makenzie is testing frugal living strategies, optimizing side hustles, and helping readers build financial freedom from scratch.