The Quest for the Perfect Guy-Approved Gift
Let us face a universal truth: finding a DIY gift that the men in our lives will actually use, display, and genuinely appreciate is like trying to find a matching sock in the dark. We love a good craft, but most DIY coasters lean heavily toward the delicate, the floral, or the overly distressed “Live, Laugh, Love” aesthetic. While those are beautiful in the right setting, they often end up shoved in a drawer when it is time to pour a neat bourbon or crack open a cold stout.
Enter the ultimate solution: The Rugged, Whiskey-Proof DIY Wood Coaster. This is not your average Mod Podge and scrapbook paper project. We are talking about thick, handsome, moisture-wicking, heavy-duty wood coasters that look like they belong in a high-end cigar lounge or a sophisticated man cave. Best of all? You do not need a massive garage full of expensive power tools to pull this off. With a little elbow grease, some budget-savvy sourcing, and a few clever finishing tricks, you can turn a $0 piece of scrap wood into a premium gift that rivals the $45 sets sold at luxury men’s boutiques.
Whether you are a handy parent looking for a killer Father’s Day project, a frugal bride crafting groomsmen gifts, or a resourceful upcycler diving into basic woodworking, this masterclass will walk you through every single step. We will cover how to source free hardwoods, the secret to a glass-like sanding finish, and the exact waterproof sealers that will stop condensation from ruining his favorite coffee table. Roll up your sleeves, dust off that workbench, and let us build something incredibly practical and undeniably masculine.
Section 1: Anatomy of a Masculine Coaster & Sourcing Free Wood
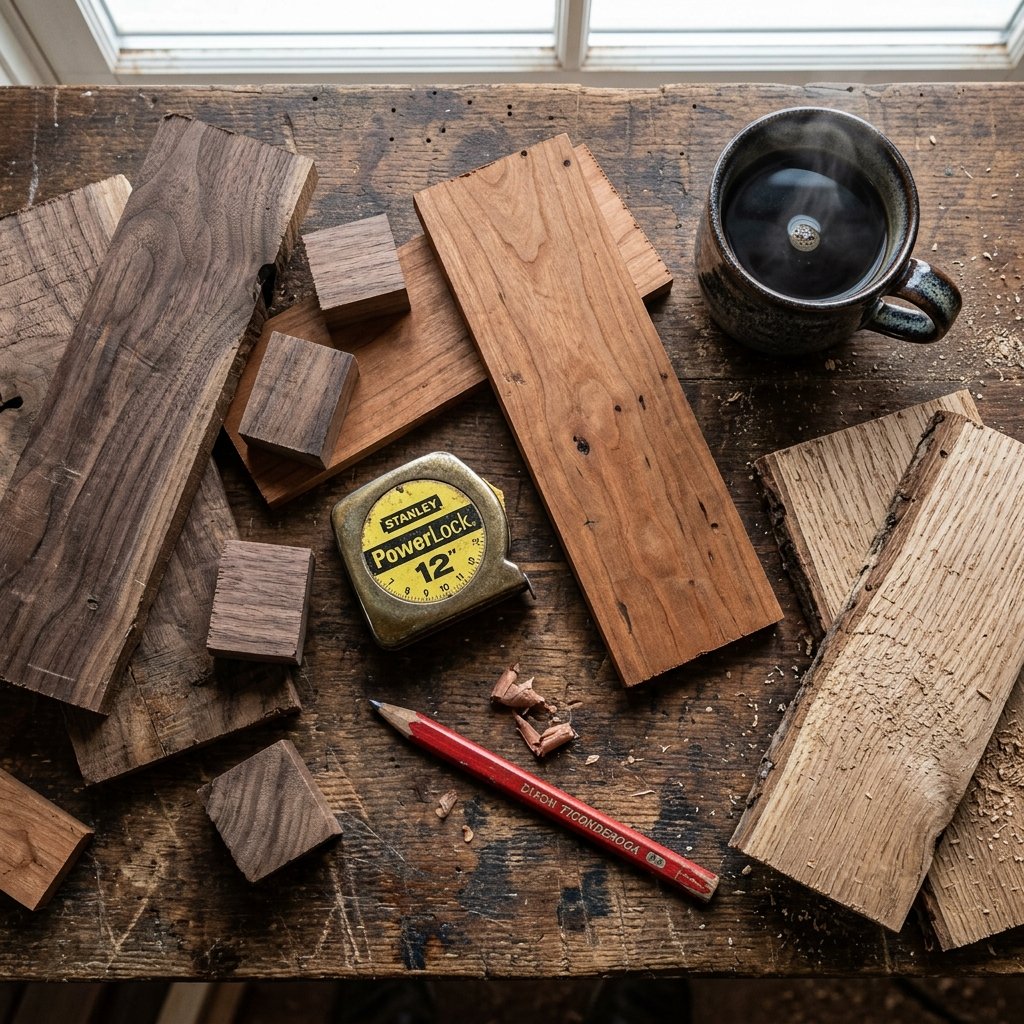
Before we make a single cut, we need to talk about material. The secret to a coaster a man will actually use lies in its weight, texture, and durability. Flimsy balsa wood or thin craft plywood will not survive the condensation of an ice-cold IPA. You need hardwood. Hardwoods like walnut, oak, maple, and cherry offer stunning natural grain patterns, satisfying heft, and serious longevity.
The Frugal Crafter’s Guide to Sourcing Hardwood
If you walk into a big-box hardware store and look for premium hardwoods, your budget will evaporate. Instead, tap into the resourceful upcycler within you. Here is where to look for high-quality wood for exactly $0 to $5:
- Cabinet Shop Offcuts: Local custom cabinet makers throw away “scraps” that are the perfect size for coasters. Walk in with a dozen donuts and ask if you can raid their offcut bin.
- Broken Furniture: Check thrift stores or the side of the road for broken solid wood coffee tables, bed frames, or dining chairs. A scratched oak tabletop can yield dozens of beautiful coasters.
- Pallet Wood (With Caution): While rustic, ensure the pallets are stamped “HT” (Heat Treated) rather than chemically treated, especially if they will be handled frequently.
- Firewood Piles: A well-seasoned log of cherry or hickory can be sliced into stunning “live edge” coasters.
Wood Type Comparison & Budget Guide
| Wood Species | Aesthetic / Vibe | Durability | Estimated Cost (DIY Sourced) | Retail Cost Equivalent |
|---|---|---|---|---|
| Black Walnut | Dark, rich, sophisticated cigar-lounge vibe. | High (Dense and heavy) | $0 – $5 (Offcut bin) | $45 – $60 |
| White Oak | Rugged, classic, prominent grain patterns. | Extremely High (Water resistant) | $0 – $3 (Old furniture) | $35 – $50 |
| Cherry | Warm, reddish tones that darken beautifully over time. | Medium-High | $0 – $4 (Firewood/Scraps) | $40 – $55 |
| Pine / Fir | Rustic, cabin style. (Needs heavy sealing). | Low (Soft, dents easily) | $0 (Construction scrap) | $15 – $20 |
Budget-Savvy Pro Tip: Always check the “cull lumber” cart at the back of your local hardware store. You can often find slightly bowed or split pieces of premium boards for 70% off. Since we only need small 4×4 inch sections, a bowed board is completely fine for this project!
Section 2: Essential Tools for Every Budget Level
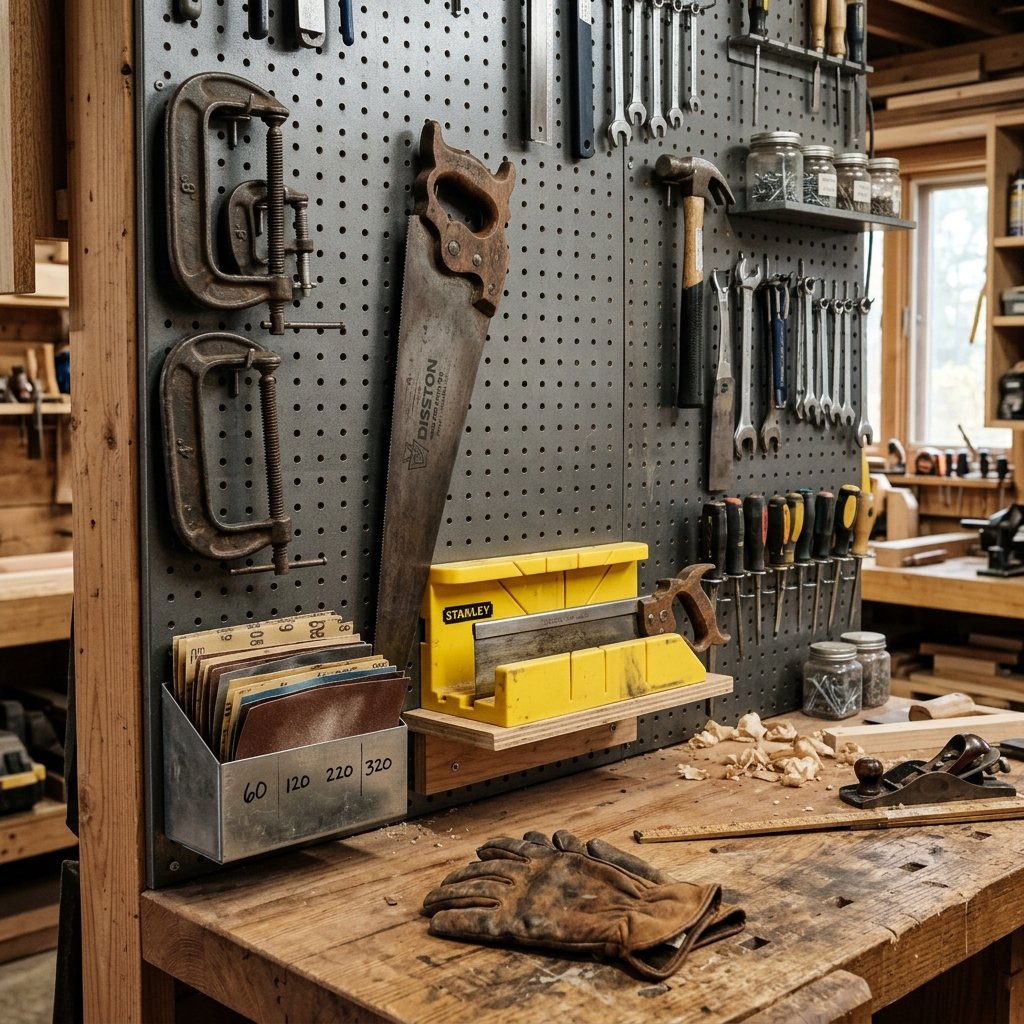
One of the biggest misconceptions about woodworking is that you need a $5,000 shop setup. Not true. Whether you are a fully equipped handy dad or a frugal crafter working on an apartment balcony, this project adapts to your tool kit. The goal is to cut the wood into uniform shapes—typically 4×4 inch squares or hexagons—and smooth them out.
The “Zero-Budget” Hand Tool Setup
If you are working with absolute minimal tools, you can still achieve a high-end look. It just takes a bit more time and elbow grease.
- Miter Box and Hand Saw: For about $12 at any hardware store, a plastic miter box ensures your cuts are perfectly straight or precisely angled at 45 degrees.
- Sanding Blocks: Skip the expensive orbital sander. Buy a multi-pack of sandpaper (grits 80, 120, 220) for $5 and wrap it around a scrap block of wood.
- C-Clamps: Essential for holding your wood steady while you saw.
The “Weekend Warrior” Power Tool Setup
If you have access to basic power tools, your production time will be cut in half, making this ideal for batching out groomsmen gifts or holiday presents.
- Miter Saw (Chop Saw): Makes perfectly square crosscuts in seconds.
- Random Orbital Sander: The MVP of this project. It will save your shoulders and give the wood a buttery-smooth, professional finish.
- Router (Optional): A trim router with a chamfer or round-over bit takes a coaster from “homemade” to “store-bought luxury” by giving it a precise, angled edge.
Safety First: Woodworking is incredibly rewarding, but safety is non-negotiable. Always wear ANSI-approved safety glasses and a dust mask (especially when sanding hardwoods like walnut, which can irritate the lungs). Keep fingers far away from saw blades, and never wear loose clothing or jewelry around spinning tools.
Section 3: The Build – Cutting & Shaping Like a Pro

Now comes the fun part: turning that rough scrap wood into sleek, functional art. The standard size for a coaster is between 3.5 inches and 4 inches wide, and about 3/8 to 1/2 inch thick. Any thinner, and they might warp when exposed to moisture; any thicker, and they look like clunky blocks rather than refined home accessories.
Step-by-Step Cutting Instructions
- Measure and Mark: Using a combination square and a sharp pencil, mark your wood at 4-inch intervals. Measure twice, cut once is the golden rule here.
- Make the Cuts: Secure your wood. If using a hand saw, let the saw do the work—do not force it down, just push and pull smoothly. If using a miter saw, bring the blade down slowly to prevent the wood from splintering on the back edge (this is called “blowout”).
- Shape the Edges: A harsh, 90-degree corner is prone to chipping and feels cheap. You want to “break the edges.” If you do not have a router, take your 80-grit sanding block and run it along all the sharp top and bottom edges at a 45-degree angle. This creates a “chamfer” that looks incredibly elegant and feels great in the hand.
Face Grain vs. End Grain: A Clever Distinction
When you look at a board, the wide, flat top is the “face grain.” The cut ends where you see the tree rings are the “end grain.” Most beginner coasters are face grain because it is easier to cut. However, if you want to impress a woodworking aficionado, make end-grain coasters. End grain acts like a bundle of microscopic straws; it is incredibly durable and actually absorbs the shock of heavy glasses better. To make these, you glue strips of wood together, slice them like a loaf of bread, and face the rings upward. It is a bit more advanced, but the visual impact is staggering.
Section 4: The Secret to a Glass-Like Sanding Finish
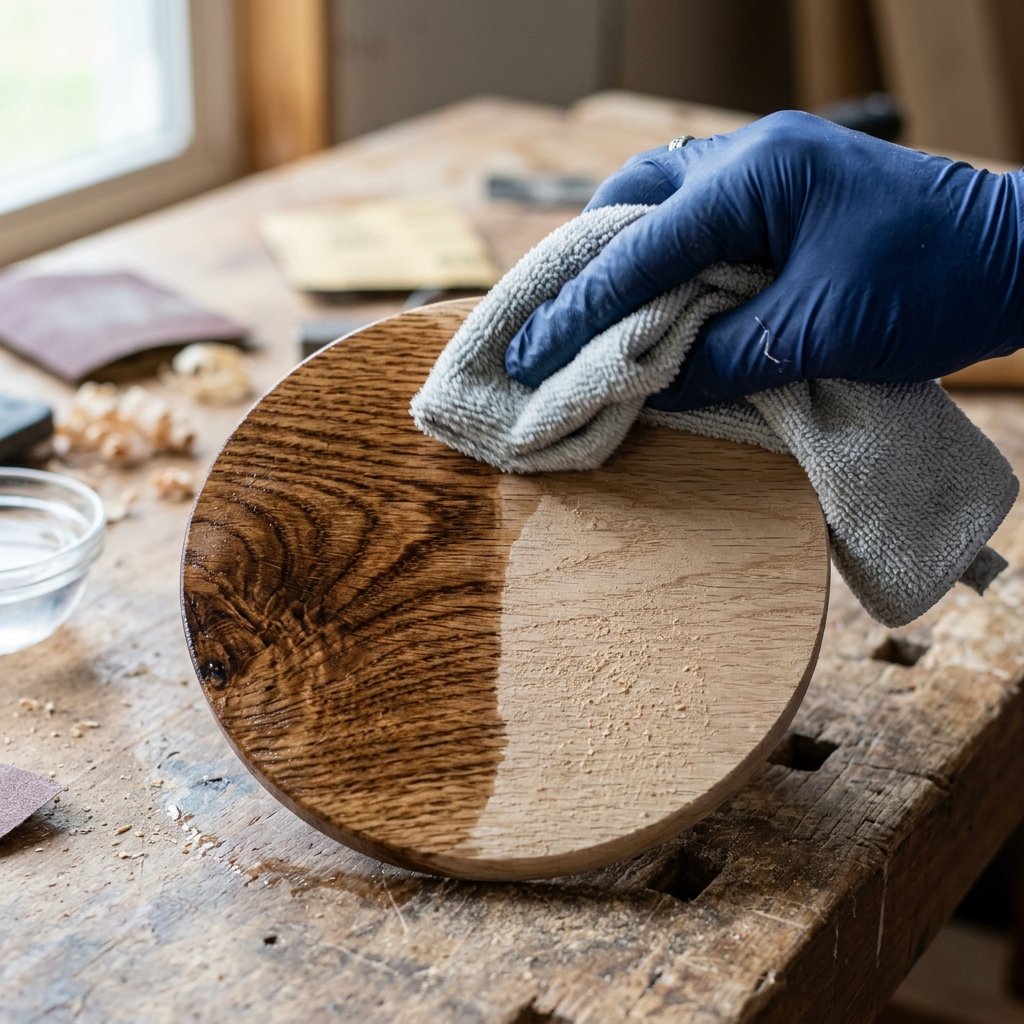
If there is one step that separates a cheap DIY from a luxury, heirloom-quality gift, it is the sanding process. You cannot rush this. Men appreciate craftsmanship, and a coaster that feels like raw silk under the fingertips screams high quality.
The Grit Progression Strategy
Do not just grab whatever sandpaper is lying around. You must progress through the grits sequentially to remove the scratches left by the previous paper.
- 80 Grit (The Eraser): Use this to remove saw marks, level out uneven spots, and shape your edges.
- 120 Grit (The Smoother): This removes the deep scratches left by the 80 grit. The wood will start to feel uniform.
- 220 Grit (The Polisher): This is where the magic happens. Sanding with 220 grit prepares the wood for finishing and makes it feel incredibly smooth.
The “Water Popping” Master Trick
Here is a master tailor-level secret applied to woodworking. When wood gets wet (like from a sweaty beer glass), the microscopic wood fibers swell and stand straight up, making your perfectly sanded coaster feel rough and fuzzy. To prevent this, we intentionally raise the grain before we finish it.
The Water Popping Technique: Once you have sanded up to 220 grit, take a damp cloth and wipe down the entire coaster. The wood will turn dark, and within 5 minutes as it dries, it will feel rough again. Do not panic! Take your 220-grit paper and lightly sand it one more time by hand. Now, those fibers are sheared off permanently. When his iced drink sweats on this coaster, it will remain perfectly smooth.
Wipe the coasters down with a tack cloth or a rag lightly dampened with mineral spirits to remove every speck of dust before moving to the finishing stage.
Section 5: The Ultimate Waterproof & Whiskey-Proof Finishes
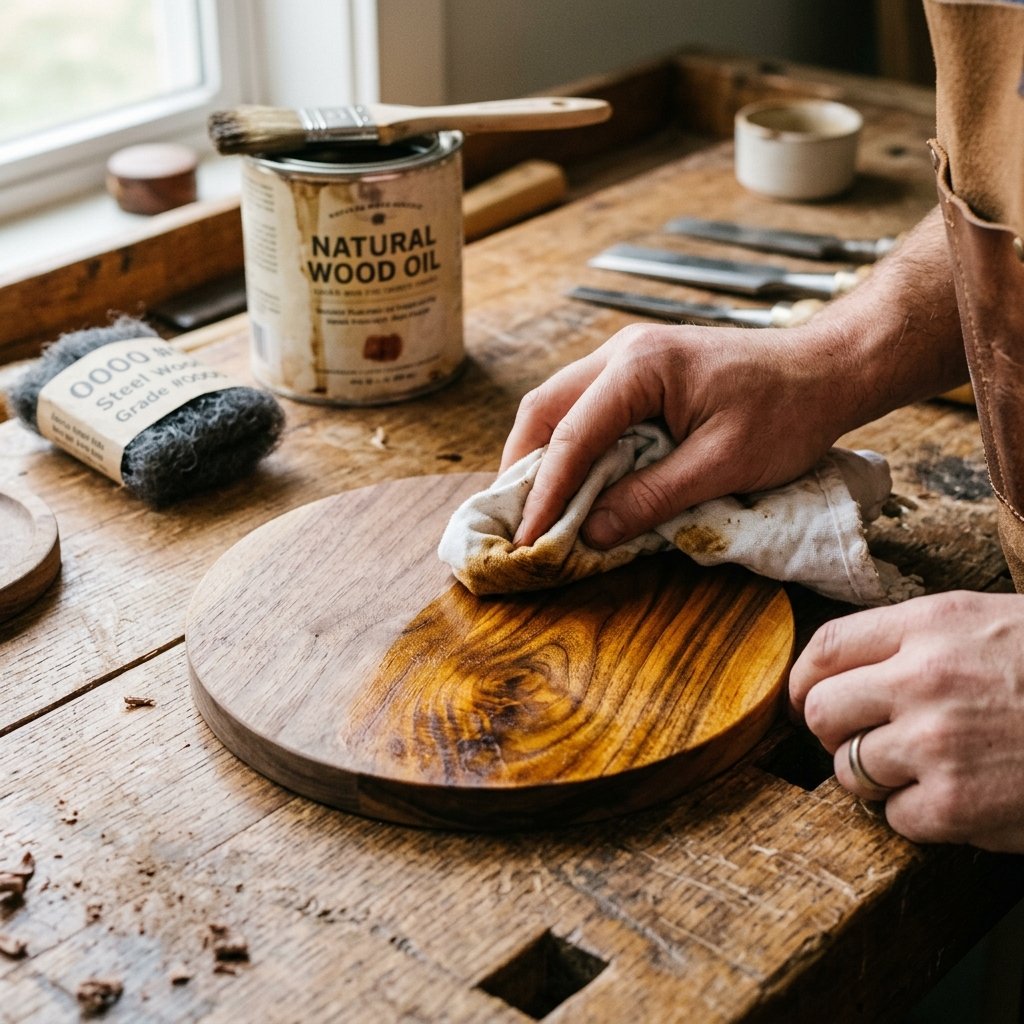
A coaster has one job: protect the table from moisture and heat. If you leave raw wood exposed, a sweating glass will leave a permanent black water ring on the wood, ruining your hard work. We need a finish that is tough, water-resistant, and enhances the masculine beauty of the wood without making it look like it is encased in cheap plastic.
Comparing High-End Finishes
| Finish Type | Pros | Cons | Application Method | Best For |
|---|---|---|---|---|
| Wipe-On Polyurethane | Bulletproof, highly water-resistant, durable. | Can look slightly plasticky if built up too thick. | Wipe on with a lint-free rag, 3-4 thin coats. | Maximum protection against heavy condensation. |
| Pure Tung Oil | 100% natural, matte, penetrates deeply, enhances grain. | Requires multiple coats and long curing times (days). | Rub in heavily, let soak, wipe off excess. | A rugged, natural, “close-to-the-wood” feel. |
| Beeswax & Mineral Oil | Food safe, incredibly easy to apply, smells great. | Requires reapplication every few months; less waterproof. | Rub on with fingers, buff out with a cloth. | Quick gifts; households that don’t mind maintenance. |
| Epoxy Resin | 100% waterproof, glass-like, extreme durability. | Expensive, messy, can look overly modern/artificial. | Pour and spread, use a torch to pop bubbles. | Creating “river coasters” or embedding items. |
The “Bulletproof” Application Method
For a gift that a guy will use daily, Wipe-On Polyurethane (Satin finish) is the absolute winner. It offers the protection of a bar top without the glossy, artificial shine. Here is the foolproof application recipe:
- Coat 1 (The Sealer): Using an old, clean cotton t-shirt, wipe a generous layer of polyurethane over the top, bottom, and sides. The wood will drink it up. Let it dry for 4 hours.
- Scuff Sand: Very lightly run 320-grit sandpaper or #0000 steel wool over the surface to knock down any dust nibs. Wipe clean.
- Coat 2 & 3: Apply very thin, even coats, waiting 4-6 hours between each.
- Cure Time: While it feels dry to the touch in hours, poly takes about 7 days to fully cure and harden. Tell him not to use them for a week!
Section 6: Next-Level Customizations (Leather, Metal, & Fire)
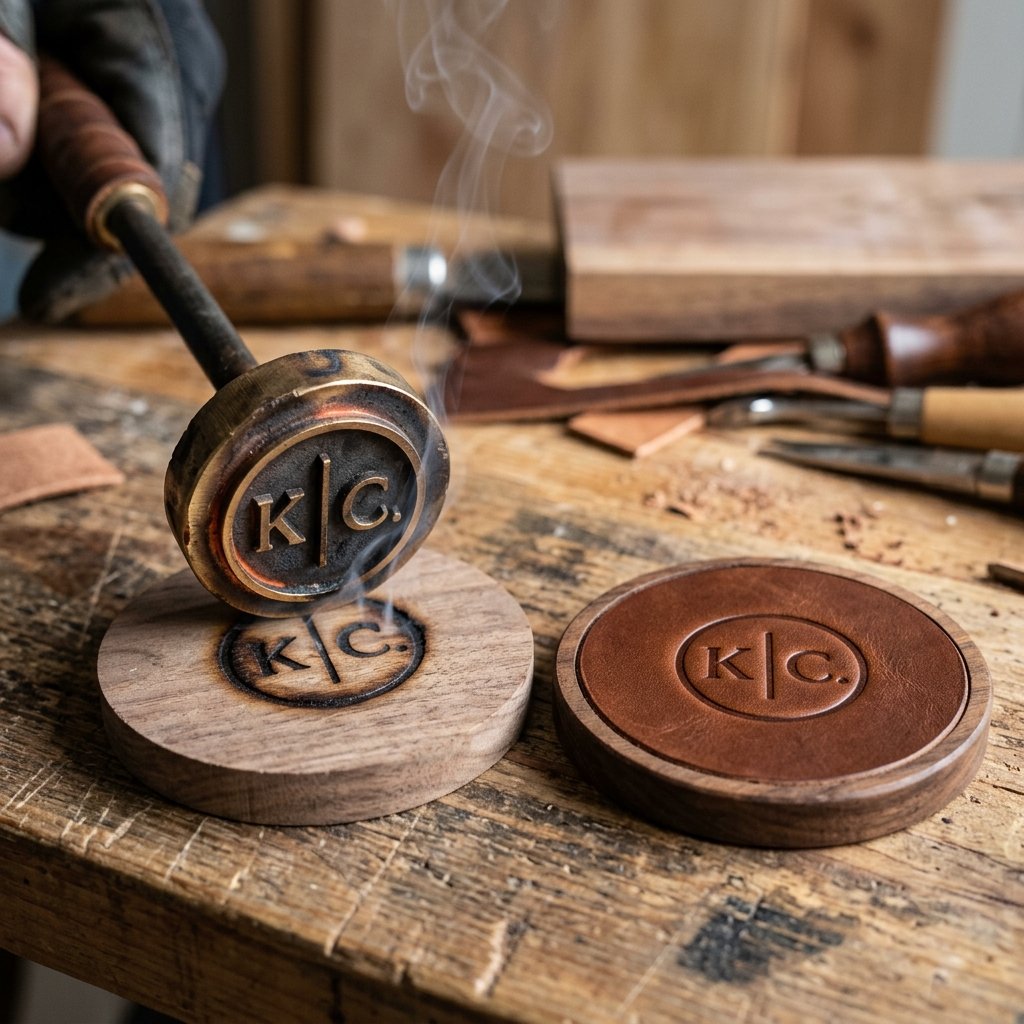
To truly elevate this from a “nice craft” to a “Where did you buy this?!” luxury item, we need to add some rugged textures. Mixing materials like wood, leather, and metal triggers an aesthetic that is incredibly appealing in masculine design.
1. The Leather Backing (The Gentleman’s Touch)
Wood coasters can sometimes slide on glass tables or scratch delicate surfaces. Adding a leather bottom solves this practically and looks incredibly expensive.
- Sourcing Frugal Leather: Do not buy expensive hides. Go to a thrift store and buy a large, beat-up men’s leather jacket or a wide leather belt for $4. Cut it up!
- Application: Cut the leather slightly larger than your coaster. Apply a thin, even layer of contact cement or high-quality wood glue to both the wood and the rough side of the leather. Press together, clamp with a heavy book overnight, and then trim the excess flush with a sharp utility knife.
2. Wood Burning & Branding (Pyrography)
Personalization makes a gift unforgettable. If you have a cheap $15 soldering iron or wood-burning tool, you can add custom touches.
- Monograms: Print his initials in a strong, vintage font (like a stencil or typewriter font). Transfer it to the wood using carbon paper, and carefully burn the outline.
- Custom Branding Irons: For about $30 online, you can order a custom brass branding iron (e.g., “Handcrafted by [Your Name]”). Heat it up with a blowtorch and press it into the back of the coaster. It is the ultimate flex for a DIYer.
3. Industrial Metal Accents
For a more industrial, garage-ready look, head to the hardware store and buy small brass or black iron corner brackets (L-brackets). Screw these into the four corners of the coaster. It adds satisfying weight, a steampunk/industrial vibe, and protects the corners from drops.
Section 7: Presentation, Care Instructions, & Gifting
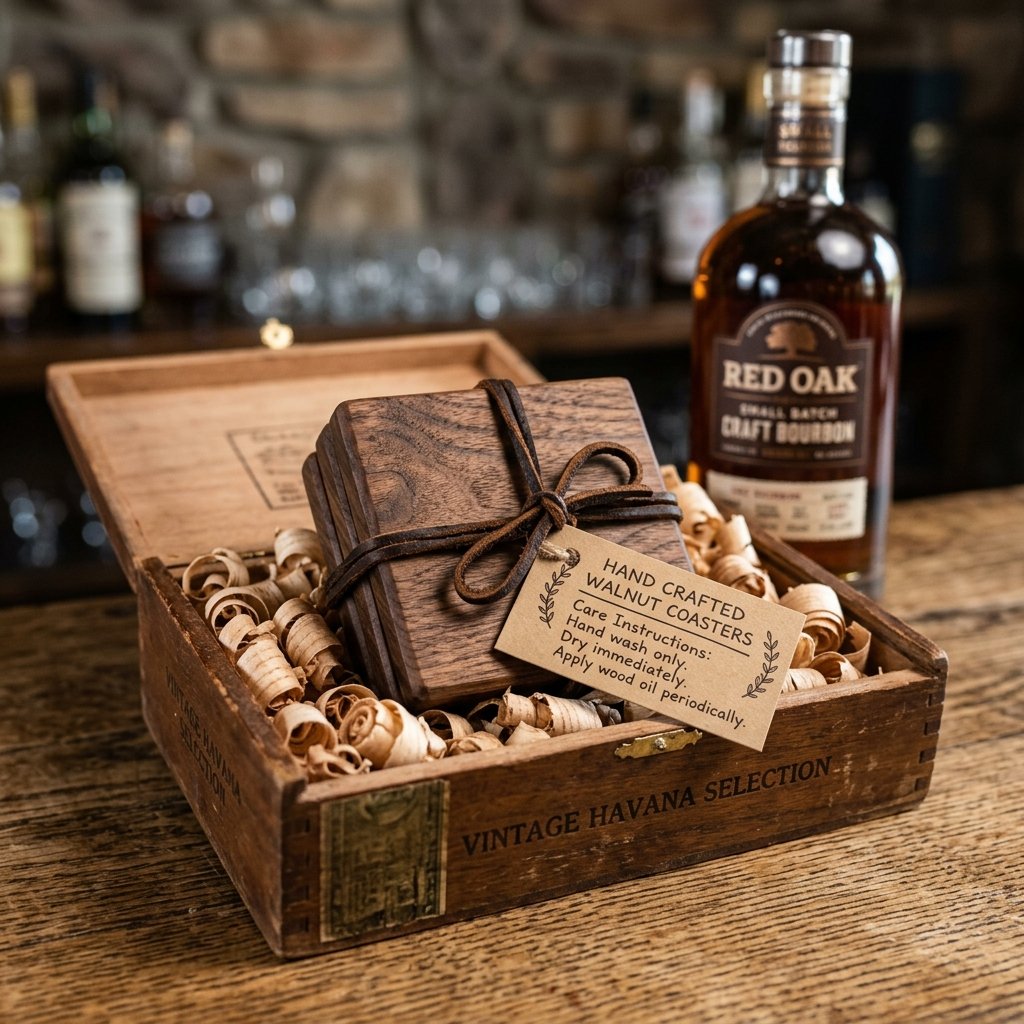
You have spent hours crafting the perfect, rugged wood coasters. Do not just hand them over in a plastic grocery bag. The presentation of a DIY gift dictates how it is received. We want the unboxing experience to feel like he is opening a high-end artisanal product.
The Frugal & Handsome Packaging Strategy
Ditch the sparkly wrapping paper. Opt for materials that match the rugged vibe of the coasters:
- The Twine & Tag Method: Stack the set of 4 or 6 coasters. Tie them tightly together using thick jute twine or a strip of scrap leather. Tuck a sprig of fresh rosemary or a small pine twig under the knot.
- The Cigar Box: Go to your local cigar shop. They often sell their empty wooden cigar boxes for $2 to $5. Line the box with wood shavings (which you generated while making the coasters!) and nestle the coasters inside. It smells amazing and looks incredibly premium.
- The “Perfect Pairing”: Gift the coasters alongside a heavy crystal whiskey tumbler, a bag of locally roasted coffee beans, or a six-pack of his favorite craft stout.
Including a “Care & Maintenance” Card
Handmade items require a little love. Write or print a small, masculine care card on heavy kraft paper to include in the box. This shows you care about the longevity of your gift.
Care Instructions for Your Handcrafted Coasters:
• These coasters were cut from solid hardwood and sealed for heavy-duty use.
• To Clean: Wipe with a damp cloth. Do not submerge in water or put in the dishwasher (they are wood, not magic).
• Maintenance: If they ever look dry after a year of hard use, rub a tiny drop of mineral oil or beeswax into the grain to restore their handsome shine.
• Cheers!
By combining resourceful material sourcing, clever construction techniques, and an eye for masculine design, you have created a zero-budget masterpiece. These aren’t just coasters; they are conversation pieces, table protectors, and a testament to the fact that the best gifts are built, not bought.
Conclusion
Crafting Memories, One Scrap at a Time
Creating the ultimate DIY wood coasters that men actually want to use is the perfect intersection of frugality, creativity, and practical craftsmanship. By looking past the expensive retail shelves and diving into the scrap bins, thrift store leather, and basic tools, you have engineered a gift that carries genuine weight and meaning. You have mastered the art of grain selection, the secret of water-popping for a glass-like finish, and the bulletproof sealing techniques that guarantee these coasters will survive years of icy beers and neat whiskeys.
Remember, the beauty of this project lies in its imperfections and its customizability. Whether you left a rustic saw mark, added industrial metal corners, or burned a custom monogram into the face, you have crafted an heirloom. So, clear off that workbench, gather your materials, and start building. Not only will you save a fortune compared to buying boutique gifts, but you will hand over a piece of rugged, functional art that he will be proud to set his glass on every single day. Happy building, frugal crafters!

Makenzie is the founder and lead writer at MoneyHackTips.com — a personal finance blog dedicated to delivering street-smart financial wisdom for real people on real budgets. With 300+ published articles covering everything from debt management to investing fundamentals, Makenzie’s mission is to make every dollar work harder. When not writing about money hacks, Makenzie is testing frugal living strategies, optimizing side hustles, and helping readers build financial freedom from scratch.