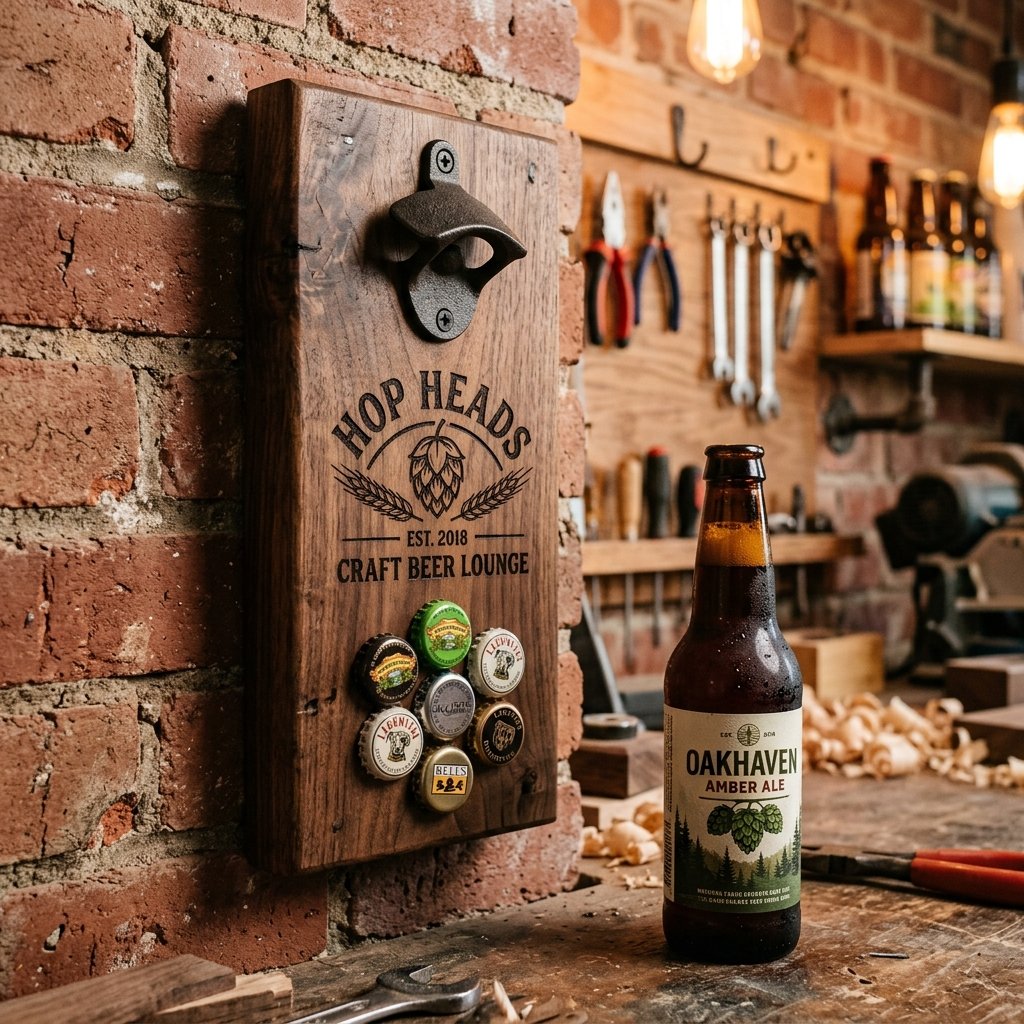

Let us let you in on a little secret: the most unforgettable, jaw-dropping gifts are rarely the ones that drain your bank account. If you have ever scrolled through high-end artisanal catalogs or trendy boutique websites, you have likely seen those gorgeous, personalized wooden wall-mount bottle openers. They exude a rugged, masculine elegance, complete with custom engravings, rustic hardware, and that magical magnetic cap catcher. The price tag? Usually anywhere from $40 to $85. But what if we told you that as a resourceful, budget-savvy crafter, you can build an identical—if not superior—heirloom-quality piece for under $5?
Welcome to the ultimate trash-to-treasure masterclass in crafting for him. Whether you are a frugal DIYer looking for the perfect Father’s Day triumph, a budget bride assembling epic groomsmen gifts, or a handy upcycler wanting to add some functional charm to your backyard patio, this project is your golden ticket. We are going to bypass the expensive laser engravers, skip the overpriced big-box lumber aisles, and dive deep into clever upcycling techniques. By the time you finish this guide, you will know exactly how to turn a scrap piece of wood into a personalized masterpiece that will have everyone asking, Where did you buy this? Grab your sandpaper and let us get crafty!
The Ultimate Scrap Wood Scavenger Hunt: Sourcing Materials for Pennies
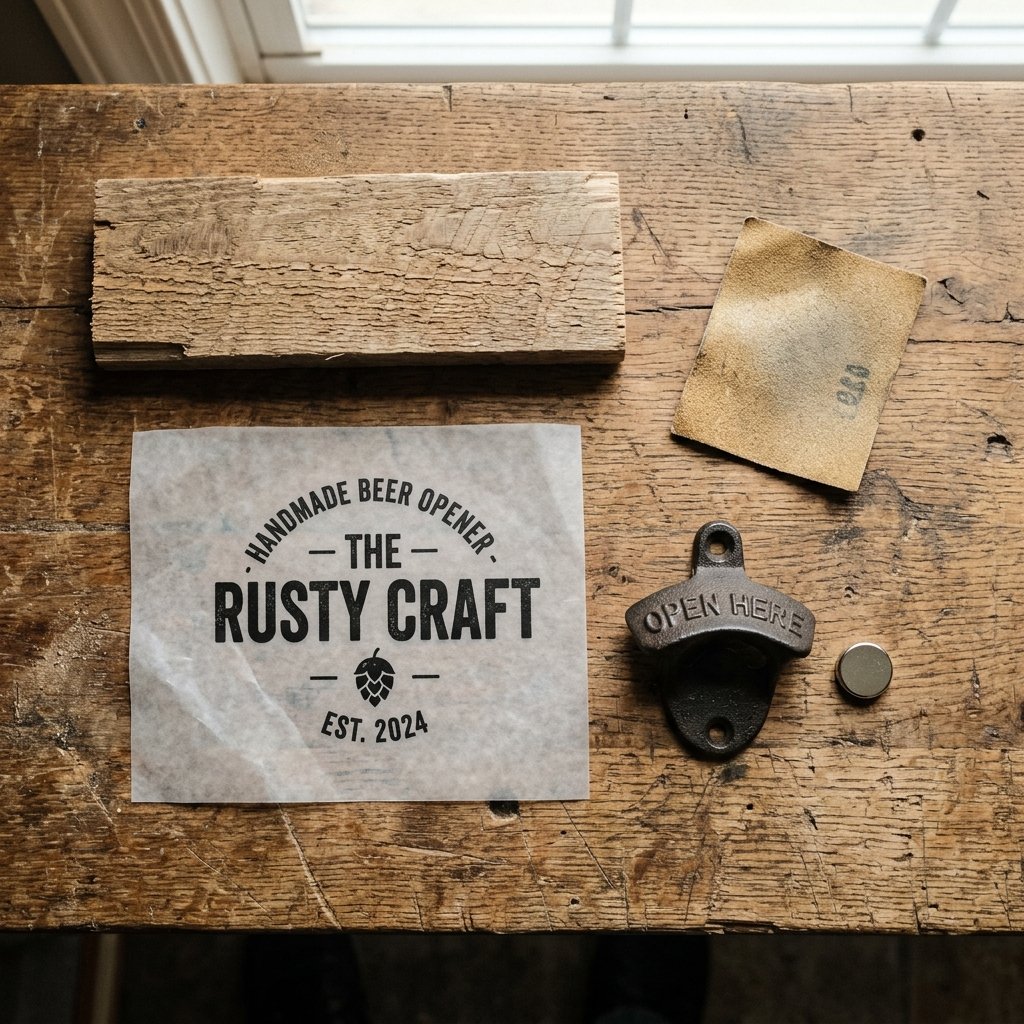
The foundation of any rugged, masculine DIY project is the wood. But walking into a hardware store and buying premium hardwood by the foot is a surefire way to blow your budget. The secret of the crafty-expert is knowing where to look for high-quality scraps. We are looking for a piece of wood approximately 10 inches long, 4 inches wide, and 1 inch thick. This is an incredibly common dimension for offcuts.
Where to Find Your Wood for Free (or Cheap)
- Pallet Wood: The holy grail of frugal DIYers. Pallet planks are usually oak or pine and have a gorgeous, weathered texture. Just ensure they are heat-treated (marked with an ‘HT’) rather than chemically treated.
- Construction Site Offcuts: Framing lumber like 2x4s can be easily ripped down. Ask politely at local build sites; they throw away pieces this size by the hundreds.
- Thrift Store Cutting Boards: A worn-out, solid wood cutting board from a thrift store for $1 can be cut into two or three beautiful bottle opener bases.
- Cabinet Shop Scraps: Local cabinet makers toss out premium hardwoods (walnut, cherry, maple) every single day. A polite phone call can yield a lifetime supply of small project blanks.
Let us break down the exact economics of this project. By utilizing resourceful sourcing, the savings are astronomical.
| Material / Component | High-End Retail Cost | Our Frugal DIY Cost |
|---|---|---|
| Wood Base (Walnut/Oak) | $15.00 | $0.00 (Scrap/Upcycled) |
| Cast Iron Opener Hardware | $8.00 | $1.25 (Bulk online/Craft store) |
| Rare Earth Magnet (Cap Catcher) | $5.00 | $1.50 (Bulk pack) |
| Personalization/Engraving | $25.00+ | $0.10 (Wax paper/Printer ink) |
| Stain & Mounting Screws | $5.00 | $0.50 (Stash leftovers) |
| Total Estimated Cost | $58.00+ | $3.35 |
Budget Crafter Mantra: Never pay for small wood dimensions. What is trash to a contractor is a rustic treasure to a crafter. Always check the scrap bins first!
Milling and Shaping: Turning Rough Lumber into a Rustic Masterpiece

Once you have secured your scrap wood, it is time to prep the canvas. This is where the magic of transformation happens. A rough, splintered piece of pallet wood can look like a $60 artisanal piece if you treat it right. First, cut your wood to size. The golden ratio for a wall-mount opener is typically 10 inches by 4 inches, but feel free to adjust based on your scrap.
The Sanding Progression
Do not skip grits! This is the most common mistake novice DIYers make. Sanding is what dictates how well your wood will take stain and how professional the final piece will feel in the hand.
- 80-Grit (The Eraser): Start here to remove deep scratches, mill marks, and splinters. If you are using pallet wood, this will expose the fresh grain beneath the grime.
- 120-Grit (The Smoother): This removes the scratches left by the 80-grit. Pay special attention to the edges. For a softer, more rugged look, gently round over the sharp corners (a technique called ‘breaking the edges’).
- 220-Grit (The Polisher): This is your finishing grit. Sand until the wood feels as smooth as glass. Wipe away all dust with a tack cloth or a slightly damp rag.
Safety Note: Always wear a well-fitting dust mask and safety glasses when sanding or sawing, especially when working with upcycled wood of unknown origins. Work in a well-ventilated area!
Faux-Finishing Like a Pro
If you scored premium hardwood, a simple coat of mineral oil might be all you need. But if you are working with cheap pine or whitewood, you will want to elevate it. Instead of buying expensive stains, try the Steel Wool and Vinegar trick. Drop a pad of #0000 steel wool into a mason jar of white vinegar and let it sit for 24 hours. Brush this solution onto your pine, and watch as it chemically reacts with the tannins in the wood, turning it a gorgeous, naturally weathered grayish-brown within minutes. It is a 100% free stain alternative that looks incredibly authentic.
The Magic Trick: 3 Ways to Personalize Wood Without Expensive Machines
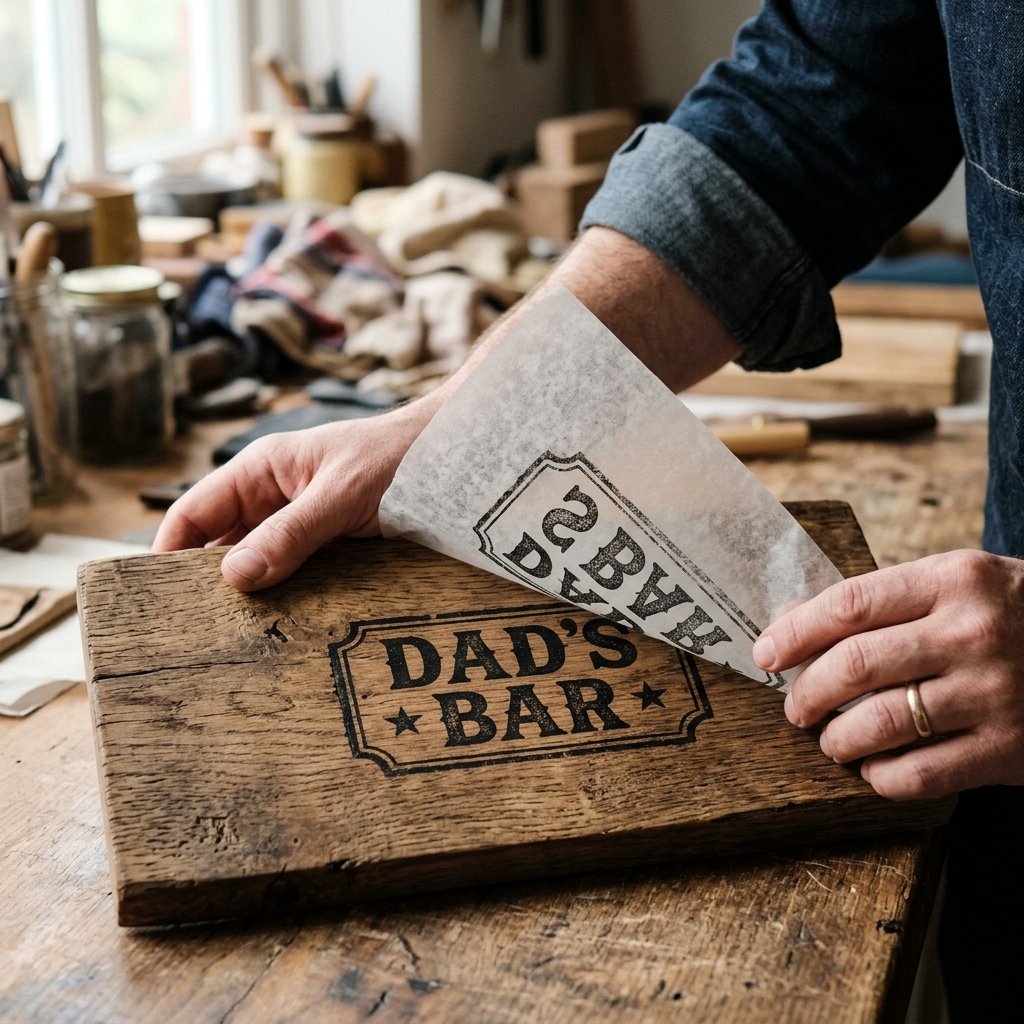
Here is where we take this project from a basic piece of wood to a deeply meaningful, personalized gift. Big brands use expensive laser engravers to add names, wedding dates, or logos. We are going to use pure, resourceful ingenuity. Here are three foolproof, budget-savvy ways to transfer text or images onto your wood.
Method 1: The Wax Paper Transfer (Fastest & Cheapest)
This is a brilliant hack for anyone with a standard home inkjet printer. Cut a piece of standard kitchen wax paper to the size of an 8.5×11 sheet of paper. Tape the edges to a regular piece of printer paper so it feeds through the printer smoothly.
- Design your logo: Use a free program like Canva to design your monogram, quote, or logo. CRITICAL STEP: You must flip/mirror the image horizontally before printing!
- Print: Print the design onto the waxy side of the paper. The ink will sit wet on top of the wax.
- Transfer: Carefully place the wax paper, ink-side down, onto your sanded wood. Do not let it slide! Firmly rub the back of the wax paper with the edge of a credit card to press the ink into the wood grain.
- Reveal: Peel back the paper to reveal a rustic, faded-vintage print on your wood. Seal it immediately with clear spray enamel so it doesn’t smudge.
Method 2: Mod Podge Image Transfer (Bold & Durable)
If you want a darker, more solid black logo, print your mirrored design using a Laser Printer (inkjet will not work for this). Apply a thin layer of Mod Podge directly over the ink, press it face down onto the wood, and let it dry overnight. The next day, take a damp sponge and gently rub away the paper. The paper dissolves, but the laser toner remains permanently glued to the wood!
Method 3: The Hand-Burned Heirloom (Rugged & Permanent)
For the ultimate masculine touch, use a cheap $10 wood-burning pen from the craft store. Print your design normally, tape it to the wood, and trace over the lines heavily with a ballpoint pen to leave an indentation in the soft wood. Remove the paper, and carefully follow the indented lines with your heated wood-burning tool. It takes patience, but the tactile, burned-in result is absolutely stunning and looks incredibly high-end.
Hardware Heroics: Attaching the Opener and the Hidden Magnetic Cap Catcher

Now that your board is perfectly shaped, stained, and personalized, it is time to add the functionality. The hardware is what makes this a tool rather than just a decoration. You can source cast-iron, vintage-style bottle opener heads online for about $1 to $1.50 each when bought in multipacks. They usually come with matching mounting screws.
Positioning the Opener
Place your opener hardware near the top of the board, leaving at least 1.5 inches of space from the top edge so the bottle has room to angle backward when opening. Mark the holes with a pencil, and always drill pilot holes. Using a drill bit slightly smaller than your screws prevents the wood from splitting when you drive the screws in.
The Secret Upgrade: The Hidden Magnetic Catcher
This is the feature that will make people gasp and say, ‘No one will believe you made this!’ Instead of a bulky metal bucket at the bottom to catch the falling bottle caps, we are going to use invisible magnetism. When a cap is pried off, it drops and magically sticks to the wood.
- Source the Magnet: You need a strong Rare Earth (Neodymium) magnet. A 1-inch diameter, 1/4-inch thick disc magnet works perfectly and costs around $1.50.
- Drill the Hole: Flip your wood over to the back. Measure about 3 to 4 inches below where the opener hardware is mounted on the front. Using a Forstner bit or a spade bit that matches the diameter of your magnet, drill a shallow hole into the back of the wood.
- The Depth is Crucial: You want to drill as close to the front surface as possible without poking through. Aim to leave only about 1/8-inch to 1/16-inch of wood between the magnet and the front surface. The thinner the wood, the stronger the magnetic pull will be on the falling cap.
- Secure the Magnet: Add a dab of strong epoxy or super glue into the hole and press the magnet in. Let it cure completely.
Crafty-Expert Tip: Test the magnetic pull before gluing! Hold the magnet in the hole on the back, and drop a bottle cap down the front. If it doesn’t catch, you need to drill slightly deeper.
Sealing the Deal: Weatherproofing and Flawless Wall Mounting
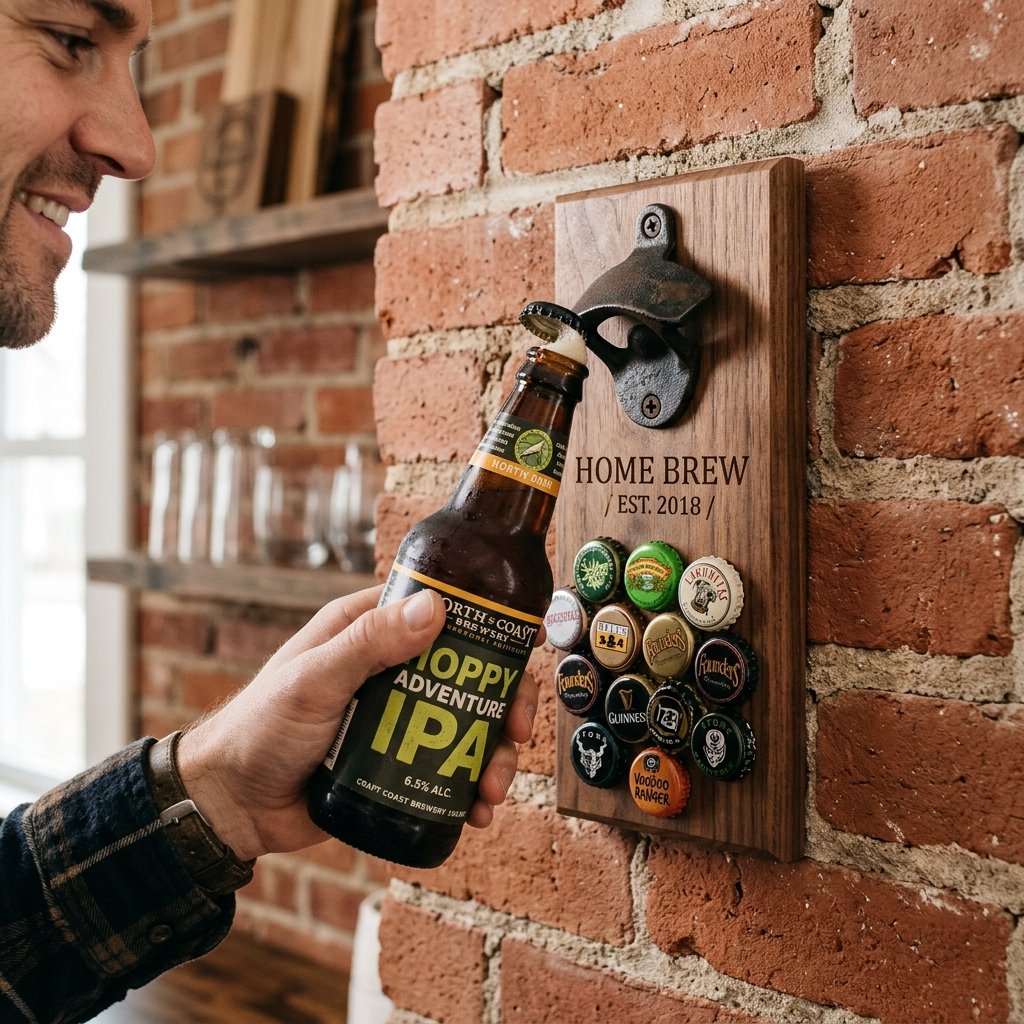
The final steps are all about durability and presentation. Whether this bottle opener is going in a man cave, a kitchen, or an outdoor patio bar, it needs to be protected from beer splashes and weather.
Choosing Your Sealant
For a truly rugged, matte finish that feels natural, rub the wood generously with Boiled Linseed Oil or Tung Oil. It brings out the richness of the grain without making it look plasticky. If the opener will live outdoors, you must use a spar urethane or an exterior-grade polyurethane. Apply two to three thin coats, sanding very lightly with 320-grit sandpaper between coats for a flawless, professional finish.
Mounting It Flush to the Wall
A high-end piece shouldn’t have ugly screws poking through the front of the beautiful personalization. To mount this securely and invisibly, we use the back of the board.
| Mounting Method | Difficulty | Cost | Best For |
|---|---|---|---|
| Keyhole Router Bit | Advanced | Free (If you own a router) | The ultimate flush, professional mount. |
| D-Ring Hangers | Beginner | $0.50 | Quick indoor hanging. Leaves a slight gap. |
| Pre-drilled Countersink | Intermediate | $0.00 | Heavy duty outdoor mounting into studs. |
If you do not have a router to cut a keyhole slot, the most budget-savvy, heavy-duty method is to drill two small holes completely through the board—one hidden directly behind the cast iron opener hardware, and one at the very bottom. You can drive long screws through these holes directly into a wall stud, and the top screw will be completely hidden by the opener hardware once you screw it on!
Conclusion
And there you have it—a spectacular, heirloom-quality personalized wood wall-mount bottle opener for less than the cost of a fancy cup of coffee! By combining scrap wood scavenging, clever ink transfer hacks, and the hidden magic of rare-earth magnets, you have bypassed the retail markup and created something truly unique. This is the essence of frugal DIY: using your hands, your resourcefulness, and a little bit of crafty ingenuity to build gifts that carry real meaning. Whether you are batch-building ten of these for your groomsmen or crafting a single, heartfelt piece for Father’s Day, the recipient will be absolutely blown away. They really will not believe you made it yourself—and you can just smile, knowing it only cost you $5. Now, go crack open a cold beverage; you have earned it!

Makenzie is the founder and lead writer at MoneyHackTips.com — a personal finance blog dedicated to delivering street-smart financial wisdom for real people on real budgets. With 300+ published articles covering everything from debt management to investing fundamentals, Makenzie’s mission is to make every dollar work harder. When not writing about money hacks, Makenzie is testing frugal living strategies, optimizing side hustles, and helping readers build financial freedom from scratch.