
We have all been there: you are out on the water, working in the garage, or simply leaning over to pick up a dropped bolt, and clatter—your favorite pair of sunglasses hits the pavement. Or worse, they disappear into the depths of a lake. Losing or damaging high-quality eyewear is a frustration no frugal DIYer should have to endure. But why spend $15 to $25 on a synthetic, store-bought retainer when you likely have the materials for a superior, more stylish version sitting in your rag bin right now? Enter the DIY T-Shirt Yarn Sunglasses Strap. This project is the epitome of resourceful engineering: it takes exactly 5 minutes, costs $0, and results in a rugged, ‘masculine-elegant’ accessory that holds your frames tighter than any plastic alternative. By utilizing the natural ‘jersey curl’ of upcycled cotton, we create a soft, high-friction grip that stays put during high-intensity activity. Whether you are a handy parent keeping up with the kids or a budget-savvy adventurer, this guide will show you how to turn a retired tee into your most practical piece of gear.
The Zero-Dollar Gear Upgrade: Why Upcycled Yarn Wins
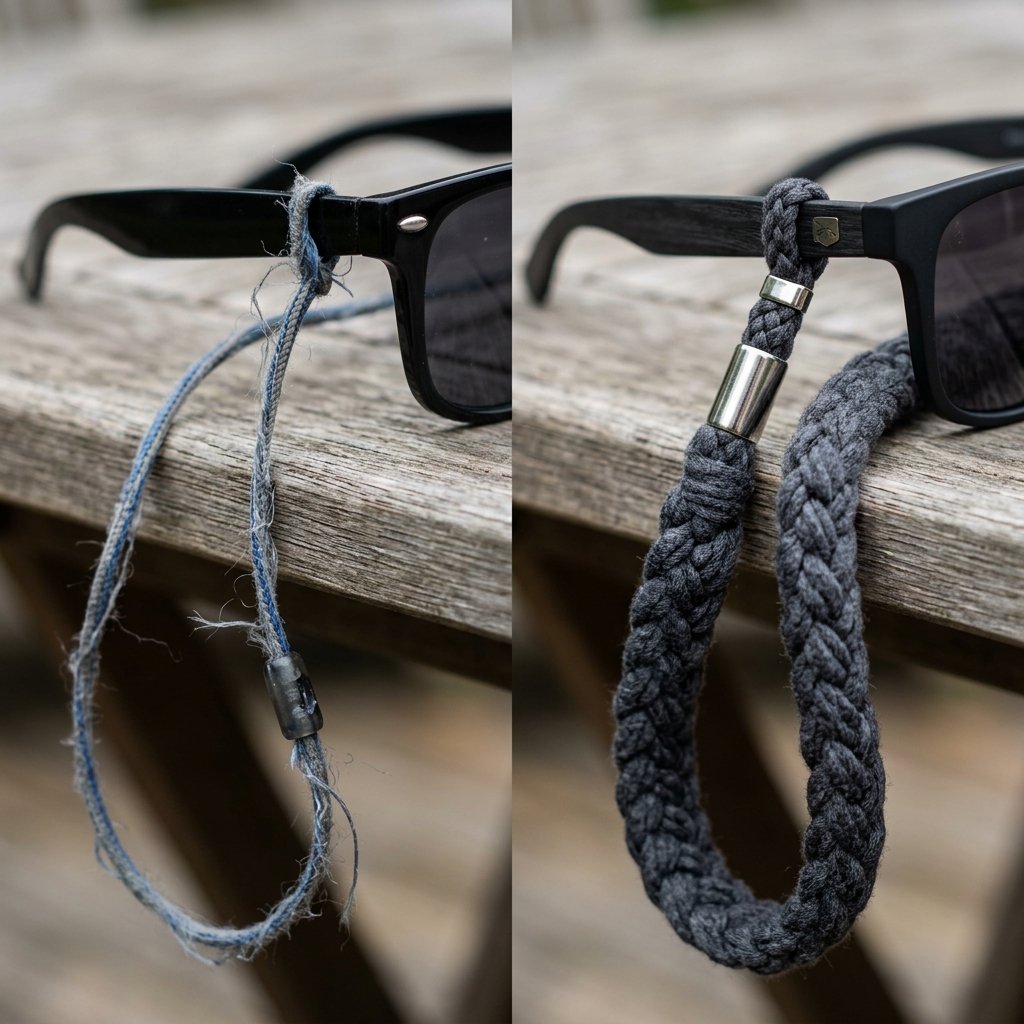
In the world of tactical frugality, we look for items that are both ‘form’ and ‘function.’ T-shirt yarn, specifically jersey knit cotton, is a secret weapon for the maker. Unlike paracord, which can be abrasive against the neck, or neoprene, which can cause sweating, upcycled cotton is breathable, washable, and remarkably durable. The magic lies in the elasticity. Because T-shirt fabric is a knit, when you pull a thin strip, it curls inward on itself, creating a rounded cord that looks remarkably like expensive boutique rope. This ‘jersey curl’ provides a natural tension that grips the temples of your sunglasses without the need for bulky rubber connectors.
| Feature | Store-Bought Strap | DIY T-Shirt Yarn Strap |
|---|---|---|
| Cost | $15.00 – $30.00 | $0.00 |
| Material | Nylon/Plastic | 100% Upcycled Cotton |
| Comfort | Can be itchy/hot | Soft & Breathable |
| Build Time | Driving to store (30 mins) | 5 Minutes |
| Eco-Impact | Manufacturing waste | Zero Waste (Upcycled) |
The Science of the Grip
Most sunglasses arms (the temples) are made of smooth acetate or metal. To keep them from sliding off, you need a material with a high coefficient of friction. Cotton yarn, especially when slightly stretched, creates a ‘sock’ effect over the temple tip. This ensures that even if you are jogging or working under a car, your glasses remain anchored to your person.
The Harvest: Transforming a Retired Tee into Premium Cordage

Before we assemble the strap, we must harvest the material. Not all T-shirts are created equal. For a rugged, high-end look, look for 100% cotton or 95% cotton/5% spandex blends. Avoid heavy graphics or side seams if possible, though a seamless ‘tubular’ knit shirt (common in older workwear brands) is the holy grail for this project.
Materials Needed
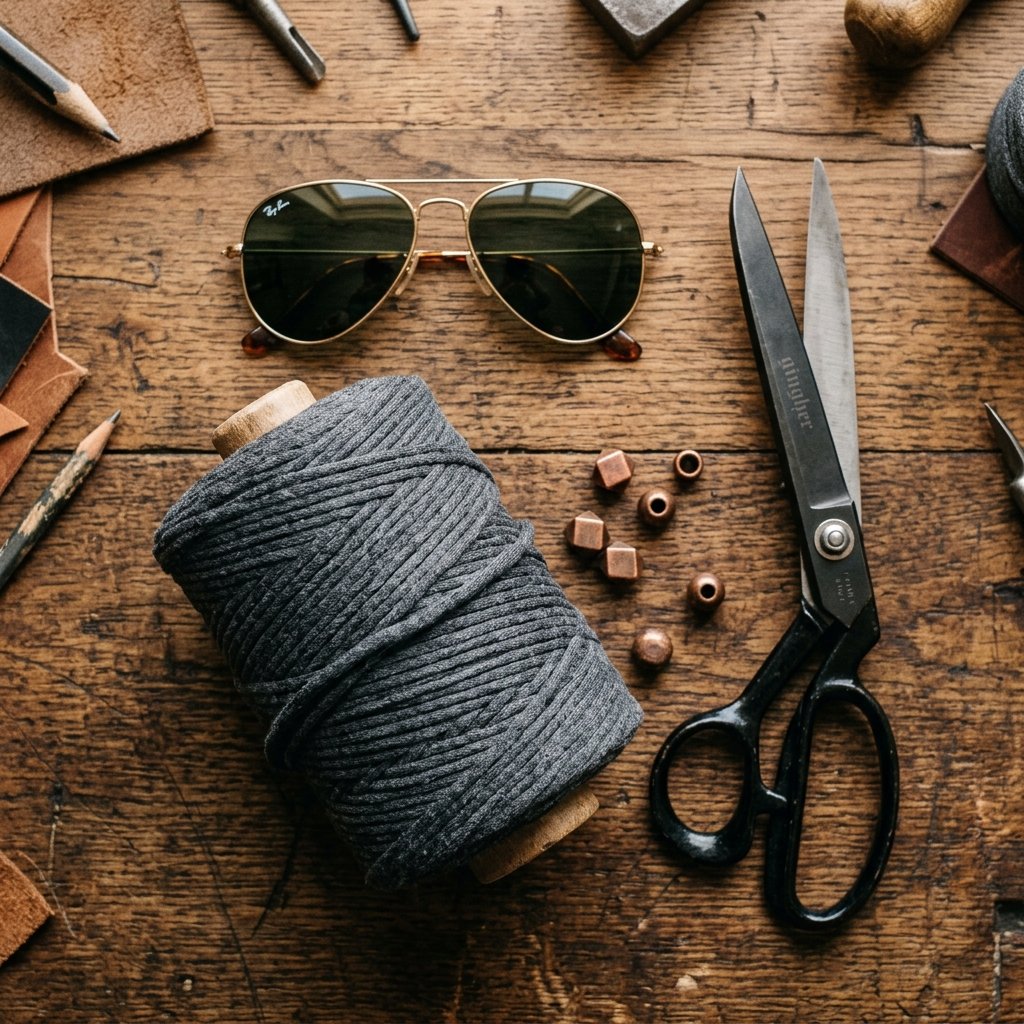
- One Old T-Shirt (Grey, Navy, or Olive Drab work best for a classic look).
- Fabric Scissors (Must be sharp for a clean edge).
- Measuring Tape (Or just eyeball it—we are being resourceful!).
- Optional: Two small rubber O-rings or copper nuts for weight and adjustment.
Pro-Tip: Use the bottom hem of the shirt for a different project. The best yarn comes from the ‘body’ of the shirt, where the fabric is most consistent in its stretch.
To create the yarn, lay the shirt flat. Cut a strip 1 inch wide across the width of the shirt. Once you have a large loop, snip one end to make a long ribbon. Now, the magic: grasp one end in each hand and pull hard. You will see the edges roll inward, transforming the flat fabric into a professional-grade cord. This process takes approximately 60 seconds but is the most satisfying part of the build.
Construction Phase: The 5-Minute Assembly Guide
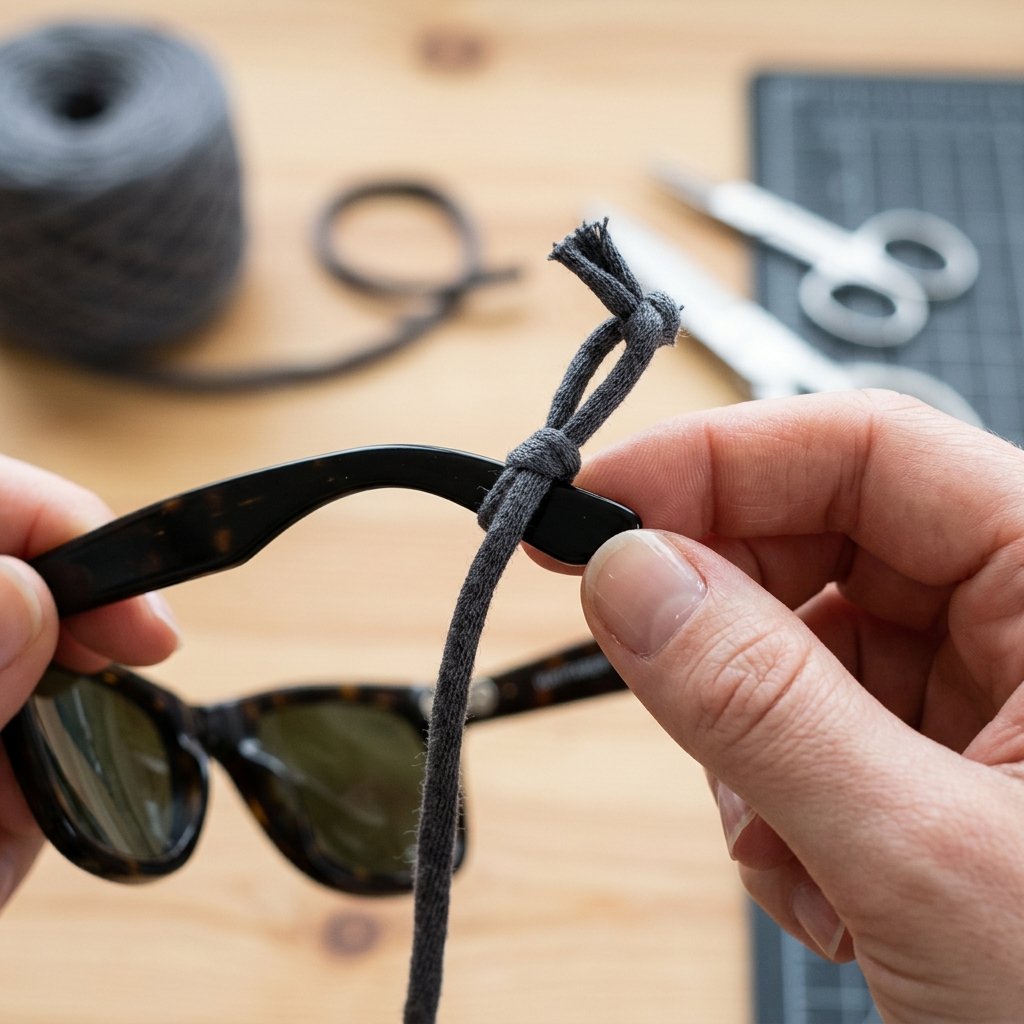
Now that you have your cord, it is time to turn it into a functional retainer. This method uses a clever ‘friction-fit’ loop that requires no sewing and no glue. It is pure, elegant engineering that you can do at a campsite or a kitchen table.
Step-by-Step Assembly
- Measure the Length: Drape the yarn around your neck and hold your sunglasses where you want them to sit on your chest. Add 4 inches to this length for the knots. Usually, 24 to 28 inches is the sweet spot.
- Create the Attachment Loops: Fold the last 2 inches of one end of the yarn back onto itself to form a small loop.
- Tie the ‘Surgeon’s Loop’: Secure this loop with a tight overhand knot or a ‘constrictor knot.’ Ensure the resulting loop is just slightly smaller than the widest part of your sunglasses’ arms.
- Repeat: Do the exact same thing on the other end of the yarn.
- The Installation: Slide the loops onto the ends of the sunglasses temples. Push them up past the ‘ear curve’ of the frame. The tension of the cotton will hold them firmly in place.
Safety Note: Ensure the knots are pulled extremely tight. If you are using a very thin T-shirt, you may want to double-knot for extra security. Always test the ‘shake factor’ over a soft surface like a couch before heading out.
The Pro Finishes: Hardware, Knots, and Custom Adjustments
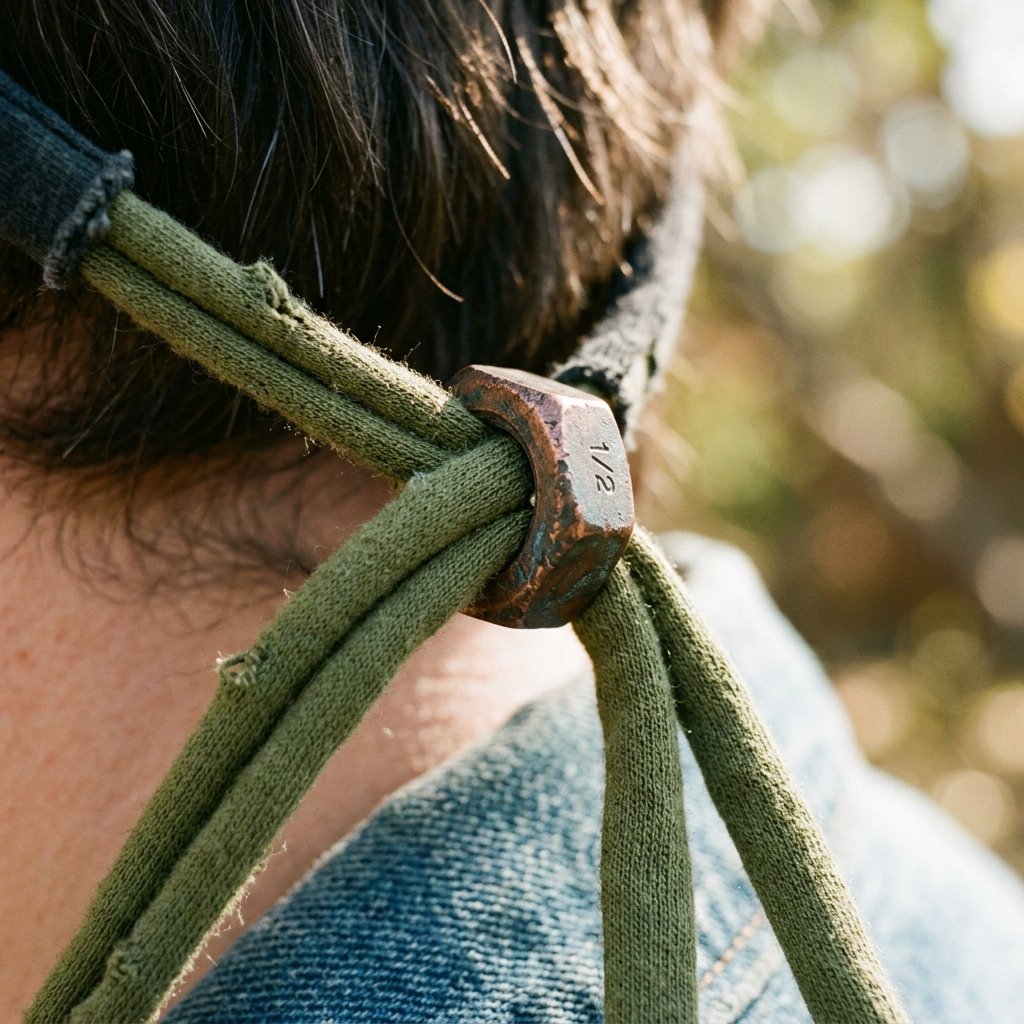
If you want to take your strap from ‘homemade’ to ’boutique-quality,’ we can add a few clever modifications. This is where your inner designer comes out. A simple piece of hardware can add weight, which helps the strap hang correctly, and allows for adjustability.
Adding a Slider for Activity
If you are using these for fishing or hiking, you want the strap to be able to tighten against the back of your head. Find a small 1/4 inch copper nut from the hardware bin or a large-hole wooden bead. Thread both ends of the yarn through the bead before you attach the second loop to your glasses. This bead now acts as a slider.
| Modification | Benefit | Difficulty |
|---|---|---|
| Copper Nut Slider | Adjustable fit for sports; adds a rugged, industrial look. | Easy |
| Dipping Ends in Wax | Prevents any fraying and makes threading beads easier. | Medium |
| Braided Cord | Uses 3 thinner strands for a ‘nautical’ rope aesthetic. | Medium |
For those who prefer a minimalist look, skip the hardware. The natural weight of the cotton is usually enough to keep the glasses resting comfortably on your chest. If the yarn feels too ‘bouncy,’ simply pull it tighter to decrease the elasticity and increase the density of the cord.
Rugged Versatility: Styling and Maintenance

Your new strap isn’t just a utility item; it is a style statement. The matte finish of cotton T-shirt yarn looks significantly more sophisticated than the shiny, neon synthetics found in sporting goods stores. It pairs perfectly with a linen shirt for a summer wedding or a rugged canvas jacket for a weekend project.
Care and Longevity
One of the greatest advantages of this DIY project is that it is 100% washable. Sunglasses straps get hit with sweat, sunscreen, and salt spray. When yours gets grimy, don’t throw it away:
- Remove the strap from the glasses.
- Toss it in a small mesh laundry bag (or a sock tied with a rubber band).
- Wash with your regular laundry on a cold cycle.
- Air dry to maintain the elasticity.
Because you made this yourself, you now have the skills to produce a new one in 5 minutes whenever you change your style or your old one finally wears out. It is the ultimate sustainable cycle of ‘use, reuse, and craft.’
Conclusion
Stop overpaying for basic necessities and start looking at your ‘trash’ as a resource. The DIY T-Shirt Yarn Sunglasses Strap is more than just a 5-minute craft; it is a testament to the power of frugal innovation. You have saved $20, kept a textile out of the landfill, and created a bespoke accessory that is more comfortable and durable than its commercial counterparts. This is the essence of the ‘Trash-to-Treasure’ philosophy. Now that you have mastered the jersey curl and the friction-fit loop, what else can you upcycle? Whether you’re gifting these to friends or outfitting the whole family for a beach trip, you can take pride in the fact that you solved a common problem with nothing but a pair of scissors and a bit of cleverness. Stay crafty, stay frugal, and never lose your shades again!

Makenzie is the founder and lead writer at MoneyHackTips.com — a personal finance blog dedicated to delivering street-smart financial wisdom for real people on real budgets. With 300+ published articles covering everything from debt management to investing fundamentals, Makenzie’s mission is to make every dollar work harder. When not writing about money hacks, Makenzie is testing frugal living strategies, optimizing side hustles, and helping readers build financial freedom from scratch.