
The Underestimated Elegance of the Humble Carnation
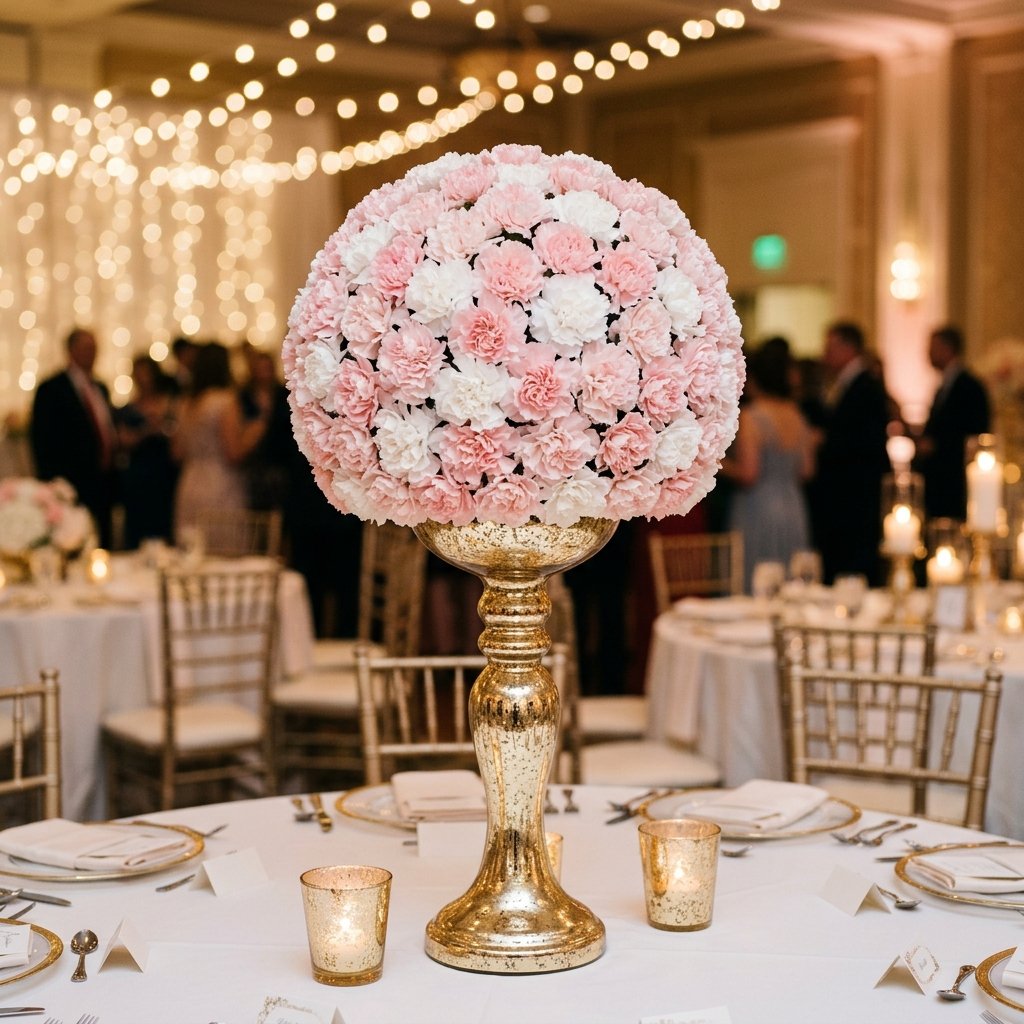
Let’s talk about the unsung hero of the floral world: the carnation. For too long, this rugged, ruffled bloom has been relegated to the ‘filler’ category or dismissed as a grocery-store afterthought. But for the resourceful DIYer and the budget-savvy bride, the carnation is actually a secret weapon. When packed tightly together in a geometric arrangement, carnations lose their individual identity and transform into a lush, velvety texture that mimics expensive peonies or hydrangeas. The floral sphere—often called a pomander—is the pinnacle of this transformation. It looks like a million bucks, but with a little crafty-expert knowledge, you can assemble these for less than the price of a standard takeout meal. Whether you are styling a wedding, a sophisticated Father’s Day brunch, or a high-end home gala, mastering the carnation sphere is a game-changer for your decor arsenal.
The Blueprint: Materials and Budget Breakdown
Why DIY Beats the Florist Every Time
When you walk into a high-end florist and ask for a ‘floral pave sphere,’ you are likely looking at a starting price of $75 to $150 per centerpiece. Why? Because you are paying for the labor of a professional and the markup on the blooms. By sourcing your own carnations in bulk and doing the assembly yourself, you can slash that cost by 80% to 90%. The beauty of the carnation lies in its durability; it can handle the manhandling of a beginner crafter without wilting, making it the perfect entry point for handy parents and upcyclers.
| Material Item | Estimated DIY Cost (Per Sphere) | Retail/Florist Equivalent |
|---|---|---|
| Carnations (approx. 25-35 stems) | $12.00 – $18.00 (Bulk) | $45.00 |
| Floral Foam Sphere (6-inch) | $3.50 | $10.00 |
| Water & Floral Food | $0.10 | Included |
| Recycled Base or Pedestal | $1.25 (Dollar Tree) | $25.00+ |
| Total Estimated Cost | $16.85 – $22.85 | $80.00 – $150.00 |
Budget Guru Tip: Source your carnations from wholesale clubs like Costco or Sam’s Club, or talk to your local grocery store manager about ordering full ‘procon’ boxes of a single color. Buying in bulk is the ultimate way to achieve that luxury look for cheap.
The Hydration Ritual: Prepping Your Blooms Like a Pro
Engineering Longevity into Your Design
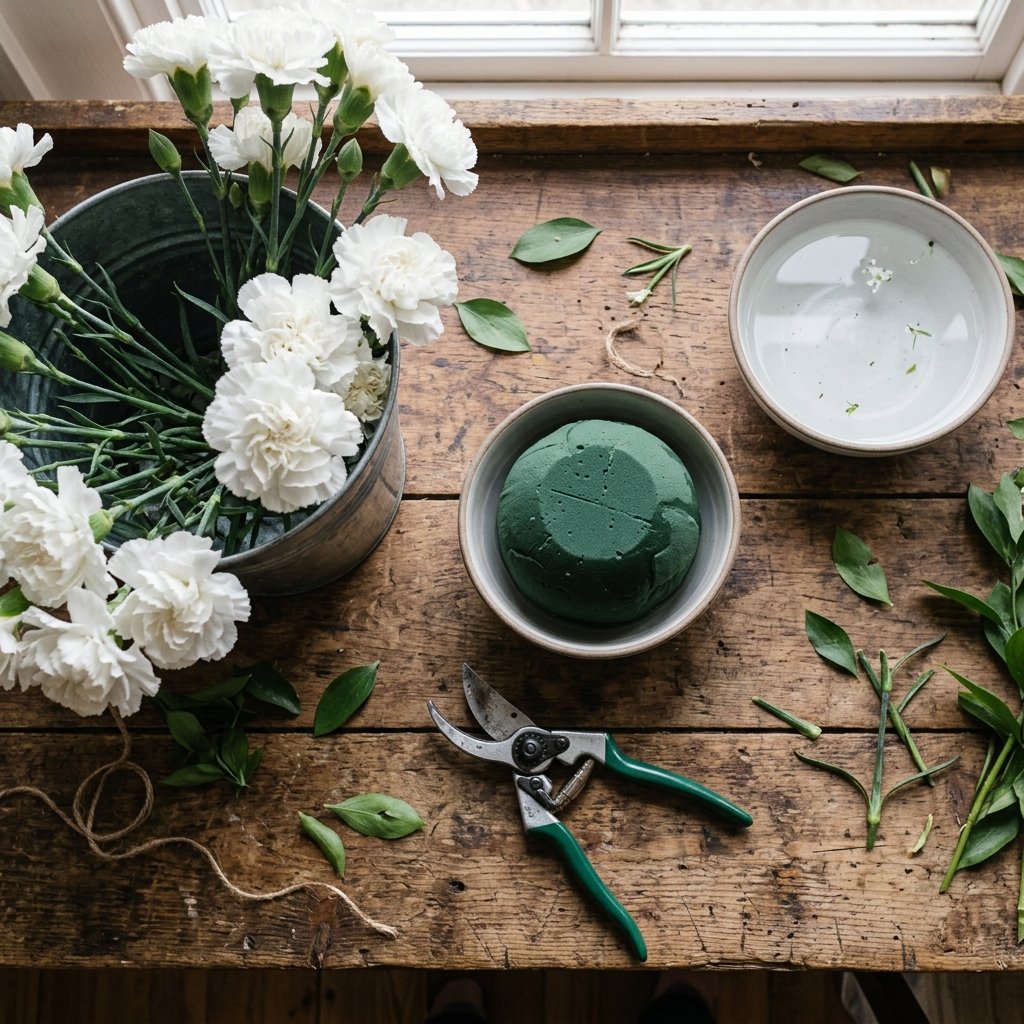
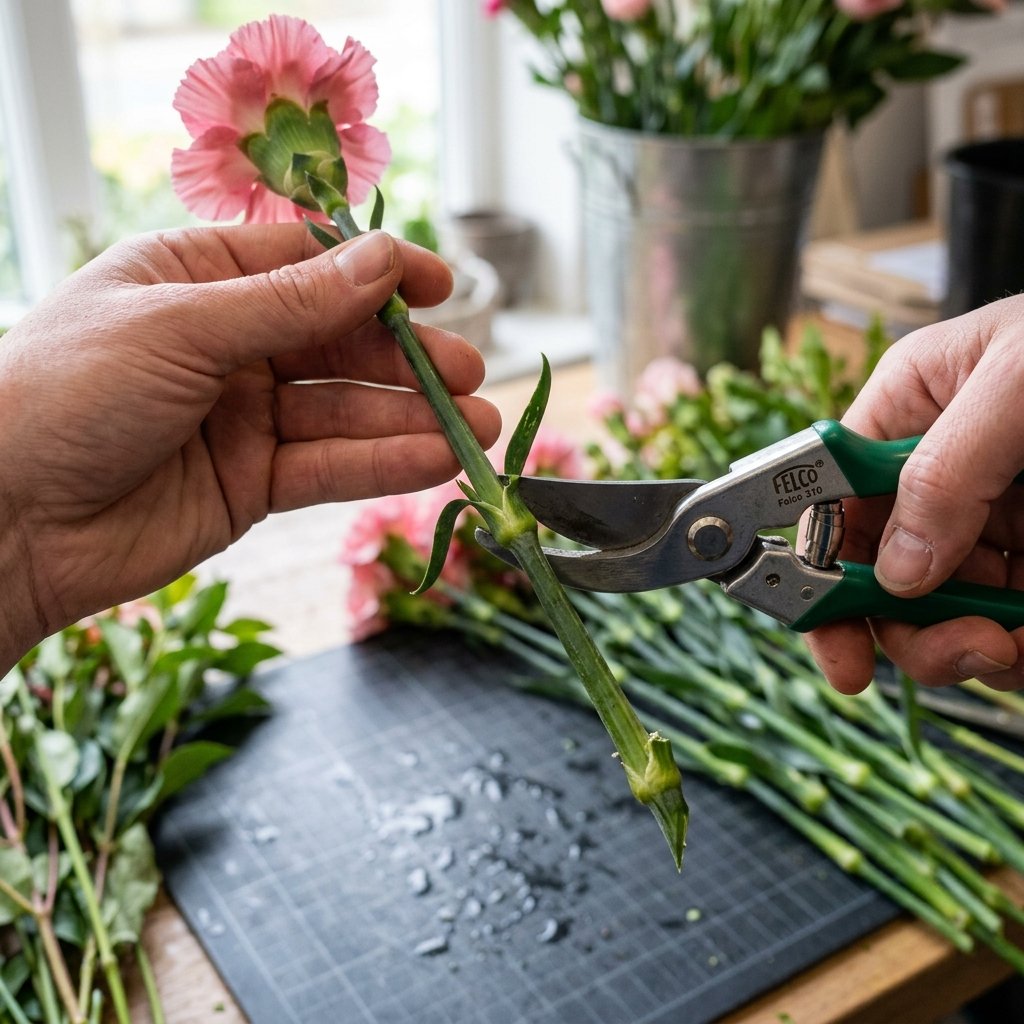
Before you even touch the foam, your flowers need to be ‘conditioned.’ This is where many amateurs fail. A carnation is a rugged flower, but it needs a proper drink to ensure it stays turgid and vibrant for the duration of your event. If you are prepping for a weekend event, you should start this process 48 hours in advance. This ensures the blooms are fully ‘shattered’ (opened up) to cover the most surface area on your sphere.
- The Stem Cut: Use sharp shears or a floral knife to cut the stems at a 45-degree angle. This increases the surface area for water intake.
- Node Removal: Carnations have ‘knuckles’ or nodes. Cut just above a node to ensure the stem can draw water efficiently.
- Temperature Shock: Place the stems in lukewarm water (not ice cold) mixed with floral preservative. The warmth encourages the petals to expand.
- The Bloom Spread: If your carnations are still tight buds, gently massage the ‘calyx’ (the green base of the flower) with your thumb and forefinger to help the petals relax and spread.
Safety Note: Always cut away from your body when using a floral knife. While carnations are non-toxic, some people with sensitive skin may experience mild irritation from the sap; wear gloves if you are processing hundreds of stems.
The Core Construction: Preparing the Floral Foam
The Physics of the Perfect Sphere
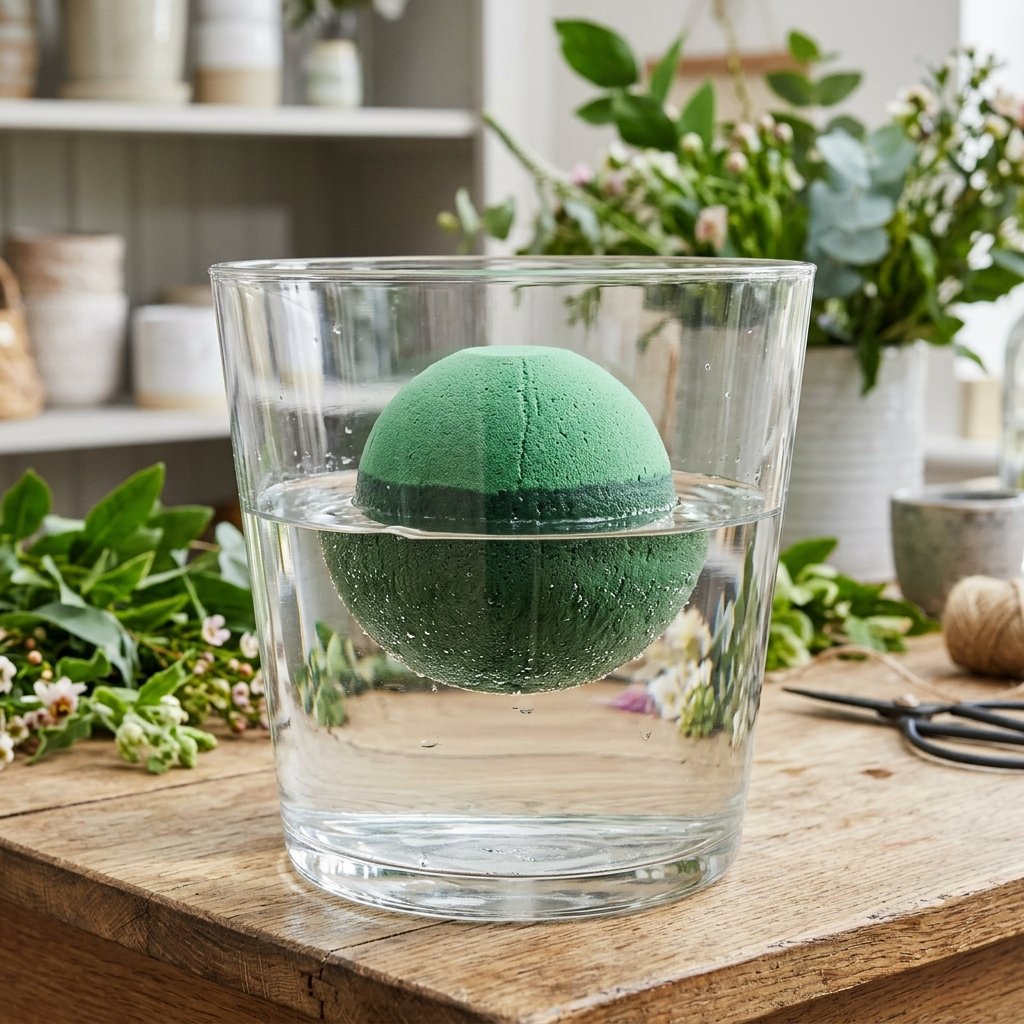
The foundation of your centerpiece is the floral foam sphere. You must use ‘Wet Foam’ (often green), not ‘Dry Foam’ (often grey/brown), which is intended for silk flowers. The foam acts as both the anchor for your stems and the life-support system for the flowers. A properly soaked 6-inch sphere can hold nearly a quart of water, making it quite heavy—ensure your base can support the weight of a 3-5 pound wet sphere.
- The Float Soak: Fill a deep bucket with water and floral food. Place the foam sphere on top of the water. Do not push it down. Let it sink naturally as it absorbs water. This prevents ‘air pockets’ in the center that can kill your stems.
- The Caging (Optional but Recommended): For larger spheres, wrap the wet foam in a thin layer of chicken wire or floral netting. This prevents the weight of the flowers from breaking the foam apart.
- Securing the Base: If your sphere is sitting on a vase, use ‘Oasis tape’ (waterproof floral tape) to create a cross-hatch over the top to lock the sphere in place.
Comparison: Foam Sizes vs. Flower Count
| Foam Sphere Diameter | Approx. Carnations Needed | Visual Impact |
|---|---|---|
| 4-inch | 15-20 | Small/Cocktail Table |
| 6-inch | 30-40 | Standard Dining Table |
| 8-inch | 60-75 | Grand Entryway/Statement |
Assembly Masterclass: Creating the Pave Look
The ‘North-South-East-West’ Technique
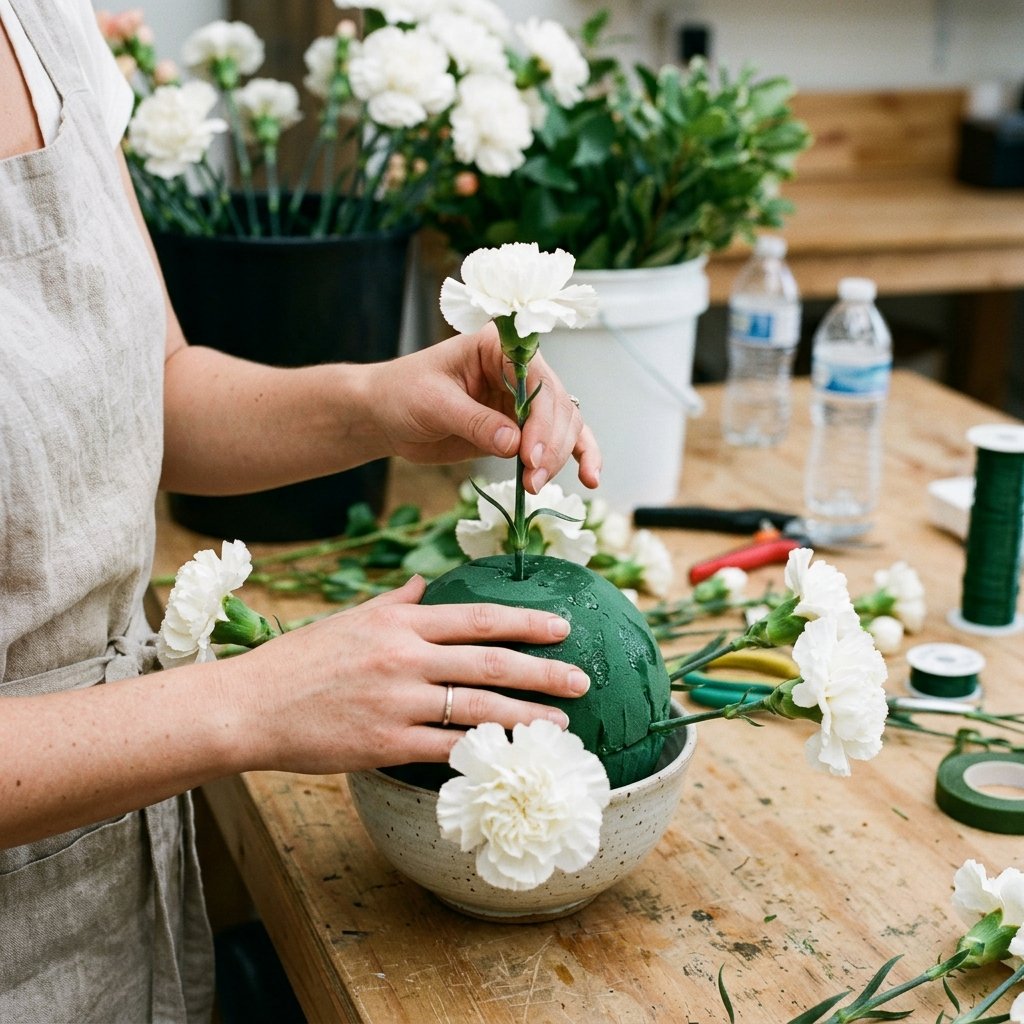
To achieve that masculine-elegant, perfectly symmetrical look, you cannot just start sticking flowers in at random. You need a strategy. The goal is a ‘pave’ finish, where the flower heads touch each other so closely that no green foam is visible. This creates a solid texture of color that looks incredibly expensive.
- Stem Preparation: Cut your carnation stems to a uniform length of approximately 2 to 3 inches. If the stems are too long, they will hit each other inside the sphere; too short, and they won’t stay secure.
- Establishing the Poles: Insert your first flower at the very top (North Pole). Insert the second at the very bottom (South Pole—if the sphere is hanging) or at the base line. Then insert flowers at the ‘equator’ at four equidistant points.
- Filling the Quadrants: Work within the sections you’ve created. Insert flowers at a 90-degree angle to the foam surface. If you tilt them, you will create gaps.
- The ‘Kissing’ Rule: Each carnation head should just ‘kiss’ its neighbor. Do not squash them, but do not leave any space. The ruffles should interlock.
Mantra for Success: “Uniform length, perpendicular entry, interlocking ruffles.” Follow this, and your sphere will look like it was made by a 5th-avenue stylist.
Styling and Upcycling: From Dollar Tree to High-End

Elevating the Base
A floral sphere on its own is lovely, but the clever crafter knows that the base is what sells the ‘luxury’ illusion. You can use almost anything as a pedestal, provided it is sturdy. This is where your Dollar Tree interior designer skills come into play. A simple glass candle holder from a discount store can be transformed with a bit of metallic spray paint or stone-texture finish to look like a heavy antique find.
- The Mercury Glass Hack: Take a clear glass vase, spray the inside with water, then mist with silver spray paint. The water droplets create a distressed, high-end mercury glass effect for under $2.
- The Floating Sphere: For a whimsical look, thread a heavy-duty ribbon through the center of the foam (using a long upholstery needle) before adding flowers. These ‘kissing balls’ can be hung from shepherd’s hooks or ceiling beams.
- The Naturalist Look: Place the sphere on a bed of moss inside a low wooden crate for a rugged, practical aesthetic that suits outdoor or rustic events.
Cost Comparison: The Base
| Base Type | DIY Source | Cost | Luxury Look Equivalent |
|---|---|---|---|
| Gold Pedestal | Dollar Tree + Spray Paint | $2.50 | West Elm ($40) |
| Birch Slab | Backyard/Firewood pile | $0.00 | Terrain ($28) |
| Silver Urn | Thrift Store + Polish | $4.00 | Pottery Barn ($65) |
Maintenance: Keeping the Luxury Alive
The Aftercare Protocol
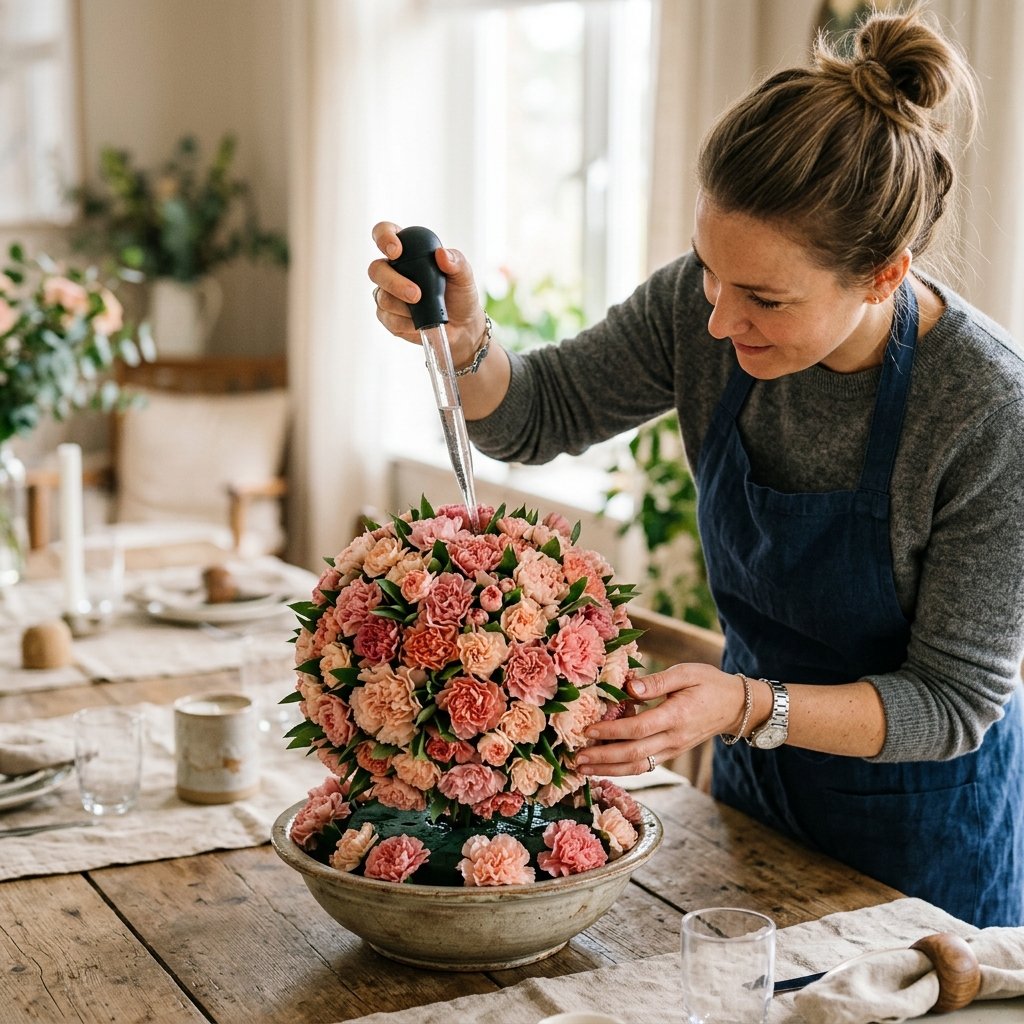
One of the best things about carnations is that they are tough as nails. While a rose sphere might start to brown in 48 hours, a carnation sphere can look fresh for 7 to 10 days if treated correctly. This makes them the ultimate choice for handy parents who need to prep decor early in the week to save time on the big day.
- The Daily Mist: Use a spray bottle to mist the flower heads daily. Carnations can actually absorb some moisture through their petals.
- The ‘Turkey Baster’ Method: Since the foam will lose water to evaporation and the flowers, use a turkey baster to pour a small amount of water into the top of the sphere every two days.
- Refrigeration: If you have the space, keep the finished spheres in a cool basement or a floral fridge (avoid home fridges with fruit, as ethylene gas from ripening fruit will kill flowers).
Pro Tip: If a single flower dies or wilts, simply pull it out and replace it with a fresh one. The dense ‘pave’ style makes it incredibly easy to ‘patch’ your arrangement without anyone noticing.
Conclusion
Luxury is a Mindset, Not a Price Tag
Creating a gorgeous DIY carnation flower sphere is more than just a craft project; it is an exercise in resourceful creativity. By taking one of the most affordable materials in the floral world and applying a bit of ‘crafty-expert’ engineering, you can produce decor that rivals the most expensive event planners. Remember, the key to the ‘luxury look’ isn’t spending more—it’s paying attention to the details: the hydration of the blooms, the symmetry of the sphere, and the styling of the base. So, the next time you see a bundle of carnations at the market, don’t walk past. See them for the potential masterpieces they are. You’ve got the skills, you’ve got the budget, and now you’ve got the blueprint. Happy crafting!

Makenzie is the founder and lead writer at MoneyHackTips.com — a personal finance blog dedicated to delivering street-smart financial wisdom for real people on real budgets. With 300+ published articles covering everything from debt management to investing fundamentals, Makenzie’s mission is to make every dollar work harder. When not writing about money hacks, Makenzie is testing frugal living strategies, optimizing side hustles, and helping readers build financial freedom from scratch.