
When it comes to planning a wedding, the costs can escalate faster than a bouquet toss. For those of us who appreciate a rugged, masculine-elegant aesthetic—think deep forest greens, natural textures, and the earthy scent of the woods—the price tag for ‘bespoke’ decor can be staggering. But here is a secret: you don’t need a boutique florist or an expensive rental company to capture the magic of the Pacific Northwest or a hidden forest glade. With a bit of resourceful creativity and some clever upcycling, you can create stunning moss-covered table numbers that look like they were plucked straight from a fairytale.
This project is for the frugal DIYer who isn’t afraid to get their hands a little dirty to save a lot of green. Whether you are a budget-savvy bride, a handy groom, or a crafty friend helping out, these table numbers are the perfect way to add organic texture and sophisticated charm to your reception tables without breaking the bank. By using upcycled cardboard and preserved moss, we are going to craft a centerpiece element that is as durable as it is beautiful.
The High-End Woodland Aesthetic on a Thrift-Store Budget

The ‘Woodland’ or ‘Enchanted Forest’ wedding theme is timeless because it balances rugged naturalism with refined elegance. However, if you look at high-end wedding catalogs, a single moss-covered number can retail for anywhere from $15 to $25. If you have 20 tables, that is $500 just for numbers! Our goal today is to slash that cost to under $1.50 per number.
The key to making these look ‘expensive’ rather than ‘elementary school project’ lies in the materials. We aren’t just slapping moss on a flat surface; we are creating dimensional, textured pieces of art. We will utilize preserved sheet moss, which maintains its vibrant green color without needing water, making it perfect for indoor or outdoor venues.
| Material Item | Sourcing Strategy | Estimated Cost |
|---|---|---|
| Preserved Sheet Moss | Bulk craft store or online | $0.75 per number |
| Corrugated Cardboard | Upcycled shipping boxes | $0.00 (Free) |
| Hot Glue Sticks | Dollar Store bulk pack | $0.25 per number |
| Precision Craft Knife | Existing tool kit | $0.00 |
| Total Cost | DIY Brilliance | ~$1.00 – $1.50 |
“The secret to great design isn’t a large budget; it’s the ability to see the potential in what others throw away. A shipping box is just a table number waiting to be dressed in green.”
Sourcing Your Greenery: Selecting the Perfect Moss
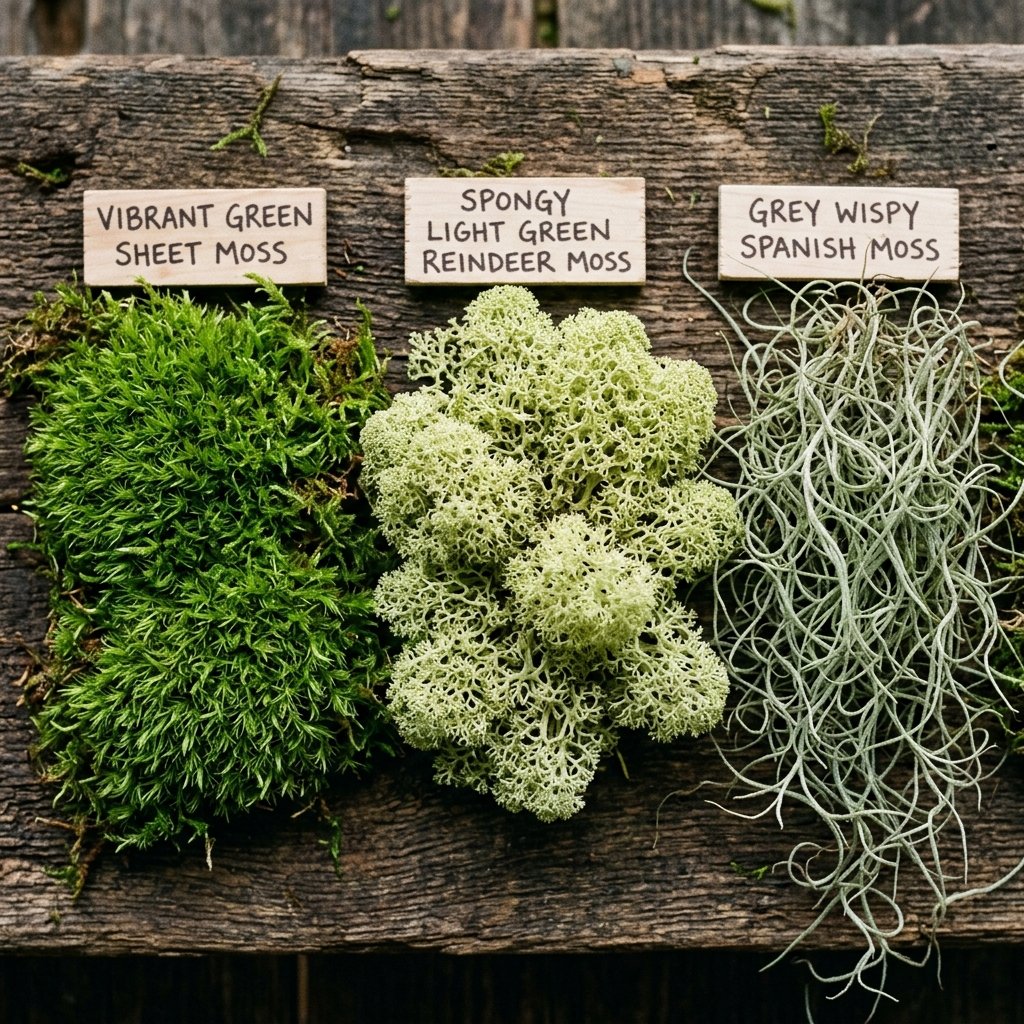
Types of Moss for Crafting
Not all moss is created equal. To achieve that masculine-elegant look, you need to choose the right variety. Here is a quick guide to help you select the best material for your wedding numbers:
- Preserved Sheet Moss: This is the gold standard. It comes in large, flat pieces that act like fabric. It is easy to cut and provides a uniform, lush look.
- Reindeer Moss: This is more ‘clumpy’ and sponge-like. While beautiful, it is better for filling gaps or adding 3D texture rather than covering the entire number.
- Spanish Moss: Avoid this for this specific project. It is too wispy and grey, which leans more toward ‘haunted house’ than ‘enchanted forest.’
When sourcing your moss, look for preserved varieties rather than dried. Preserved moss has been treated with glycerin to keep it soft and pliable. Dried moss can be brittle and will crumble during the assembly process, leaving you with a mess and a patchy-looking number.
The Foundation: Building Sturdy Numbers from Upcycled Cardboard
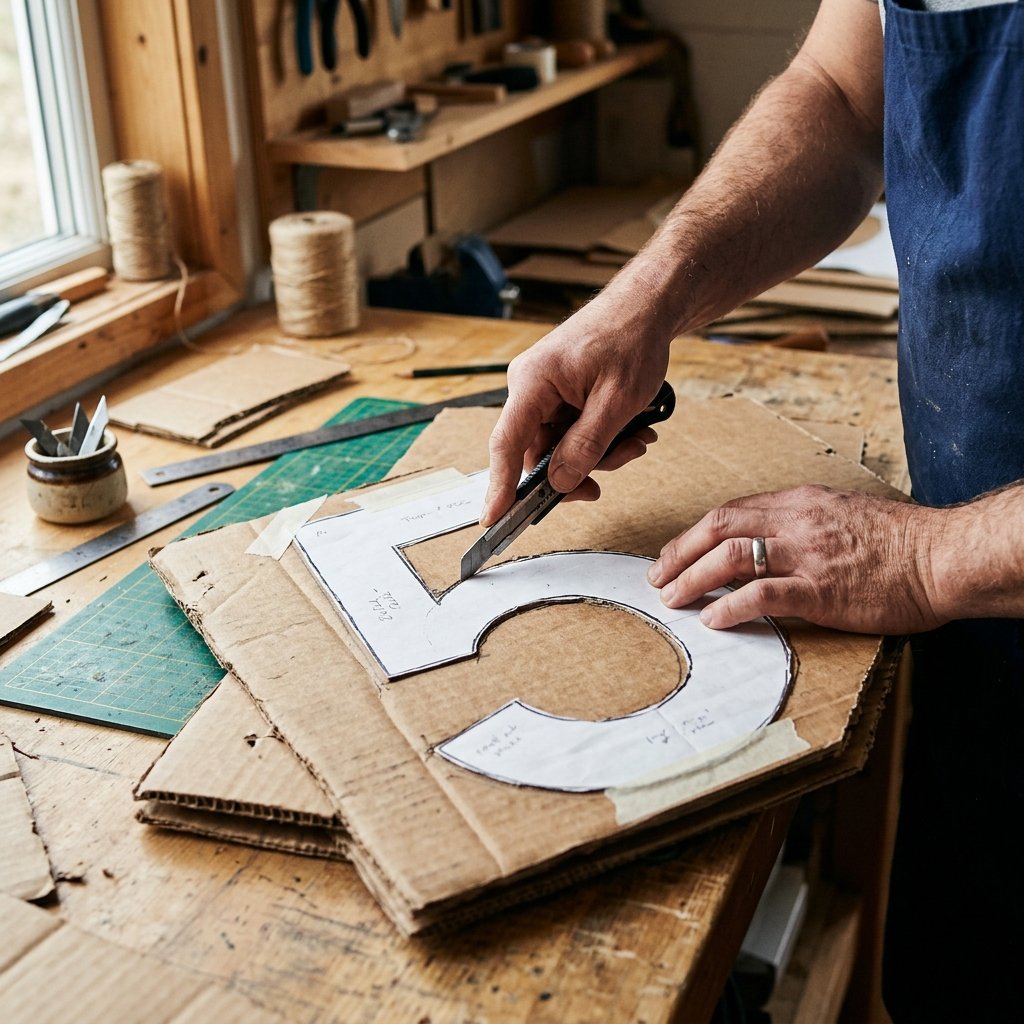
The structure of your table number is vital. You want something that can stand on its own or lean against a centerpiece without sagging. Instead of buying pre-cut wooden numbers (which can be $3-$5 each), we are going to use double-walled corrugated cardboard from old shipping boxes.
Step-by-Step Template Creation
- Print Your Templates: Choose a bold, serif font (like ‘Playfair Display’ or ‘Georgia’) and print your numbers at about 6-8 inches tall.
- Trace and Cut: Trace the numbers onto your cardboard. For extra stability, cut two of every number and glue them together. This gives the moss something ‘thick’ to cling to.
- Create the Base: If you want the numbers to stand independently, cut a small rectangular ‘T-stand’ out of cardboard and hot glue it to the bottom-rear of the number.
“Measure twice, cut once, and always use a fresh blade. A sharp knife ensures clean edges that won’t fray the moss later.”
The Assembly Process: A Step-by-Step Guide to Moss Mastery

Applying the Moss Like a Pro
This is where the magic happens. Follow these steps to ensure a professional, high-end finish:
- Dry Fit First: Lay your cardboard number over the sheet moss. Cut a piece of moss that is roughly 1 inch larger than the number on all sides.
- Glue the Face: Apply a generous amount of hot glue to the front of the cardboard number. Press the moss firmly onto the surface. Warning: Use a silicone spatula or a scrap piece of wood to press the moss down to avoid burning your fingers!
- The Wrap Technique: Flip the number over. Apply glue to the edges of the cardboard and fold the overhanging moss over the sides. This ensures that no brown cardboard is visible from the side, giving it a solid, 3D appearance.
- Detailing: Use small scraps of moss to fill in any ‘bald spots’ or gaps where the cardboard might be peeking through.
Pro-Tip: If you find the moss is too ‘fluffy’ and obscuring the shape of the number, use a pair of fabric scissors to give the moss a ‘haircut,’ trimming it down until the silhouette of the number is sharp and clear.
Comparison: The ‘I Do’ Budget vs. The ‘Big Box’ Price Tag
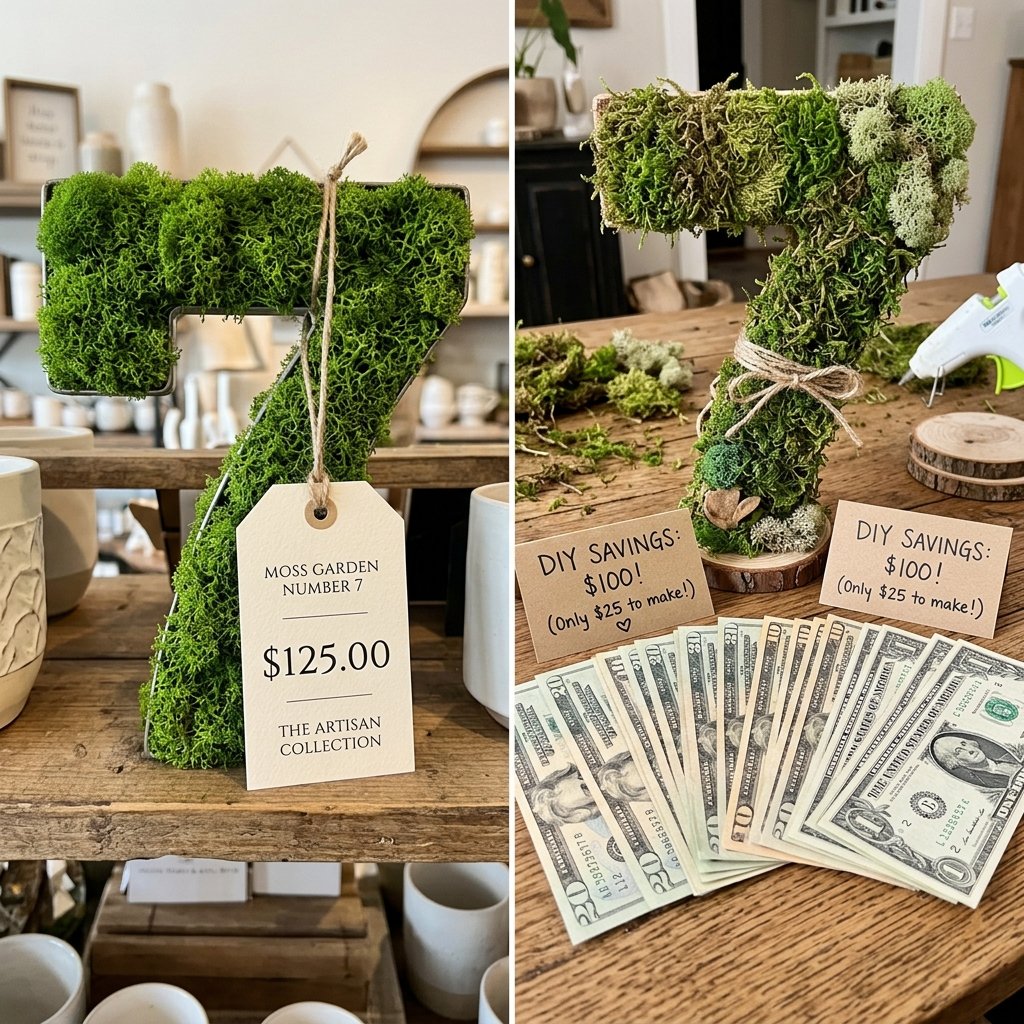
Let’s talk numbers—literally. When you are planning a wedding for 150 guests, every dollar counts. By choosing to DIY these moss-covered numbers, you aren’t just being crafty; you are being a financial genius. Here is how the costs stack up when you compare our DIY method to buying pre-made decor from popular wedding retailers.
| Source | Price Per Number | Total for 20 Tables | Savings |
|---|---|---|---|
| Luxury Wedding Boutique | $24.00 | $480.00 | $0.00 |
| Online Handmade Marketplace | $12.50 | $250.00 | $230.00 |
| The Frugal DIY Method | $1.50 | $30.00 | $450.00 |
With that $450 savings, you could upgrade your bar package, buy your wedding shoes, or put it toward a much-needed honeymoon massage. That is the power of a resourceful, budget-savvy mindset.
Pro-Styling Tips: Integrating Your Numbers into the Centerpiece
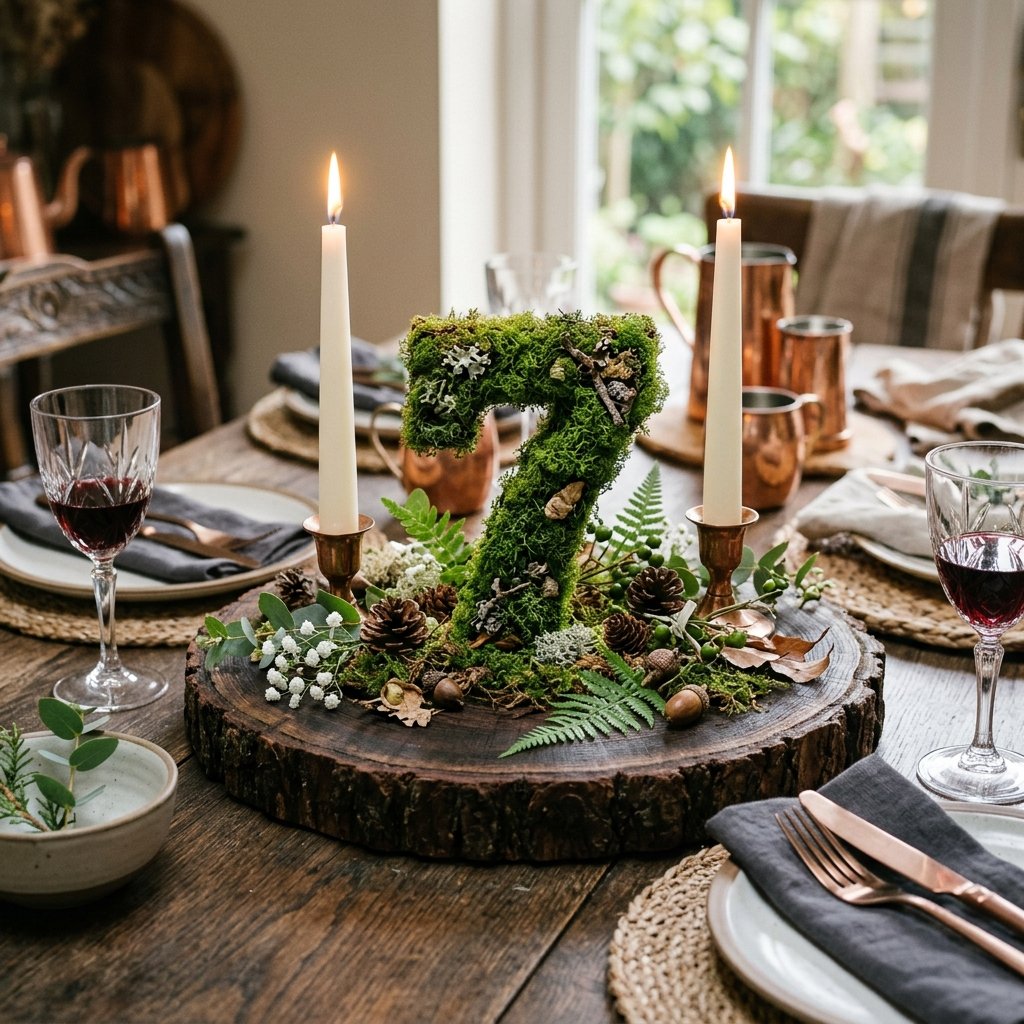
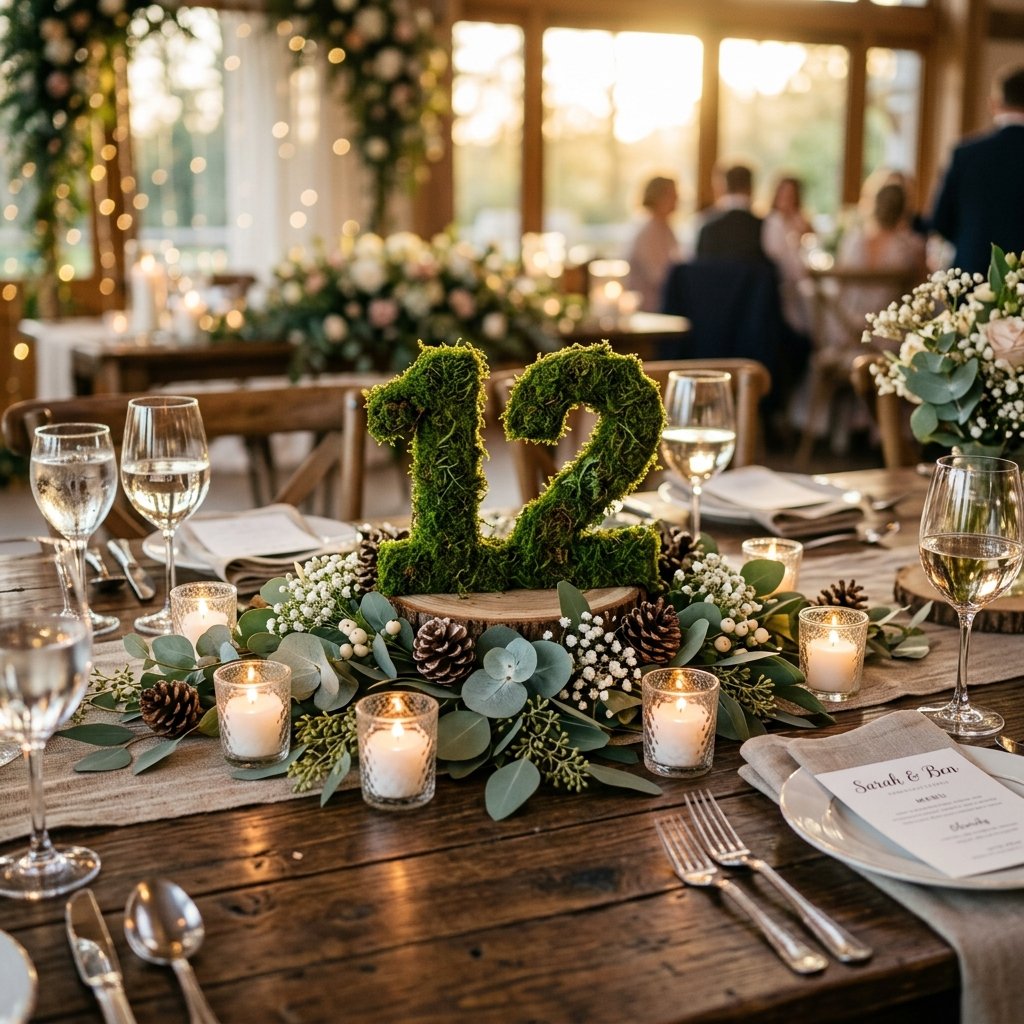
Once your numbers are complete, you need to style them to maximize their impact. A moss number sitting alone on a white tablecloth can look a bit lonely. To achieve that rugged-elegant woodland vibe, you need to create a ‘vignette.’
- The Wood Slice Base: Place your moss number on a raw-edge wood slice (another great DIY project!). This adds height and reinforces the forest theme.
- Add Light: Surround the base with warm LED tea lights or small glass votives. The light will catch the texture of the moss and create beautiful shadows.
- Natural Accents: Scatter a few pinecones, acorns, or sprigs of dried lavender around the base. This grounds the number and makes it feel like part of the environment.
- Contrast: Pair the rugged moss with sleek glass or metallic accents (like gold-rimmed plates or copper cutlery) to keep the look sophisticated and ‘wedding-ready’ rather than just rustic.
“Design is about the layers. The moss is your texture; the wood is your foundation; the candles are your soul.”
Conclusion
Creating your own wedding decor doesn’t have to be a source of stress. In fact, projects like these moss-covered table numbers offer a wonderful opportunity to step away from the spreadsheets and get back to the joy of making. By using clever upcycling and a few budget-friendly materials, you have created something that is not only beautiful and functional but also carries the story of your own resourceful spirit.
As you walk into your reception and see those lush, green numbers glowing under the lights, you’ll feel a sense of pride knowing you didn’t just buy a wedding—you built one. Now, go forth, get crafty, and enjoy your beautiful woodland celebration!

Makenzie is the founder and lead writer at MoneyHackTips.com — a personal finance blog dedicated to delivering street-smart financial wisdom for real people on real budgets. With 300+ published articles covering everything from debt management to investing fundamentals, Makenzie’s mission is to make every dollar work harder. When not writing about money hacks, Makenzie is testing frugal living strategies, optimizing side hustles, and helping readers build financial freedom from scratch.