
Welcome to the ultimate intersection of frugal ingenuity and high-end masculine gifting. If you have ever found yourself staring blankly at a department store shelf, scoffing at a $45 price tag for a single, mass-produced monogrammed rocks glass, you are in exactly the right place. Finding the perfect gift for the men in your life—be it your husband, your dad, your groomsmen, or your brother—can often feel like an impossible task. They say they do not want anything, or their hobbies require gear that costs a small fortune. But what if you could roll up your sleeves, tap into your resourceful, budget-savvy creativity, and handcraft a rugged, deeply personalized gift that looks like it came from an artisanal boutique?
Enter the magic of at-home glass etching. This is not just a craft; it is a clever, crafty-expert hack that transforms a standard $1.25 Dollar Tree heavy-base tumbler into a bespoke heirloom piece. Whether he is a bourbon aficionado, a scotch enthusiast, or just a guy who appreciates a heavy, handsome glass for his evening iced tea, a custom-etched glass hits every mark. It is practical, it is masculine-elegant, and best of all, it is incredibly budget-friendly.
In this comprehensive masterclass, we are going to dive deep into the alchemy of glass etching. You do not need a fancy workshop or expensive machinery. With a few simple supplies, a steady hand, and a little bit of chemical magic, you will learn how to permanently frost glass with crisp, flawless designs. From selecting the perfect budget glassware to designing rugged stencils and mastering the etching application, this guide is your blueprint for the ultimate DIY gift for men. Let us turn that frugal ambition into a treasured, practical masterpiece.
The Alchemy of Etching: Understanding the Process
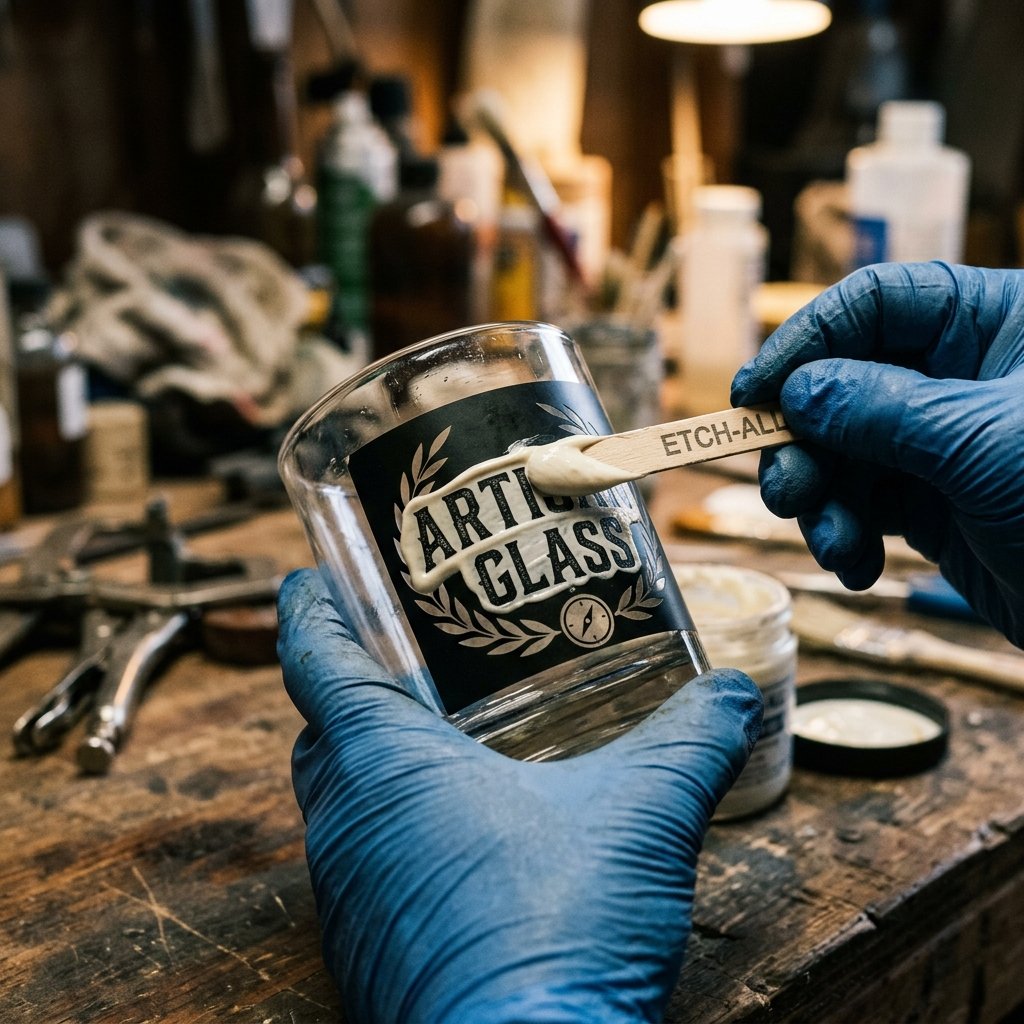
Before we dive into the hands-on crafting, it is essential to understand exactly what we are doing when we etch glass. This is not paint, and it is not a decal that will peel off in the dishwasher. Glass etching cream is a powerful, chemical compound that literally eats away at the microscopic top layer of the glass, leaving behind a permanent, frosted texture. It is rugged, it is durable, and it is 100% dishwasher safe.
Why Etching is the Ultimate Masculine Craft
Men tend to appreciate gifts that are functional, durable, and free of unnecessary fuss. A painted glass might chip, and a vinyl decal will eventually curl at the edges after a few runs through the hot water cycle. An etched glass, however, is permanent. The design becomes one with the glass itself. It has a tactile, frosted feel that catches the light beautifully when filled with amber spirits. It is a subtle, elegant customization that feels incredibly high-end.
“Remember, etching cream is an acid. It is literally eating away the top layer of the glass. Treat it with respect, wear your gloves, and never wash it down a porcelain sink unless you want a frosted basin!” – The Resourceful Crafter’s Safety Mantra
Safety First: The Craftsman’s Code
Because we are working with a chemical compound, safety is non-negotiable. You do not need a hazmat suit, but you do need to be smart. Always work in a well-ventilated area. Wear protective nitrile or latex gloves to keep the cream off your skin, and consider safety glasses to protect your eyes from any rogue splatters. If you get etching cream on your skin, wash it off immediately with plenty of soap and water. By respecting the materials, you ensure that this frugal DIY remains a fun, rewarding experience rather than a trip to the first aid kit.
Gathering Your Arsenal: Materials & Cost Breakdown
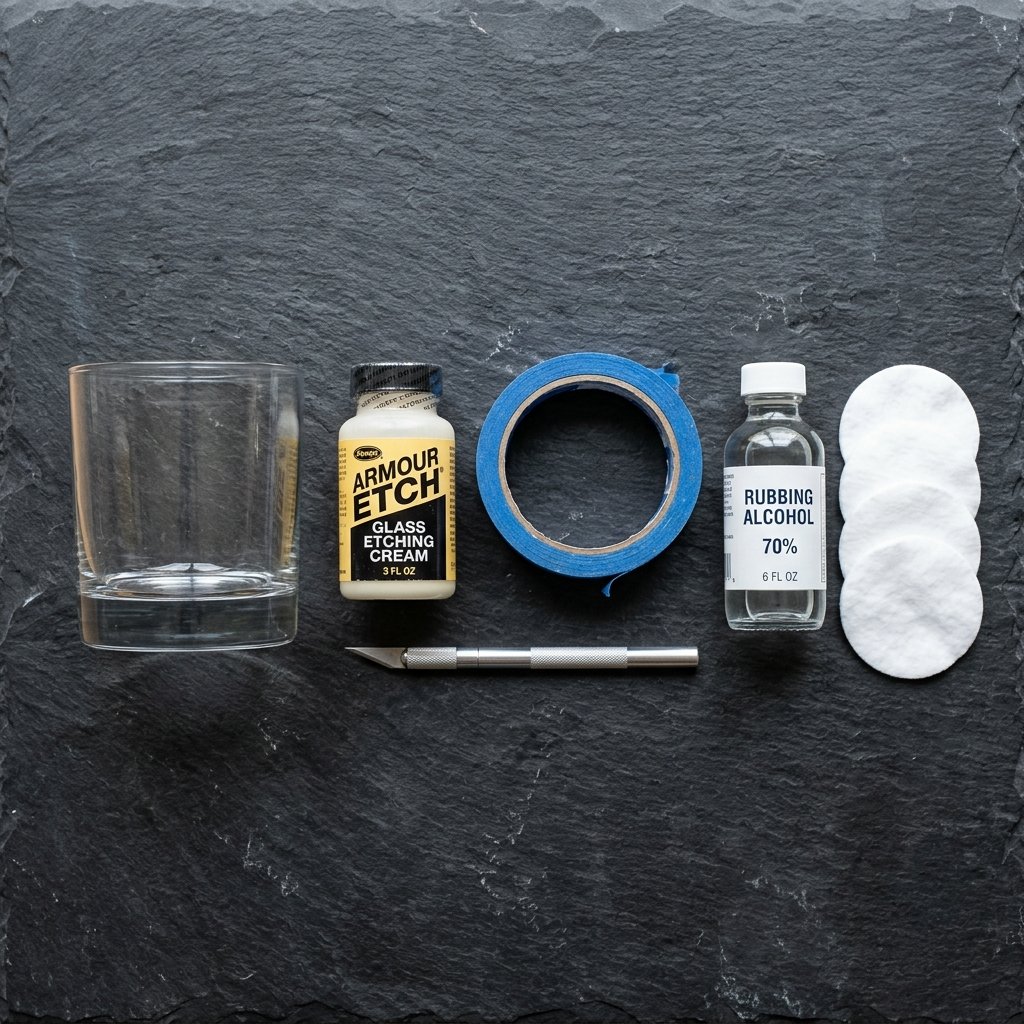
The true beauty of this project lies in its phenomenal return on investment. The initial cost of the etching cream might seem like a small investment, but a single 3-ounce bottle can etch dozens, if not hundreds, of glasses. When you pair this magic cream with budget-friendly glassware, the per-gift cost plummets to mere pennies.
The Frugal Sourcing Guide
- The Glassware: Do not overlook your local dollar store. Dollar Tree often stocks heavy-bottomed rocks glasses, highballs, and pilsner glasses that rival the weight and clarity of expensive department store brands. Look for glasses with smooth, untextured sides, as these provide the best canvas for your stencil.
- The Etching Cream: Armour Etch is the gold standard for home crafters. A small bottle will run you about $10 to $15, but remember, a little goes a very long way.
- The Stencils: If you own a Cricut or Silhouette machine, you can cut your own stencils using scrap permanent vinyl. If not, you can buy pre-cut adhesive stencils at any craft store, or even use standard painter’s tape to create geometric, modern designs.
- The Prep Tools: Rubbing alcohol, cotton balls, blue painter’s tape, and a foam brush or popsicle stick for application. You likely already have these in your bathroom or garage!
| Material / Item | DIY Cost (Per Glass) | High-End Retail Equivalent |
|---|---|---|
| Heavy-Base Whiskey Glass | $1.25 (Dollar Store) | $15.00 – $25.00 |
| Custom Monogram / Etching | $0.15 (Prorated Cream Cost) | $20.00 – $40.00 (Boutique Customization) |
| Packaging & Presentation | $2.00 (DIY Cigar Box/Shavings) | $10.00 (Gift Box Add-on) |
| Total Investment | $3.40 per custom gift! | $45.00 – $75.00+ |
As you can see from our budget breakdown, stepping into the role of a resourceful maker saves you a small fortune while delivering a product that carries far more sentimental weight than anything you could pull off a shelf.
Designing the Perfect Masculine Stencil
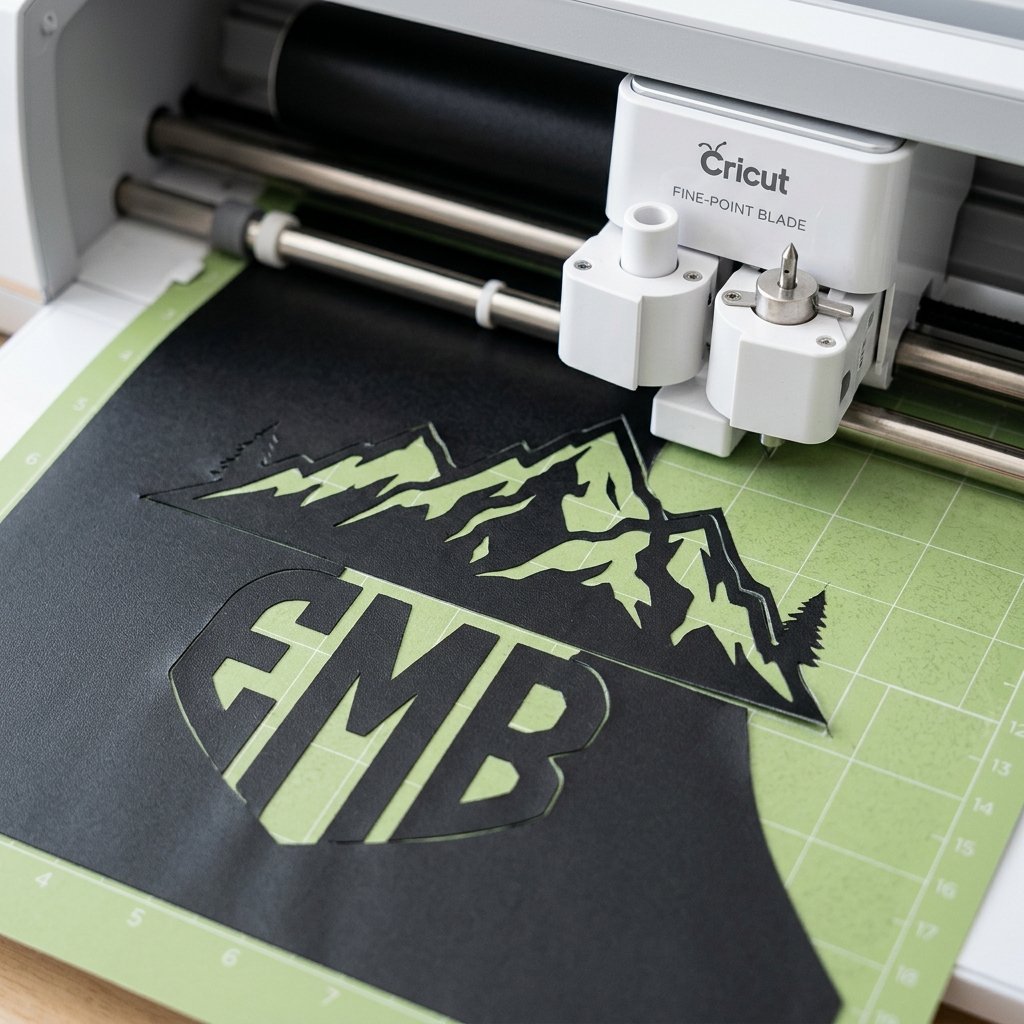
The design you choose is what elevates this project from a simple craft to a deeply meaningful, personalized gift. When designing for men, the rule of thumb is often ‘less is more.’ You want to aim for rugged elegance—clean lines, bold typography, and meaningful symbols.
Concept Ideas for the Modern Man
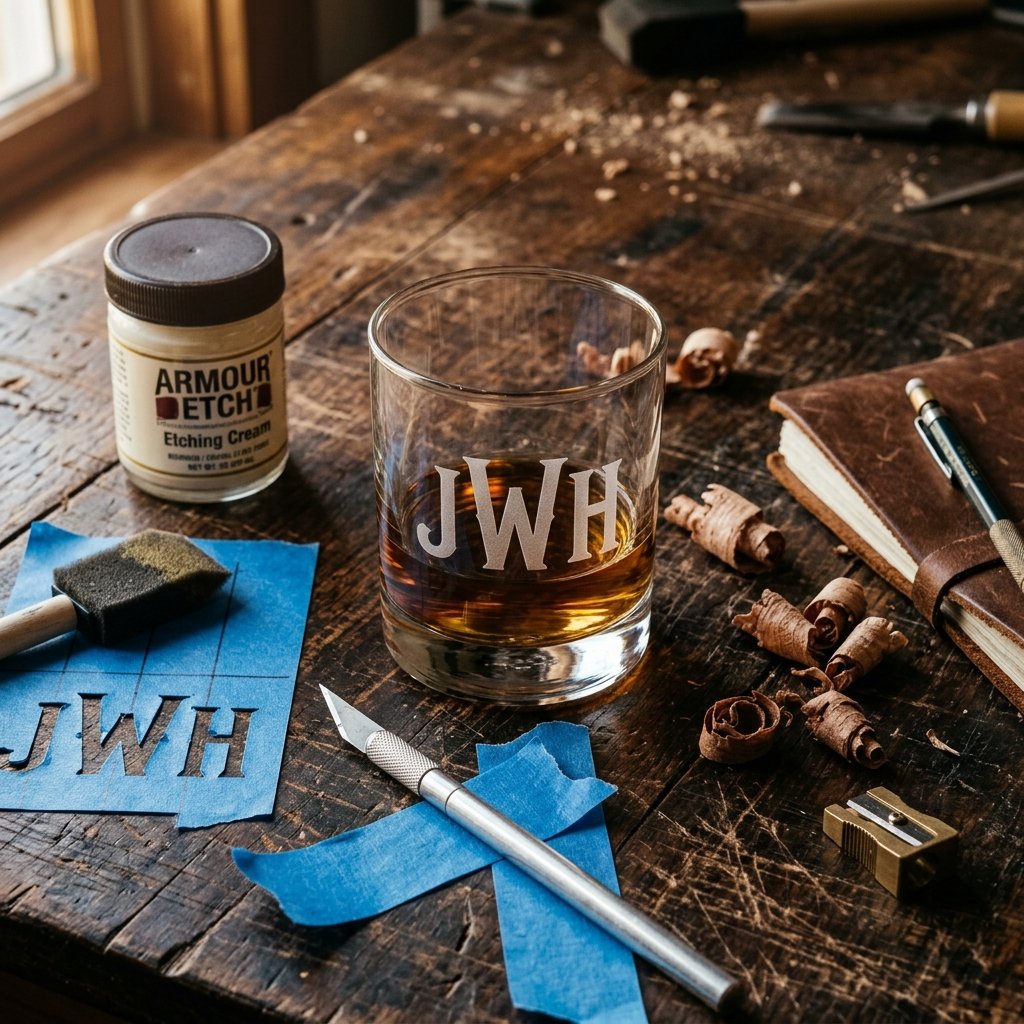
- The Classic Monogram: A single, bold initial or a classic three-letter monogram is timeless. It turns a cheap glass into a piece of a sophisticated home bar collection.
- Geographic Coordinates: Etch the latitude and longitude of a place that holds special meaning—where you met, his childhood home, or his favorite fishing cabin. This is incredibly thoughtful and visually intriguing.
- Wilderness & Hobbies: Minimalist pine trees, mountain silhouettes, antlers, or a subtle crossed-wrench icon for the gearhead. Tailor the imagery to his passions.
- Witty Bar Cart Humor: Phrases like ‘Liquid Patience,’ ‘Dad’s Medicine,’ or a simple ‘Pour Line’ with an arrow can add a touch of clever humor to his evening routine.
Understanding Positive and Negative Space
When creating or weeding your stencil, you must think in reverse. The areas where the glass is exposed (the negative space of the stencil) will become the frosted, etched design. The areas covered by the vinyl or tape will remain clear glass. If you are cutting your own stencils, ensure you weed out the letters or the design itself, leaving the surrounding border intact to protect the rest of the glass. Always leave a generous border of vinyl around your design to prevent the etching cream from accidentally smudging onto the clear glass.
The Preparation Phase: Cleaning and Taping
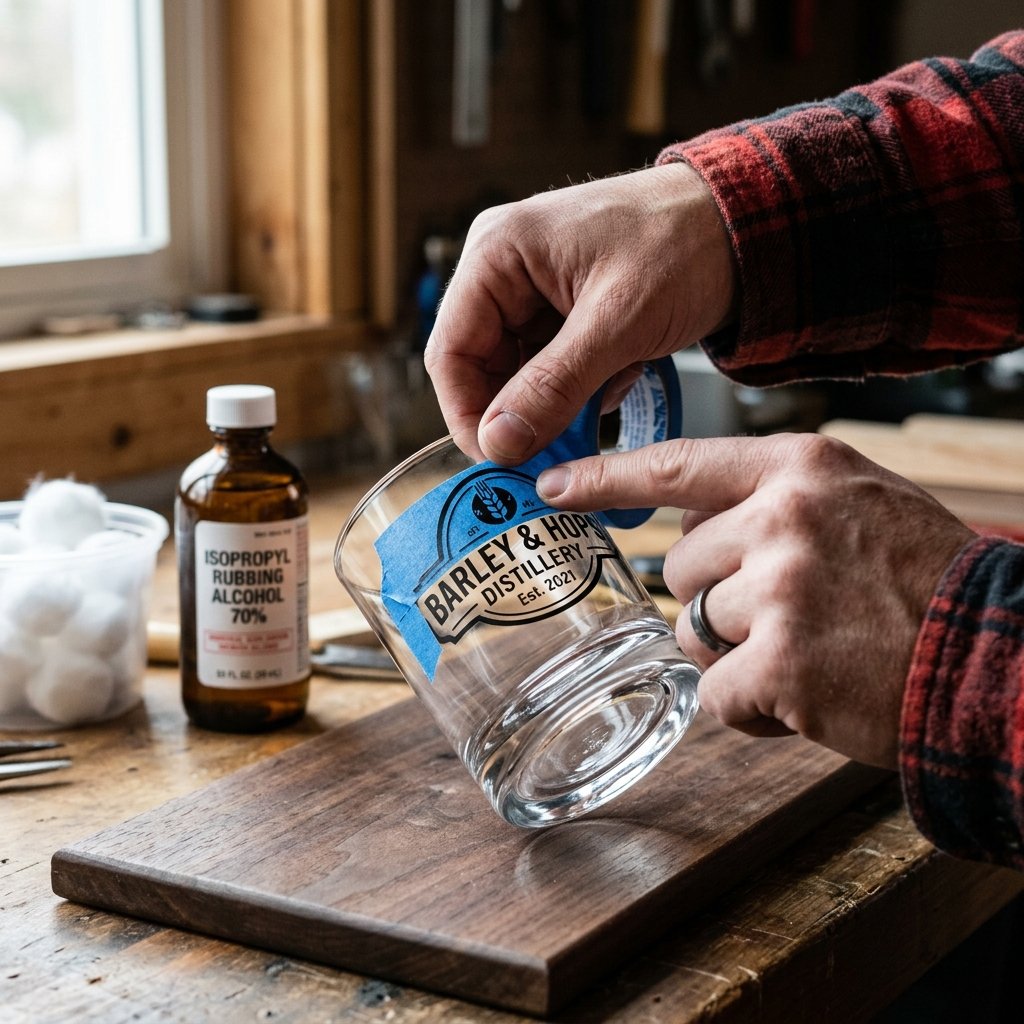
Any master craftsman will tell you that the secret to a flawless finish lies in the preparation. You cannot rush this phase. If you want crisp, professional-looking edges without any bleeding, you must prep your glass meticulously.
Step 1: The Deep Clean
Glass straight from the store is covered in dust, packaging residue, and most importantly, the oils from human hands. Etching cream cannot penetrate grease. If there is a fingerprint on your glass, the acid will not etch evenly, resulting in a splotchy, ruined design. Take a cotton ball soaked in high-percentage rubbing alcohol (isopropyl alcohol) and vigorously wipe down the entire surface of the glass. Once cleaned, only handle the glass by the inside rim or the very bottom. Do not touch the exterior canvas!
Step 2: Applying and Burnishing the Stencil
Carefully apply your vinyl or adhesive stencil to the glass. Because whiskey glasses are often slightly tapered or curved, you may need to make small relief cuts in the outer edges of your stencil to help it lay perfectly flat without bubbling. Once applied, use a scraper tool, a credit card, or your thumbnail to firmly rub—or burnish—the stencil onto the glass. Pay hyper-focused attention to the inner edges of your design. If there is even a microscopic gap between the stencil and the glass, the etching cream will seep under, ruining the crisp lines.
Step 3: Creating the Danger Zone Barrier
Etching cream is notorious for migrating. You might accidentally brush it too far, or a stray glob might drop onto an unprotected area. To prevent this tragedy, take your blue painter’s tape and create a wide border entirely around your stencil. Tape off the rim of the glass and down the sides. Think of this as creating a protective quarantine zone. The extra 2 minutes it takes to tape off the glass will save you the heartbreak of a ruined project.
The Etching Application: Where the Magic Happens
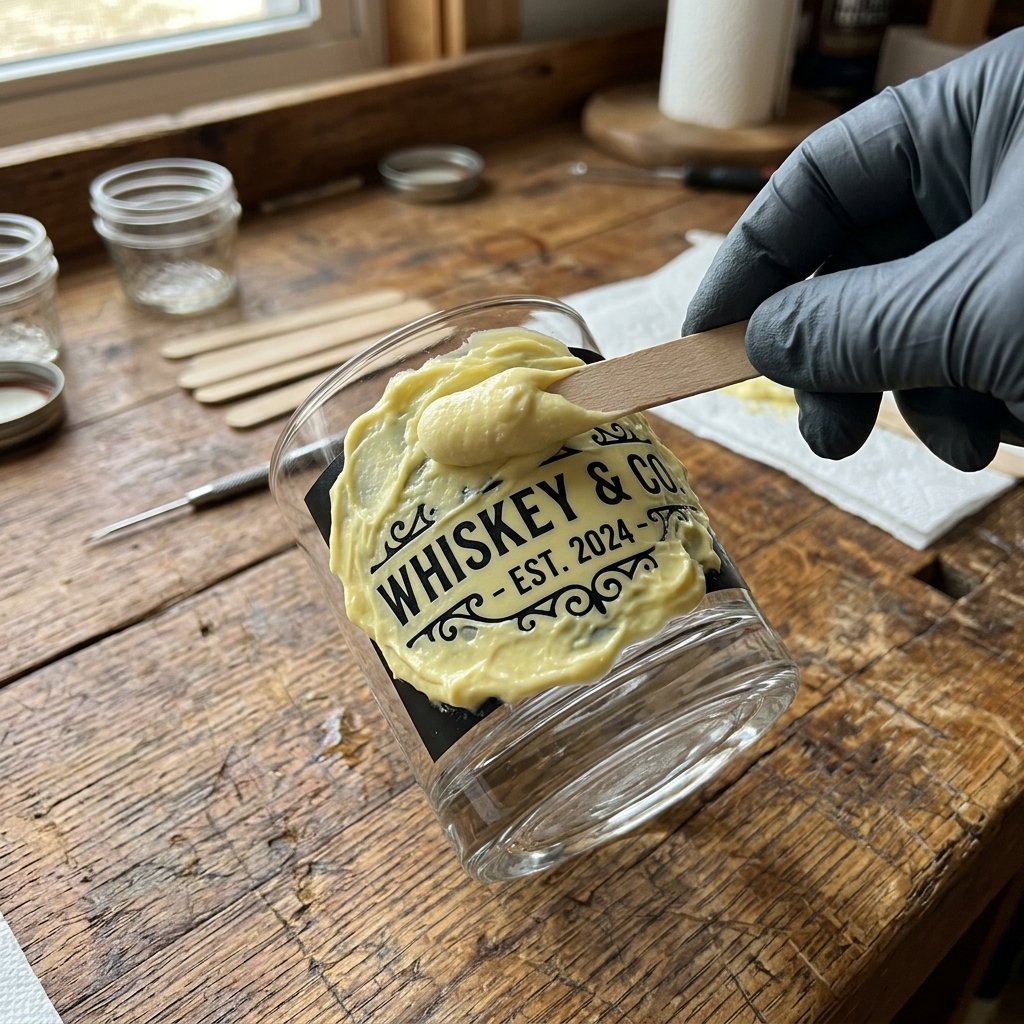
This is the moment of truth. You have prepped, you have taped, and now it is time to unleash the chemical alchemy. Put on your gloves, ensure your workspace is ventilated, and let us get to work.
The Glob and Dab Method
A common beginner mistake is treating etching cream like paint. If you brush it on in thin, sweeping strokes, you will end up with a streaky, uneven etch that looks amateurish. Instead, you need to use the ‘Glob and Dab’ method. Using a popsicle stick or a foam brush, scoop out a generous, thick glob of the etching cream. Dab it thickly over the exposed glass of your stencil. You want the cream to be so thick that you cannot see the glass underneath it. It should look like a thick layer of frosting.
Timing and Agitation
Most commercial etching creams recommend leaving the product on for 1 to 3 minutes. However, seasoned frugal DIYers know the secret to a deep, brilliantly white, and permanent frost is time and agitation. Set your timer for 5 to 10 minutes. During this time, do not just walk away. Every two minutes, take your brush and gently swirl or push the cream around over the stencil. This breaks up any microscopic air bubbles that might have formed and ensures that fresh acid is constantly in contact with the glass surface. This constant agitation is the difference between a faint, cloudy etch and a bold, professional-grade finish.
“Do not skimp on the cream, and do not let it sit stagnant. Move it around! The more you agitate the cream, the crisper and more uniform your final frosted design will be.”
Salvaging the Cream
Here is a brilliant budget-savvy tip: Etching cream is reusable! Because you applied it thickly, only the very bottom layer interacted with the glass. When your timer goes off, use your popsicle stick to gently scrape the excess cream off the stencil and put it right back into the jar. This resourceful hack stretches your materials, ensuring that one small jar can truly last for years of gift-giving.
The Reveal and Cleanup: Washing and Peeling
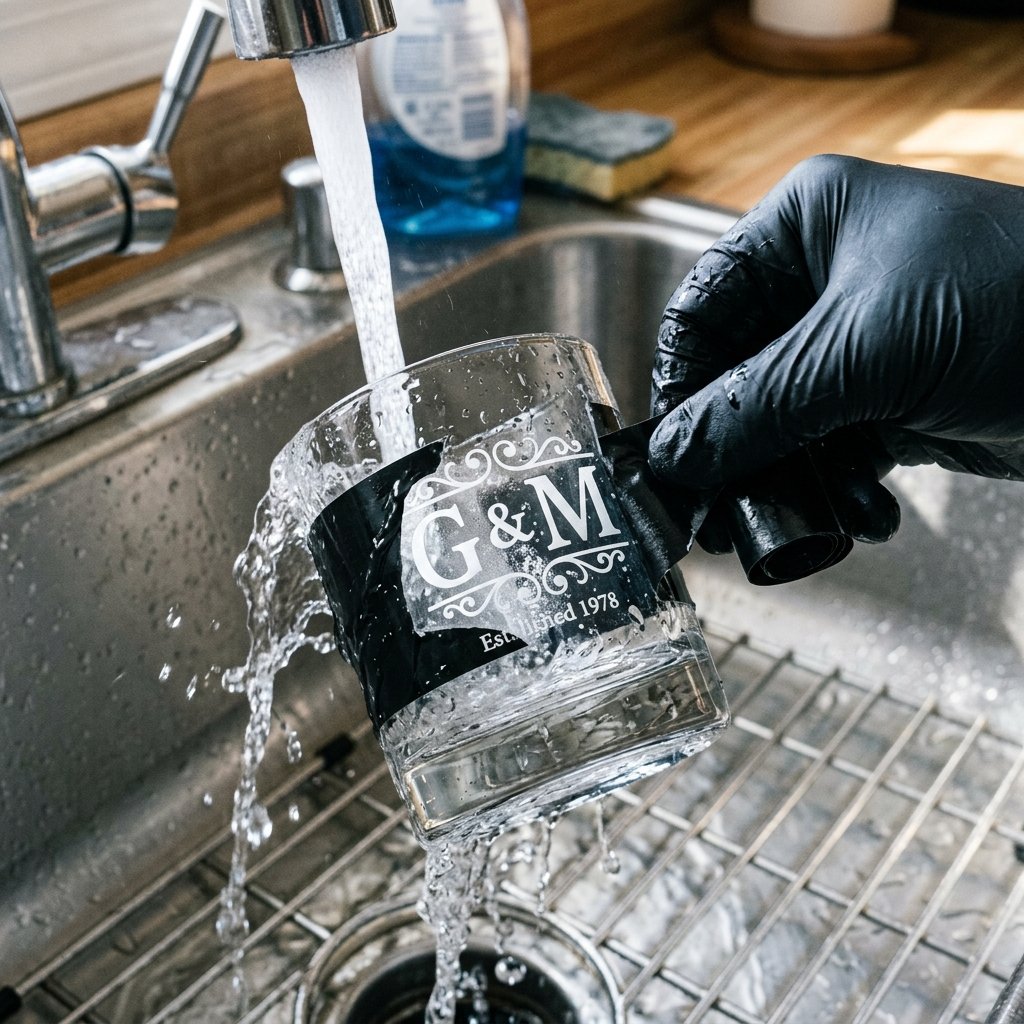
The timer has sounded, the excess cream is safely back in the jar, and it is time for the grand reveal. This step requires a bit of care to ensure you do not accidentally etch areas of the glass during the rinse process.
The Rinsing Protocol
Take your glass to a stainless steel or plastic utility sink. Crucial Warning: Do not rinse etching cream in a porcelain sink, as the diluted acid can dull the porcelain finish over time. Turn the water on warm. Keeping your gloves on, hold the glass under the running water and use a dedicated sponge or your gloved fingers to quickly and thoroughly wash away all remaining etching cream. You must ensure every speck of the cream is neutralized and washed down the drain before you remove the stencil.
Peeling the Stencil
Once the glass is completely rinsed and safe to handle, peel away the wet painter’s tape and the vinyl stencil. At first glance, while the glass is wet, the etching might look faint or almost invisible. Do not panic! This is completely normal. The true magic of the frosted glass only reveals itself once the surface is bone dry. Take a clean, lint-free microfiber towel and thoroughly dry the glass. As the moisture evaporates, your crisp, bright white, permanent design will magically appear before your eyes.
Troubleshooting Common Issues
- Splotchy or Faint Etching: This is usually caused by not cleaning the glass well enough with alcohol, or not applying the cream thickly enough. Unfortunately, you cannot ‘re-etch’ the same spot easily without risking blurry edges, so preparation is key.
- Bleeding Edges: If the frost escaped the boundaries of your design, your stencil was not burnished down hard enough. Next time, use a harder scraper tool and ensure there are no air bubbles near the cut lines.
Elevating the Gift Presentation: Packaging on a Dime
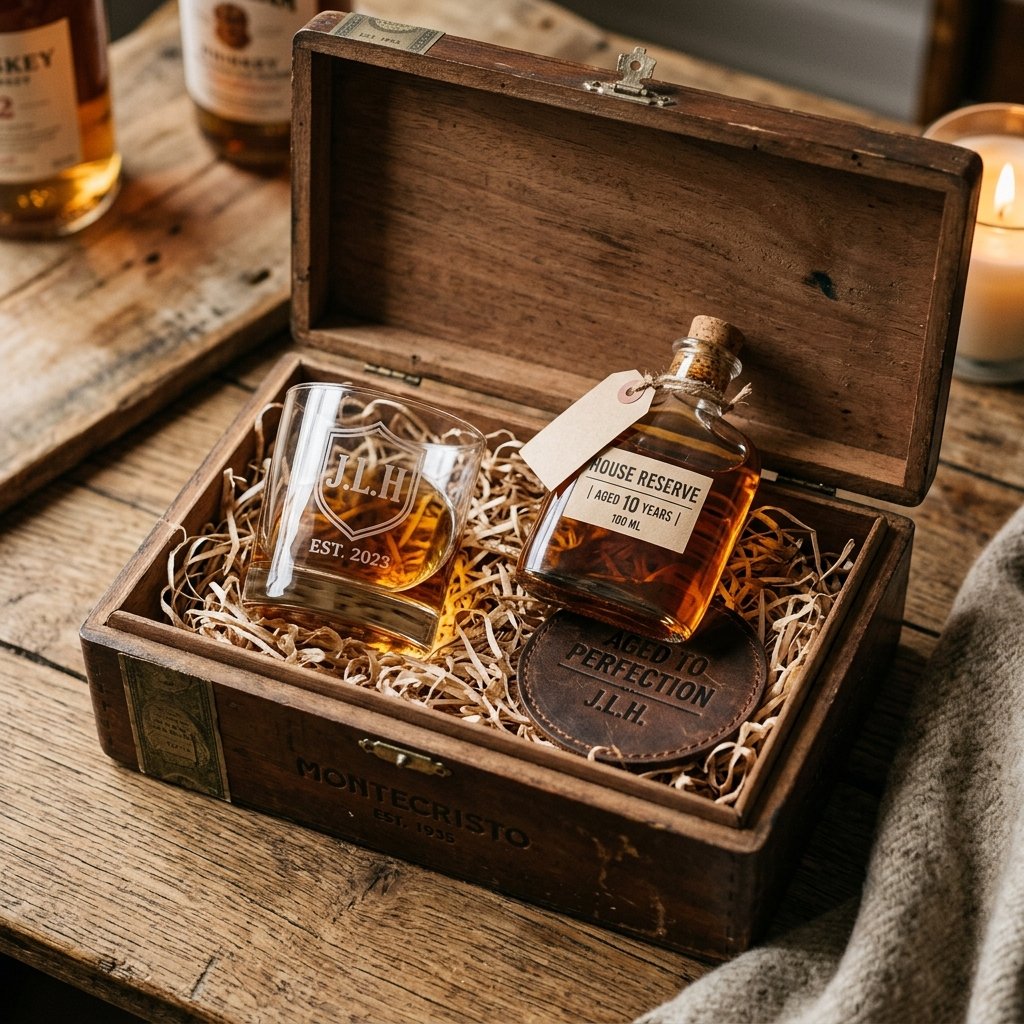
You have just crafted a stunning, bespoke whiskey glass that looks like it cost $50. Do not ruin the illusion by handing it over in a plastic grocery bag! The presentation is half the gift, and as a creative upcycler, you can craft high-end packaging for next to nothing.
The Rustic Cigar Box Hack
Head to your local cigar shop. Most tobacconists sell their empty wooden cigar boxes for $1 to $3, or sometimes give them away for free. These sturdy wooden boxes feature beautiful hinges and clasps, making them the perfect masculine gift box. Lightly sand off any unwanted logos, or leave them for a rugged, vintage vibe.
Nesting the Glass
Skip the cheap tissue paper. For a truly rugged look, nestle the etched glass in wood excelsior (wood shavings), which you can buy in bulk for a few dollars at craft stores. Alternatively, you can shred brown kraft paper or use clean straw. This gives the gift a raw, artisanal, ‘straight from the woodshop’ aesthetic.
The Perfect Pairings
To make the gift even more substantial, consider pairing the custom glass with complementary budget-friendly items:
- DIY Whiskey Infusion: Buy an inexpensive bottle of bourbon and infuse it yourself. Add a vanilla bean, a cinnamon stick, and some dried orange peel to a mason jar of whiskey. Let it sit for a week, then pour it into a handsome glass flask. A custom glass and custom whiskey is an unbeatable combo.
- Ice Sphere Molds: A set of silicone ice sphere molds costs about $5 online. Toss one into the gift box to complete the whiskey-drinker’s experience.
- Leather Coasters: If you have scrap leather, cut out a simple circle, stamp his initials into it, and you have just added another handcrafted element to the suite.
By focusing on the details of the presentation, you elevate a simple piece of dollar-store glassware into a curated, thoughtful, and deeply impressive gift experience that he will proudly display on his bar cart for years to come.
Conclusion
Crafting the ultimate DIY gift for men does not require a maxed-out credit card or a degree in advanced woodworking. It simply requires a shift in perspective—a willingness to look at a blank, budget-friendly canvas and see the luxurious potential hidden within. By mastering the simple, satisfying art of glass etching, you have unlocked a frugal superpower. You can now create personalized, deeply meaningful, and incredibly durable gifts for every father, brother, husband, or groomsman in your life.
This custom etched whiskey glass is more than just a vessel for a favorite drink; it is a testament to your resourcefulness, your creativity, and the time you invested in making something truly unique. So, gather your supplies, tape off your edges, and let the etching cream do its magic. When he unwraps that rustic wooden box and sees his monogram flawlessly frosted into heavy glass, he will be blown away—and your budget-savvy secret will be safe with us. Happy crafting, and cheers to the power of the DIY spirit!

Makenzie is the founder and lead writer at MoneyHackTips.com — a personal finance blog dedicated to delivering street-smart financial wisdom for real people on real budgets. With 300+ published articles covering everything from debt management to investing fundamentals, Makenzie’s mission is to make every dollar work harder. When not writing about money hacks, Makenzie is testing frugal living strategies, optimizing side hustles, and helping readers build financial freedom from scratch.